
Are you a middle school student looking for some inspiration for your next invention? Look no further! In this blog post, we’ll be sharing some innovative and creative school invention ideas that are perfect for middle school students.
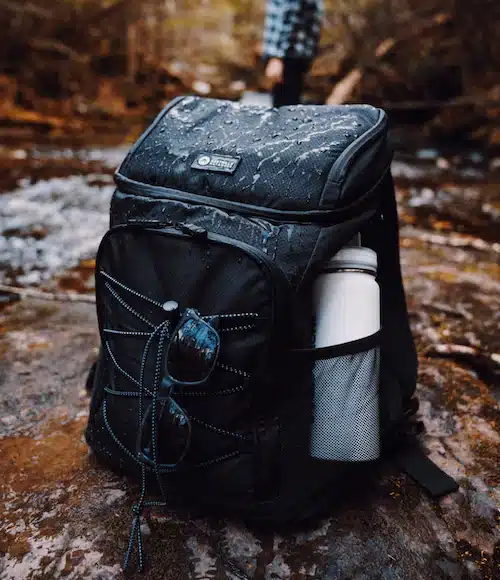
First up, how about inventing a smart backpack? This backpack could have features like built-in charging ports for your devices, solar panels for recharging on the go, and even a tracking system to prevent losing it. Another great idea is creating a mobile app that helps students manage their time and assignments more efficiently. It could include features like reminders, calendars, and to-do lists. For those interested in science, consider inventing a water filtration system or a solar-powered oven.
The possibilities are endless! With a little creativity and hard work, you can come up with an invention that could change the world.
Here are the top 35 invention ideas for you to ace in your project:
1. A Solar-Powered Phone Charger
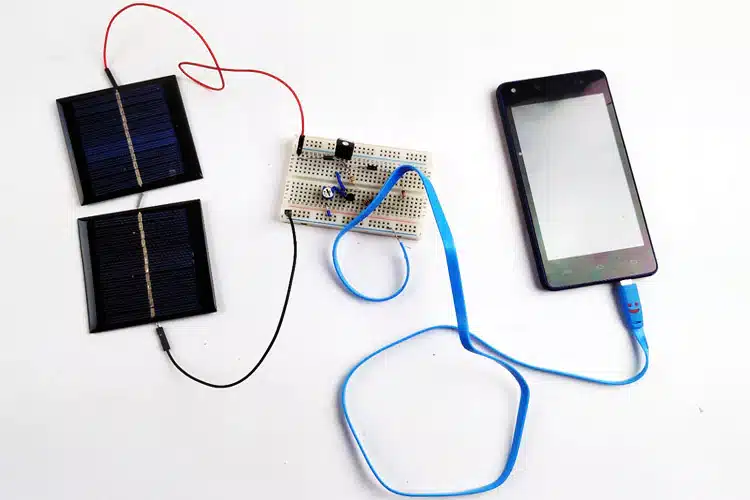
To make a solar-powered phone charger, you will need a solar panel, a voltage regulator, a rechargeable battery, and a USB port. First, connect the solar panel to the voltage regulator, making sure the positive and negative wires are correctly aligned. Then, connect the voltage regulator to the rechargeable battery, following the same procedure. Finally, connect the USB port to the battery, ensuring the positive and negative wires are aligned correctly. Once everything is connected, your solar-powered phone charger should be ready to use!
2. A Self-Watering Plant System
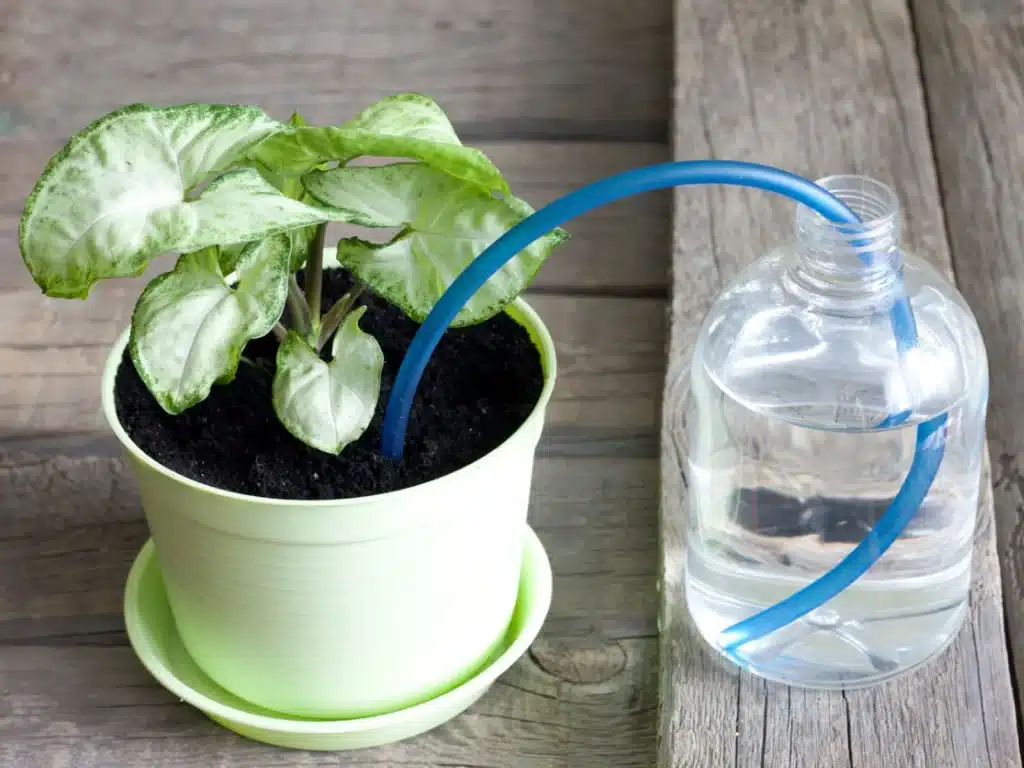
For a self-watering plant system, you will need a few supplies. First, you’ll need a container to hold your plant and water. You’ll also need a wick or rope to draw water up from the reservoir to the soil and some ground for your plant to grow in. To assemble your self-watering plant system, start by drilling a small hole in the bottom of your container for drainage. Then, cut a length of wick or rope that is long enough to reach from the bottom of your container to the top of your soil. Insert one end of the wick through the drainage hole and place the other end on top of the soil. Next, fill the bottom of your container with water, making sure the wick is submerged. Then, add soil to the top of your container and plant your desired plant. As the soil dries out, the wick will draw water up from the reservoir, keeping your plant hydrated.
3. A Bike Lock that Doubles as a Phone Holder
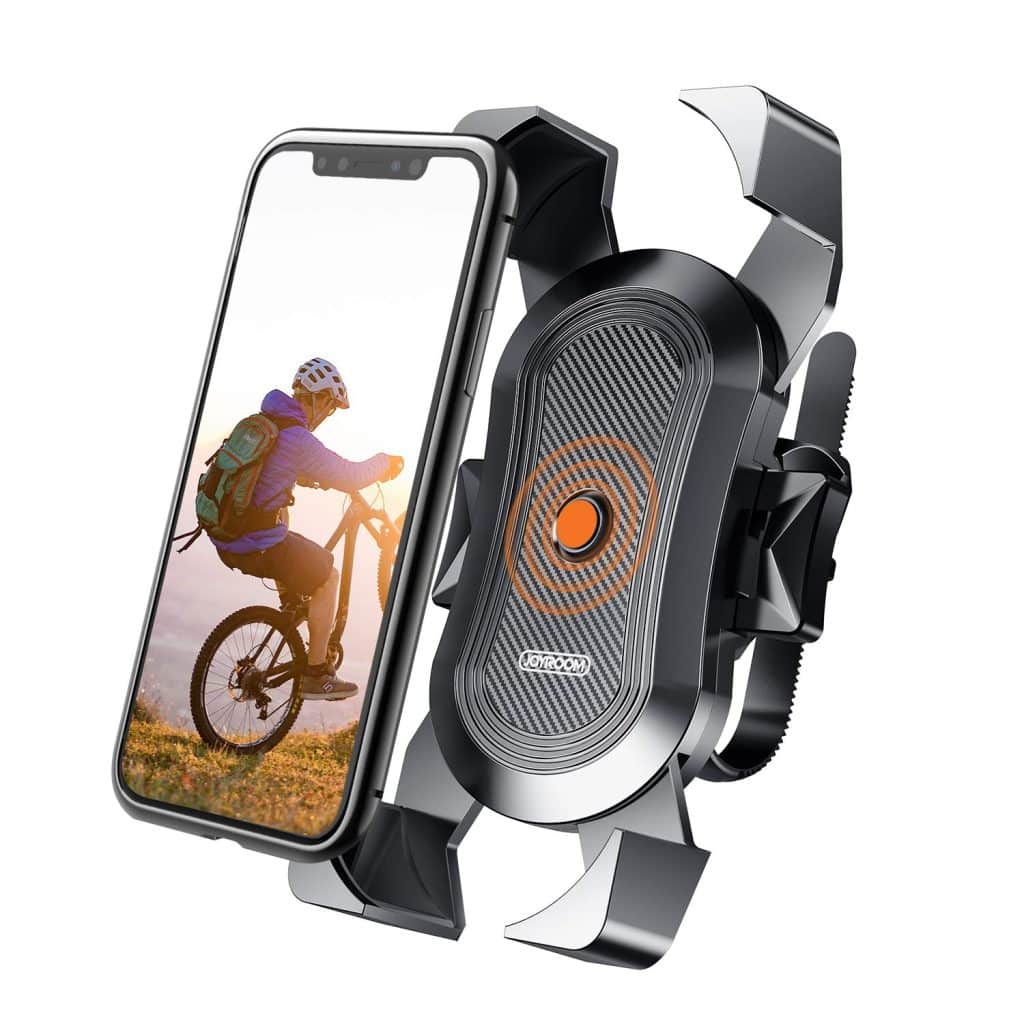
A bike lock that doubles as a phone holder is going to be interesting. For this, you will need a sturdy bike lock and a phone mount that can fit securely onto the lock. First, attach the phone mount to the lock, ensuring that it is tightly secured. Next, place your phone on the mount and adjust it to your preferred angle for viewing. Lastly, wrap the lock around your bike frame or post and secure it in place. Now, you have a convenient way to keep your phone within reach while also keeping your bike secure.
4. A Backpack with Built-In LED Lights for Safety
A backpack with built-in LED lights for safety can be made by using a backpack, LED strip lights, a battery pack, and a switch. First, measure the length of the backpack straps and cut the LED strip lights to fit. Then, attach the LED lights to the straps using adhesive tape. Next, attach the battery pack to the backpack with adhesive tape or a clip. Finally, attach the switch to the backpack in a convenient location. Test the lights to ensure they work properly.
5. A Portable Study Desk that Fits in a Locker
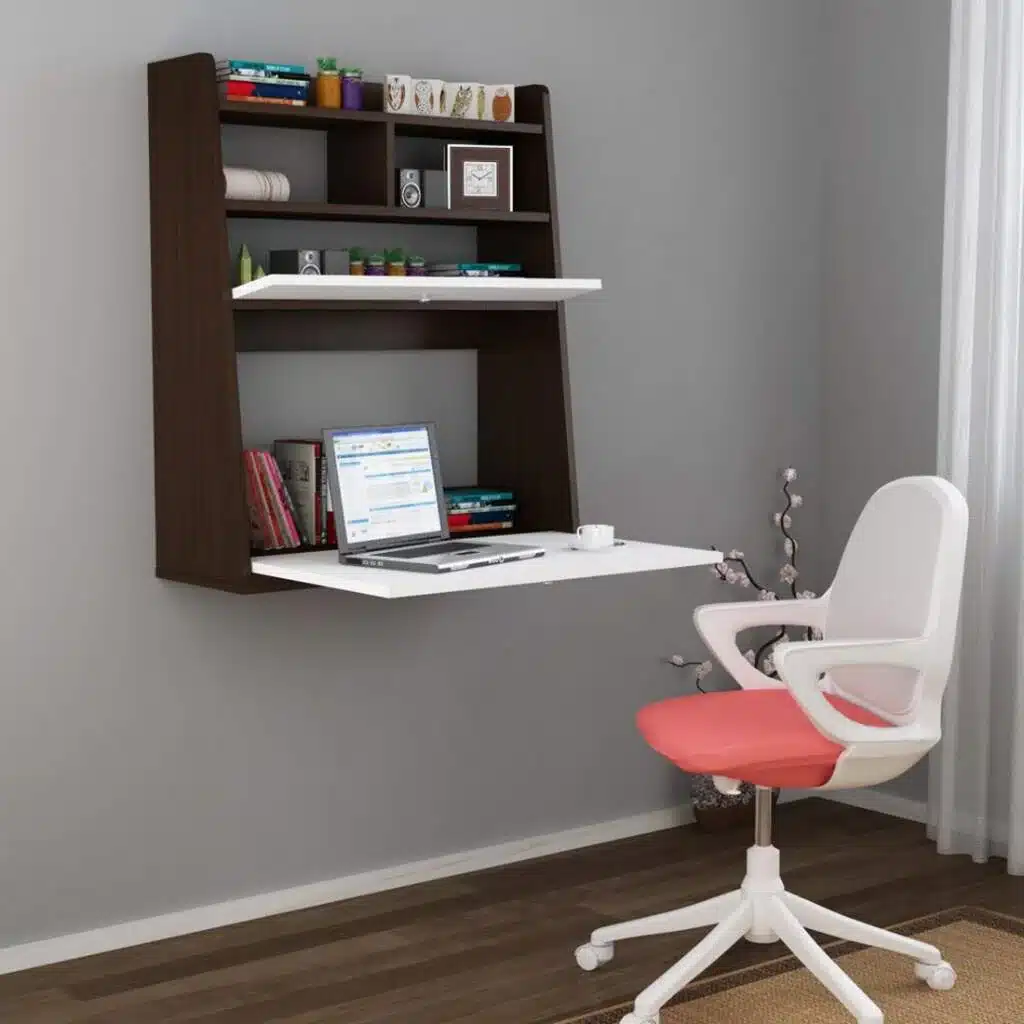
Looking to create a study desk that can easily fit inside a locker? You’ll need a few materials to get started. First, grab a piece of plywood that will serve as the desk’s surface and cut it to your desired size. Then, attach folding legs to the bottom of the plywood using screws and hinges. Be sure that the legs are sturdy enough to support the weight of the desk. Next, create a frame around the desk surface using PVC pipes or wooden dowels to ensure stability and prevent wobbling. Finally, attach a handle to the side of the desk for easy carrying. And there you have it – your very own portable study desk!
6. An Automatic Pencil Sharpener
If you’re tired of constantly having to buy new pencils or struggling to sharpen them manually, consider making your own DIY automatic pencil sharpener! With just a few simple materials, you can create a device that will sharpen your pencils quickly and efficiently. Start by gathering a small motor, battery pack, and a switch. Then, attach a sharpening blade to the motor and connect everything together using wires. Finally, mount the device onto a sturdy base and test it out on a few pencils.
7. A Device That Helps You Find Lost Items
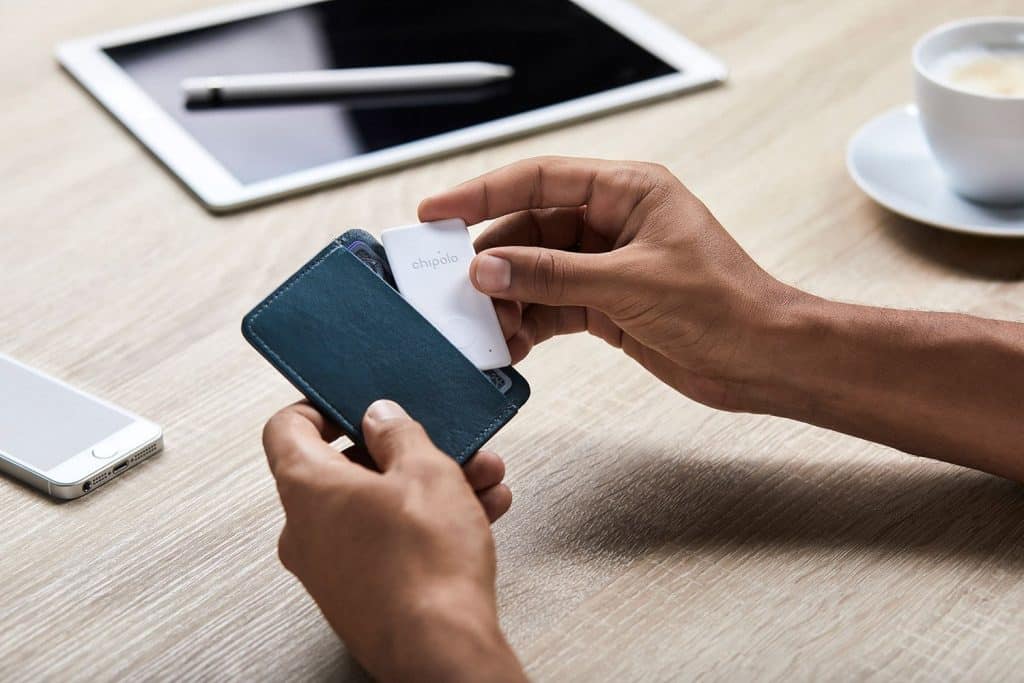
Great idea, isn’t it? One way to start would be to research Bluetooth and GPS technology, which are key technologies used in the Find-It-Yourself device. You could also consider creating an accompanying app that allows users to set up virtual boundaries and receive notifications when their lost item is detected within the boundary. It’s important to keep the device small and portable so that it can easily be attached to any item.
8. An Intelligent Mirror that Gives You Skincare Advice

To create an intelligent mirror that gives you skincare advice, you will need to start with a regular mirror and add some technology. First, install a camera behind the mirror that can take high-quality images of your face. Next, use facial recognition software to analyze your skin and identify any areas that need attention. You can then program the mirror to provide customized skincare advice based on your individual needs. This could include recommending specific products, suggesting changes to your skincare routine, or providing tips for better self-care.
9. A Temperature-Controlled Water Bottle
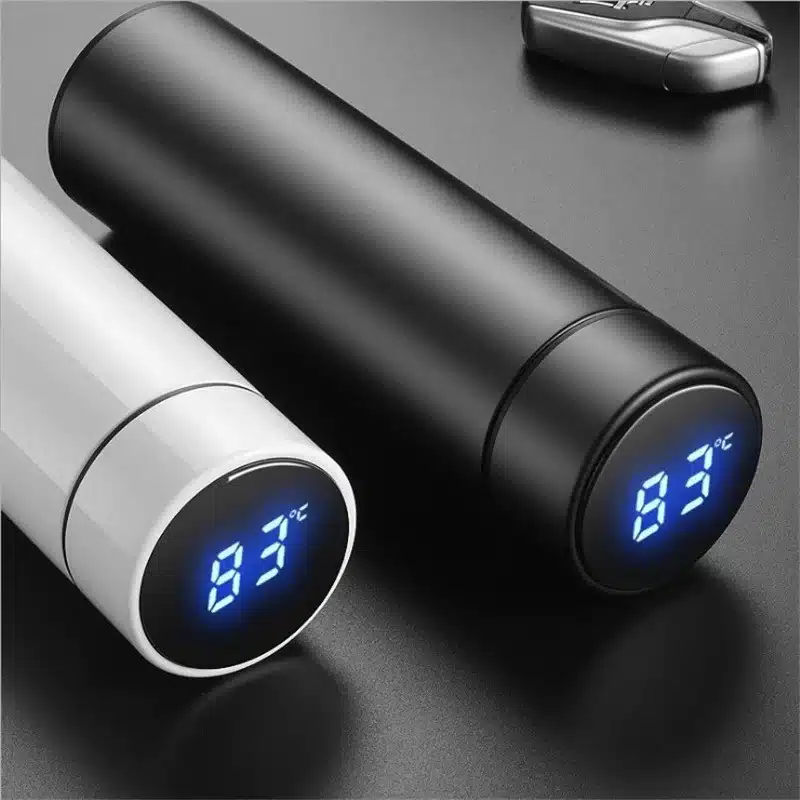
To make a temperature-controlled water bottle, you will need a few materials, such as a water bottle, a thermometer, a heating element, and a cooling element. Start by inserting the thermometer into the water bottle to get an accurate reading of the temperature. Next, attach the heating and cooling elements to the water bottle. The heating element will raise the temperature of the water, while the cooling element will lower it. Connect both elements to a control system that will regulate the temperature of the water.
10. A Noise-Canceling Earplug for Studying
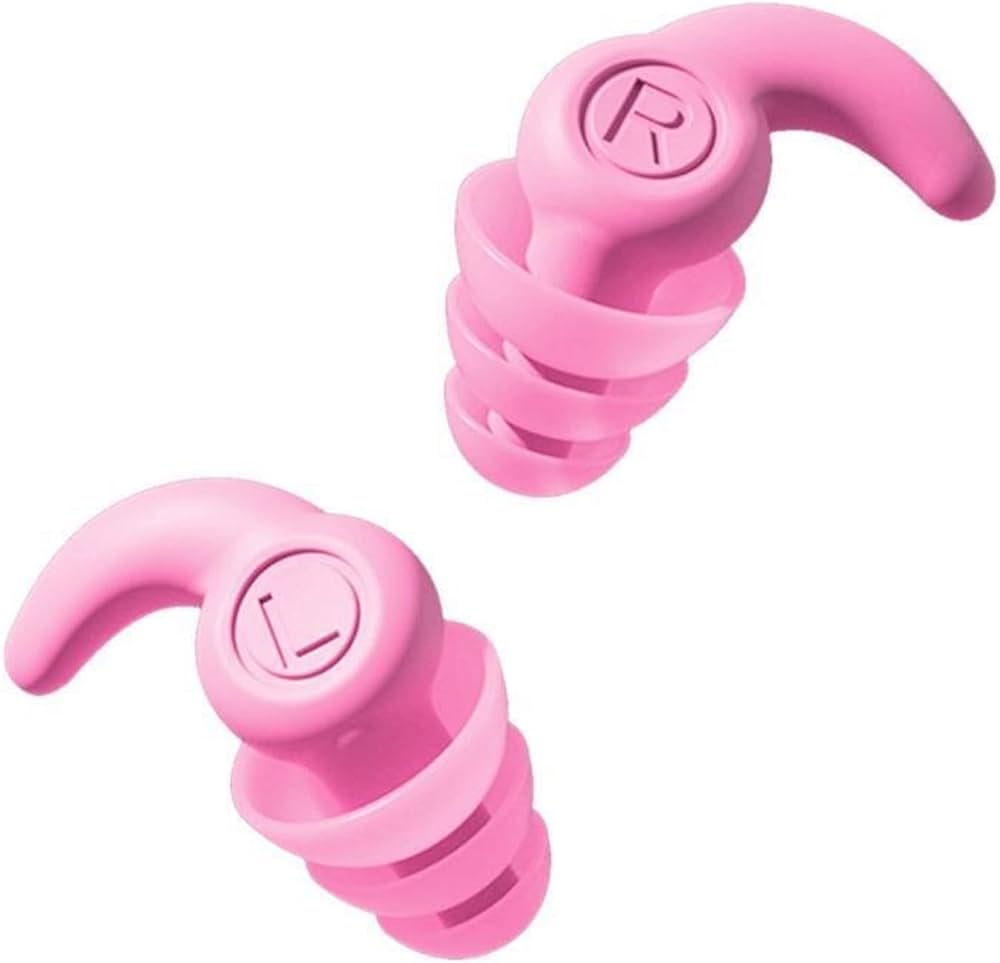
One way to create a noise-canceling earplug for studying is by using a combination of materials that are readily available. Start by purchasing a pair of foam earplugs and a set of noise-canceling headphones. Cut off the ear cups from the headphones and remove the speakers from them. Apply a generous amount of hot glue to the earplugs and attach the speakers to them. Once the glue has dried, cover the speakers with the ear cups and test the earplugs by playing some music. The result should be a pair of earplugs that block out ambient noise while still allowing you to listen to your study music.
11. A Device That Helps You Organize Your School Supplies
If you’re looking for a way to organize your school supplies, why not try making your own DIY device? With just a few materials and some basic crafting skills, you can create a customized organizer that fits your needs perfectly. Start by choosing the size and shape of your organizer, then gather materials like cardboard, fabric, and glue. Cut and fold the cardboard into the desired shape, cover it with fabric, and add compartments for your pencils, pens, highlighters, and other supplies. With a little creativity and effort, you can have a functional and stylish organizer that will make your school days easier.
12. A Basketball Hoop that Doubles as a Laundry Hamper
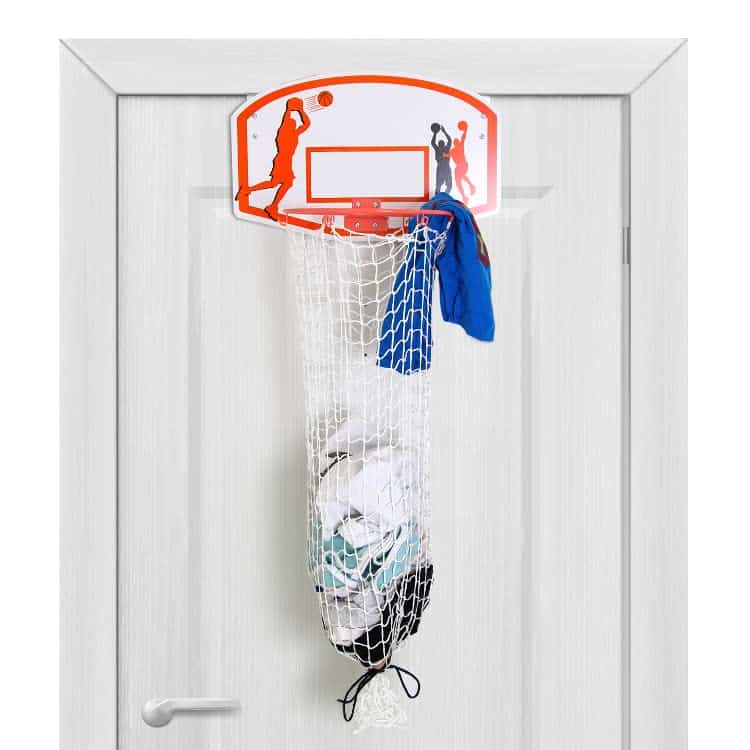
To create a basketball hoop that doubles as a laundry hamper, you must have a large cylindrical laundry basket, a basketball hoop, and sturdy adhesive. Securely attach the basketball hoop to the top of the laundry basket and ensure it is firmly fastened. Then, place the laundry basket in your desired location and start shooting your dirty clothes into the hoop! This DIY project is both practical and entertaining, making laundry duty much more enjoyable.
13. A Chair that Doubles as a Backpack
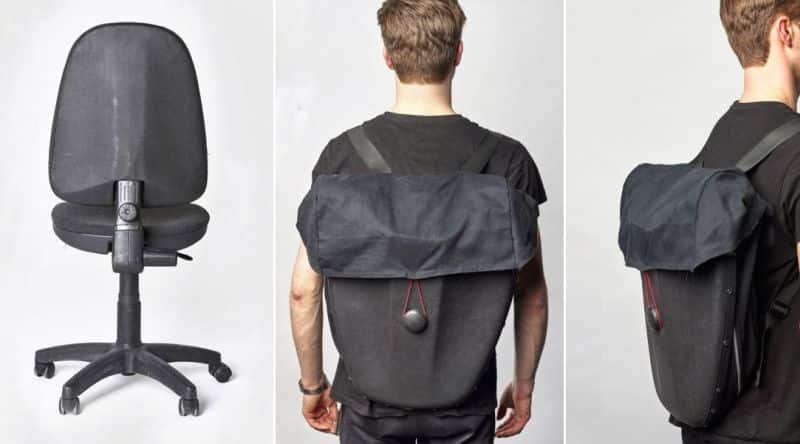
To invent a chair that doubles as a backpack, you would need to think about the design and functionality of both items. It would be important to consider the weight and balance of the backpack when the chair is being used, as well as the comfort and stability of the chair when it is being carried on one’s back. You may want to explore materials that are lightweight yet sturdy and experiment with different folding mechanisms to make the transformation from chair to backpack seamless.
14. A Smartwatch that Reminds You to Drink Water
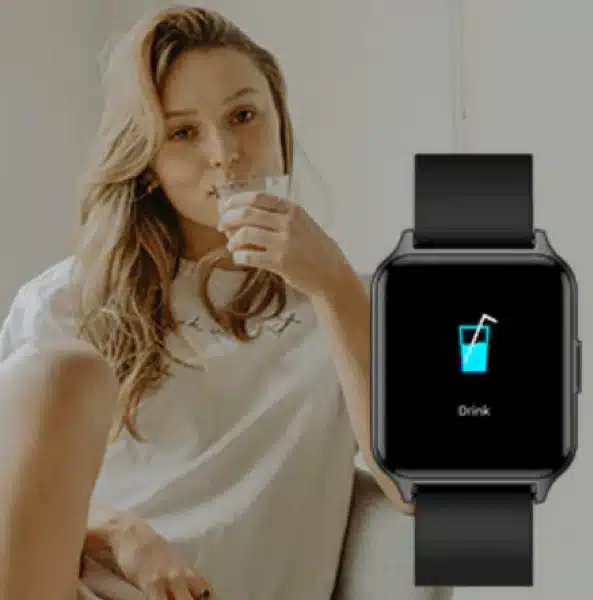
A way to create a smartwatch that reminds you to drink water is by incorporating sensors that measure the amount of water you consume throughout the day. The watch could then remind you to drink water at regular intervals through vibrations, messages on the screen, or even a voice assistant. It’s important to make the watch user-friendly and visually appealing, taking into consideration the size, style, and interface that would be most intuitive for users.
15. A Book Stand that Holds Your Book Open for You
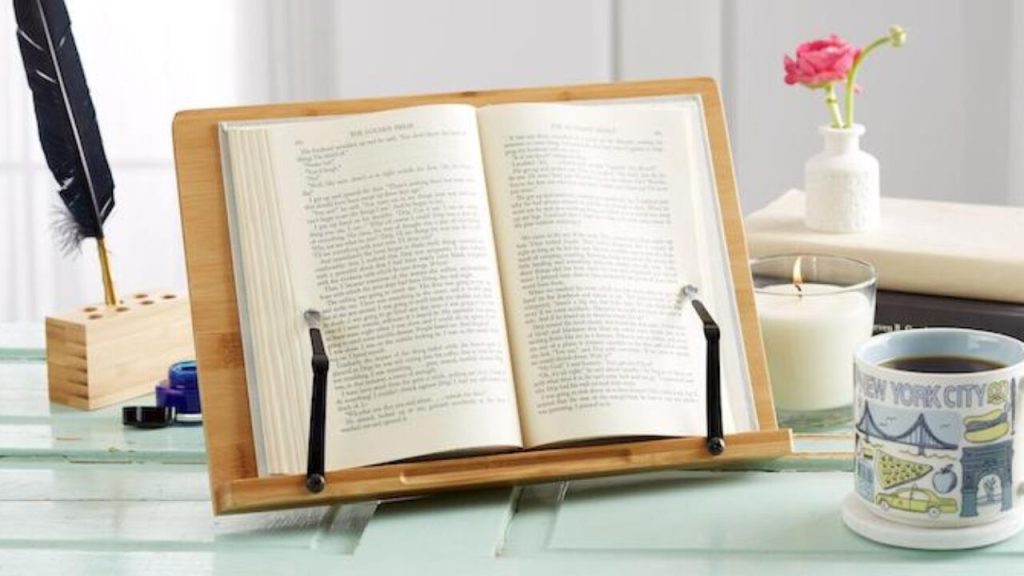
A book stand that holds your book open for you, yes, interesting! You will need a few materials. First, you will need a sturdy piece of cardboard or a thin piece of wood. You will also need a ruler, a pencil, a pair of scissors, and some tape. Start by measuring and marking out a rectangle on your cardboard or wood that is slightly larger than the size of your book. Cut out the rectangle using your scissors. Next, cut a slit in the middle of the rectangle that is just wide enough to fit the spine of your book. Make sure the slit is centered in the rectangle. Fold the two sides of the rectangle up at a slight angle to create a stand for your book. Use tape to secure the sides in place. Finally, place your book on the stand, with the spine resting in the slit.
16. A Creative Bookmark that Remembers Where You Left
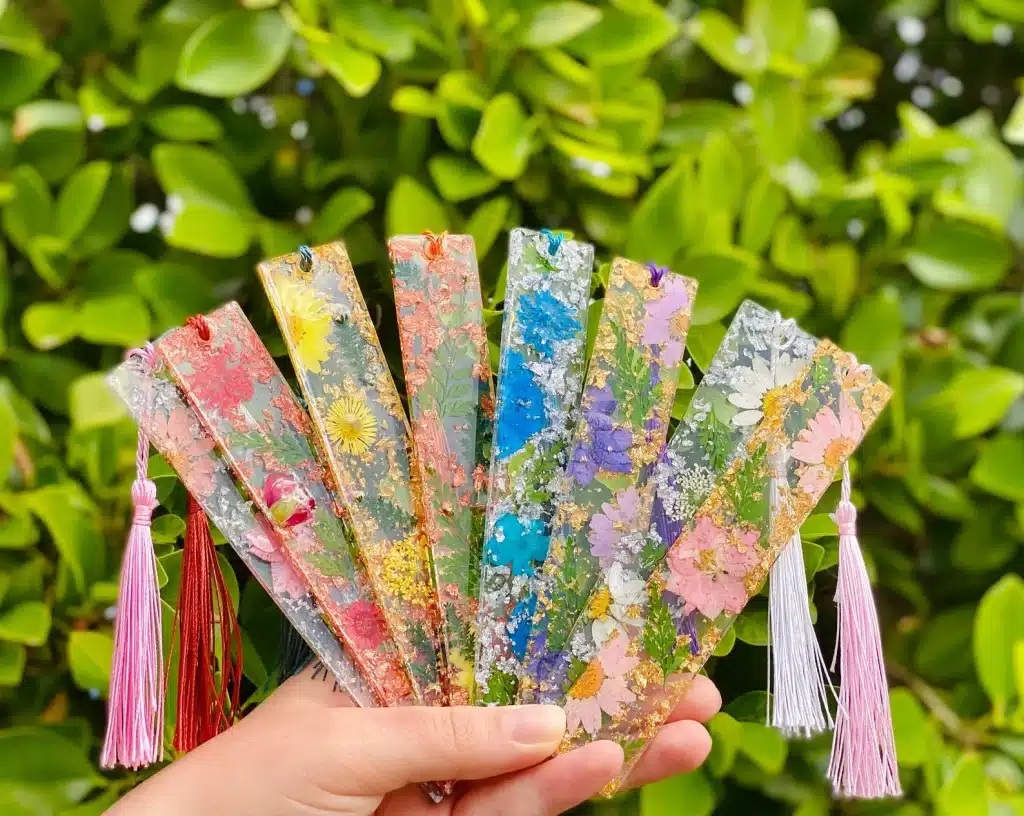
Are you tired of losing your place in your favorite book? Do you find yourself constantly flipping through pages trying to remember where you left off? Well, have no fear! With this creative bookmark, you’ll never lose your place again. It’s easy to make, and you’ll wonder how you ever lived without it. Plus, it’s a great way to add a personal touch to your reading experience.
17. A Device That Helps You Find Parking Spots at School

Have you ever been late for class because you couldn’t find a parking spot at school? Well, imagine having a device that helps you locate available spots with just a few taps on your phone. This innovative device uses real-time data to guide you to the nearest available parking spot, saving you time and reducing stress.
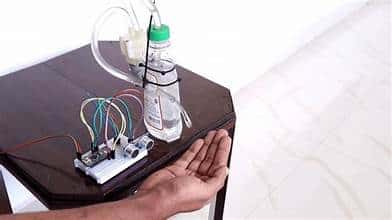
18. A Wearable GPS Tracker for Students on Field Trips
![]()
Creating a wearable GPS tracker for students on field trips is a straightforward process. You’ll need a GPS module, a microcontroller, a battery, and a wristband or clothing clip to attach to the student’s attire. Begin by connecting the GPS module to the microcontroller and programming it to transmit the location data to a website or app. Next, attach the battery to power the device. Finally, attach the GPS tracker to the student’s wristband or clothing clip so that it can be conveniently worn and tracked throughout the field trip.
19. A Device That Helps You Organize Your Locker
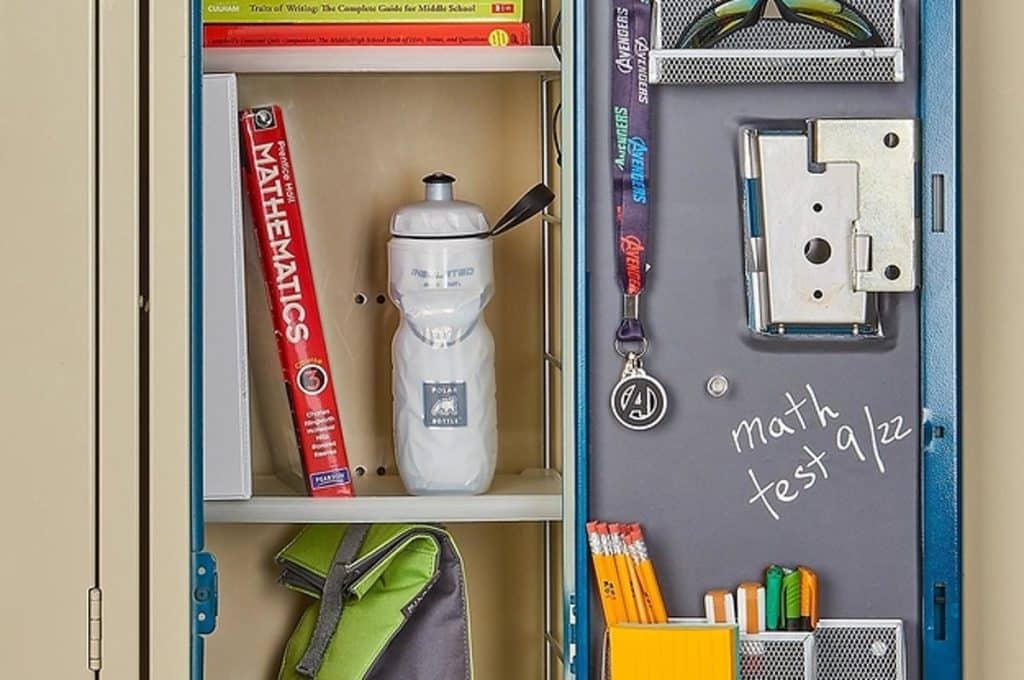
To make a device that helps you organize your locker and make it interactive, you could start by brainstorming the features you want it to have. Some ideas could include a touchscreen display, voice commands, and an inventory system that tracks the items in your locker. Once you have a clear idea of what you want, you can start building the device using a microcontroller like an Arduino or Raspberry Pi.
20. A Water-Resistant Backpack for Rainy Days
Are you tired of worrying about your belongings getting soaked on a rainy day? Well, we have a solution for you! With a few simple steps, you can create a water-resistant backpack that will keep your belongings safe and dry. Not only will this save you from the hassle of carrying around a bulky umbrella, but it will also give you peace of mind knowing that your valuables are protected.
21. A Device to Keep Track of Your Homework Assignments
Do you often find it difficult to keep track of your homework assignments? If so, don’t worry; you’re not alone. Here’s a fun and engaging solution that can help you stay organized and on top of your work. Create a colorful and personalized chart or calendar that you can hang in your study area. Use stickers or markers to mark off each assignment as you complete it, and set goals for yourself to stay motivated. You can even add motivational quotes or pictures to keep you inspired. With this device, you’ll never miss an assignment again!
22. A Water Filter Bottle
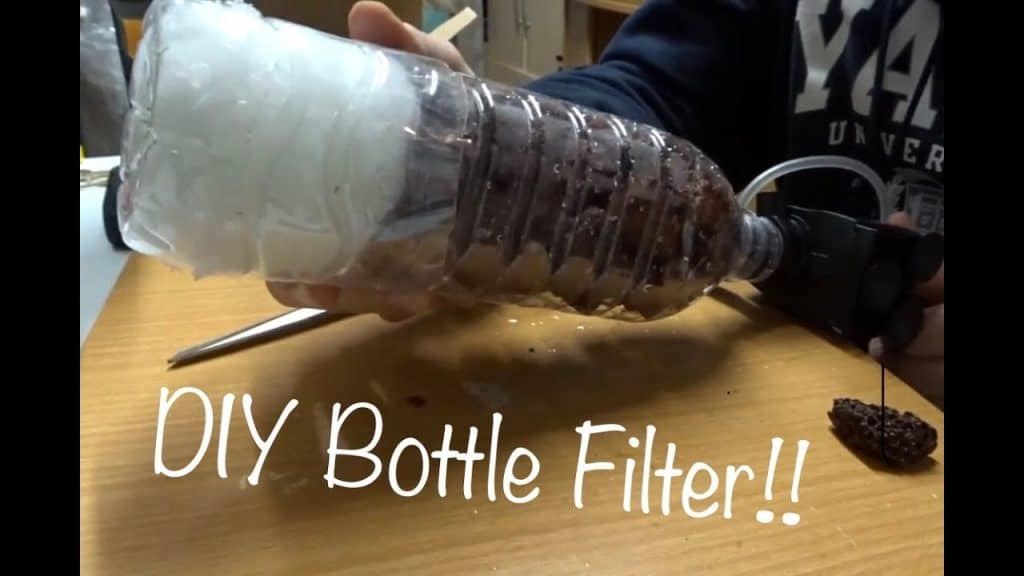
To make a water filter bottle DIY project, start by finding a plastic bottle and cutting it in half. Then, fill the bottom half with a layer of small rocks, followed by a layer of sand, and finally, a layer of activated charcoal. Place the top half of the bottle back on, and poke a few small holes in the cap. When you pour water into the top of the bottle, it will filter through the layers and come out clean and drinkable from the bottom. This is a great way to learn about water filtration and make a useful tool for outdoor adventures!
23. A Smart Recycling Bin

For a smart recycling bin, you should have a regular recycling bin, a microcontroller board such as Arduino or Raspberry Pi, a distance sensor, a servo motor, and a Wi-Fi module. First, attach the distance sensor to the front of the recycling bin so that it can detect when someone approaches it. Then, connect the distance sensor to the microcontroller board. Next, you will need to connect the servo motor to the microcontroller board. The servo motor will be responsible for opening and closing the lid of the recycling bin. You can program the microcontroller to open the lid when the distance sensor detects someone approaching the bin and then close the lid once the person has finished depositing their recyclables. Finally, connect the Wi-Fi module to the microcontroller board so that you can control the recycling bin remotely.
24. Sling Shot Pen
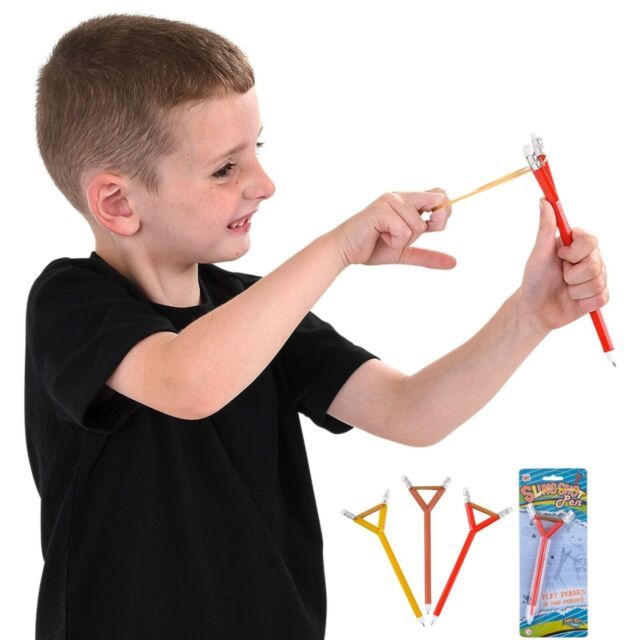
To make a simple pen sling shot invention, you will need a pen, a rubber band, and a small piece of paper. First, remove the ink cartridge from the pen and discard it. Next, stretch the rubber band around the middle of the pen and secure it in place. Finally, fold the small piece of paper in half and place it in between the rubber band and the pen. Now, your pen slingshot is ready to use!
25. An Interesting Board Game
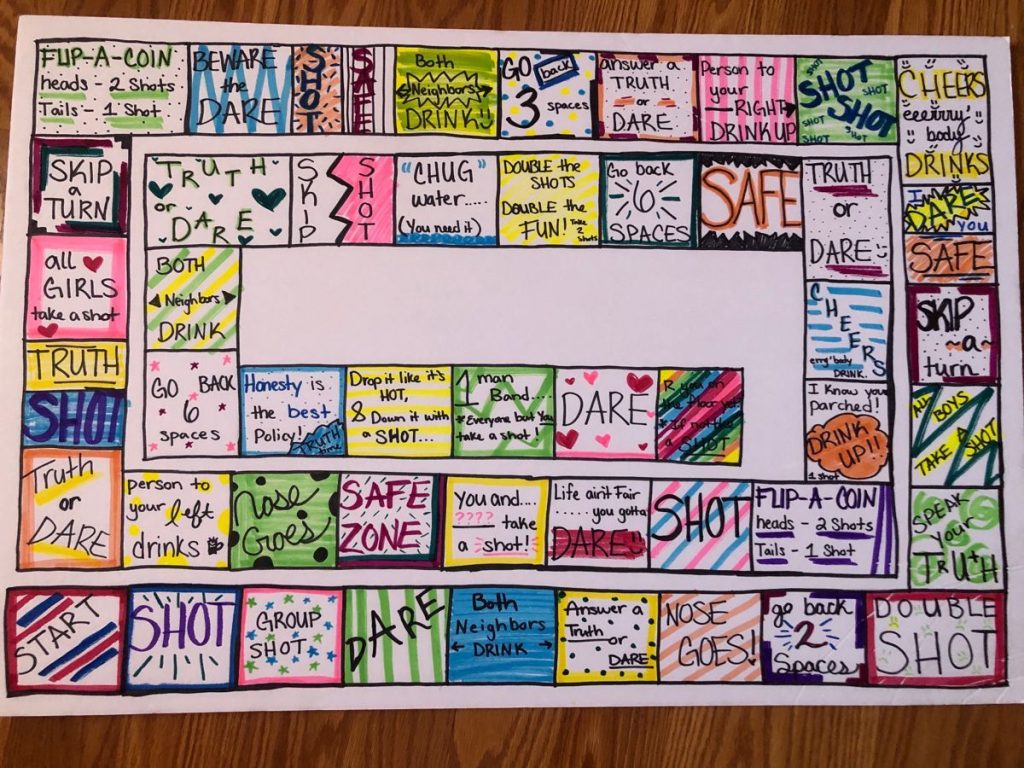
Creating an interesting board game requires careful planning and consideration of various factors. First, determine the theme and objective of the game. Next, establish the rules and mechanics that will govern gameplay. Consider adding elements of chance or strategy to keep things exciting. Additionally, we design and create visually appealing game pieces and a game board that complements the theme.
26. A Smart Bike Lock
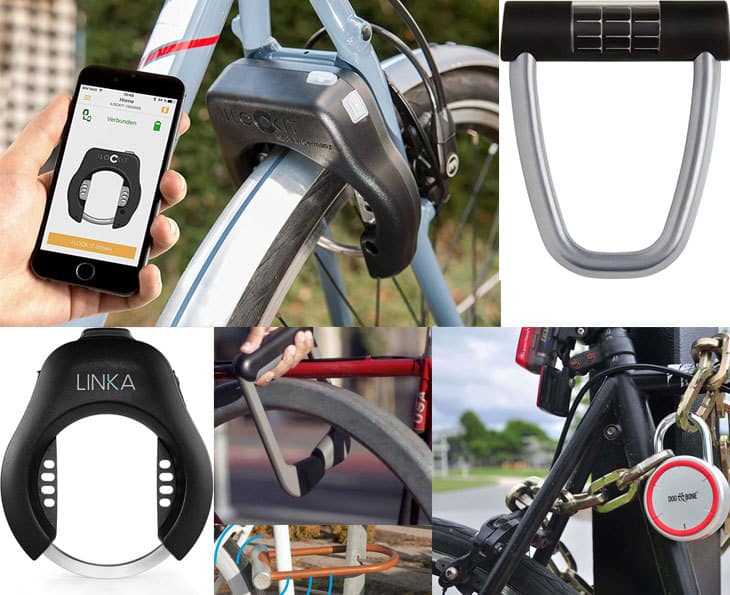
To make a smart bike lock, you will need a few components, such as a microcontroller, a Bluetooth module, a motor, a battery, and a lock mechanism. You should start by programming the microcontroller to receive, and process commands from a smartphone app through the Bluetooth module. Then, you can connect the motor to the lock mechanism to control the opening and closing of the lock. Finally, you need to power the system with a battery and test it thoroughly before attaching it to your bike.
27. A Touch Sensor Eye Glass Wiper
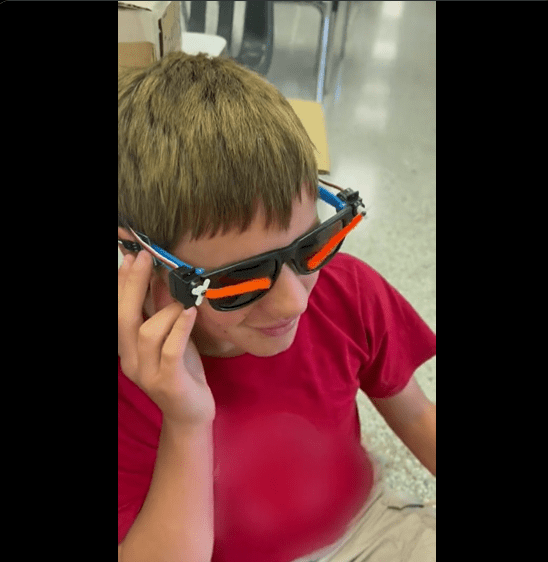
To make a touch sensor eyeglass wiper, you will need a few basic materials. First, find a small piece of conductive foam and cut it into a circular shape. Then, attach a small piece of conductive tape to the foam. Next, attach a small motor to the foam using some adhesive. Finally, attach a small piece of cloth to the motor using some adhesive. Once everything is attached, connect the motor to a battery and test the touch sensor. If everything works correctly, you should be able to touch the sensor and activate the motor to wipe your glasses.
28. A Mechanical Hand
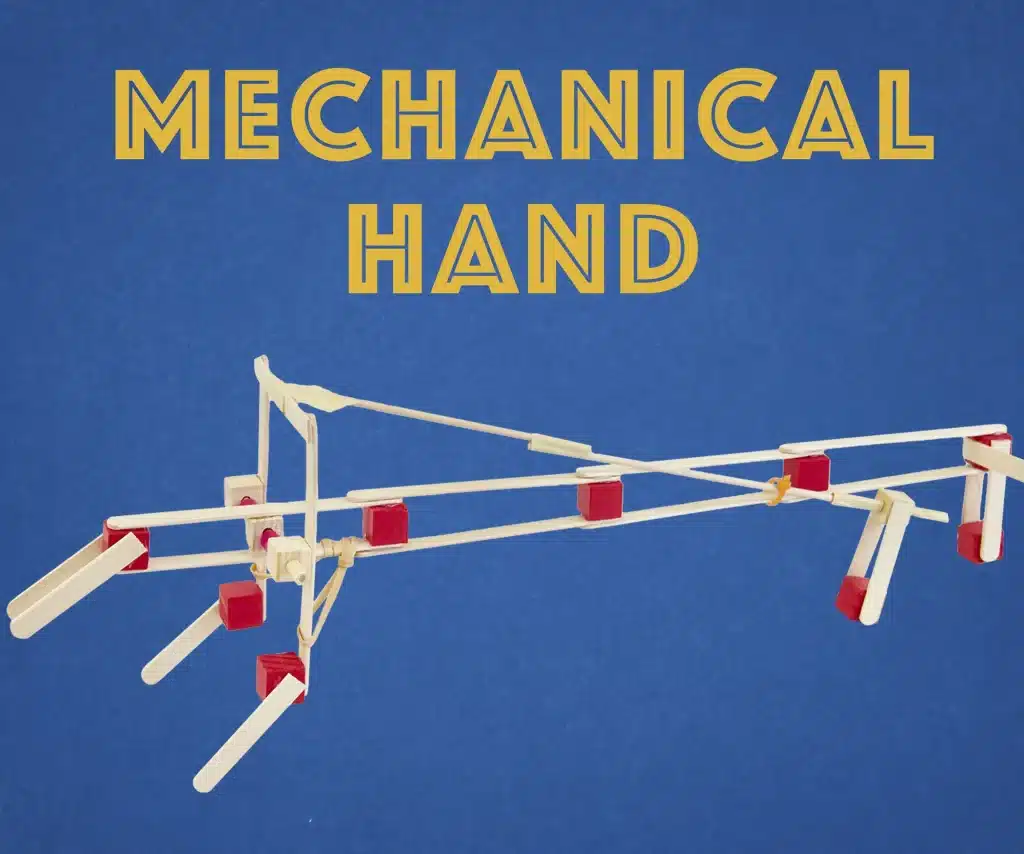
Have you ever thought about the incredible impact a prosthetic hand could have on someone’s life? With a mechanical hand, individuals with limb differences can regain their independence and perform everyday tasks that were once difficult or impossible. Making a mechanical hand may seem like a daunting task, but with the right materials and instructions, it can be a rewarding project. By creating a prosthetic hand, you have the opportunity to change someone’s life for the better.
29. A Straw Rocket
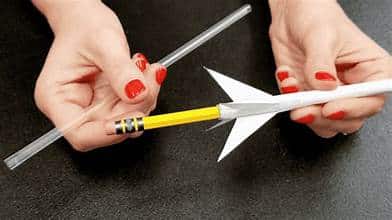
Looking to create a fun and exciting activity for yourself or your kids? Look no further than making straw rockets! With just a few simple materials, you can create your own mini rockets and launch them into the air for hours of entertainment. Here’s how: Materials: – Drinking straws – Paper – Scissors – Tape – Markers (optional). Start by cutting a small triangle from a piece of paper. This will be the nose cone for your rocket. Next, roll up another piece of paper tightly around the drinking straw. This will be the body of your rocket. Use tape to secure the nose cone to the top of the rocket body. Decorate your rocket with markers if you’d like. Now it’s time to launch! Place the drinking straw in your mouth and blow hard, shooting the rocket into the air.
30. A Bottle Vacuum Cleaner
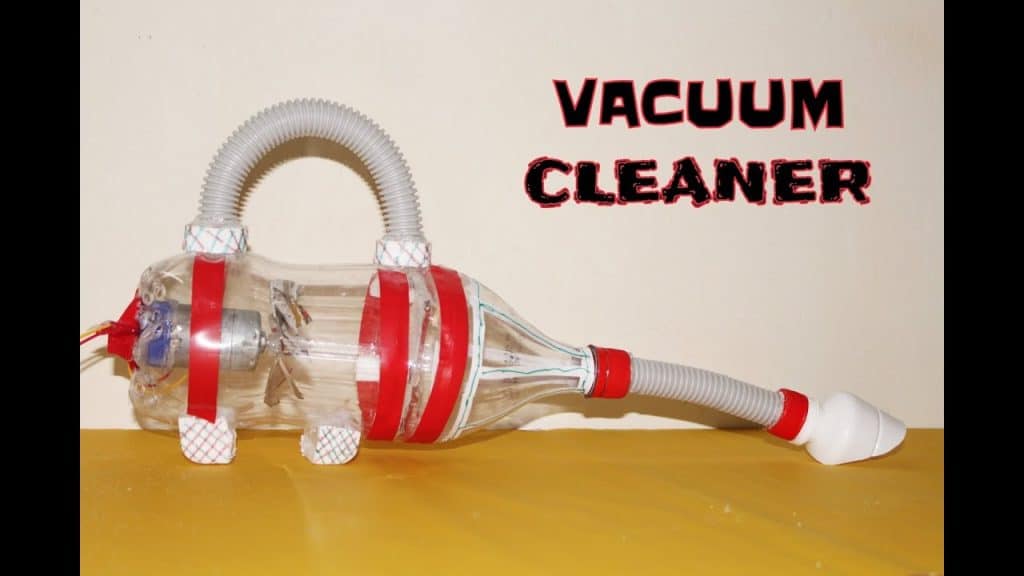
Do you want to keep your home clean and free of dust and debris without breaking the bank? Look no further than creating your own bottle vacuum cleaner! Not only is it a cost-effective solution, but it’s also a great way to repurpose items you already have at home. To make your own bottle vacuum cleaner, you’ll need a plastic bottle, a vacuum cleaner hose, duct tape, and a pair of scissors. First, cut off the bottom of the plastic bottle and discard it. Then, take the vacuum cleaner hose and insert it into the opening of the bottle. Use duct tape to secure the hose to the bottle, ensuring that there are no air leaks. Now, your bottle vacuum cleaner is ready to use!
31. A Wobble Bot
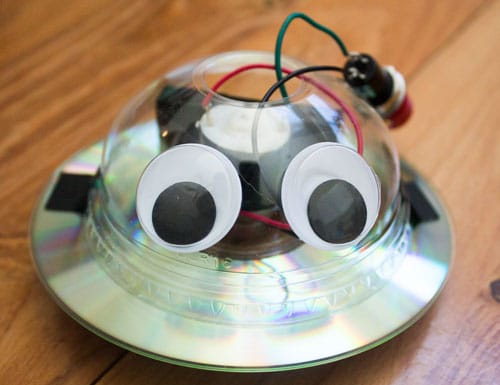
Looking to create a Wobble Bot? You’ve come to the right place! Here’s how you can make one of your own and gather your materials. You’ll need a motor, a battery pack, wires, a plastic cup, and some hot glue. Attach the motor to the bottom of the plastic cup using hot glue. Connect the wires from the battery pack to the motor, making sure they are securely attached. Add some weight to the top of the cup, like a small ball or a weighted bead. Turn on the motor and watch your Wobble Bot go!
32. A Smartphone Projector
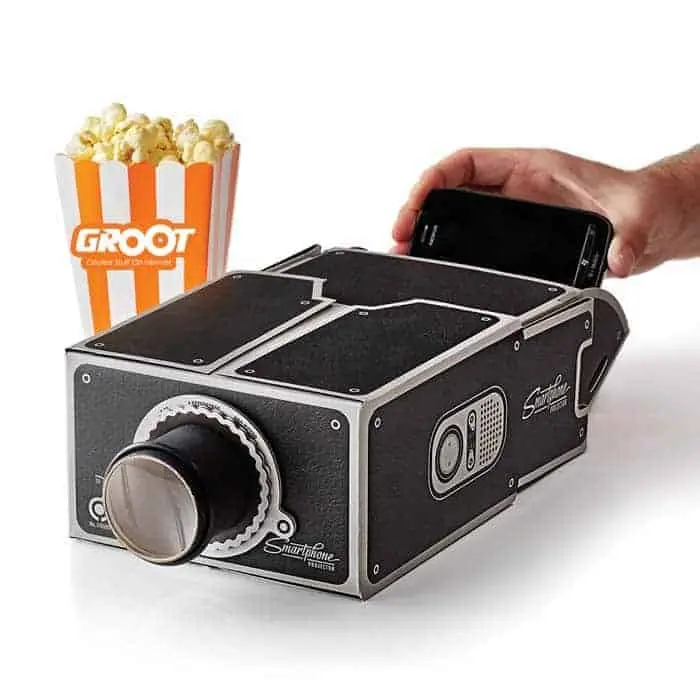
To make a smartphone projector, you will need a cardboard box, a magnifying glass, a sharp knife, a ruler, and some tape. Cut out a rectangular hole on one side of the cardboard box, leaving a border of about 2 cm on all sides. This will be the projection screen. On the opposite side of the box, cut out a smaller rectangular hole about the size of your smartphone screen. Take the magnifying glass and tape it over the smaller hole. Make sure it is centered and secured in place. Place your smartphone inside the box, with the screen facing toward the magnifying glass. Turn on a video or movie on your smartphone and adjust the focus by moving the phone back and forth until the image on the projection screen is clear. And there you have it, your very own smartphone projector!
33. A Harvest Rainwater
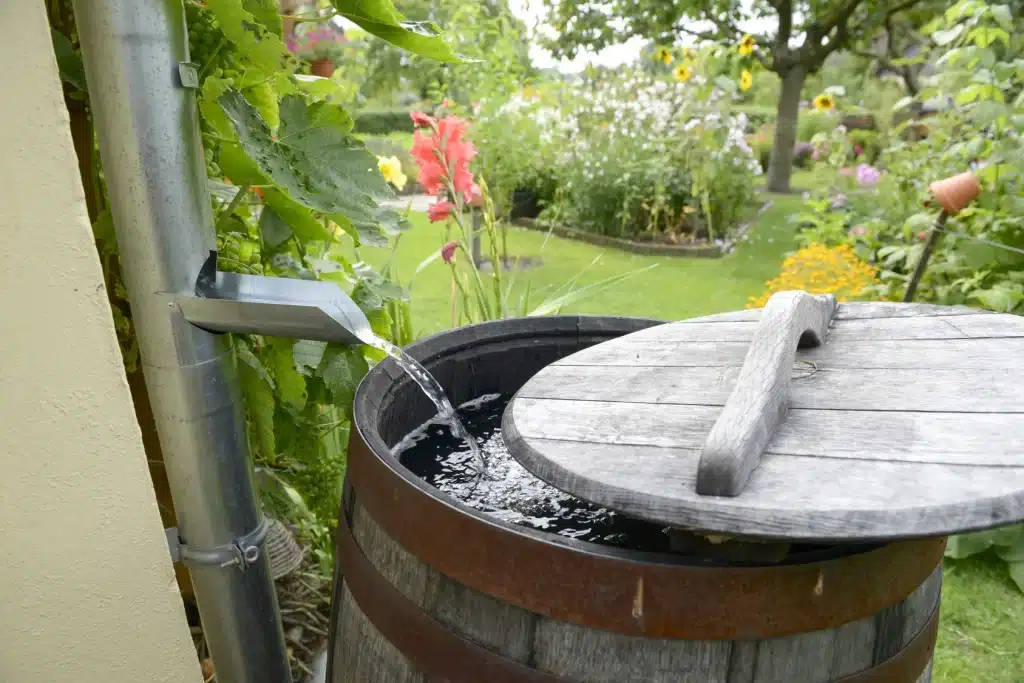
Harvesting rainwater is not only an eco-friendly practice, but it can also save you money on water bills and help conserve our planet’s precious resources. By collecting rainwater, you can use it for tasks such as watering plants, washing your car, or even flushing your toilet. Plus, it’s easy to do! All you need is a rain barrel or cistern, some basic plumbing tools, and a little bit of time.
34. A Hand Sanitizer Machine
Keeping your hands clean and free from germs is more important than ever. And what better way to ensure your safety than by making your very own hand sanitizer machine? With this machine, you’ll never have to worry about running out of hand sanitizer again. Plus, it’s incredibly easy to make. First, gather all the materials you’ll need: a small pump, a container for the hand sanitizer, tubing, and a power source. Once you have everything, attach the tubing to the pump and the container. Make sure it’s securely attached to both ends. Next, connect the pump to a power source, either a battery or plug it into an outlet. Fill the container with hand sanitizer and test your machine by pressing the pump. Making your own hand sanitizer machine is not only convenient but also cost-effective.
35. A Paper Bag Invention

To make a paper bag invention, you will need a few basic materials, including a paper bag, scissors, glue, and any decorations you want to add. First, lay the paper bag flat on a surface and cut off the bottom of the bag. Then, cut the remaining bag in half lengthwise. Next, take one of the halves and fold it in half, creating a crease in the center. Then, fold the top corners of the bag down towards the center crease, creating a triangle shape. Fold the remaining edges of the bag up and over the triangle shape, creating a pocket. Secure the edges with glue. Repeat these steps with the other half of the bag. Once complete, you can decorate the pockets with stickers, markers, or any other craft supplies you have on hand.
Summing It Up
All in all, middle school students have a wealth of creativity, and their innovative minds can be harnessed to come up with some amazing inventions. With the right guidance and support, students can identify problems, brainstorm ideas, and create solutions that can make a difference in the world.
From eco-friendly products to apps that solve everyday problems, the possibilities are endless. The key is to encourage students to think outside the box, work collaboratively, and embrace failure as a stepping stone to success. By providing access to resources, mentorship, and opportunities to showcase their ideas, we can empower our young inventors and inspire a new generation of problem-solvers.
Let’s encourage our middle school students to unleash their creativity and make a positive impact on the world!


3 Comments
Pingback: What Places in School Are High Risk for Contamination? - illustrated Tea Cup
Pingback: What Did Nikola Tesla Invent? - illustrated Tea Cup
Pingback: What Could Life Be without Technology? - illustrated Tea Cup