Sponge painting has always had its charm ever since it was introduced. This simple technique is not just cost-effective but also triggers your creative imagination to enjoy versatile sponge painting ideas.
It is all in the use and execution of the sponge that creates different artistic looks. You should be aware of the way you use the sponge, the colors that you choose, and the creative way to layer them.
There is immense scope for experimenting with sponge painting for furniture refurbishment; you should just be sure of how to use your imagination with that.
Are you also excited to try different sponge painting ideas for refurbishing your furniture pieces? We are here with all the details you need to give your best shots with this amazing yet simple technique.
Sponge Painting For Furniture Refurbishment
Sponge painting techniques can easily be done using a kitchen or a marine sponge using subtle color combinations. You can also experiment with the sheen and transparency levels to enhance its beauty.
Interestingly, the sponge painting technique can create different impacts on the overall look of the room.
Apart from trying the sponge painting techniques on the room walls, the technique enjoys its popularity for furniture refurbishment.
Yes, you can get a whole new look for your furniture by trying your hands with sponge painting ideas.
It is no longer limited to the application of high contrasting colors; rather, it is more towards the lighter and subtle use of the colors. Honestly, the effect looks so impressive, dramatic, and timeless!
Let us start with the detailed process of using sponge painting on furniture.
Picking Colors
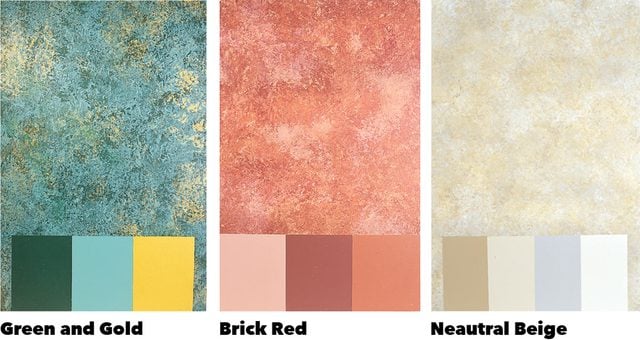
One of the most tricky and hardest parts of sponge painting is to choose the right colors. Luckily, there aren’t any limitations about the colors you choose; you can use 1, 2, or even 12 different colors for a particular look. However, you should be sure that all colors beautifully blend.
You can go with different colors to create a subtle look or can choose colors from a similar pallet to get a monochromatic final look. Simply try different color combinations until you get what you want.
Quick Tip: Try the different color combinations on a spare piece of cardboard or wood before actually trying them on your furniture.
Picking Sponges
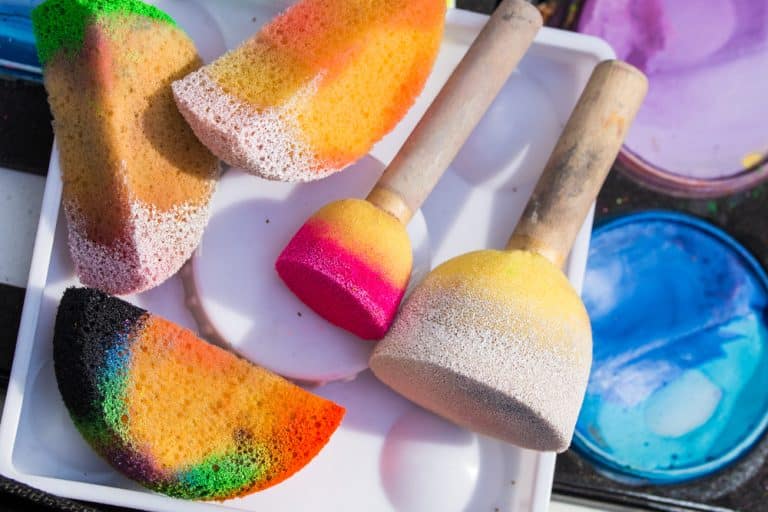
Besides choosing the color combination, selecting the correct sponge is equally important. The right type of sponge will give the desired texture to enhance the beauty of the furniture refurbishment.
A natural sea sponge is one of the best choices to get the desired result. Though these sponges are a little expensive, they ensure attractively random and varied patterns. Additionally, these sponges are easy to use, clean, and last long.
You can also get other sponge products; however, they might be less expensive but are often hard to work with and clean. They won’t provide the desired effect either.
How To Use Sponge Painting On Furniture?
These are the following steps to use sponge painting on furniture for an amazing result.
- Start with reading the manual instructions available on the paint or as provided by the furniture retailer.
- Look for a well-ventilated place for sponge painting your furniture. Make sure that the chosen place should have a temperature above 65 degrees.
- Collect some old newspaper, cardboard, and a drop cloth to avoid any possible mess.
- Remove all the hardware from the furniture, and tape the glass and mirrors as and where necessary.
- Make sure to fill the nail holes with water-based filler to avoid any damage.
- Now, wet the wood by spraying some water on it and allow it to raise the grain.
- Before proceeding with the final sanding, allow the dampened wood to rest and dry for 30 minutes.
- Remove shipping marks and skin oils from the furniture by lightly sanding it, using 180 grit paper.
- After this, apply the initial paint coat on the furniture, one section at a time, using a paintbrush.
- Let it rest and dry for approximately 2-3 hours.
- Again, apply a coat of paint on the desired section and let it dry for 1-2 minutes.
- Sponge-paint the section until you get the desired result, followed by 4-5 hours of drying.
- Once it is dried, apply the first coat of topcoat finish, followed by the second and then the third with approximately 2-3 hours of drying in between each coat.
- Lightly buff and dust the piece of furniture after it has dried.
- Use water to wash and clean all the applicators.
- Lastly, let the furniture completely dry for 7 days before using it.
Final Thoughts
Sponge painting has lasted all these years with the same impressive charm. Why? First, it is easy, and second, it is simply beautiful.
You need no special tools and equipment or any specific skill to try sponge painting; all you need is your vivid imagination and creativity.
Believe us; not only will you love the result but you will also thoroughly enjoy the process. So, ditch all your confusion and excuses and try the different sponge painting ideas for furniture refurbishment now.
Let us know in the comments which furniture you painted using a sponge.

