Entertaining your children while keeping them busy and not glued to a screen is tough. But with fun invention ideas, you can guarantee a fun time.
STEM projects will help your kids with their fine motor skills, and teach them the functioning of the world.
Making a boat out of household items is one such challenge that will keep the kids occupied all summer long.
While building boats, an imaginative mind is indispensable. Boats can be made with almost everything you see around you.
The tricky part is to keep them afloat. Here are a couple of methods you can try out to make floatable boats with your kids.
Paper Origami Boat
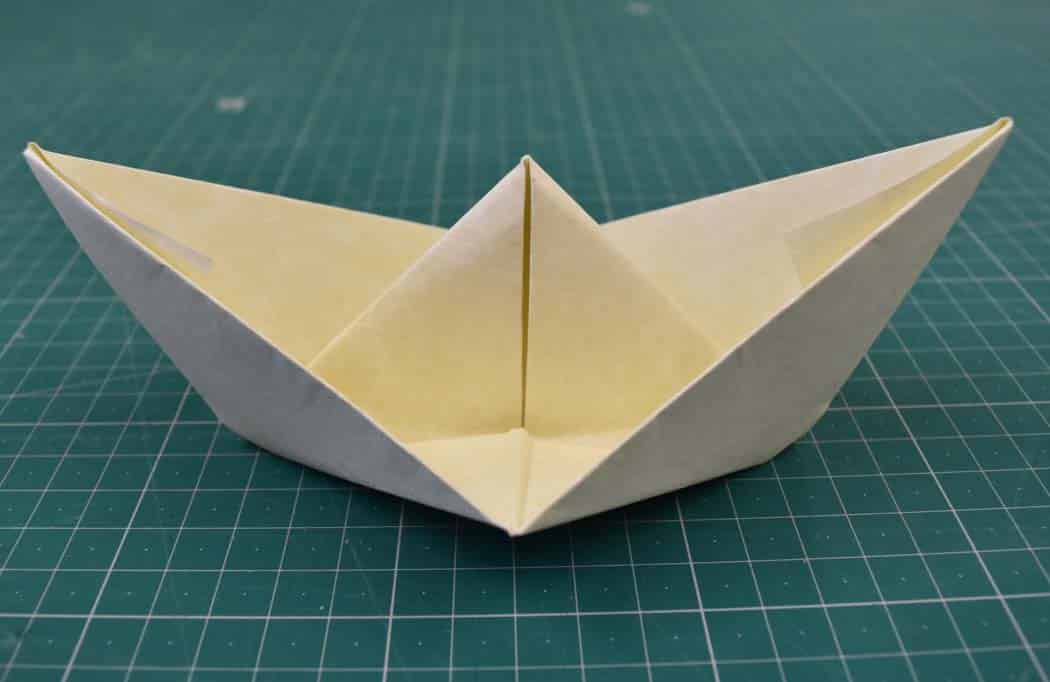
The art of making boats out of paper is an age-old tradition. The boats are easy to make and can float for a while, much to children’s enjoyment.
This project also needs no materials; an A4 paper and some wax are enough to get your child started.
Material Required
- 1 A4 Sheet of paper.
- Wax
- Gloves(Optional).
- Newspaper(Optional).
Steps for Making a Paper Origami Boat
- Take the A4 Sheet and keep it on a flat surface, with the longer side lying horizontally.
- Now fold the sheet the long way (in a hot dog style), then unfold it so the crease is visible.
- Fold the sheet again on the shorter side (in a hamburger style), but don’t unfold it.
- Make sure the opening of the fold is facing you, then fold the corners to make a triangle.
- The top left and right corners should meet the crease, creating two flaps not covered by the triangle.
- Take one flap at a time and fold it at the base of the triangle over the triangle shape.
- As the paper looks like a hat, small flaps should be sticking out at the corner.
- Fold each flap along the corner of the triangle so they don’t stick out anymore.
- As the whole paper looks like a triangle, open the flap and make the two ends of the triangle meet.
- Press down on the paper, and along the new creases, the new shape will be a square.
- Arrange the paper into a diamond so the triangle-shaped flap faces you.
- Fold each flap separately so that the bottom corner meets the top corner of the diamond.
- As you get an even smaller triangle, open the bottom opening of the triangle and make the corners meet again.
- Press down on the paper so the new square shape is neat.
- At this point, you should have a square divided in half by a diagonal opening.
- Pull at the corner that can be pulled to widen the diagonal, and then you will see the boat slowly coming into shape.
- Press down on the bottom crease so the trapezoid shape holds and only the tip of the boat is visible.
Steps to Make the Boat Floatable
- Take a little wax and apply it liberally on both sides of the bottom of the boat.
- Widen the bottom gap of the boat and apply wax there as well.
- Make sure you widen the gap enough to stand still on a flat surface.
- Finally, gently set it on calm waters and see it sail.
Plastic Container Boat
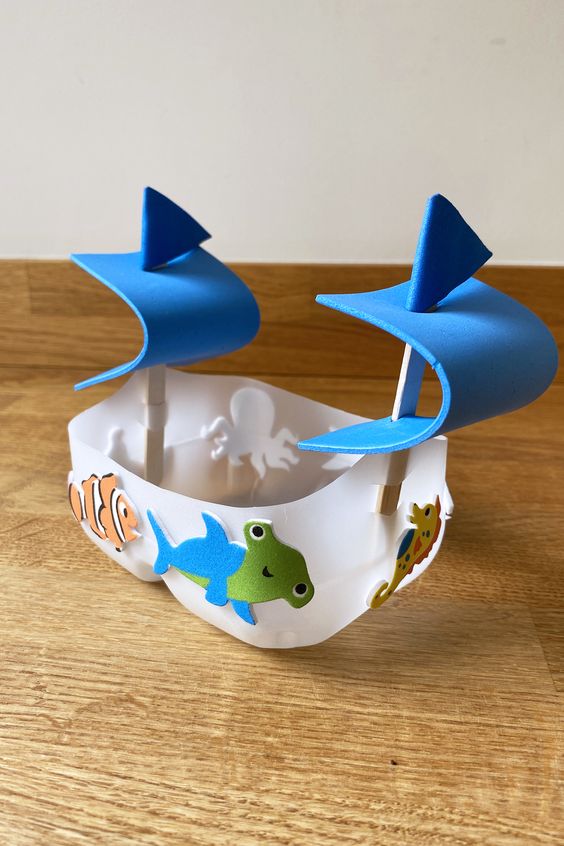
If you want to create something a little more elaborate and creative than paper boats, try using recycled materials. There are plenty of reusable items in our daily lives that end up in the bin.
But using them for children’s projects can be a fun way of being environmentally conscious. Here are the specifications for such a project.
Material Required
- For the Hull: Small, shallow, waterproof materials like plastic containers, half-gallon milk cartons, etc.
- For the Mast: Toilet paper rolls, straws, toy sticks, etc.
- For the Sail: A small piece of cardboard, paper, fabric, or aluminum foil.
- Crafting essentials: Scissors, glue, tape, pens, etc.
Steps for Making a Plastic Container Boat
- Take the milk carton and cut it in half lengthwise. If it is a plastic container, keep it intact.
- You will now have a long, tray-like shape for the boat’s body.
- Attach your star or paper roll to the middle of the body. You can use glue, playdough, or tape for a stronger hold.
- Cut a triangle off the cardboard or fabric for the sail and attach it to the mast using staples or glue.
- Try floating the construction in a small space to see how it performs before moving to a bigger space.
Conclusion
Making boats is an integral part of our childhood. The above-listed ideas are easy and interesting.
You can make them out of paper by folding them and using a little wax. Or you can use recyclable materials to create something that can be played with for a long time.
You can improvise the above-mentioned boat-making ideas to add a touch of creativity. Add colors and designs to make your boats look beautiful.
Let us know your favorite method of making floatable boats in the comments below!