Watercolor paintings are generally fragile and usually at a risk of getting damaged with time.
The excess humidity and sunlight can fade the color pigments, wrinkling the surface. These conditions are enough to spoil your masterpiece creation.
However, sealing your watercolor painting is one of the simplest and effortless ways to secure it. Sealing the watercolor painting can preserve its colors and minimize fading for many years.
A seamless clear coating using ultra-violent resistance provides the best protection without damaging the appearance of the painting.
So, do you now plan to seal your colorful painting ideas on the canvas? Let us get into the details of properly sealing the watercolor painting on the canvas.
Why Should You Seal Watercolor Painting?
Until now, watercolor paintings have been glass-framed to ensure their longevity. However, your painting is still at risk of losing its charm.
Sealing is a cost-effective, quick, and convenient way of preserving the quality of the watercolor painting.
Here’s why you should ditch framing your painting for glass protection and prefer sealing it.
- Your painting is water-based and, thus, can easily be spoiled by any liquid.
- The excess air and surrounding sunlight can cause wrinkles to the base paper.
- The color pigments may fade with time, resulting in deteriorated painting quality.
How To Seal Watercolor Painting?
Steps
1. Complete the process by putting your watercolor painting on a spacious, flat surface. Also, work in dust-free surroundings to avoid dust or dirt settling on your painting.
2. You can use a UV-resistant acrylic clear coat spray or a wax varnish to seal the watercolor painting. Both will give fine results; however, you should be aware of properly using them.
3. Lastly, take full precautions while using any of the methods. You can also get professional help if you are new to watercolor paintings.
Using UV-Resistant Acrylic Clear Coat Spray
UV-resistant acrylic clear coat spray protects your watercolor painting against any damage from liquid, surrounding air, and sunlight. Here’s what you should follow.
- Vigorously shake the can of the UV-resistant clear coat to mix all its ingredients. This will ensure a smooth and even use.
- Maintain a 6-inch distance between the UV-resistant can and your painting to avoid consequences.
- Begin with spraying a light coating of the UV-resistant clear coating. Avoid coating the pool with uneven sprays on the painting.
- Create an even spray coating by moving your arm back and forth.
- Allow the first coating to dry for at least 30 minutes.
- Once the initial coating layer dries completely, repeat the same procedure and apply another coating layer. Allow it to dry for another 30 minutes.
- Now, apply the final coating spray and let it dry completely overnight.
- Once the watercolor painting is completely dry, you can use it anywhere you want without any worries.
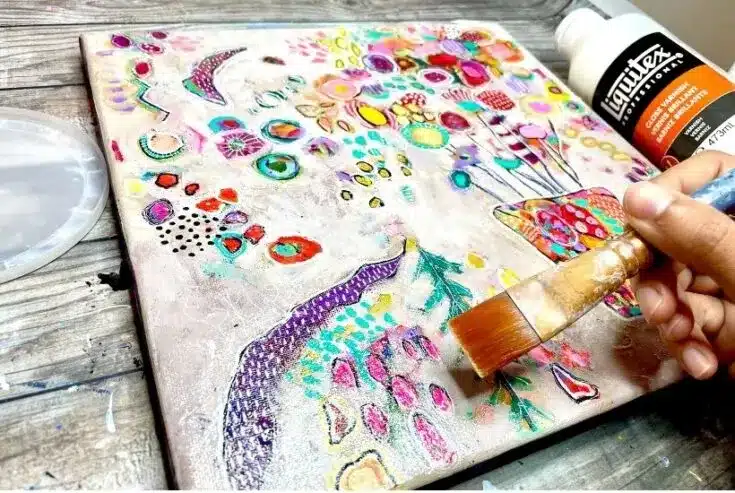
Using Wax Varnish
You can also use wax varnish to protect your watercolor painting against any damage from liquid, surrounding air, and sunlight. Here’s what you should follow.
- Start by choosing a tub of wax varnish and a clean, lint-free cloth.
- Gently cradle the cloth around your fingers without forming any lumps.
- Now, scoop out a little (in liberal quantity to cover the entire area) wax from the varnish tub.
- Start applying the wax from one corner of the painting while working towards the right side. You can start from the top right corner and move towards the left side if left-handed.
- The wax won’t smear or smudge your painting, so that you can apply a decent amount. However, be sure to avoid forming any lumps or pools of wax on one side.
- Work in a circular motion and ensure that the entire painting is with the wax coating.
- Once the initial coating is done, let it dry completely. It will take approximately a few hours.
- After the first coating is dry, you can witness a nice sheen on the painting.
- Now, apply the second coat of wax varnish similarly, allowing it to dry overnight.
- Once the second coat is also dry, observe the sheen. You won’t necessarily need any third coating on the painting; however, if the sheen is not what you expected, you can also apply the third coating.
- Finally, buff the painting for the final touches before using it as and where you need it.
General Precautions to Stop Watercolor Paintings from Fading
If you haven’t considered sealing your watercolor painting but want to prevent its colors from fading, here are a few precautions to follow.
1. Minimal Sunlight Exposure: It is advisable to store your watercolor paintings in areas with minimal to no sunlight exposure. If this is impossible, use filtered glasses that block 97%-98% of harmful UV rays. This will prevent the maximum damage and increase the life of your watercolor painting without fading.
2. Use Good Quality Paper: It is important to use good quality paper to ensure minimum damage to your watercolor painting. Pick only acid-free papers for watercolor paintings, as they don’t turn yellow with time. The paper hardly gets any wrinkles over time.
3. Temperature: It is important to avoid temperature fluctuations to keep your watercolor painting vibrant, even after many years. Ensure consistent temperature and humidity (50%-65%) where you store your paintings.
Final Thoughts
It is not the last stroke of your paintbrush that confirms a lasting impression of your watercolor painting.
Sealing the watercolor painting to enhance its lifeline with minimal or no damage is equally important.
Moreover, ensuring proper maintenance after completing the painting is highly recommended to preserve the quality of your painting.
The last thing you would want is to see your creative masterpiece being faded because you didn’t seal it properly. It is worth knowing how to seal watercolor painting on the canvas.
If you need more information about sealing the watercolor painting, write to us in the comment section!