Ever wished you could turn a boring white t-shirt into a burst of color that screams “I made this!”?
Tie-dye isn’t just a craft. It’s a way to turn plain fabric into a canvas of swirling colors and wild patterns. From teenagers to grandparents, everyone loves the magic of transforming something plain into something spectacular.
Get ready to learn these jaw-dropping techniques that transform ordinary clothes, towels, and accessories into walking art.
We’ll walk you through each method step by step, from beginner-friendly patterns to advanced designs that will wow your friends.
From classic spirals to mind-bending geometric designs, you’ll find secrets that make even professional artists look twice. No special skills are needed—just grab some dye, and let’s get started!
30 Tie-Dye Patterns that Wow!
Ready to add some color to your life? Check out these awesome tie-dye techniques that will help you create everything from simple, fun patterns to complex, eye-catching designs.
1. Container Technique

Place your fabric in a container to create bold, circular patterns. This technique results in unique, controlled bursts of color that mimic the look of a tie-dye explosion contained within the container’s shape.
Materials Needed: Container, fabric, rubber bands, dye
| Step | Description |
|---|---|
| Step 1 | Roll the fabric tightly and place it into the container. |
| Step 2 | Secure the fabric with rubber bands, ensuring the fabric stays in place. |
| Step 3 | Apply dye to various sections of the fabric inside the container. |
| Step 4 | Allow the fabric to sit in the container for a while to absorb the dye. |
| Step 5 | Remove the fabric, rinse, and let it dry. |
Tips:
-
Experiment with different container shapes for varied designs.
-
Make sure the fabric is securely tied in the container to avoid uneven dyeing.
2. Marble Technique

This pattern brings swirls of color together in a way that resembles marble, with gentle gradients blending seamlessly. It’s perfect for creating soft, organic patterns.
Materials Needed: Fabric, dye, rubber bands
| Step | Description |
|---|---|
| Step 1 | Twist the fabric loosely into a ball or spiral shape. |
| Step 2 | Secure the fabric with rubber bands to hold the twisted shape. |
| Step 3 | Apply dye in random spots across the fabric, letting the dye blend naturally. |
| Step 4 | Rotate the fabric and apply more dye to ensure an even marble effect. |
| Step 5 | Allow the fabric to set, rinse, and let it dry. |
Tips:
-
Use contrasting colors for a stronger marble effect.
-
Don’t over-dye the fabric to maintain the soft swirls.
3. Resist Technique

The resist method is all about blocking parts of the fabric from dye, allowing for crisp, sharp designs. This technique is great for creating patterns with clear lines and defined sections of color.
Materials Needed: Fabric, rubber bands, wax, plastic, or any material to block dye
| Step | Description |
|---|---|
| Step 1 | Select the areas of fabric you want to keep dye-free and apply wax or plastic. |
| Step 2 | Secure the fabric with rubber bands to hold it in place. |
| Step 3 | Apply dye to the exposed areas of the fabric, avoiding the blocked sections. |
| Step 4 | Allow the fabric to sit for a while and let the dye absorb. |
| Step 5 | Remove the wax or plastic to reveal the resist pattern. |
Tips:
-
Experiment with different materials for blocking, such as wax or even masking tape.
-
Make sure the resist is tightly secured to avoid dye seeping into blocked areas.
4. Peach Sign Technique

This technique creates soft, peachy tones and smooth transitions between colors, resulting in a calming and warm pattern. Perfect for pastel lovers, it’s ideal for creating soft, gentle designs.
Materials Needed: Fabric, peach-colored dye, rubber bands
| Step | Description |
|---|---|
| Step 1 | Fold the fabric loosely in small sections. |
| Step 2 | Secure with rubber bands to create defined areas for dye. |
| Step 3 | Apply the peach-colored dye in sections, blending gradually for a soft gradient. |
| Step 4 | Let the fabric absorb the dye for several minutes. |
| Step 5 | Rinse the fabric and allow it to dry, keeping the light pastel hues intact. |
Tips:
-
Use a light hand with the dye for a soft, pastel finish.
-
Keep the colors light to maintain the delicate peachy look.
5. Freestyle Technique

Freestyle tie-dye allows you to create a completely random, organic design. It’s all about free expression—no rules, just creativity! This technique gives a one-of-a-kind result every time.
Materials Needed: Fabric, dye, rubber bands
| Step | Description |
|---|---|
| Step 1 | Scrunch or fold the fabric randomly, with no set pattern in mind. |
| Step 2 | Secure the fabric with rubber bands to hold the folds in place. |
| Step 3 | Apply dye in various colors wherever you feel inspired, using freeform splatters or strokes. |
| Step 4 | Allow the dye to set and fully absorb into the fabric. |
| Step 5 | Rinse the fabric and let it dry, revealing your unique design. |
Tips:
-
Let go of perfection and embrace randomness for a truly unique design.
-
Use multiple colors for a bold, vibrant look.
6. Yin & Yang Technique

The Yin & Yang pattern symbolizes balance, creating two distinct halves in black and white (or contrasting colors). The design represents harmony and symmetry.
Materials Needed: Fabric, black and white dye, rubber bands
| Step | Description |
|---|---|
| Step 1 | Fold the fabric in half to create a symmetrical base. |
| Step 2 | Secure with rubber bands, ensuring both sides are tightly held. |
| Step 3 | Apply black dye to one side and white dye to the other, keeping the middle clean. |
| Step 4 | Let the dye absorb and set for several minutes. |
| Step 5 | Remove the rubber bands, rinse, and let the fabric dry to reveal the design. |
Tips:
-
Focus on symmetry to make the pattern more striking.
-
Use contrasting colors like black and white for a traditional Yin & Yang design.
7. Christmas Technique

The Christmas tie-dye technique is perfect for the holidays, with classic red, green, and white hues. It’s festive and fun, perfect for making custom holiday shirts or gifts.
Materials Needed: Red, green, and white dyes, fabric, rubber bands
| Step | Description |
|---|---|
| Step 1 | Fold the fabric in a random, scrunched pattern to create texture. |
| Step 2 | Secure with rubber bands to hold the fabric in place. |
| Step 3 | Apply red, green, and white dye in sections, creating a holiday-inspired look. |
| Step 4 | Allow the fabric to set for a while, letting the dyes blend and spread. |
| Step 5 | Rinse and let it dry to reveal a festive design. |
Tips:
-
Keep the colors vibrant for a true festive feel.
-
Use a light touch with the green and red to avoid muddied colors.
8. Flower Spiral Technique

The flower spiral technique creates beautiful, petal-like shapes radiating from a center. It’s perfect for making floral-inspired designs that look dynamic and full of life.
Materials Needed: Fabric, rubber bands, dye in multiple colors
| Step | Description |
|---|---|
| Step 1 | Twist the fabric into a spiral shape, starting from the center. |
| Step 2 | Secure with rubber bands at intervals to hold the spiral shape. |
| Step 3 | Apply dye in sections around the spiral, using multiple colors for depth. |
| Step 4 | Allow the dye to absorb and set before rinsing the fabric. |
| Step 5 | Let the fabric dry to reveal a beautiful flower-like spiral pattern. |
Tips:
-
Gradually apply dye to enhance the spiral effect.
-
Keep the center of the spiral tight for a sharper flower look.
9. Mandala Technique

Mandala patterns are known for their intricate, symmetrical designs. This technique requires careful folding and dye application to create a beautiful, radial pattern that looks like a work of art.
Materials Needed: Fabric, rubber bands, multiple colors of dye
| Step | Description |
|---|---|
| Step 1 | Fold the fabric in a fan shape or layers to create radial symmetry. |
| Step 2 | Secure the fabric with rubber bands at different points to hold the design. |
| Step 3 | Apply dye in sections, starting from the center outwards for a balanced effect. |
| Step 4 | Allow the dye to absorb and set for several minutes. |
| Step 5 | Rinse the fabric, remove rubber bands, and let the fabric dry. |
Tips:
-
Focus on even dye application to maintain the symmetry.
-
Choose a limited color palette for a harmonious effect.
10. Mouse Technique

The mouse technique creates a central point of color surrounded by a burst of contrasting hues. It’s a fun design that resembles a mouse-shaped swirl, making it a playful option for tie-dye projects.
Materials Needed: Fabric, rubber bands, dye
| Step | Description |
|---|---|
| Step 1 | Begin by folding the fabric into a tight ball. |
| Step 2 | Secure the ball with rubber bands to hold the shape in place. |
| Step 3 | Apply dye to the center of the ball, leaving the outer edges untouched. |
| Step 4 | Add contrasting colors around the edges to create a burst effect. |
| Step 5 | Allow the dye to absorb and set, then rinse and dry the fabric. |
Tips:
-
Tighten the center of the fabric to ensure the “mouse” shape stays distinct.
-
Use bright colors for the burst effect to make the pattern stand out.
11. Reverse Technique

The reverse technique is a fun and creative way to make a design that’s the opposite of typical tie-dye. Instead of adding color, you use bleach or a color remover to remove sections of the color from the fabric.
Materials Needed: Fabric, bleach or color remover, rubber bands
| Step | Description |
|---|---|
| Step 1 | Fold or crumple the fabric into a tight shape. |
| Step 2 | Secure the fabric with rubber bands. |
| Step 3 | Use bleach or color remover on selected areas to remove color. |
| Step 4 | Allow the bleach to set for a few minutes and watch it lighten the fabric. |
| Step 5 | Rinse thoroughly, dry the fabric, and reveal the reverse design. |
Tips:
-
Always wear gloves when handling bleach to protect your skin.
-
Test a small patch first to ensure you achieve the desired effect without over-bleaching.
12. Accordion Technique

Accordion folds are simple but striking, creating tight, lined patterns that are perfect for making sharp, precise designs.
Materials Needed: Fabric, rubber bands, dye
| Step | Description |
|---|---|
| Step 1 | Fold the fabric in an accordion-like fashion (back and forth, like a fan). |
| Step 2 | Secure with rubber bands at intervals along the folds. |
| Step 3 | Apply dye to the sections between the rubber bands, ensuring even coverage. |
| Step 4 | Let the dye absorb, then rinse and dry the fabric. |
| Step 5 | If desired, add additional colors or touches to enhance the design. |
Tips:
-
Keep the folds tight for clean, defined lines.
-
Use contrasting colors between each fold for maximum visual impact.
13. Diamond Technique

The diamond technique creates sharp, symmetrical patterns resembling a diamond shape. It’s perfect for clean, geometric designs with clear color divisions.
Materials Needed: Fabric, rubber bands, dye
| Step | Description |
|---|---|
| Step 1 | Fold the fabric into a diamond shape, ensuring each side is symmetrical. |
| Step 2 | Secure the fabric with rubber bands along the folds to hold the shape. |
| Step 3 | Apply dye to different sections of the fabric, keeping the colors separate. |
| Step 4 | Allow the dye to set, and then rinse the fabric to remove excess dye. |
| Step 5 | Let the fabric dry, revealing sharp, diamond-shaped patterns. |
Tips:
-
Ensure the folds are even to maintain the sharpness of the diamond shape.
-
Try using complementary or contrasting colors for a more striking design.
14. Ice Dye Technique

Ice dyeing is a unique method that involves placing ice on fabric and letting dye drip over it as the ice melts. This creates a beautiful, watercolor-like effect with soft, flowing colors.
Materials Needed: Fabric, ice cubes, powdered dye, plastic bins or trays
| Step | Description |
|---|---|
| Step 1 | Lay the fabric flat in a plastic bin or tray. |
| Step 2 | Scatter ice cubes evenly over the fabric. |
| Step 3 | Sprinkle powdered dye over the ice cubes in various areas. |
| Step 4 | Allow the ice to melt and the dye to spread across the fabric naturally. |
| Step 5 | Once the dye has set, rinse and dry the fabric to reveal the unique pattern. |
Tips:
-
Use a variety of colors for a more dynamic, layered effect.
-
Don’t move the ice during the melting process to maintain the pattern flow.
15. Rainbow Technique

The rainbow technique is all about applying multiple colors in a smooth gradient, resulting in a beautiful spectrum. It’s one of the most popular and cheerful tie-dye patterns.
Materials Needed: Fabric, multiple dye colors, rubber bands
| Step | Description |
|---|---|
| Step 1 | Fold the fabric in a basic spiral shape. |
| Step 2 | Secure with rubber bands at intervals to keep the spiral intact. |
| Step 3 | Apply the dye in stripes of red, orange, yellow, green, blue, and purple. |
| Step 4 | Let the dye set for a while and then rinse the fabric. |
| Step 5 | Allow it to dry completely to reveal the rainbow design. |
Tips:
-
Use vibrant, bold colors to make the rainbow pop.
-
Apply dye slowly and evenly for smooth color transitions.
16. Spider Technique

The spider technique creates sharp, radial lines that resemble spider webs. It’s a bold and dramatic pattern that works great on larger pieces of fabric.
Materials Needed: Fabric, rubber bands, dye
| Step | Description |
|---|---|
| Step 1 | Twist the fabric from the center to create a spiral shape. |
| Step 2 | Secure the fabric tightly with rubber bands at intervals along the spiral. |
| Step 3 | Apply dye in sections between the rubber bands, using contrasting colors. |
| Step 4 | Allow the dye to set for several minutes and then rinse. |
| Step 5 | Dry the fabric, revealing the spider-web-like pattern. |
Tips:
-
The tighter you twist the fabric, the more pronounced the spider effect will be.
-
Use dark and light colors for contrast to make the design pop.
17. Kaleidoscope Technique

Kaleidoscope tie-dye creates intricate, symmetrical patterns that repeat across the fabric. The effect is mesmerizing, and each piece will look unique with its shifting patterns.
Materials Needed: Fabric, rubber bands, multiple colors of dye
| Step | Description |
|---|---|
| Step 1 | Fold the fabric in a fan-like or accordion style to create layers. |
| Step 2 | Secure the fabric tightly with rubber bands at multiple points. |
| Step 3 | Apply dye in various colors, one section at a time, ensuring even coverage. |
| Step 4 | Let the dye set for several minutes, and then rinse the fabric. |
| Step 5 | Unfold the fabric carefully to reveal a symmetrical, kaleidoscopic pattern. |
Tips:
-
Ensure even folds for maximum symmetry.
-
Limit the number of colors used to keep the design clear and bold.
18. String Technique

The string technique uses string or twine to bind sections of the fabric, creating clean, defined lines and shapes. This method is great for sharp designs and can be used to create geometric or organic patterns.
Materials Needed: Fabric, string, dye, rubber bands
| Step | Description |
|---|---|
| Step 1 | Tie the string or twine tightly around sections of the fabric to create patterns. |
| Step 2 | Secure the fabric with rubber bands if needed to hold the string in place. |
| Step 3 | Apply dye to the fabric, making sure it penetrates between the string sections. |
| Step 4 | Allow the dye to set, and then remove the string and rubber bands. |
| Step 5 | Rinse the fabric and let it dry to reveal sharp, defined lines. |
Tips:
-
Use a tight string to create the most defined patterns.
-
Experiment with different shapes of string to create unique designs.
19. Crumple Technique

The crumple technique is a simple and fun way to create random, splattered patterns. It’s easy to do and results in a textured, vibrant look that’s never the same twice.
Materials Needed: Fabric, dye, rubber bands
| Step | Description |
|---|---|
| Step 1 | Scrunch the fabric randomly into a ball or a loosely crumpled shape. |
| Step 2 | Secure it with rubber bands to hold the shape in place. |
| Step 3 | Apply dye in random areas, allowing the fabric to soak up the colors. |
| Step 4 | Let the fabric sit for a while to absorb the dye. |
| Step 5 | Rinse and dry the fabric to reveal the chaotic yet beautiful crumpled pattern. |
Tips:
-
The more you crumple it, the more intense the colors will be.
-
Avoid over-applying dye to maintain the randomness of the design.
20. Stripes Technique

The stripes technique creates clean, bold lines across the fabric. This is one of the most straightforward techniques and works well for a modern, graphic look.
Materials Needed: Fabric, rubber bands, dye
| Step | Description |
|---|---|
| Step 1 | Fold the fabric in either a horizontal or vertical stripe pattern. |
| Step 2 | Secure the fabric with rubber bands to hold the stripes in place. |
| Step 3 | Apply dye to each section, one at a time, ensuring even coverage. |
| Step 4 | Let the dye set for several minutes, then rinse the fabric. |
| Step 5 | Let the fabric dry to reveal crisp, vibrant stripes. |
Tips:
-
Use multiple colors for a bold, multi-striped effect.
-
Keep the sections even to maintain sharp, clean lines.
21. Ombre Technique

Ombre tie-dye creates a smooth gradient from one color to another, giving the fabric a soft, fading look. This effect is often seen in fashion and décor for its peaceful and elegant transitions.
Materials Needed: Fabric, dye in multiple colors, rubber bands
| Step | Description |
|---|---|
| Step 1 | Fold the fabric into a simple or spiral shape, depending on preference. |
| Step 2 | Secure the fabric with rubber bands to hold it in place. |
| Step 3 | Begin applying dye at one end of the fabric and gradually work your way down, blending the colors. |
| Step 4 | Let the fabric absorb the dye for several minutes, creating a gradual fade. |
| Step 5 | Rinse the fabric, allowing the dye to blend smoothly, and let it dry. |
Tips:
-
Use water to dilute the dye for a smoother, softer transition.
-
Work quickly while applying the dye to prevent harsh lines between the colors.
22. Bullseye Technique

Bullseye tie-dye creates concentric rings that radiate from a central point, creating a striking focal point on the fabric. This technique is one of the classic tie-dye looks and always yields vibrant results.
Materials Needed: Fabric, rubber bands, dye
| Step | Description |
|---|---|
| Step 1 | Pinch the center of the fabric and pull it upwards, creating a small mound. |
| Step 2 | Secure with rubber bands, evenly spaced, to create a bullseye pattern. |
| Step 3 | Apply dye to each section, starting from the center and working outward. |
| Step 4 | Let the dye set for a few minutes, ensuring that each ring has distinct color. |
| Step 5 | Rinse the fabric to remove excess dye and let it dry to reveal the bullseye pattern. |
Tips:
-
Ensure the center is tightly pinched to create a well-defined focal point.
-
Use contrasting colors for the rings to make each one pop.
23. Sunburst Technique
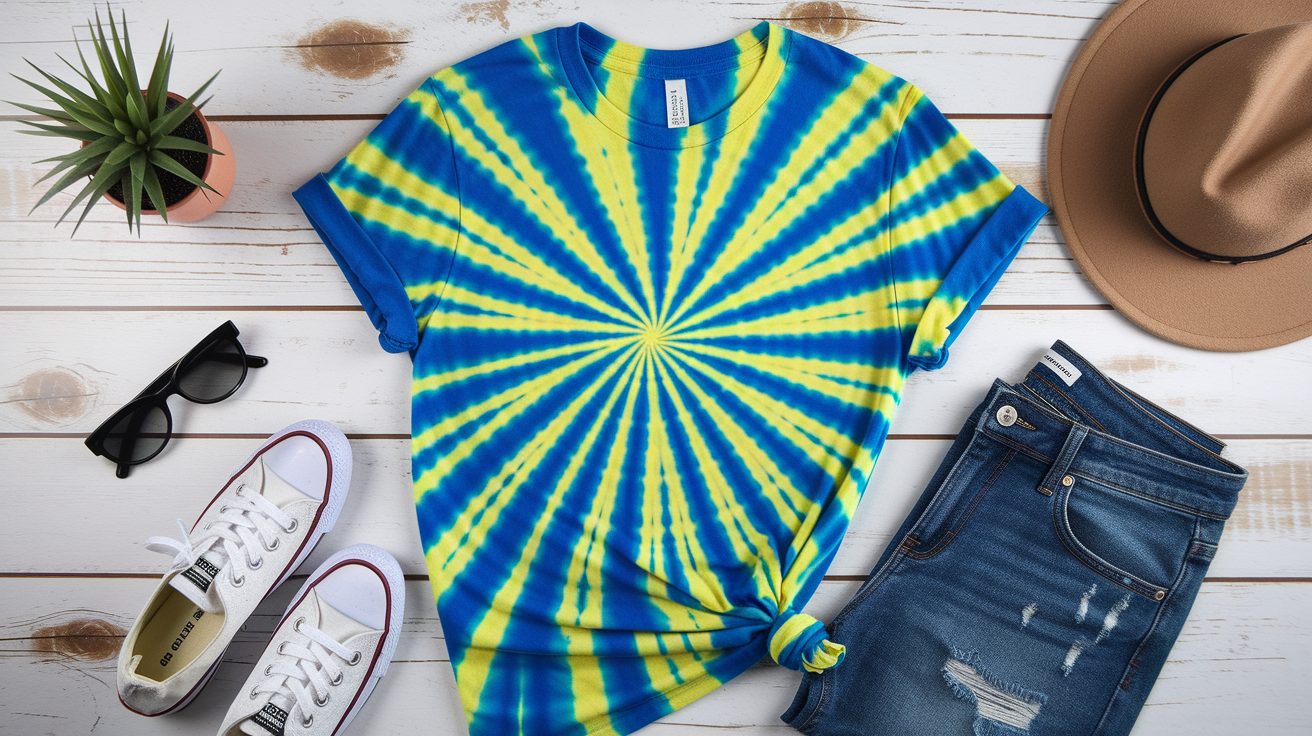
Sunburst tie-dye creates radiating lines from the center of the fabric, much like rays of the sun. It’s a bold, eye-catching design that adds energy to any project.
Materials Needed: Fabric, rubber bands, dye
| Step | Description |
|---|---|
| Step 1 | Fold the fabric in half, then twist it tightly from the center outward. |
| Step 2 | Secure the twisted fabric with rubber bands at intervals. |
| Step 3 | Apply dye in sections, radiating out from the center to mimic sun rays. |
| Step 4 | Let the fabric sit for a few minutes to allow the dye to soak in. |
| Step 5 | Rinse and dry the fabric to reveal the sunburst pattern. |
Tips:
-
Apply the dye with a light hand to create soft, radial transitions.
-
Use vibrant, contrasting colors for a dramatic effect.
24. Folding Technique

Folding is one of the simplest yet most versatile tie-dye techniques, allowing you to create a variety of geometric patterns depending on how the fabric is folded.
Materials Needed: Fabric, rubber bands, dye
| Step | Description |
|---|---|
| Step 1 | Fold the fabric in a pattern of your choice, such as accordion, fan, or zigzag. |
| Step 2 | Secure the folds with rubber bands to keep the design in place. |
| Step 3 | Apply dye in different sections, ensuring even coverage across the folds. |
| Step 4 | Let the fabric sit for a few minutes for the dye to absorb. |
| Step 5 | Rinse and let the fabric dry to reveal your folded pattern. |
Tips:
-
Try different folding methods to experiment with new designs.
-
Apply dye in a controlled manner to avoid bleeding between the sections.
25. Watercolor Technique

Watercolor tie-dye mimics the soft, translucent look of watercolor painting. This technique blends colors seamlessly for a gentle, fluid design.
Materials Needed: Fabric, dye in pastel shades, spray bottle, water
| Step | Description |
|---|---|
| Step 1 | Lay the fabric flat and lightly spray it with water to dampen it. |
| Step 2 | Lightly apply dye in soft strokes across the fabric, allowing the colors to bleed into each other. |
| Step 3 | Use a spray bottle to further blend the colors together. |
| Step 4 | Let the dye absorb into the fabric naturally, creating a watercolor effect. |
| Step 5 | Rinse and dry the fabric, allowing the soft transitions to shine through. |
Tips:
-
Use pastel or diluted dye for a more translucent, watercolor look.
-
Experiment with different water amounts to vary the blending effects.
26. Chevron Technique
![]()
Chevron creates a bold, zigzag pattern that’s eye-catching and stylish. It’s a great choice for a modern, graphic design that stands out.
Materials Needed: Fabric, rubber bands, dye
| Step | Description |
|---|---|
| Step 1 | Fold the fabric into an accordion or zigzag shape, ensuring sharp lines. |
| Step 2 | Secure the fabric with rubber bands at the points where the folds meet. |
| Step 3 | Apply dye in alternating colors to each section of the fabric. |
| Step 4 | Let the dye set, then rinse and remove the rubber bands. |
| Step 5 | Dry the fabric to reveal the bold, chevron-striped design. |
Tips:
-
Keep the folds tight for sharp, clean lines.
-
Use contrasting colors for a bold, vibrant chevron pattern.
27. Galaxy Technique

The galaxy tie-dye effect creates a cosmic, starry look with dark colors interspersed with small splashes of lighter dye to mimic stars.
Materials Needed: Fabric, dark dye (black or navy), white dye or bleach, rubber bands
| Step | Description |
|---|---|
| Step 1 | Twist or crumple the fabric to create a random, textured base. |
| Step 2 | Secure the fabric with rubber bands to hold the shape. |
| Step 3 | Apply dark dye (black or navy) as the base color. |
| Step 4 | Add white dye or bleach in small areas to create star-like spots. |
| Step 5 | Allow the fabric to sit, rinse, and then dry to reveal the galaxy effect. |
Tips:
-
Use small amounts of white dye or bleach to avoid overpowering the “stars.”
-
Keep the fabric twisted to create a more dynamic, space-like texture.
28. Firecracker Technique

Firecracker tie-dye creates vibrant bursts of color, much like fireworks exploding across the fabric. It’s a fun, dynamic pattern that looks especially bold on T-shirts or scarves.
Materials Needed: Fabric, multiple colors of dye, rubber bands
| Step | Description |
|---|---|
| Step 1 | Twist the fabric into a ball or random shape. |
| Step 2 | Secure with rubber bands to hold the fabric in place. |
| Step 3 | Apply dye in random splashes, using multiple colors to create bursts. |
| Step 4 | Let the dye absorb and set, then rinse the fabric. |
| Step 5 | Dry the fabric to reveal the vibrant, explosive pattern. |
Tips:
-
Use bright, bold colors to create an exciting firecracker effect.
-
Avoid overlapping too many colors in one area to keep the bursts distinct.
29. Star Technique

The star tie-dye technique creates a pattern that resembles a starburst or a star-like shape on the fabric. This method involves creating pointed shapes that radiate out from a center.
Materials Needed: Fabric, rubber bands, dye
| Step | Description |
|---|---|
| Step 1 | Pinch the center of the fabric and gather it into a tight ball or shape. |
| Step 2 | Secure the fabric with rubber bands at intervals. |
| Step 3 | Apply dye to the fabric in sections, working from the center out to create the rays of the star. |
| Step 4 | Let the dye set and absorb, then rinse the fabric. |
| Step 5 | Dry the fabric to reveal the star-like pattern. |
Tips:
-
Use contrasting colors to make the star pattern more vivid.
-
Tighten the center to ensure the rays are clearly defined.
30. Spiral Technique

The spiral technique is a classic tie-dye pattern that creates a vortex of colors spiraling outward from the center. It’s a timeless look that’s easy to master and always looks striking.
Materials Needed: Fabric, rubber bands, dye
| Step | Description |
|---|---|
| Step 1 | Pinch the center of the fabric and twist it to form a spiral. |
| Step 2 | Secure the fabric with rubber bands to keep the spiral shape intact. |
| Step 3 | Apply dye in wedges around the spiral, working your way outward. |
| Step 4 | Let the dye sit and absorb before rinsing the fabric. |
| Step 5 | Dry the fabric to reveal a beautifully colored spiral. |
Tips:
-
Use multiple colors to create a vibrant and dynamic spiral effect.
-
Twist the fabric tightly to get a defined, sharp spiral.
Wrapping it up!
You can master these tie-dye techniques. This guide transforms plain fabric into colorful art.
Each method tells a different story, and every pattern shows your personality. Imagine walking into a room with a shirt that speaks without words.
Start small. Grab old shirts or cheap fabric. The first try might look messy—and that’s okay. Great designs grow from unexpected color mixtures.
Practice builds confidence. Your skills will improve with each project. Experiment with different techniques. Try bold color combinations.
Share your work. Connect with other craft lovers. Join online groups. Learn from fellow creators. Get feedback. Keep pushing your creative limits.
Tie-dye is more than a craft. It’s self-expression. Make something spectacular!