As school-going kids, projects and fun activities always thrilled us, especially when creativity and learning are involved.
Working models and projects teach us many things about our environment and the dynamics involved.
Our solar system is an easy and equally creative thing to create.
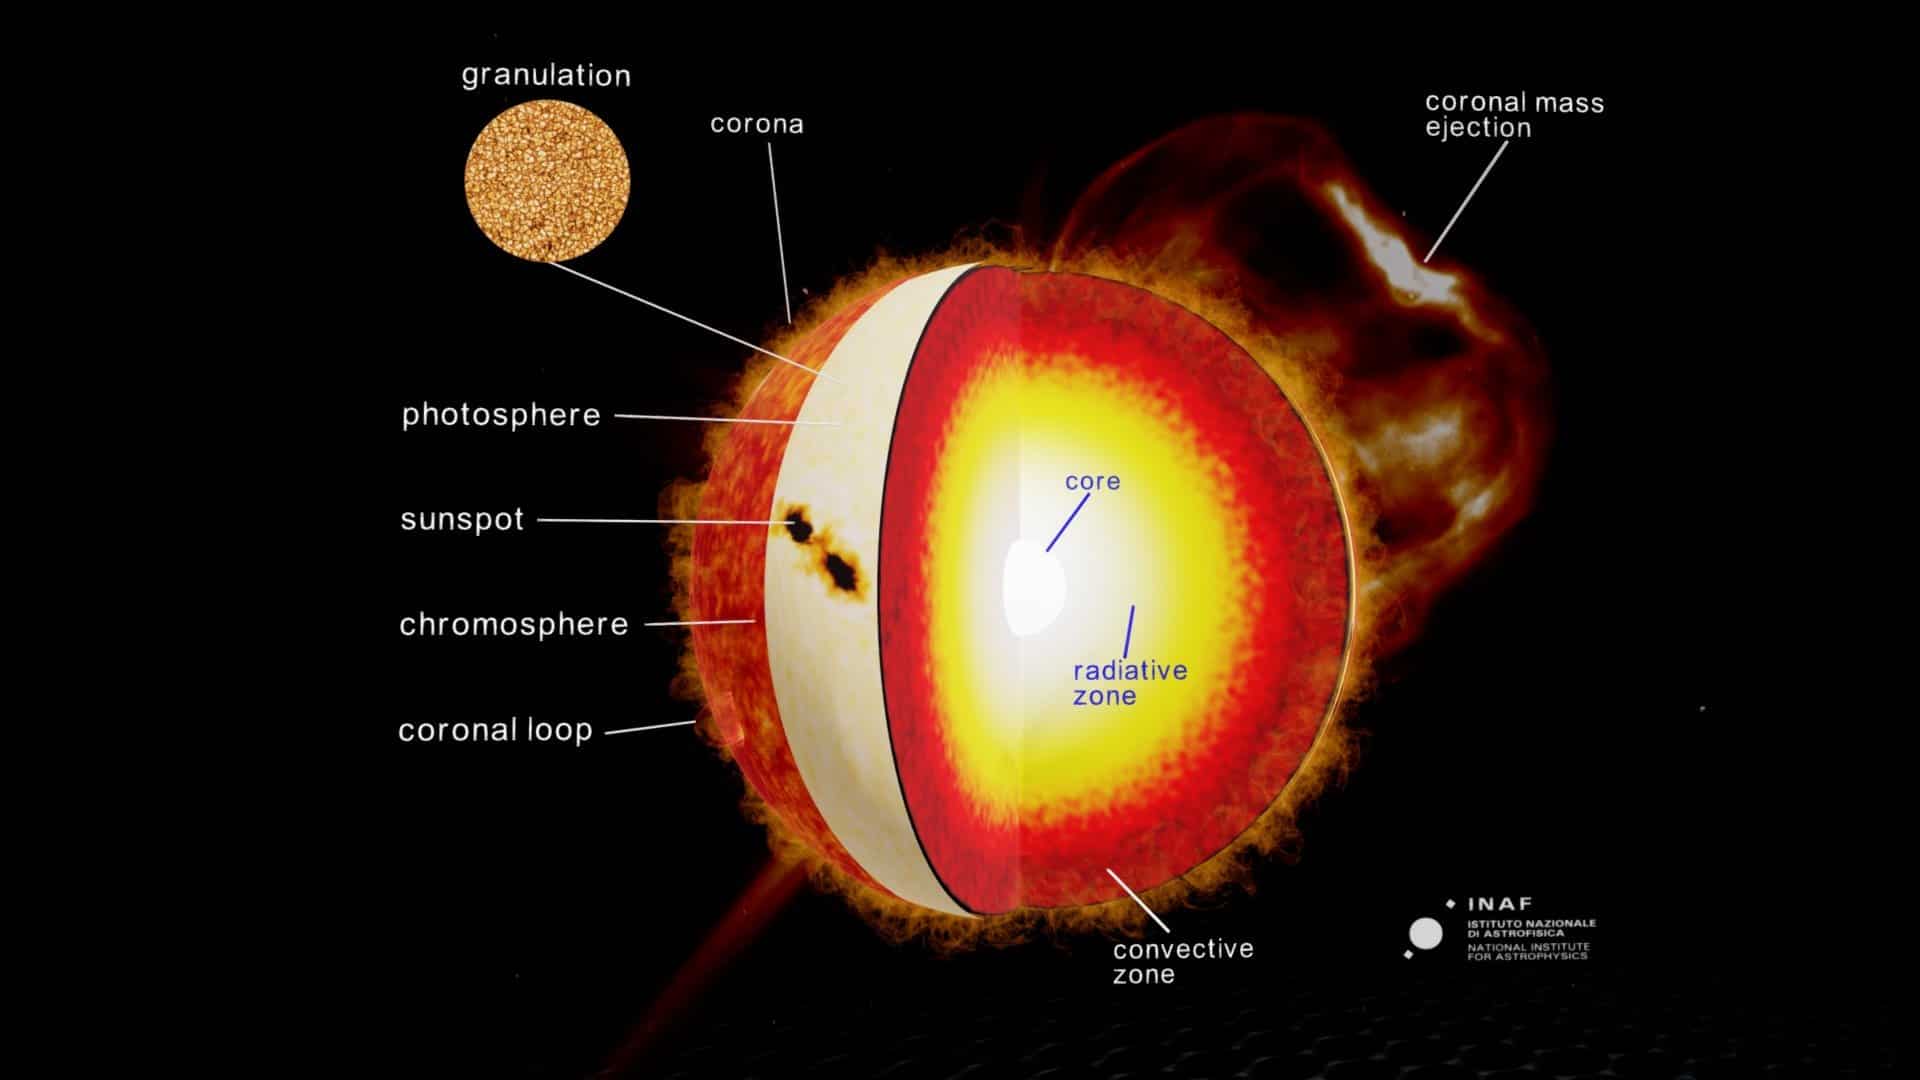
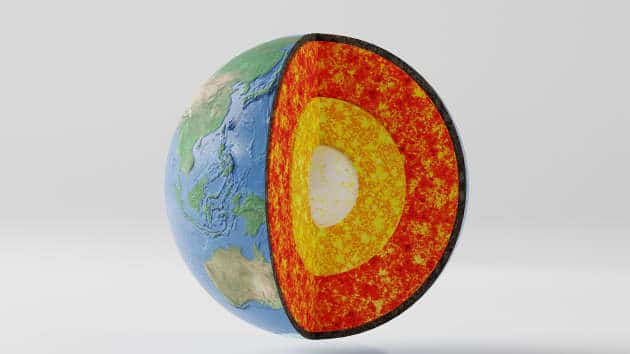
We all know that the Earth has multiple layers, but interestingly, the sun also has various layers.
However, unlike Earth, the sun is completely made of gas and has no solid surface.
And presenting the entire dynamics of it through a model provides a wholesome pleasure.
In this article, we will provide you with in-depth details regarding the making and presentation of the 3D model of the Sun beginning from scratch.
So, without any further ado, let’s get started.
3D Model for the Sun
The definitive ideas around the planet project are meant to present a detailed and informative view of the workings of our solar system and the different celestial bodies.
Out of all the possible presentations, the three-dimensional model of the sun is one of the best options to learn about the sun.
It shows what the sun looks like and how the light rays are cast from the sun.
In the following section, we will learn about making the sun’s 3D model and detail what you will need for it to execute.
Materials Required for a 3D Model of the Sun
A few materials are essential to present the best possible project around the sun’s making. The list of items that you will be required to have are listed as follows:
- Waxed paper
- Styrofoam ball
- Glue
- Yellow tissue paper
- Pipe cleaners
- Beads
- Glitter
Step-By-Step Guide for Making the Sun’s 3D Model
Now, keeping the items detailed above handy, let us work on the execution part of our project with the making of it.
- Begin by placing a piece of wax paper down on the table to protect your surface.
- The next step should be to combine glue with water to hold the various elements together.
- Once you are done preparing glue, tear apart the yellow tissue paper into several small pieces. This should not be more than 1-2 inches in size.
- The foam ball you had kept handy for making the main core coat it with the glue you prepared in the second step.
- Now, paste small pieces of yellow paper on the ball.
- Keep repeating the previous step until you finally have the smoothest possible version of the ball in your hand. Overlapping of the pieces won’t be an issue.
- While coating the paper, ensure you don’t overbulk at a particular spot.
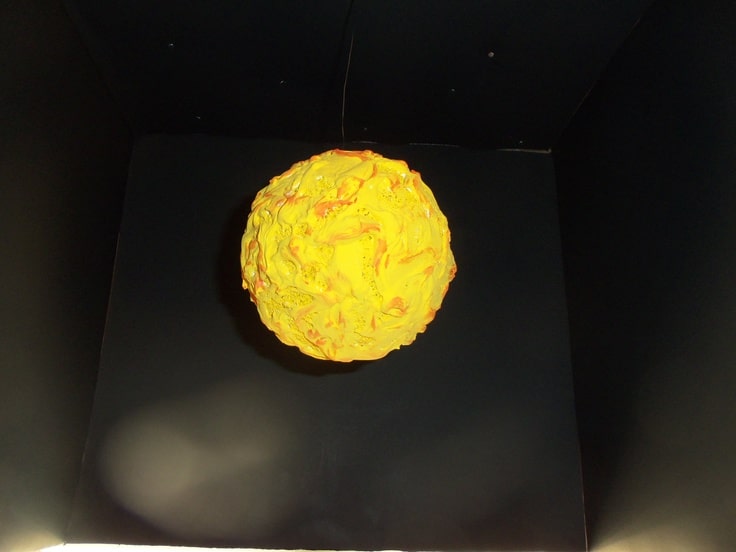
- Keep doing the step detailed above until you get a completely covered ball.
- When you are done coating the ball, sprinkle a little glitter all over it while it is still wet and wait until it gets dry.
- Make sure you turn the ball after a specific interval of every 10-15 minutes to check that it is perfectly getting dried from all the corners.
- Once the ball is completely dried, use pipe cleaners to make perfect sun rays.
- Begin by sticking the pipe cleaners to the foam ball in a pattern in a specific row.
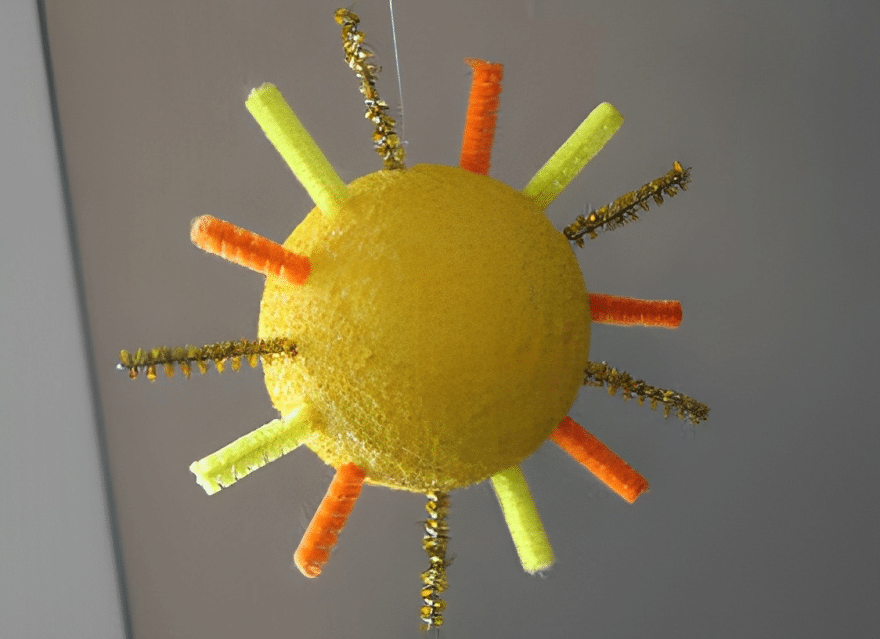
- Repeat the previous step until your foam ball takes shape like the one in the image above.
- From here, you can leave the pipe cleaners straight or pull off some creativity by bending the pipes in spirals and adding beads towards the end.
- Towards the end, you can attach a piece of yarn or any string with the pipe cleaners by hanging it anywhere you wish.
This is just one model that can be incorporated; apart from this, you can also create a 3D model of the sun by bringing clay into use.
Clay can be used to formulate a solid structure of the sun, and later, a quadrant of the extracted model can be cut out to get the final artwork.
After following the process with the clay or any suitable material, you will get the perfect 3D model in the form presented in the image below.
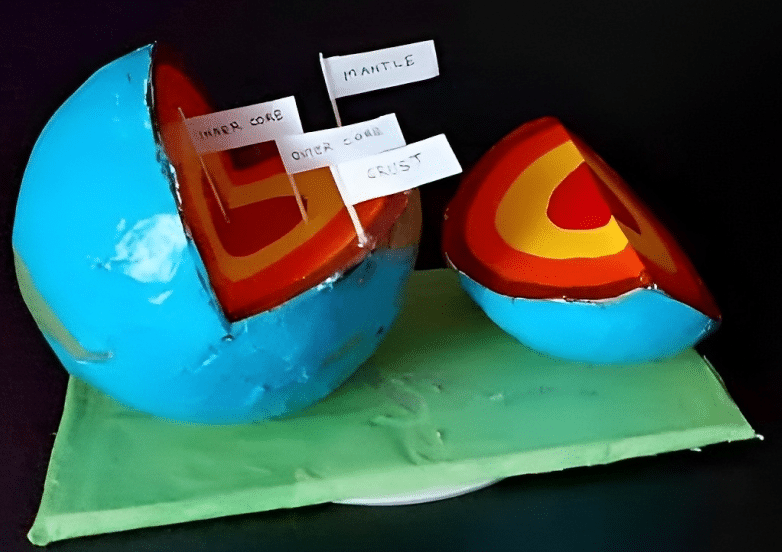
Get the naming done in any fashion you wish, as projected in the image.
This is the best model to be incorporated for the Planet project done in the school and will give a detailed idea about the sun’s structure and its inner elements.
Planet Projects and Their Importance
The variety of planet projects refers to the various initiatives and the importance of understanding our environment and the earth’s ecosystem.
Its importance can be measured by how crucial these projects are for school-going kids.
Such projects help boost environmental awareness and encourage people, especially children, to focus on routing towards sustainable practices.
Taking part in planet projects helps lead innovative solutions for the potential environmental challenges that boost a healthier environment for future generations.
Besides, we also get to know about the celestial bodies in a much more definitive and practical manner, giving an idea about the solar system.
An effort through which we can understand the importance of preserving our constantly depleting resources.
As far as this project is concerned, it helps us to understand the various layers of the sun and the importance and role each has to play.
Final Words
Crafting the Sun’s 3D model is one of the most fascinating adventures that brings in a person’s scientific knowledge and artistic skills on the same plane.
The details of the 3D model shown in the article above are just a case; you can also create a 3D working model of our solar system by incorporating multiple software tools available to us.
The resulting working model gives a visual representation and helps glorify the scientific temperament among those not interested in it.
Taking such a planet project gives you an immersive understanding of our closest heavenly objects. Besides, it helps in establishing a link with the outside world.
With this, we are done with the title; we hope you have a detailed idea of the making of the 3D projects of the Sun and the importance of the awareness around the same.
Please share your thoughts in the comments below, and let us know your ideas with this theme to make such models more insightful.