Don’t you think painting with brushes and palette knives is one way to create art, but some people like using their fingers? It might seem messy, but it’s a cool way to feel the paint and control how it goes on the canvas.
Does it help to create a beautiful texture for your painting? Well, Yes! Whether you are a pro or a beginner, finger painting helps to create an amazing texture with a fun and creative experience.
Letting your kids play with different things is fun for them to learn. Using their senses, like touching and seeing, helps them understand the world.
However, all children need to explore and learn this way. They figure out how things work around them when they play with stuff.
Now, let’s discuss how it creates texture effects with your fingers.
What is Textured Finger Painting?
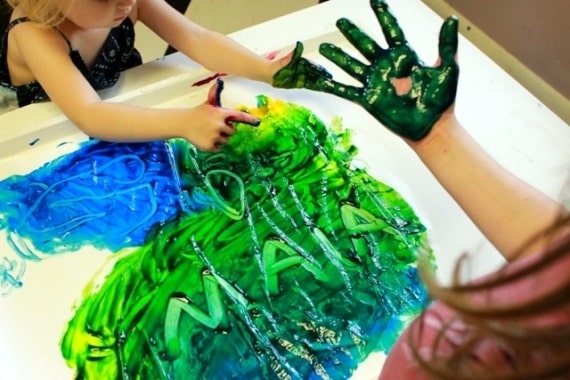
Textured finger painting ideas are like playing with colors using your hands instead of brushes. Kids put paint on their fingers and directly make designs on paper or canvas.
It’s fun because you can feel the paint and create interesting textures. Sometimes, they mix things like sand, gel, or paste with the paint to make the artwork more exciting.
This makes the painting look and feel different from regular smooth paintings. Textured finger painting can relax and make you feel more connected to what you create.
Materials Required for Texture Finger Painting
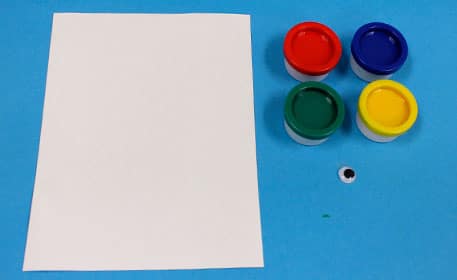
Before digging deep into how to create a texture, let’s look at the required materials.
- Paint: Paint is the colorful stuff you use to create your artwork. It comes in tubes or bottles. You can choose different colors to make your painting look cool and vibrant.
- Canvas or Paper: It is like your painting playground. It’s where you put the paint. Canvas is thick and sturdy, while paper is lighter. You can use whatever you like.
- Sand or Modeling Paste: Sand or modeling paste is like magic ingredients. When you mix them with paint, they make your artwork feel bumpy and interesting. Sand is like tiny grains, and the modeling paste is thick.
- Gel Medium: Gel medium is like a special sauce for your paint. When you mix it in, it makes the paint thicker. It helps create texture and adds a little extra something to your artwork.
- Palette: A palette is like a colorful plate for your paint. It’s where you squeeze out different colors and mix them. You can use a plastic or wooden palette to make your color combinations.
- Fingers: Last but not least, your fingers are the superhero tools in textured finger painting. Instead of brushes, you use your fingers to spread, mix, and play with the paint. It’s like finger-painting fun!
How Do You Create Texted Effects with Finger Painting?
After getting clear information about textured finger painting and its required materials, let’s check how to get started with it.
- Choose Your Canvas: Start with a sturdy canvas or thick paper. This will provide a good surface for finger painting and prevent the paper from getting too wet.
- Gather Your Colors: Pick various colors in either acrylic or finger paint. Make sure they contrast well to create a vibrant, textured effect.
- Prepare Your Fingers: Ensure your hands are clean and dry. Also, trim your nails to avoid accidentally scratching the paint.
- Dip and Dab: Dip your finger into the paint and coat it evenly for perfect texture. Dab off excess paint on the palette or a paper towel.
- Start Light: Begin with lighter strokes. Apply gentle pressure to create a base layer of color.
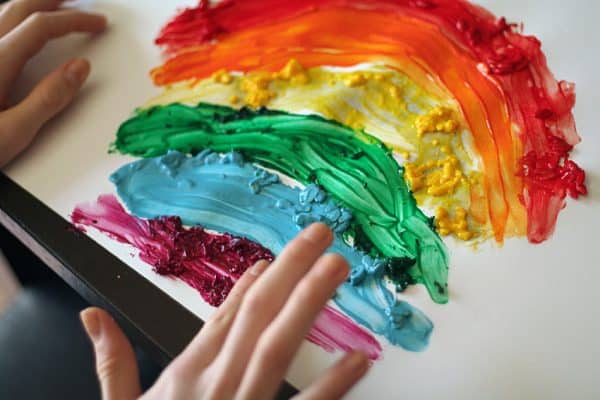
- Layering Technique: Once the first layer dries, add more paint and start layering. Vary your strokes like swirls, dots, and lines for texture.
- Mixing Colors: Mix colors directly on the canvas with your fingers. This adds depth and dimension to your artwork.
- Try Different Textures: Explore various textured effects for patterns using different parts of your fingers, like tips and sides.
- Add Details: As your painting spreads, add finer details with a more controlled finger technique. This could include intricate patterns or defined shapes.
- Let It Dry: Allow your masterpiece to dry completely before touching or framing. This ensures the textured effects stay intact.
Remember, finger painting is about welcoming spontaneity and enjoying the real experience. So, don’t be afraid to get creative and let your fingers express the art!
Summing It Up
Lastly, creating texture effects with finger painting is a gift. Start by choosing your favorite colors and squeeze a good amount of paint onto a palette. Dip your fingers in and let the fun begin!
Experiment with different strokes, like swirls, dots, or gentle taps, to bring your artwork to life. Don’t be afraid to mix colors directly on your canvas for a vibrant, dynamic effect.
Try layering paints or dragging your fingers through wet paint for a cool blend for added texture. But remember, there’s no right or wrong way. You go with the flow and enjoy the real experience.
So, grab some paintcolors, and show your creativity now. It’s an easy, enjoyable way to express yourself and create beautiful, textured masterpieces.
Happy finger painting!
Frequently Asked Questions
How Do You Create Textures in Painting?
Creating textures in painting involves using various techniques, such as layering paint, using different brush strokes with your fingers, and adding materials like sand or gel.
Experiment with these methods to add depth and real elements to your artwork.
What are the 4 Types of Texture in Art?
In painting, there are four main types of texture: actual texture, implied texture, abstract texture, and invented Texture.
What are the Ways to Add Texture to Art?
The three basic ways to add texture to art are using brushwork for different layering techniques to create tactile surfaces and using mixed media to combine various materials like sand, paper, or fabric with paint to introduce diverse textures.
Lastly, the impasto technique is used to apply thick layers of paint to create a raised, textured effect on the canvas.