Tag

pp

Browsing

Balancing the timeless character of an older home with contemporary comforts can be a rewarding yet intricate design challenge. These homes often feature unique architectural details, durable materials, and craftsmanship rarely found in modern builds.

Yet, outdated layouts, finishes, and systems can hinder everyday functionality. The goal is to enhance livability without stripping away the soul of the house. This requires thoughtful updates, subtle enhancements, and a deep respect for the home’s heritage.

Done right, modernizing an older home not only increases comfort and efficiency but also elevates its beauty and resale value.

Enhancing Functionality Without Disrupting Elegance: Bathroom Innovations

The bathroom, while often smaller in older homes, holds significant potential for modernization. These spaces typically contain vintage fixtures, pastel tiles, and aging plumbing. While charming, they might lack the convenience, storage, or aesthetic that modern homeowners desire.

A smart renovation preserves unique elements like clawfoot tubs or mosaic tile floors while updating essentials like lighting, water fixtures, and ventilation systems.

To achieve a seamless blend of old and new, homeowners often consult a local bathroom remodeling company to create bespoke solutions that fit within the constraints of older architecture.

These professionals understand how to incorporate hidden storage, energy-efficient fixtures, and improved drainage without altering the structural integrity or design essence. Recessed lighting can replace dated fixtures, while neutral or earthy tile patterns can unify modern minimalism with vintage warmth.

Respecting Original Woodwork and Flooring

Respecting Original Woodwork and Flooring

Original wood elements such as crown molding, baseboards, window trims, and hardwood floors are often irreplaceable. Their craftsmanship and materials tend to be superior to contemporary options. Rather than replacing them, restoring and integrating these features into the modern vision maintains authenticity.

Sanding, refinishing, and repairing wooden floors—especially with natural or matte stains—highlight the grain and warmth that define historical interiors. In cases where damage is irreparable, reclaimed wood of the same era can be used to patch or replace without compromising aesthetics. Molding and trims can be cleaned, repainted, or stripped to reveal their original luster.

Complementing these restored elements with neutral wall colors, simple furniture, and minimal decor allows the wood to become the star.

Updating the Kitchen with Thoughtful Restraint

The kitchen is often the most significant transformation in older homes. While it may have served previous generations well, today’s homeowners expect an open layout, efficient workflow, and ample storage. However, ripping everything out for a generic, ultra-modern kitchen can destroy the room’s soul.

Instead, start by retaining or replicating older details like butler’s pantries, built-in shelves, or original cabinetry where possible. Cabinets can be refaced or painted with contemporary colors, while updated hardware offers a subtle refresh. Replacing laminate countertops with natural stone or butcher block strikes a balance between durability and period authenticity.

Newer appliances can be integrated thoughtfully. Panel-ready refrigerators and dishwashers blend into cabinetry, avoiding a jarring contrast. Pendant lights over islands or dining areas bring in warmth and function, especially when chosen to reflect a vintage or industrial aesthetic.

Preserving Architectural Details in Living Spaces

Arches, ceiling medallions, transom windows, and wainscoting are just a few examples of the intricate details found in older living and dining rooms. These features lend character and depth—qualities often missing in new construction. Any modernization plan should aim to preserve or replicate these where possible.

Modern touches can still be layered onto these details without overwhelming them. For instance, replacing traditional drapes with streamlined roller shades maintains window emphasis while improving functionality. Smart lighting systems can be installed using vintage-style fixtures, offering the best of both eras.

Open-concept layouts, though popular, are not always necessary to achieve a modern feel. Instead, consider wider doorways, glass-paneled doors, or internal windows to create flow without removing walls.

Energy Efficiency Without Exterior Alterations

Older homes often suffer from poor insulation, single-pane windows, and inefficient HVAC systems. Yet homeowners are often reluctant to replace original windows or alter facades that contribute to the home’s historic charm.

The solution lies in selective, hidden upgrades. Spray foam or blown-in insulation can be added behind walls or in attics without disturbing finishes. Window preservation specialists can retrofit existing frames with weatherstripping and secondary glazing systems. For heating and cooling, ductless mini-split systems offer zoned control with minimal structural intrusion.

Smart thermostats, LED lighting, and water-saving devices offer environmental and cost-saving benefits while remaining discreet. These subtle integrations dramatically improve comfort and energy performance without altering the visual identity of the home.

Integrating Modern Technology Subtly

Technology is essential in a contemporary home, but it often clashes with the classic look of an older interior. The key is to hide or camouflage tech components so they don’t distract from the design.

Wall-mounted TVs can be framed or disguised as mirrors or artwork when not in use. Speaker systems can be integrated into ceilings or behind walls. Smart home hubs can be tucked into drawers or designed to resemble antique pieces.

Lighting: Layering the Old with the New

One of the simplest yet most effective ways to modernize an older home is through updated lighting. Original fixtures like chandeliers or sconces can be rewired and paired with dimmers to retain ambiance while improving functionality.

Introducing layers of lighting—ambient, task, and accent—transforms spaces from dim and outdated to vibrant and versatile. Under-cabinet lighting in kitchens, wall washers in hallways, or uplighting for architectural details enrich the atmosphere.

Furniture and Decor that Bridge the Gap

Choosing the right furnishings can make or break the balance between old and new. Mixing clean-lined furniture with vintage or antique pieces creates an eclectic but cohesive look. Mid-century chairs paired with a Victorian table or a modern sofa with a tufted ottoman introduce contrast that highlights both styles.

Area rugs, throw pillows, and curated wall art help soften transitions. Incorporating materials like leather, linen, wool, and wood ensures a timeless, grounded feel. Colors should be intentional—neutral palettes with rich accent tones allow heritage features to pop while embracing a modern sensibility.

Modernizing an older home doesn’t require sacrificing character for convenience. With thoughtful planning, subtle enhancements, and a respect for history, it’s entirely possible to bring contemporary comfort into timeless spaces. By focusing on function, restoring beauty, and carefully layering modern elements, homeowners can craft environments that feel both fresh and familiar.

Some parts of a home end up forgotten or underused simply because they weren’t designed with daily life in mind. Over time, rooms become storage spaces, layouts feel limiting, and certain areas no longer fit how you actually live. Thoughtful renovations give you the chance to change that. Instead of focusing on appearances, smart updates can turn wasted space into something practical and enjoyable.

These changes don’t have to be dramatic. A little creativity can unlock entirely new ways to use areas you already have. Whether it’s reworking a basement, adjusting ceiling heights, or adding features that make movement easier, these ideas can reshape how your home supports your lifestyle.

Play With Ceiling Heights

Ceilings are often overlooked when thinking about how a room feels. Lowering a ceiling can make large, open spaces feel cozier and more inviting, especially in areas like dining rooms or reading nooks. On the other hand, raising a ceiling where possible can open up cramped rooms and bring in more light, making them feel larger without changing the floor plan.

Adjusting ceiling height can also create opportunities for added features. Exposed beams, loft spaces, or better ventilation systems become possible when you rethink vertical space. It’s a subtle renovation that can completely change how comfortable and functional a room becomes.

Give Your Basement a New Purpose

Basements are often treated like oversized closets where old furniture and boxes go to disappear. With the right approach, they can become some of the most useful spaces in a home. Turning a basement into a home office, guest suite, or entertainment room creates extra living space without needing an addition. It’s a chance to design a spot that fits your current needs instead of letting square footage go to waste.

Working with a finished basement company is crucial if you want impactful results. These professionals know how to handle common challenges like lighting, moisture control, and layout planning. Whether you want a quiet workspace or a place to relax with friends, a finished basement can quickly become one of the most versatile areas in your home.

Walk-Through Pantry Magic

Walk-Through Pantry Magic

Kitchens often struggle with balancing storage and flow. A walk-through pantry solves both problems at once. Instead of a standard closet-style pantry tucked in a corner, this design creates a pathway that connects different parts of the kitchen or leads to adjacent rooms. It adds storage while improving how you move through the space.

This type of pantry can also double as a hidden prep area, keeping counters clear and daily tasks more organized. With shelves on both sides and enough room to walk through comfortably, it turns a basic storage solution into a feature that makes cooking and entertaining much easier.

Garage Turned Creative Zone

Garages don’t have to be limited to parking cars or storing tools. Converting part of the garage into a climate-controlled workspace, gym, or hobby area gives you a place to focus without needing to sacrifice rooms inside the house. It’s a practical way to expand usable space, especially if you’re looking for a dedicated area to work on projects or stay active.

Adding insulation, proper flooring, and temperature control turns the garage into a comfortable environment year-round. Whether it becomes a home studio, fitness corner, or workshop, this kind of renovation helps separate work or creative time from the main living areas.

Loft Up Your Life

High ceilings often leave valuable space unused. Building a loft area can turn that empty vertical space into something functional. Whether it becomes a cozy reading nook, a small guest bed, or extra storage, lofts offer a creative way to add square footage without expanding your home’s footprint.

This kind of renovation works especially well in bedrooms, studios, or open living areas. It separates activities without needing full walls, giving you flexibility in how you use the space. A loft can also bring a playful, modern touch to your home while solving practical storage or seating needs.

Rooms That Do Double Duty

Not every home has enough rooms for separate offices, guest bedrooms, or hobby spaces. Creating dual-purpose rooms with features like hidden Murphy beds or fold-away desks helps maximize what you already have. A home office during the day can quickly become a comfortable guest room when needed.

These setups make it easier to adapt to changing routines. Whether you’re hosting visitors or just need extra space occasionally, a multi-functional room prevents square footage from sitting unused. It’s a flexible solution that adjusts to your lifestyle instead of locking a room into a single purpose.

Bathroom Meets Utility Hub

Large bathrooms can offer more than just extra floor space. Converting part of an oversized bathroom into a combined laundry and utility area makes daily chores easier without affecting comfort. It keeps laundry machines close to bedrooms and living spaces, saving trips across the house.

This setup also helps streamline storage for cleaning supplies, linens, and other essentials. Instead of dedicating separate rooms for different tasks, combining them into one efficient space frees up other areas of the home for relaxation or entertainment.

Walls That Move with You

Open floor plans are popular, but sometimes you need separation without committing to permanent walls. Movable walls offer a flexible way to adjust your space based on the day’s needs. You can open up a large area for gatherings or close off a section for privacy when working from home.

These walls can be designed to mix with your decor, acting as functional partitions without making rooms feel smaller. Whether you’re creating a temporary play area or a quiet workspace, movable walls give you control over how each part of your home is used.

Bring the Outdoors In

Adding an interior courtyard or light well introduces natural elements into your home without sacrificing privacy. These features create small pockets of outdoor space that can be enjoyed from the inside, offering fresh air, sunlight, and a calming view throughout the day.

It’s a unique way to brighten interior rooms and make your home feel more open and connected to nature. Whether it’s used for plants, a small seating area, or just as a source of natural light, this type of renovation can transform the atmosphere of your living space.

Thoughtful renovations can make your home fit your life better. A few changes like creating flexible rooms, rethinking storage, or using unused spaces can completely shift how comfortable and functional your home feels. With the right ideas, every corner of your house can serve a purpose that makes daily living easier and more enjoyable.

Buying your first home comes with a mix of excitement and pressure. After months of house hunting, comparing mortgage rates, and finally getting your offer accepted, it’s easy to feel like the hard part is over. But once you move in, the reality of homeownership kicks in fast.

First-time buyers often focus on the visible features of a house. Paint colors, kitchen layouts, or backyard space usually stand out. What’s less obvious are the hidden repair issues that might be waiting below the surface. Many problems don’t show up during a quick walk-through or even during casual inspections. Some repairs don’t become clear until you’ve been living in the house for a few weeks, or until something stops working altogether.

Knowing what kinds of repairs tend to catch people off guard can help you plan better and avoid unexpected costs. These issues don’t always mean you bought a bad house, but they do highlight the importance of being prepared.

Roof Repairs or Full Replacement

The roof is one of the most important parts of the home, but it’s often overlooked. From the ground, everything might look fine. Shingles may seem intact, and the seller might say it hasn’t had problems. But that doesn’t mean the roof doesn’t need attention.

Over time, weather, poor maintenance, and age can weaken roofing materials. You might not notice anything until you see water stains on a ceiling or feel a draft from the attic. By that point, the damage is already done. In some cases, small fixes like replacing a few shingles might be enough. But for older roofs, a full replacement may be necessary.

It’s a smart move to get a full roof inspection before closing. If repairs aren’t enough, it may be time to talk to a roof replacement company about long-term solutions. Addressing the issue early can help prevent damage to insulation, drywall, and even flooring.

A roof that looks okay during a showing could still have problems underneath. Leaks often start small and go unnoticed until mold or water spots appear. Replacing a roof is a major expense, so it’s better to know where things stand before move-in day.

Outdated Electrical Systems

Outdated Electrical Systems

Another common surprise for first-time buyers is the state of the electrical system. In many older homes, the wiring hasn’t been updated in decades. If you see two-prong outlets or an old fuse box, that’s a clear sign that updates are overdue.

Outdated wiring isn’t just an inconvenience—it can be a safety hazard. Overloaded circuits, flickering lights, or warm outlets are all signs that something’s not right. If you plan to add new appliances or tech devices, the system might not support them.

Updating electrical work can get pricey, but it’s worth the investment for safety and function. A licensed electrician can inspect the system and help you decide what needs to be replaced or upgraded.

Hidden Plumbing Issues

Plumbing problems don’t always show up during a casual look around the house. Pipes are hidden behind walls, under floors, and underground. First-time buyers might notice a slow drain or hear noisy pipes, but not realize the full scope of the issue.

Galvanized pipes are common in older homes and tend to corrode on the inside. This reduces water pressure and increases the risk of leaks. Sewer lines can also be a concern. Tree roots, shifting soil, or collapsed sections can cause blockages that lead to backups.

Fixing plumbing problems can get expensive, especially if you need to open up floors or dig up the yard. Before buying, it’s worth having a plumber do a full inspection, including a sewer scope if the home is more than a few decades old. That extra step might save you thousands later.

HVAC System Problems

Heating and cooling systems are easy to overlook during the buying process. If the home feels comfortable during a walk-through, most people assume the HVAC is working fine. But that doesn’t mean it will last.

Furnaces and air conditioners have limited lifespans. If the unit is 15 years or older, it might be near the end. Older systems often run inefficiently, which leads to high utility bills and uneven temperatures in different rooms.

Ductwork also plays a role. Cracks, leaks, or poor layout can affect airflow and comfort. In some homes, rooms on the second floor might stay warm in summer, no matter how low the thermostat is set.

Ask the seller for service records. If the HVAC system hasn’t been maintained, it may need more than a tune-up. Replacing an entire system isn’t cheap, so it’s better to plan for it than be caught off guard in the middle of a heatwave or cold snap.

Foundation and Structural Concerns

Foundation and Structural Concerns

Foundation problems are often invisible at first glance. Cracks in walls, uneven floors, or doors that stick are signs that something might be shifting under the house. In some cases, it’s just minor settling. In others, it could point to major structural issues.

A shifting foundation can cause damage throughout the home. Tiles may crack, windows may not open properly, and gaps may form along baseboards or ceilings. Fixing these problems can involve anything from filling small cracks to lifting parts of the house with specialized supports.

If the inspection report flags foundation concerns, don’t ignore them. Get a second opinion from a structural specialist before moving forward.

Water Damage and Mold

Water issues are a major concern in any home. Leaks can come from roofs, plumbing, windows, or even poor drainage outside. What starts as a small drip can lead to stained walls, warped floors, or mold growth.

Musty smells, peeling paint, or soft spots in walls are red flags. Mold can be harmful, especially for people with allergies or asthma. Fixing the source of the water is just the beginning—damaged materials often need to be replaced, and cleanup must be done properly.

Mold tests and moisture checks can help spot hidden problems before you close the deal.

First-time homebuyers often focus on finishes and features, but it’s what’s hidden that causes the biggest surprises. Knowing what repairs to look out for can help you feel more confident and prepared.

Every home needs work over time. What matters is going in with a clear picture and being ready to take care of issues before they grow into bigger problems.

Dirt, grime, and stubborn stains can turn even the most beautiful carpets into eyesores. Professional cleaning might seem like the only solution, but with the right tools and knowledge, homeowners can achieve remarkable results.

A carpet extractor is widely considered the go-to tool for deep carpet cleaning, offering a transformative approach to maintaining pristine floor coverings.

Read on to uncover the secrets of professional-level carpet cleaning and how a carpet extractor can elevate your home maintenance routine.

Understanding Carpet Extractors

Carpet extractors are sophisticated cleaning machines that go far beyond traditional vacuum cleaners. These devices use a combination of water, cleaning solution, and powerful suction to remove deeply embedded dirt, allergens, and stains from carpet fibers.

Unlike standard cleaning methods, carpet extractors work by injecting a precise mixture of water and cleaning solution directly into the carpet pile. The machine then immediately extracts the dirty liquid, pulling out contaminants that ordinary cleaning methods simply cannot reach.

As emphasized by The Carpet and Rug Institute, maintaining clean carpets is a crucial aspect of creating a healthy and welcoming indoor environment. This approach plays a significant role in ensuring that spaces where people spend the majority of their time remain comfortable, productive, and safe.

Carpet extractors simplify the process, making it easier to achieve thorough and effective cleaning while supporting a cleaner and more enjoyable indoor atmosphere.

How Carpet Extractors Differ from Traditional Cleaning Methods

Standard carpet cleaning methods often struggle to remove all dirt and moisture, leaving carpets susceptible to mold growth. According to the International Association of Certified Home Inspectors, carpets in basements, damp climates, or any area exposed to prolonged wet conditions are particularly vulnerable to mold.

This issue highlights the limitations of traditional cleaning methods, which may inadvertently contribute to these risks.

Carpet extractors provide a more effective solution by:

  • providing deep cleaning capabilities
  • removing up to 95% of dirt and bacteria
  • minimizing moisture retention
  • extending the life of carpet fibers

The Science Behind Deep Carpet Cleaning

Modern carpet extractors leverage advanced technologies to deliver exceptional cleaning results. The process involves multiple critical steps that ensure comprehensive dirt removal and carpet preservation.

Breaking Down Dirt and Stains

One of the critical components of deep carpet cleaning lies in the specially formulated cleaning solutions used by modern extractors. These solutions are engineered to tackle a wide range of contaminants. For instance, enzyme-based cleaners are highly effective at breaking down organic materials such as food particles, sweat, and pet accidents, targeting the root of odors and discoloration. Meanwhile, formulations designed for more stubborn stains, like oil-based spills or ink, employ surfactants and emulsifiers to dissolve and lift residues that traditional cleaners struggle to address.

Once these solutions are applied, the carpet extractor agitates the fibers, ensuring thorough penetration. This step loosens dirt and grime embedded deep within the pile, preparing it for effective extraction. Suction then removes the dissolved dirt and cleaning agents, leaving the carpet clean and free from chemical residues.

Preserving Carpet Longevity

When used correctly, modern extractors help preserve carpet texture, color, and structural integrity. However, improper use (such as excessive water, incorrect chemicals, or aggressive brushing) can potentially damage delicate carpets, cause dye bleeding, or roughen textures over time.

Many extractors also feature moisture management systems to prevent over-wetting, which can lead to shrinkage, mildew, or prolonged drying times.

Choosing the Right Carpet Extractor for Your Home

Not all carpet extractors are created equal. Professional-grade models offer features that make a significant difference in cleaning effectiveness. Selecting extractors with HEPA filtration is recommended to improve indoor air quality.

Other key considerations when selecting a carpet extractor include:

  • tank capacity
  • suction power
  • cleaning solution compatibility
  • portability
  • additional attachments

While professional models offer maximum performance, many consumer-grade extractors provide excellent results for home use. Understanding your specific needs helps make the most informed decision.

Choosing the Right Carpet Extractor for Your Home

Mastering Carpet Extractor Techniques

Achieving professional-level results with a carpet extractor requires precision and adherence to proper technique. The process begins with thoroughly vacuuming the carpet to remove loose dirt, dust, and debris. This step is essential to prevent surface grime from interfering with the extractor’s deeper cleaning capabilities.

Before beginning the extraction process, pre-treat any visible stains using a targeted cleaning solution suitable for the type of spill or dirt. Pre-treatment allows the solution to break down stubborn marks, making them easier to remove during extraction.

Divide the carpet into small, manageable sections to ensure even and complete coverage. Work systematically, starting from one corner of the room and progressing methodically to the next. When using the extractor, follow slow and steady strokes, overlapping each pass slightly to prevent streaks and ensure comprehensive cleaning. Pay close attention to heavily trafficked areas where dirt accumulates more deeply.

Finally, allow the carpet ample time to dry after the extraction process, ensuring ventilation in the room to expedite drying and maintain the integrity of the fibers. Mastering these techniques ensures that carpets are cleaned thoroughly and preserved for long-term use.

Maintenance and Care of Your Carpet Extractor

Regular maintenance ensures your machine continues performing at peak efficiency. Clean the tanks after each use, replace filters as recommended, and store the extractor in a dry, cool location.

Conclusion

Carpet extractors offer a game-changing approach to home floor maintenance. By understanding the technology, techniques, and benefits, homeowners can achieve professional-level cleaning results with confidence and ease.

Frequently Asked Questions

1. How often should I use a carpet extractor?

For high-traffic areas, extraction cleaning is recommended every 3-6 months. Low-traffic areas can be cleaned annually.

2. Can carpet extractors remove all types of stains?

While highly effective, some extremely set-in or specialized stains might require professional treatment.

3. Are carpet extractors safe for all carpet types?

Most modern extractors work well with various carpet materials, but always check manufacturer recommendations for your specific carpet type.

4. How long does a carpet take to dry after extraction?

Typically, carpets dry within 6-10 hours, depending on humidity and ventilation.

Crystal-clear windows enhance the appearance of any property, whether residential or commercial. However, achieving streak-free windows can be challenging, especially when cleaning tall or hard-to-reach areas.

Luckily, a water fed pole can simplify this process, combining modern technology with precision to deliver sparkling results. This equipment eliminates the need for ladders, reduces physical strain, and ensures a spotless finish with purified water.

Continue reading to discover the best practices for using a water fed pole, from equipment selection to expert cleaning techniques.

The Psychology of Clean Windows

Around the world, the majority of people spend most of their time indoors, with studies estimating this figure to be between 80–90%. As our environments increasingly shape our mental and emotional well-being, seemingly minor details, such as the cleanliness of windows, can have a profound impact on how individuals perceive and experience their surroundings.

Clean windows allow natural light to stream into interior spaces, transforming the atmosphere and creating a sense of openness. Exposure to sunlight has been shown to boost serotonin levels, contributing to improved mood and increased energy.

When windows are free of streaks and grime, the unobstructed view not only enhances the aesthetic appeal of a space but also fosters a deeper connection to the outside world. This connection is vital for those living in urban environments, where windows often serve as the primary link between indoor and outdoor spaces.

Conversely, dirty windows can negatively affect one’s psychological state. Grimy or streaked windows may subconsciously communicate neglect, reducing feelings of comfort and pride in one’s environment. This can lead to increased stress levels and diminished productivity, particularly in spaces designed for work or study.

From a design psychology perspective, clean windows are integral in shaping a harmonious environment. Interior designers and architects often emphasize the importance of maintaining clear windows, recognizing their ability to influence the perception of space, light, and even cleanliness.

In commercial settings, spotless windows can elevate the perceived professionalism and care of a business, leaving lasting impressions on clients and visitors.

The Science Behind Water Fed Pole Cleaning

Having understood the role of clean windows in enhancing mood, productivity, and overall well-being, prioritizing them is an excellent step to create environments that inspire positivity and balance. Thankfully, doing that is easier with the help of a water fed pole.

The equipment is designed to clean windows using purified water, free of minerals and impurities that can cause streaks or residue. The telescopic pole, often extending several meters, allows access to high windows or challenging angles without requiring ladders or scaffolding.

Attached to the pole is a brush head that gently agitates dirt and debris while water flows continuously through jets. The purified water dissolves grime and reduces streaking, though in high humidity or on very dirty glass, users may still need to follow up with a squeegee or microfiber cloth for a perfect finish. This technology is more commonly used by professional window cleaners than average homeowners due to the cost and setup complexity, especially regarding water purification systems.

Effective Use of Water Fed Poles

Now that you know what a water fed pole is and how it works, follow these detailed steps and expert tips to master using this equipment for perfectly clean windows every time.

1. Preparing for Success–Gathering the Right Equipment

Before starting, ensure you have all the necessary tools for using the water fed pole effectively. This preparation minimizes interruptions and guarantees superior results.

Key items to gather include:

  • a high-quality water fed pole with adjustable features
  • a water purification system to produce mineral-free water
  • a suitable brush head designed for window cleaning
  • protective gloves and safety gear for handling the equipment

Test the purification system to ensure it is working correctly and producing water without impurities. Additionally, inspect the pole and brush to confirm there are no damages that might affect performance.

2. Setting Up the Water Fed Pole

Proper setup is vital for smooth and efficient cleaning. Start by connecting the water fed pole to the purification system, ensuring a secure fit to prevent leaks. Adjust the length of the telescopic pole based on the height of the windows you intend to clean.

Attach the brush head to the pole, ensuring it’s firmly in place. Check the jets on the brush head to ensure water flows evenly during use. Position yourself safely on the ground or a stable surface, ensuring you can maneuver the pole without strain.

3. Mastering the Cleaning Technique

The technique used when cleaning windows with a water fed pole is vital in achieving streak-free results.

Move the pole in steady vertical or horizontal strokes, overlapping each pass slightly for comprehensive coverage. Avoid applying excessive pressure, as the brush and purified water are designed to lift dirt without force.

For windows with stubborn grime or stains, focus on the affected areas with gentle, repeated strokes. Always work methodically from top to bottom to avoid spreading dirt to already-cleaned sections.

Mastering the Cleaning Technique

4. Addressing Common Challenges

Using a water fed pole for window cleaning may present challenges, especially for first-time users.

One common issue is uneven water flow from the jets. Regularly check the brush head during cleaning to ensure consistent distribution of water. Clogged jets can be cleared by flushing them with purified water.

Another challenge is managing the pole’s weight when extended. Opt for models made with lightweight materials like aluminum or carbon fiber for easier maneuverability. Additionally, take breaks during extended cleaning sessions to avoid strain.

5. Post-Cleaning Maintenance and Care

Maintaining the water fed pole after each use ensures its longevity and reliable performance. Begin by detaching the brush head and rinsing it to remove dirt or debris. Store the pole in a clean, dry place to prevent corrosion or damage.

Regularly inspect the purification system to ensure it continues producing mineral-free water. Replace filters as needed to maintain water quality. By caring for the equipment, you can enjoy seamless and streak-free cleaning sessions for years to come.

Conclusion

Using a water fed pole is a great way to take your window cleaning routine to the next level. After all, it offers a combination of precision and efficiency unmatched by traditional methods.

Understanding its mechanics, preparing equipment thoroughly, mastering proper techniques, addressing challenges, and maintaining the tool post-use can help you achieve streak-free windows with ease.

The purified water and advanced design of water fed poles ensure consistent results, making them a reliable choice for anyone seeking sparkling, professional-grade finishes.

Frequently Asked Questions

1. Can a water fed pole be used on non-glass surfaces?

Water fed poles can clean other surfaces, such as solar panels or smooth exterior walls, provided the brush head and water pressure are suitable for the material.

2. How high can a water fed pole reach?

Most water fed poles can extend up to 30 feet or more, depending on the model. Specialized versions can clean windows on taller buildings or multi-story properties.

3. Does purified water really make a difference?

Absolutely. Purified water eliminates minerals and impurities that cause streaks, ensuring spotless results without additional drying or chemical cleaning agents.

4. Are water fed poles suitable for residential use?

They are ideal for residential properties and offer a safer alternative to ladders for cleaning high windows. Compact models are available for home use.

In the dynamic world of digital imagery, the ability to modify a photo’s background color is an invaluable skill. It allows for enhanced customization, better alignment with branding, and the creation of visually appealing content. Creative Fabrica’s photo background colour changer simplifies this process, enabling users to transform their images swiftly and efficiently.

Understanding the Significance of Background Color Modification

Changing the background of a photo significantly influences its visual impact and context. It allows for the alignment of images with specific themes or branding requirements, enhancing their relevance and appeal. A well-chosen color can transform the mood of a photograph, drawing attention to the subject and ensuring the image resonates with the intended audience.

Understanding the Significance of Background Color Modification

Benefits of Using Color Changer Tool

  • Speed and Efficiency: The tool processes images rapidly, allowing for quick modifications without lengthy editing sessions.
  • User-Friendly Interface: Designed with simplicity in mind, the platform caters to users with varying levels of editing experience.
  • Customization Options: Beyond solid colors, users can explore gradients, textures, and patterns, offering a wide array of creative possibilities.
  • No Installation Required: Being web-based, there’s no need to install additional software, making it accessible from any device with an internet connection.

Step-by-Step Guide: Changing Background Color with Creative Fabrica’s Tool

To utilize Creative Fabrica’s color changer:

  1. Access the Tool: Visit the Tool page on Creative Fabrica’s website.
  2. Upload Your Image: Click on the “Add your image here” button and select the image file from your device that you wish to edit.
  3. Remove Existing Background: Click on your photo background and select “remove image background”.
  4. Select New Color: After removing, click “change image background color” and choose your desired color, gradient, or pattern.
  5. Preview and Adjust: Review the changes and make any necessary adjustments to ensure the new color complements the subject effectively.
  6. Download or Continue Editing: Once satisfied, download the edited image or proceed with further edits using Creative Fabrica’s suite of tools.

For a visual walkthrough, refer to the following tutorial:

Easy Background Removal with a Click – Creative Fabrica Tool Tutorial

Alternative Tools Market

While Creative Fabrica offers a robust solution for changing photo backgrounds, several other tools provide unique features tailored to various user needs. Below is a comparison of some notable alternatives:

Tool

Key Features

Pricing

Creative Fabrica’s Tool

– Free Online Tool

– Fast Processing

– High-Quality Output

– User-Friendly

Free; additional features available with subscription.

Canva

– Background Remover

– Design Integration

– User-Friendly

– Free Trial

Free plan with limited features; Pro plan at $12.99/month.

Adobe Express

– Eraser Tool

– Integration

– Advanced Editing

Free plan with limited features; Premium plan at $9.99/month.

Fotor

– AI-Powered Changer

– Customization

– User-Friendly

Free plan with basic features; Premium plan at $8.99/month.

Each tool has unique features, so exploring them can help determine which best fits your needs.

Tips for Optimal Results

To achieve the best outcomes when changing colors:

  • High-Quality Images: Start with high-resolution images to ensure that details are preserved during the editing process.
  • Consistent Lighting: Ensure that the subject and background have consistent lighting to create a natural and cohesive look.
  • Contrast Consideration: Be mindful of the contrast between the subject and the new background to ensure that the subject stands out effectively.
  • Subtle Shadows: Incorporate subtle shadows if necessary to ground the subject and add depth to the image.

Conclusion

The ability to change a photo’s background color opens up a world of creative possibilities, allowing for personalized and contextually relevant imagery. Creative Fabrica’s Change Photo Background Color tool offers a user-friendly and efficient solution for this purpose. By following the steps outlined above, you can transform your images to align with your creative vision or branding requirements.

Mobility skills are the foundation for a child’s independence, confidence, and overall physical development. As parents and caregivers, we’re always on the lookout for engaging ways to help children strengthen these essential abilities.

The good news is, there are plenty of fun activities—both indoors and out—that can support your child’s mobility while making playtime exciting. Here are some creative ideas to get your little ones moving, including how obstacle courses, nature toys and ride-on toys can play a valuable role in developing those key mobility skills.

1. Climbing Frames & Obstacle Courses

Climbing frames help kids develop mobility skills by encouraging them to climb, balance, and move in different directions. As children play, they strengthen their muscles, improve their coordination, and build better balance. Frames also challenge kids to solve problems and try new movements, which play an important role in boosting their confidence and encouraging independence.

Another great way to promote mobility through play is to create an obstacle course. Use cushions, cones, hula hoops, or even tape on the floor to create paths for jumping, crawling, balancing, and weaving. These activities encourage children to coordinate their movements, improve balance, and build strength—all while having a blast. Plus, asking them to join in to create their own obstacle course helps to promote creative and critical thinking in a fun and positive way.

2. Dancing, Animal Walks & Movement Games

Dancing activities do more than just entertain—they help children develop a strong sense of rhythm, improve body awareness, and enhance agility. As kids learn to control their movements to match the beat or freeze in place, they build coordination and balance in a fun, low-pressure environment.

Animal walks and movement games can also encourage creativity and self-expression, giving children the chance to explore different ways of moving their bodies. Whether your little one wants to be a lion, a monkey or even a cat, it’s an excellent way to burn off excess energy and boost cardiovascular health, promoting endurance and overall fitness.

Whether it’s a spontaneous dance party at home or a structured movement class, incorporating music and movement into your child’s routine supports both their physical and emotional well-being. Fun dance and movement games to add to your play rotation can include classics like musical statues, freeze dance, Simon Says or follow-the-leader.

3. Ride-On Toys

Classic ride-on toys—such as scooters, tricycles, and balance bikes—are brilliant for building leg strength, coordination, and balance. As children push, pedal, or scoot along, they’re developing the muscle control and spatial awareness needed for more advanced physical skills.

Electric ride-on cars also offer a more exciting upgrade for kids of any age. These mini vehicles not only make playtime thrilling but also teach children how to steer, control speed, move safely and navigate obstacles. This hands-on experience enhances their coordination and decision-making skills, all while giving them a sense of independence as they explore their surroundings. Children also naturally learn by watching adults, so a kids’ sized car can even help contribute to imaginative role-playing and narrative thinking.

4. Outdoor Sports and Games

Simple games like bubble chasing, soft football, bean bag balancing, and even Floor is Lava are fantastic for improving mobility and overall coordination. These activities require children to loosen up, run, jump, change direction quickly, and react to fast-moving objects, all of which help develop agility, speed, strength and cardiovascular fitness.

Beyond the physical benefits, outdoor games and sports teach valuable social skills such as communication, listening skills and cooperation. Team and collaborative games where passing, throwing and combined movements are needed encourage kids to focus on developing fine motor skills easily and holistically.

5. Nature Walks and Treasure Hunts

Getting kids excited about getting out and about can play a huge role in promoting those essential mobility skills. Exploring the outdoors on foot is a wonderful way to encourage natural movement and curiosity.

Nature Walks and Treasure Hunts

Nature walks, scavenger hunts, or visits to the playground inspire children to climb, run, jump, and navigate uneven terrain, which helps build strength, balance, and spatial awareness. Encourage them to touch trees, make leaf piles and collect rocks and stones – even these little acts of exploration can help fine-tune those all-important mobility skills in a way that’s fun, safe and nature-inspired.

Supporting your child’s mobility skills doesn’t have to be complicated or costly – it’s all about making movement a joyful, easy and regular part of their everyday life. From climbing frames and creative obstacle courses to dance parties, electric ride-on toys, and outdoor games, there are countless ways to get kids moving, learning, and growing.

By encouraging your little ones to explore, play, and challenge themselves in new ways, you’re helping them build the confidence, coordination, and strength they need for a healthy, active future. So head outside, try a new game, and watch as your child’s mobility—and their love for active play grows with every little step they take.

The US iGaming sector is rapidly expanding, but that growth brings complexity. Operators must quickly adapt to regulatory barriers, shifting consumer expectations, and evolving technology demands.

Rather than simply entering the US market, Soft2Bet is reshaping it.

By combining tailored gamification, strategic compliance, and a focus on player-centric innovation, the company positions itself as a competitive force in the American iGaming landscape.

Curious to find out how? Read on, and let’s unpack the details.

The Rise of Soft2Bet in the Global iGaming Market

Founded to solve operational friction in online gaming, Soft2Bet has since scaled into a multi-brand group with over 20 B2C platforms. Globally, its portfolio covers casino, sportsbook, and hybrid models that blend content and community.

Now, the company is targeting growth in the United States, a market projected to reach $23 billion in revenue by 2028. With deep experience in regulated markets across Europe, Soft2Bet enters the US with a mature tech stack and a track record of navigating compliance and consumer behavior at scale.

Soft2Bet’s Approach to Gamification in the iGaming Industry

Soft2Bet’s Approach to Gamification in the iGaming Industry

Gamification isn’t a gimmick—it’s a strategic lever. For B2B marketers and executives, the real question is whether it drives results. Soft2Bet’s data says it does.

For example, the platform’s reward mechanics applied across user journeys—from onboarding through repeat engagement—can increase user retention and session length compared with internal performance metrics.

More than points and badges, Soft2Bet’s gamification framework includes the following:

  • Dynamic missions
  • Custom loyalty stores
  • Real-time achievement tracking

Each modular feature allows customization based on operator needs or local regulations.

Enhancing User Engagement through Interactive Features

Retention remains a core challenge in US markets, where competition for attention is relentless. Soft2Bet responds to this challenge with an interactive-focused design.

Some key features of the company’s solutions include:

  • Personalized dashboards with progress indicators
  • Leaderboards linked to tournament-style play
  • In-app notifications that guide user behavior

These features aren’t cosmetic—they’re engineered to build emotional stickiness and predictable engagement cycles. When users know what to expect (and what’s in it for them), they stay.

How Soft2Bet Navigates Regulatory Challenges in the US Market

Compliance isn’t optional when operating any business—instead, it’s strategic. In the US, every state imposes distinct rules, and failure to comply means forfeiting growth.

Soft2Bet has invested in a region-specific legal and compliance team. This group ensures that product adaptations align with state-level mandates, such as geo-fencing, ID verification, or responsible play limits.

This infrastructure enables speed to market without compromising safety or integrity—and it’s a key differentiator for potential partners evaluating platform providers.

Responsible Gaming and Soft2Bet’s Commitment to Player Welfare

Increased scrutiny from regulators and advocacy groups made responsible gaming a top concern for US operators.

Soft2Bet doesn’t treat this as box-checking. Instead, it embeds safety into system design:

  • Voluntary self-exclusion tools
  • Loss and wager limits
  • Real-time behavioral analytics to detect risk patterns.

Soft2Bet is also aligned with the American Gaming Association’s responsible gaming code. That trust foundation builds credibility not just with regulators but also with players who prioritize safety.

Soft2Bet’s Impact on the US Economy and Employment

As Soft2Bet expands its US footprint, it contributes to local economies—particularly through tech hiring and operational partnerships.

Its US roadmap includes:

  • Strategic partnerships with local gaming operators
  • Development hubs focused on North American product design
  • Hiring plans for marketing, compliance, and engineering roles

For states welcoming regulated online gaming, Soft2Bet presents innovation and economic stimulus.

What the Future Holds for Soft2Bet in the US Market

Soft2Bet plans to deepen investment in AI-driven personalization, cross-platform integrations, and white-label opportunities for regional brands.

The company is also exploring collaboration with US-based media outlets to align gaming experiences with sports content and digital entertainment.

With its plans, Soft2Bet isn’t experimenting with the US—it’s investing in it.

Final Thoughts

Soft2Bet’s impact on the US iGaming market isn’t just about presence—it’s about performance. From gamification strategy to regulatory rigor, it’s bringing tested systems to an evolving market—and setting a new standard in the process.

For iGaming operators, marketers, and business leaders evaluating how to stay competitive, Soft2Bet represents a model worth watching.

Explore Soft2Bet’s US operations and platform capabilities here.

Forget everything you know about refueling—the ritual of visiting gas stations belongs to your past. Home charging doesn’t just change where you power up; it transforms when, how, and even why you think about energy. Your garage outlet just became your personal energy portal.

New EV owners quickly discover that charging infrastructure makes all the difference, with options ranging from basic adapters to advanced high-powered stations like the 180 kw EV charger for commercial applications.

But where should a beginner start? Let’s demystify the home charging experience.

Understanding the Three Charging Levels

The charging level you choose dramatically impacts your daily experience. This fundamental choice determines whether your car charges in hours or days.

Level 1 charging involves:

  • Using the standard charger included with most EVs
  • Plugging into any regular 120V household outlet
  • Gaining roughly 3-5 miles of range per hour
  • No additional installation requirements
  • Adequate for plug-in hybrids or minimal daily driving

Level 2 charging steps up to:

  • 240V power (like your dryer or oven uses)
  • Dedicated charging equipment installation
  • 15-40 miles of range per hour, depending on amperage
  • Complete overnight charging for most driving needs
  • The sweet spot for most EV owners

DC Fast Charging (Level 3) provides:

  • Primarily commercial charging for on-the-go needs
  • Not typically installed residentially due to power requirements
  • 80% charge in 20-40 minutes for most vehicles
  • Higher cost per charging session than home options

Most beginners start with Level 1 while transitioning to Level 2 once they experience the convenience difference.

First Steps: Evaluating Your Home Electrical Capacity

First Steps: Evaluating Your Home Electrical Capacity

Your home’s electrical infrastructure determines your charging capabilities. Understanding these limits prevents surprises during installation.

Start by assessing:

  • Your electrical panel’s total amperage (100A vs 200A service)
  • Available space for a new dedicated circuit breaker
  • Distance from the panel to your parking location
  • Existing capacity utilization (how many high-draw appliances you already have)

These factors determine whether your home can immediately support Level 2 charging or might require electrical service upgrades. Most modern homes with 200A service can accommodate charging without modifications.

Choosing Between Portable and Wall-Mounted Options

Your first substantial decision involves permanence versus flexibility. Both approaches offer viable charging solutions with different advantages.

Portable Level 2 chargers offer:

  • Plug-in convenience to 240V outlets (like a dryer outlet)
  • No permanent installation required
  • Ability to take your charger when moving
  • Lower overall cost without installation
  • Flexibility to charge at multiple locations

Wall-mounted chargers provide:

  • Cleaner, more integrated appearance
  • Potentially higher power delivery
  • Weather resistance for outdoor installations
  • Advanced features like access control and scheduling
  • Enhanced safety features and permanent connections

Many beginners opt for quality portable options initially, transitioning to wall-mounted solutions once they’ve confirmed their long-term needs.

Installation Process: What to Expect

Professional installation ensures safety and code compliance. While DIY might tempt some, electrical work requires proper expertise and permitting.

A typical installation includes:

  • Initial consultation and site assessment
  • Electrical load calculation for your home
  • Installation of a dedicated circuit breaker
  • Running appropriate gauge wiring to your charging location
  • Mounting hardware and making final connections
  • Testing and demonstrating proper operation

The process typically takes 2-4 hours for straightforward installations, with complex scenarios requiring additional time for panel upgrades or extensive wiring runs.

Charging Etiquette and Best Practices

Optimal charging habits extend battery life and reduce costs. Small behavioral adjustments yield long-term benefits for your vehicle.

Adopt these charging habits:

  • Keep your battery between 20-80% for daily use
  • Only charge to 100% before long trips
  • Take advantage of scheduled charging during off-peak rates
  • Avoid frequent DC fast charging for routine needs
  • Let your battery management system work (avoid frequent partial charges)

These practices not only preserve battery health but also minimize your electricity costs and environmental impact.

Common Beginner Mistakes to Avoid

New EV owners often make predictable missteps. Learning from others’ experiences helps you avoid unnecessary complications.

Watch out for:

  • Underestimating charging needs based on ideal conditions
  • Relying exclusively on public charging infrastructure
  • Installing undersized charging equipment that limits future vehicles
  • Overlooking utility company incentives and special EV rates
  • Placing chargers in locations that create tripping hazards or exposure to elements

Proper planning prevents most of these issues and ensures a smooth transition to electric driving.

Weather Considerations for Outdoor Installations

Environmental exposure affects charging equipment durability and safety. Outdoor installations require additional weatherproofing considerations.

For outdoor installations, ensure:

  • Proper NEMA-rated weatherproof enclosures
  • Protection from direct water exposure
  • Mounting height that prevents snow accumulation or flooding issues
  • Cable management systems that keep cords off the ground
  • UV-resistant materials for long-term sun exposure

These precautions extend equipment lifespan and maintain safe operation regardless of weather conditions.

Smart Charging: Beyond Basic Power Delivery

Connected charging unlocks optimization opportunities beyond simple electricity delivery. While not essential for beginners, smart features provide valuable benefits as you become more familiar with EV ownership.

Smart charging capabilities include:

  • Time-of-use rate scheduling to minimize costs
  • Remote monitoring and control via smartphone apps
  • Energy consumption tracking and reporting
  • Integration with home energy management systems
  • Automatic updates as charging standards evolve

These features transform charging from a basic utility to an integrated part of your home energy ecosystem.

The transition to home charging represents one of the most satisfying aspects of EV ownership. The convenience of starting each day with a full charge quickly becomes the new normal, making the old ritual of gas station visits seem increasingly archaic and inconvenient.

Ever noticed how the thrill of buying a new home can push important inspection steps into the background? It happens all the time. You’re thinking about paint colors and furniture placement while potential issues lurk beneath those freshly painted walls. So many buyers get caught up in curb appeal and neighborhood ratings that they miss the warning signs of future problems.

What separates your dream home from a budget-draining nightmare is usually just a careful look at foundations, water systems, flood risks, and pest activity. Taking care of these checks before the moving truck arrives saves countless headaches down the road. You’ll thank yourself later for paying attention to these crucial details now.

Simplifying the Moving Process

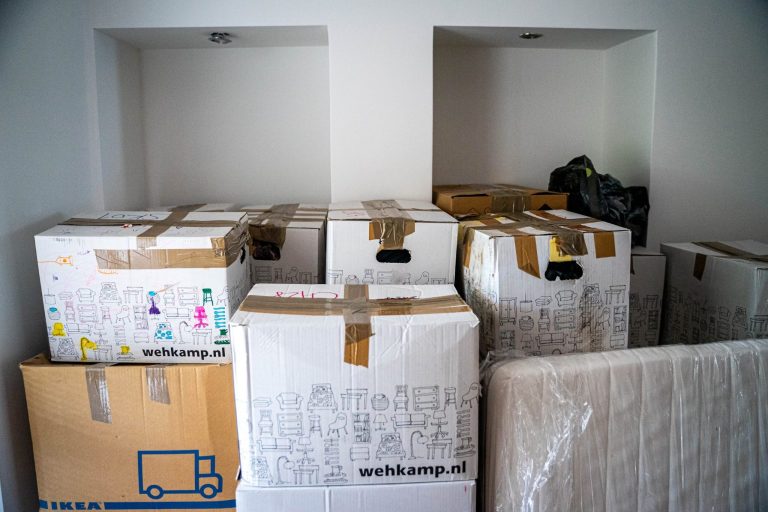
Stress is a natural part of moving, but planning ahead makes all the difference. Take time to sort through your belongings before you start packing. This decluttering step cuts down on moving costs and saves time. Sort what remains by room or purpose, then pack each category with care. Try color-coding boxes by room — it’ll make unpacking so much easier.

Don’t forget about utilities! Nobody wants to arrive at a new home without electricity or water. Call providers at least two weeks ahead to arrange service transfers. While you’re at it, make a master list of everywhere needing your updated address:

  • Subscription services and regular deliveries.
  • Banks and financial institutions.
  • Insurance providers.
  • Government agencies and licensing offices.
  • Medical providers and pharmacies.
  • Online shopping accounts.

For moving day, put together an “open first” box with essentials you’ll need right away:

  • Toiletries and medications.
  • Phone chargers and basic electronics.
  • Simple tools for furniture assembly.
  • Change of clothes and towels.
  • Basic cleaning supplies.
  • Snacks and water bottles.

Once that’s taken care of, you can make moving easier and far less stressful with a solid approach. Start by decluttering—getting rid of what you no longer need makes packing faster and lighter. Use towels, linens, and baskets to protect breakables and save space. You should also label every box with its contents and destination room to simplify unloading. The extra prep work is well worth it.

Checking the Water System Before You Move In

In case you don’t already know, your water quality affects everything from your health to how long your appliances last. So if you’re moving to a home with well water, you’ll want to give that extra attention. Unlike city water, private wells don’t have government oversight—the testing falls on your shoulders. Before drinking a single glass, schedule professional testing for bacteria, nitrates, lead, and other potential contaminants.

A thorough well inspection should examine these key components:

  • Well cap: Check for proper sealing to prevent contamination
  • Pressure tank: Look for leaks or unusual cycling patterns
  • Well location: Note proximity to septic systems or other contamination sources
  • Pump condition: Verify age and maintenance history
  • Watercolor and odor: Observe for discoloration or unusual smells

Addressing specific issues becomes straightforward once you understand what’s in your water. Hard water typically requires a softener to protect appliances and improve cleaning effectiveness. Acidic water often needs neutralizers to prevent pipe corrosion. Installing appropriate filtration systems tailored to your specific water challenges ensures safe drinking water throughout the home.

Water pressure significantly affects daily life and household functionality. Testing multiple water sources simultaneously reveals the system’s capacity during peak usage times. The ability to shower while running a dishwasher indicates adequate pressure distribution. Low pressure often signals pump problems or distribution issues that require addressing before moving in.

Obtaining maintenance records from previous owners provides valuable system history. Information about pump replacements, filter changes, and service dates offers insight into future maintenance needs. Creating a maintenance calendar immediately helps prevent system failures and extends equipment life. Establishing relationships with reliable local well service professionals early provides valuable support for any future issues that might arise.

Final Home Checks and Moving Day Success

Even a quick look at your basement can tell you a lot about your home, but a closer look can uncover serious issues before they cost you the farm. More specifically, a thorough basement inspection tells you about structural integrity and moisture management. Look for these warning signs on your first tour:

  • Cracks in foundation walls, especially horizontal ones.
  • Water stains or white mineral deposits (efflorescence).
  • Musty odors indicating hidden moisture.
  • Uneven floors or settled areas.
  • Malfunctioning sump pumps or missing backup batteries.

Don’t forget the plumbing system, either. Beyond just turning on faucets, check under sinks for signs of leaks while water runs. Flush toilets several times so that you know they refill properly and to see if you notice any strange noises in the pipes. That banging sound (the water hammer) when shutting off water quickly signals pressure issues needing attention.

Those beautiful mature trees in the yard might be secretly causing problems underground. Keep an eye out for suspiciously green patches of grass or subtle ground depressions that might indicate leaking sewer lines from root damage. Not sure if a tree species might cause trouble? Ask an arborist about potentially problematic varieties before finalizing your move.

Pest control is infinitely easier before moving in furniture that creates hiding spots. Take time to check for:

  • Droppings or nesting materials in corners and storage areas.
  • Gnaw marks on baseboards or wooden structures.
  • Sawdust piles near wooden elements, which could mean possible termite or carpenter ant damage.
  • Gaps in window screens or door sweeps.

When you’re ready for moving day, double-check that utility transfers happened correctly with quick confirmation calls. Be sure to test electrical outlets with inexpensive plug-in testers, especially in older homes. Replace smoke detector batteries and note manufacture dates — they need replacement every ten years regardless of condition. Last but not least, locate and label main shutoff valves that you’ll need in case emergencies happen.

If you need help with logistics, especially for longer moves, hiring specialized moving experts often proves worthwhile. Create a detailed schedule including buffer time for unexpected delays. Have payment methods ready for service providers and develop backup plans for common issues like weather complications or scheduling conflicts.

Final Thoughts

Taking time to inspect foundation integrity, water systems, plumbing connections, and potential pest issues before moving day prevents those disheartening discoveries that typically surface after boxes are unpacked. When critical systems function properly from day one, attention naturally shifts to the enjoyable aspects of settling in — arranging personal spaces, meeting neighbors, and making the house your home.

The peace of mind that comes from knowing no major surprises wait behind walls or beneath floors transforms a simple change of address into the beginning of a positive new chapter, free from the disruptions of unexpected repairs or budget-draining emergencies.