Author

Olivia Martinez

Browsing

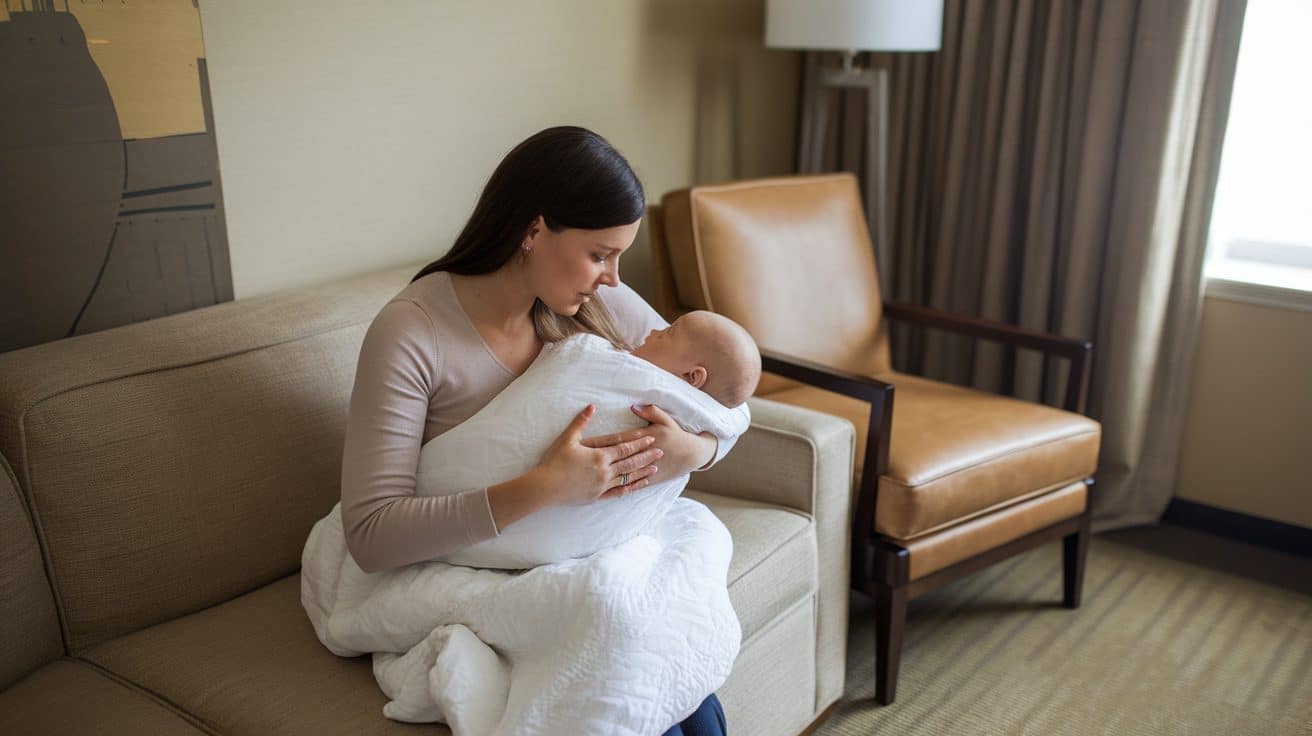
Traveling with a baby is always an enjoyable experience, but jet lag can make adjusting to new time zones challenging.

If you’ve ever tried to get your baby to sleep after crossing several time zones, you know how difficult it can be.

A sudden shift in schedule can lead to restless nights, irritable days, and a lot of frustration for both you and your baby.

The good news is, with a little preparation and a few suggestions, you can help your baby adjust to the new time zone quickly and make your trip much more pleasant.

From pre-travel preparations to ideas for managing jet lag on the plane and after you arrive, here’s what you need to know to handle baby jet lag effectively.

Why Do Babies Get Jet Lag?

Why Do Babies Get Jet Lag

Jet lag occurs when your baby’s internal clock gets confused after crossing time zones. Babies, especially younger ones, are used to their own sleep-wake routines, and traveling to a new time zone can disrupt that.

They might find it difficult to fall asleep or wake up at the right times, even with small time shifts.

Since babies are more sensitive to changes, jet lag can lead to fussiness, irritability, or sleepy moments at odd hours.

Depending on the size of the time difference, jet lag typically lasts a few days to a week. Babies under 6 months generally aren’t as affected because they don’t have a strict sleep schedule.

However, older babies and toddlers might take longer to adjust. It can take up to a week or more to get back on track. But with a bit of patience and consistency, your baby will be feeling better soon!
How to Prevent Baby Jet Lag Before You Travel

How to Prevent Baby Jet Lag Before You Travel

You don’t have to wait until you arrive at your destination to start preparing for jet lag. Here are some steps you can take before your trip to help your baby adjust smoothly:

1. Adjust Their Sleep Schedule Gradually

A few days before you travel, try gradually shifting your baby’s bedtime to match your destination’s time zone. If you’re traveling east, put them to bed a bit earlier each night.

If you’re traveling west, make bedtime a little later. This gradual adjustment can make the time change less shocking when you arrive.

2. Ensure They Are Well-Rested

Make sure your baby is well-rested before the flight. If your baby is overtired, they might have trouble adjusting to the new time zone.

Prior to your trip, try to get them rested by ensuring they have regular naps or some quiet time so they’re not already sleep-deprived when it’s time to board the plane.

3. Choose the Right Flight Timing

When booking your flight, consider your baby’s usual sleep schedule. If you’re flying long distances, night flights can be beneficial, as your baby may sleep through most of the flight, making the arrival smoother.

For shorter trips, a daytime flight might work better, allowing your baby to stay active throughout the day and sleep at the correct local bedtime once you arrive.

How to Manage Baby Jet Lag During the Flight

How to Manage Baby Jet Lag During the Flight

Set your baby’s sleep routine to the new time zone and keep them comfortable throughout the flight. Here is what you can do 

1. Set Your Watch to the New Time Zone

Once you’re on the plane, change your watch to your destination’s time zone. This will help you mentally prepare for the time change and adjust your sleep routine during the flight.

Even though your baby won’t understand the time change, adjusting your own schedule will help you stay in sync with the new time zone.

2. Request a Bassinet

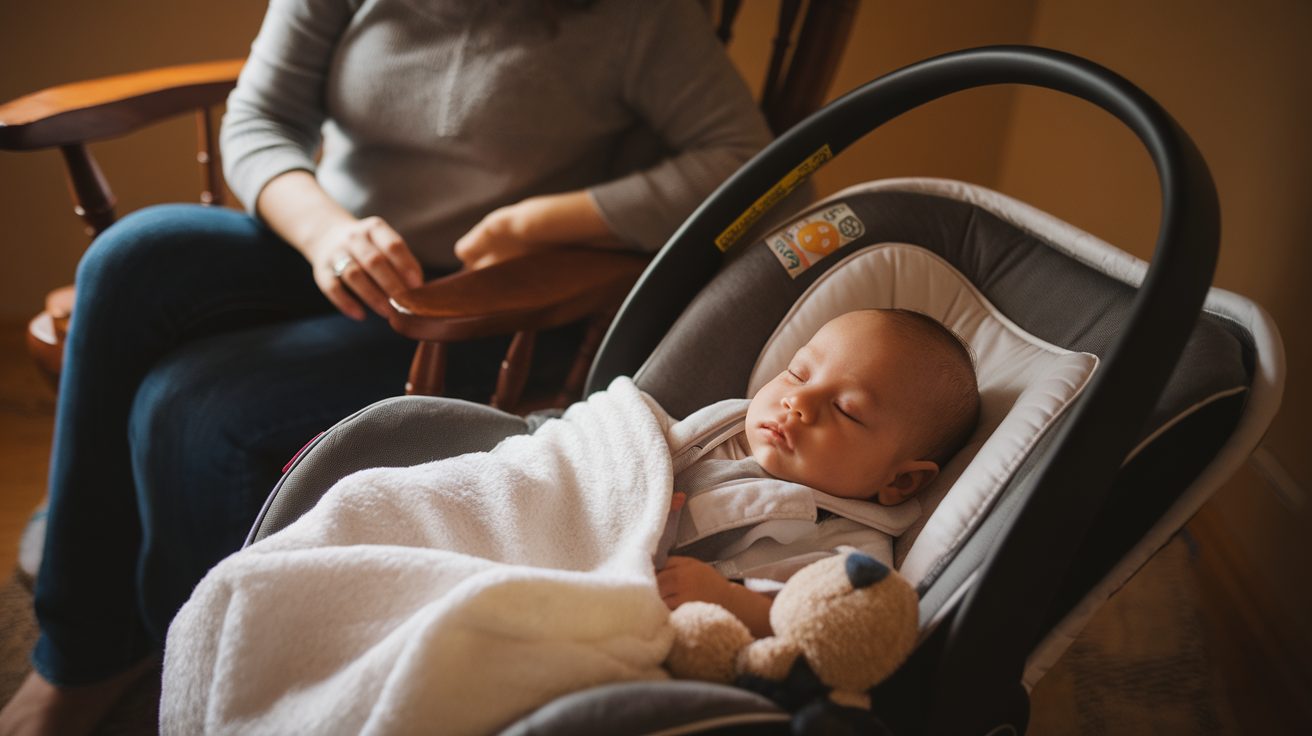
If your baby is young enough, check with the airline to see if they offer bassinets. A bassinet will give your baby more space to sleep comfortably during the flight.

Be sure to request it well in advance, as not all flights have this option available.

3. Keep Your Baby Hydrated

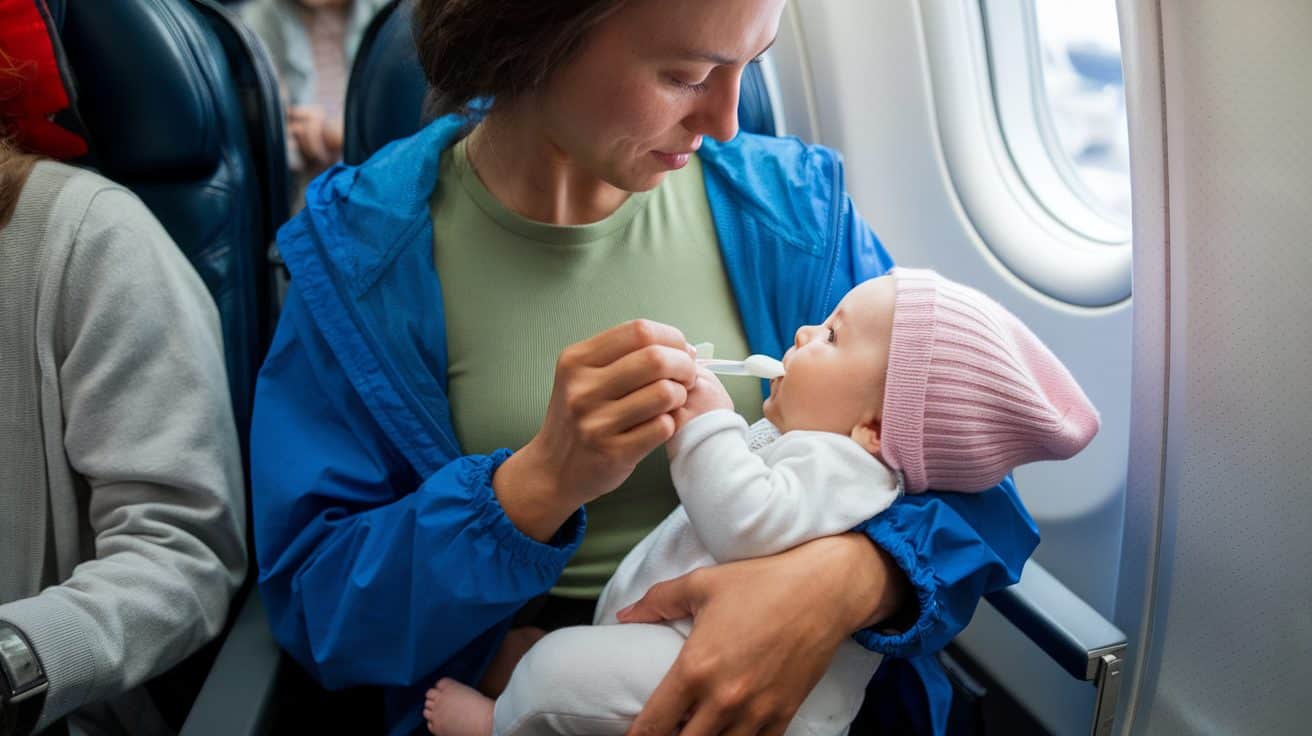
Airplane cabins can be very dry, so it’s essential to keep your baby hydrated throughout the flight. Offer fluids frequently, whether it’s breast milk, formula, or water.

Staying hydrated will help them feel better and aid in their adjustment to the new time zone.

How to Get Your Baby Back on Schedule After the Flight

How to Get Your Baby Back on Schedule After the Flight

Synchronize your baby’s sleep with the local time and gradually adjust their bedtime to match the new time zone.

1. Sync Your Baby’s Sleep to Local Time

As soon as you arrive, start getting your baby on the local schedule. If they wake up at odd hours, don’t worry—this is a part of the adjustment. Try to keep their bedtime and wake-up times in sync with the new local time.

2. Take It Easy on the First Day

The first day after arrival is crucial for your baby’s adjustment. Take things easy—avoid overloading your baby with activities. A quiet, calm day with some time outside will help them relax and adjust without feeling overwhelmed.

3. Make Gradual Adjustments to Sleep Time

If your baby’s bedtime is still off by an hour or two after the first few days, make small adjustments. Move bedtime forward or backward by 30 to 60 minutes each night until it matches the local time.

Tips to Help Your Baby Adjust to New Time Zones

Here are some tips to help your baby adjust to new time zones:

  • Stick to Routines: Keep your baby’s sleep routine consistent to help them feel secure and adapt more easily.
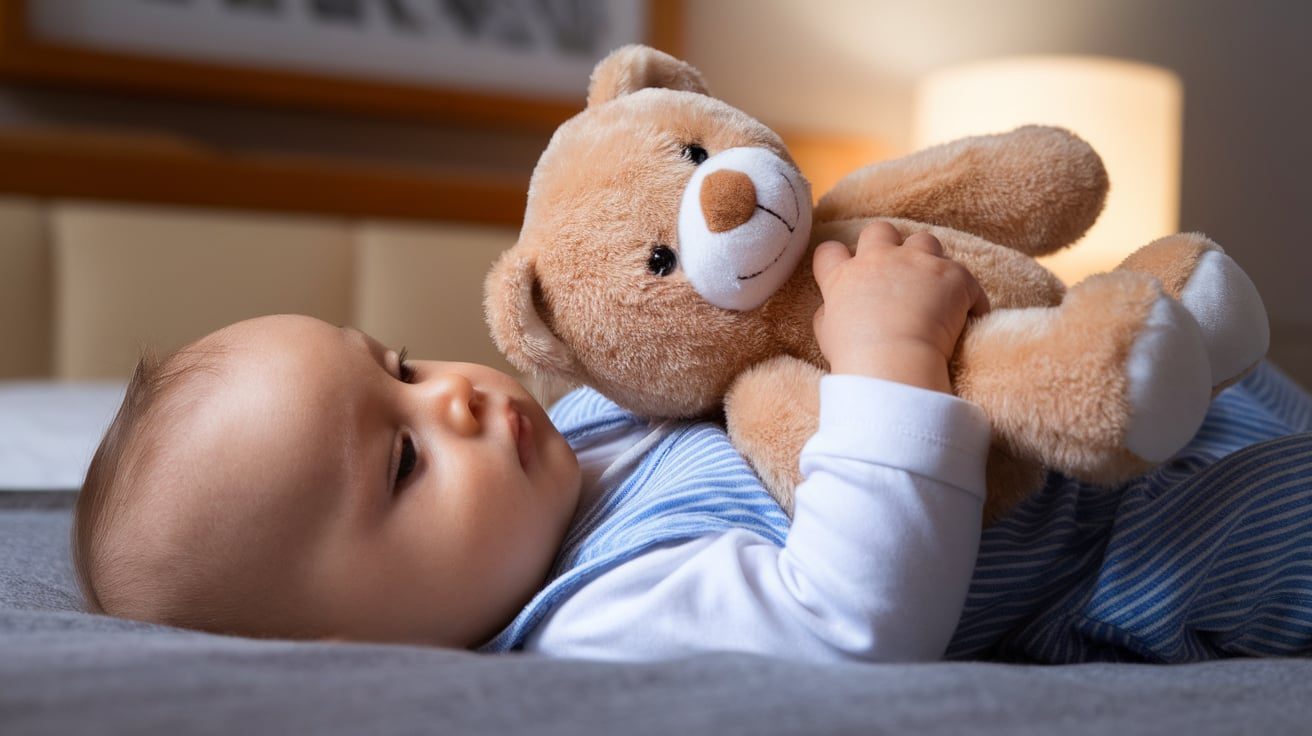
  • Pack Comfort Items: Bring familiar items like a blanket or toy to soothe your baby in new surroundings.
  • Use Natural Light: Expose your baby to sunlight to help reset their internal clock.
  • Keep Them Active: Keep your baby active during the day to ensure they’re tired by bedtime.
  • Be Patient: Give your baby time to adjust to the new time zone; it may take a few days.
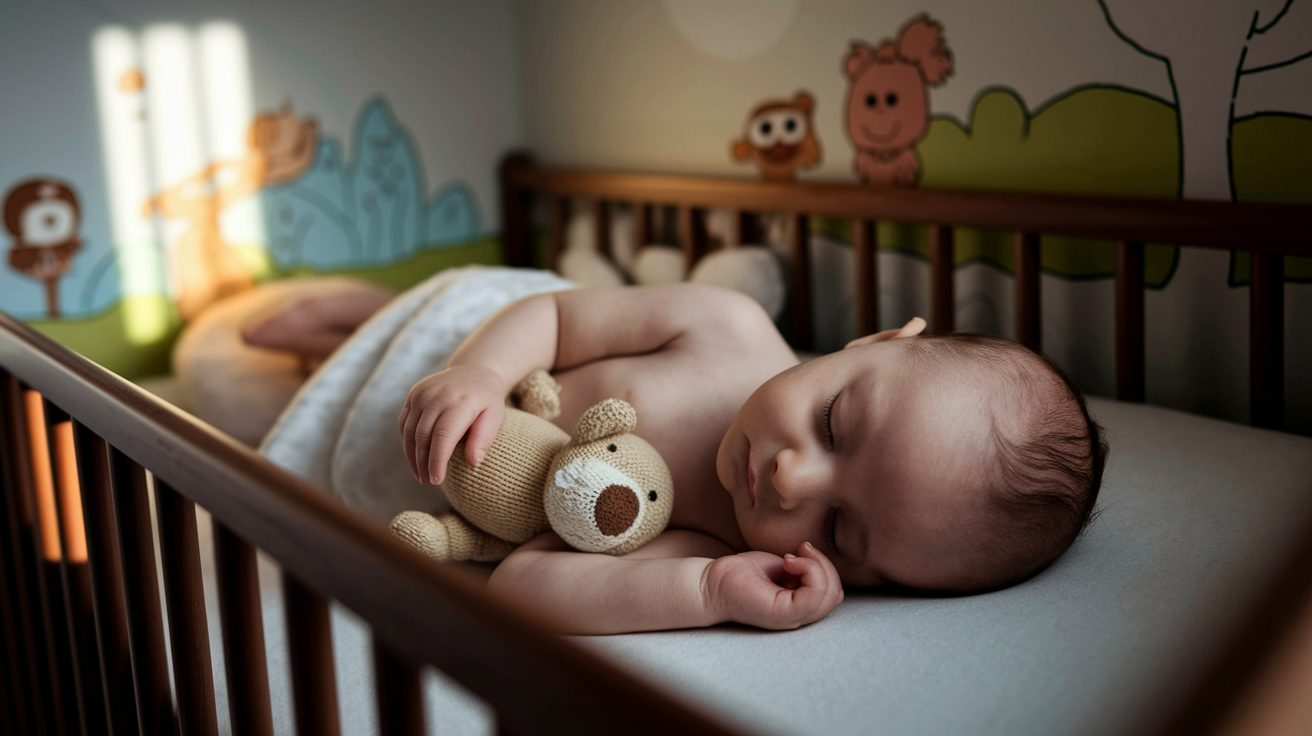
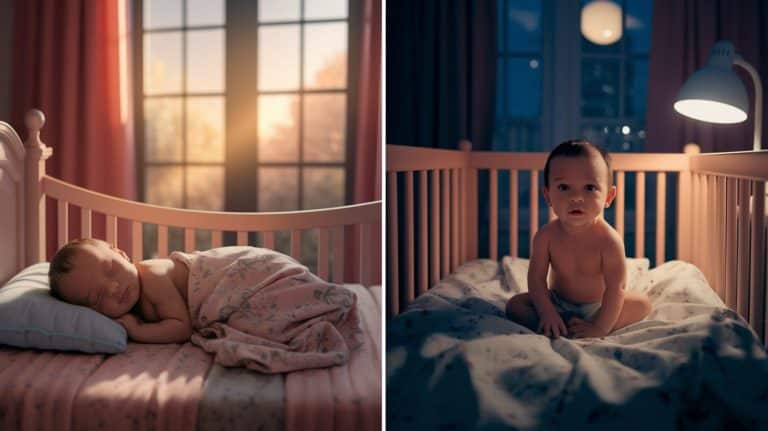
  • Create a Calm Sleep Environment: Make the sleeping area quiet, dark, and comfortable for better rest.

Patience and consistency are key to helping your baby adjust smoothly.

When to Seek Professional Advice

When to Seek Professional Advice

If your baby’s jet lag persists beyond a week or you notice unusual symptoms, consider consulting your pediatrician. Extended sleep disruptions might indicate other issues affecting your little one’s rest.

While adjusting to new time zones is normal, prolonged difficulty settling into a healthy sleep pattern warrants professional attention. Your pediatrician can help determine if something else might be interfering with your baby’s sleep quality.

Don’t hesitate to reach out to your doctor if your parental instincts tell you something isn’t right. They can provide personalized advice based on your baby’s specific situation and medical history.

A quick consultation offers peace of mind by ruling out potential concerns and ensuring your baby’s sleep development remains on track.

Summing It Up!

Handling baby jet lag can be difficult, but the change isn’t too hard with the right methods. Keep to familiar routines, get your baby into natural light, and stay patient as they get used to the new time zone.

Bring comfort items from home, adjust sleep times slowly, and keep babies active during daylight hours. Create a calm sleep space, feed on the new time zone schedule, and limit screens before bedtime.

For easier trips, start shifting bedtime a few days before travel. If going east, make bedtime earlier. If west, make it later. Well-rested babies adjust better to new schedules.

After arrival, sync to local time right away. Take the first day slowly and make small adjustments to bedtime until it matches local time.

Frequently Asked Questions

How Long Does Jet Lag Last in Babies?

Depending on the time difference, jet lag in babies typically lasts a few days to a week. Younger babies may adjust faster, while older babies and toddlers may take longer.

How to Get the Baby Back on Schedule After Traveling?

To get your baby back on schedule after traveling, gradually adjust their sleep times, stick to familiar routines, use sunlight to reset their body clock, and be patient as they adapt.

How Can You Help a Baby with Jet Lag?

Help your baby with jet lag by sticking to routines, using sunlight to reset their internal clock, keeping them active during the day, and being patient as they gradually adjust.

1. Introduction

A. What to Expect in a Winery Tasting Room

A winery tasting room is the gateway to a memorable wine tasting experience. Whether you’re a seasoned wine enthusiast or a first-time visitor, stepping into a tasting room allows you to explore different wine varieties, learn about the winemaking process, and immerse yourself in the winery’s unique atmosphere.

Each winery has its own approach to tastings, with some offering guided tours, exclusive wine pairings, and behind-the-scenes looks at the vineyard’s operations.

Understanding what to expect before your visit can help you make the most of your time. Most wineries have structured tasting menus, where guests can sample a curated selection of wines.

Some may include educational insights on the tasting process, wine characteristics, and ideal food pairings. Being prepared will ensure you fully appreciate the flavors, aromas, and stories behind each bottle.

B. Why the Wine Tasting Experience Matters

A wine tasting experience is more than just sipping different wines—it’s an opportunity to expand your palate, refine your tasting skills, and develop a deeper appreciation for viticulture.

By engaging in a structured tasting, you can identify nuances in wine, from fruit-forward notes to earthy undertones, and learn how factors like terroir and aging influence flavor.

Additionally, a well-planned wine tasting experience connects you with the people behind the bottle. Winemakers and tasting room hosts often share insights about the winery’s history, grape selection, and production methods. These interactions provide valuable knowledge that enhances your appreciation of the wines you’re tasting.

C. Planning Ahead for the Best Visit

Before heading to a winery, planning ahead ensures a smooth and enjoyable visit. Checking the winery’s website for reservation requirements, tasting fees, and special events can help you avoid surprises. Some wineries require advanced bookings, especially for private or premium tastings, while others operate on a walk-in basis.

Additionally, researching the types of wines a winery specializes in can help tailor your visit to your preferences.

If you love bold reds or crisp whites, knowing what’s available allows you to prioritize your selections. Dressing comfortably, hydrating, and eating beforehand will also contribute to a better wine tasting experience.

2. Choosing the Right Winery

Choosing the Right Winery

A. Researching Winery Specialties

Each winery offers a unique selection of wines, and understanding what they specialize in can enhance your wine tasting experience. Some wineries focus on classic varietals like Cabernet Sauvignon and Chardonnay, while others experiment with lesser-known grapes or unique aging techniques.

Checking a winery’s website or reviews can give insight into their offerings.

If you’re interested in organic or biodynamic wines, looking for wineries that follow sustainable practices can make your visit more rewarding. Similarly, some wineries produce limited-edition releases or reserve wines that are only available on-site, giving you access to exclusive tastings.

B. Checking Reservation Requirements

Not all wineries operate on a first-come, first-served basis. Many require reservations, especially for premium tastings or behind-the-scenes tours. Booking in advance ensures that you secure a spot, particularly during peak seasons or special events.

Some wineries also offer different levels of tastings, from standard flights to private, guided experiences. If you’re looking for a more in-depth session with the winemaker or a sommelier, choosing a winery that provides personalized tastings will elevate your wine tasting experience.

C. Considering Location and Atmosphere

The setting of a winery can significantly impact your enjoyment. Some wineries are set against rolling vineyards, offering breathtaking views, while others provide a more intimate, rustic ambiance. Deciding whether you prefer a bustling, social environment or a quiet, private tasting can help you choose the best location.

Additionally, consider the amenities available. Some wineries have picnic areas, live music, or on-site restaurants, allowing you to extend your visit beyond just a tasting. Selecting a winery that matches your preferred atmosphere will make your experience more enjoyable.

3. Enhancing Your Wine Tasting Experience

A. Following Proper Tasting Etiquette

To fully enjoy your wine tasting experience, it’s important to follow proper etiquette. Start by holding the wine glass by the stem to avoid warming the wine with your hands. Swirling the wine releases its aromas, while taking a moment to smell it allows you to identify different scent profiles before tasting.

Another key aspect of etiquette is pacing yourself. Tasting pours are small, but sampling multiple wines can add up quickly. Using the spit bucket when necessary can help you stay clear-headed and maintain a refined palate throughout the session.

B. Engaging with the Tasting Room Host

Tasting room hosts are knowledgeable guides who can enrich your wine tasting experience. Engaging with them by asking questions about the wine’s origin, flavor notes, and food pairings can provide deeper insights. They can also recommend wines based on your preferences, making your visit more personalized.

Many hosts enjoy sharing stories about the winery’s history, the challenges of winemaking, and the artistry behind each bottle. Showing interest and appreciation in their expertise not only enhances your knowledge but also fosters a more interactive experience.

C. Understanding Wine Characteristics

Wine tasting involves more than just identifying whether you like a wine or not. Understanding characteristics like acidity, tannins, and body can help you articulate your preferences. Learning to distinguish between dry and sweet wines, fruit-forward versus earthy flavors, and different aging methods makes for a richer wine tasting experience.

Taking notes as you taste can help you remember which wines stood out and why. Noting details like vintage, vineyard, and tasting impressions allows you to refine your palate over time and select wines more confidently in the future.

4. Making the Most of Your Visit

A. Pairing Wine with Food Options

Many wineries offer food pairings to complement their wines. Small bites like cheese, charcuterie, or chocolate can enhance the flavors of the wine and provide a more immersive experience. Learning which foods pair best with different wines will make your wine tasting experience more enjoyable and educational.

If the winery has a full-service restaurant, consider enjoying a meal alongside your tasting. Some wineries even offer curated tasting menus that highlight the synergy between food and wine, creating a well-rounded experience.

B. Taking Notes for Future Reference

Recording your impressions during a tasting ensures you remember the wines you loved. Writing down tasting notes, preferred varietals, and any special releases allows you to track your evolving palate and make informed purchasing decisions later.

Many wineries also offer tasting sheets where you can jot down details. Using these as a reference helps you find similar wines at local stores or plan future winery visits based on your tastes.

C. Purchasing Wines You Enjoy

If you discover a wine you love, consider purchasing a bottle to take home. Many wineries offer discounts for purchases made on-site or for joining their wine club. This allows you to continue enjoying your wine tasting experience even after you leave.

Buying directly from the winery also supports small producers and gives you access to wines that may not be available in retail stores. If you’re unsure, asking the staff about aging potential and storage recommendations can help you make the best choice.

5. Conclusion

After your visit, take a moment to reflect on what you learned and which wines stood out. Each wine tasting experience adds to your knowledge and appreciation of wine, helping you refine your palate over time.

If you enjoyed your visit, consider exploring more wineries in the region. Expanding your wine tasting experience to different locations exposes you to new varietals and winemaking styles.

Sharing your experience with friends or on social media can help others discover great wineries. Recommending wines you loved and recounting memorable moments ensures your wine tasting journey continues beyond the tasting room.

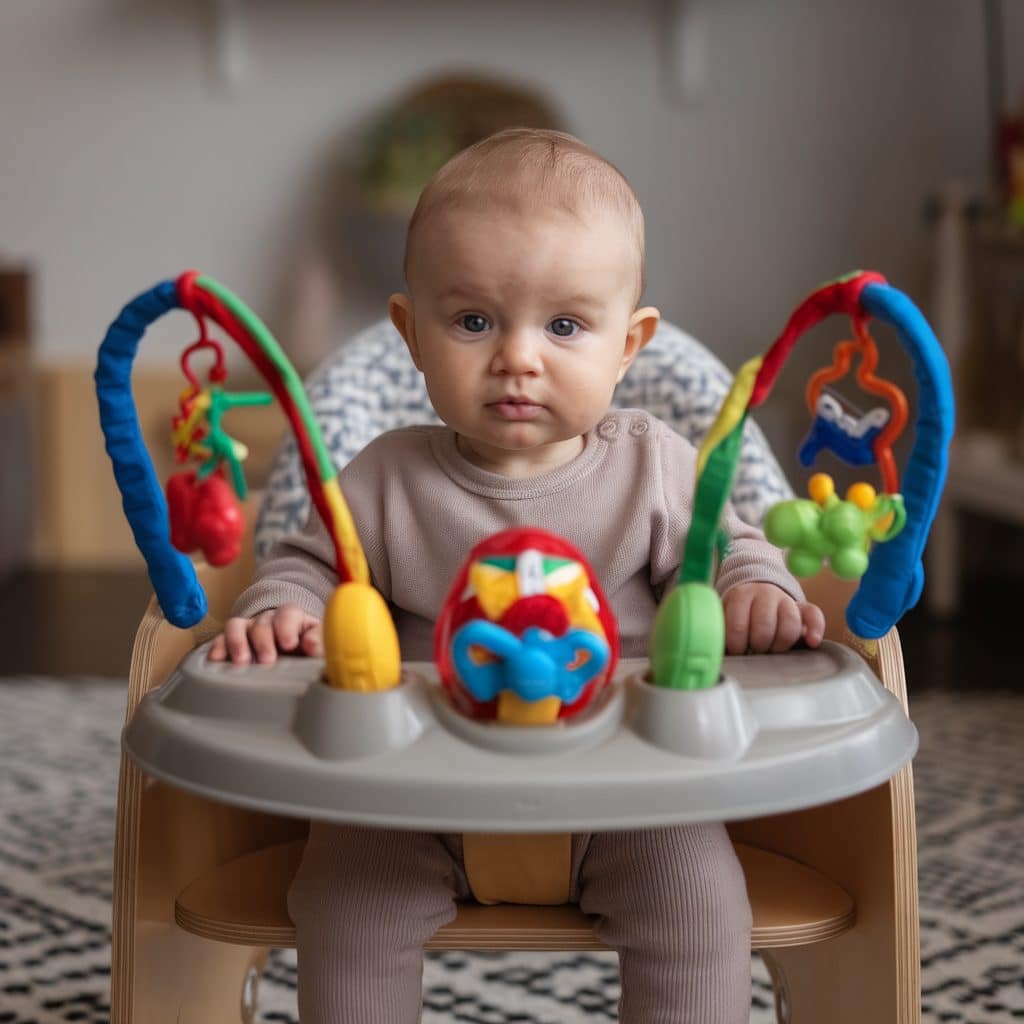
Is your little one bouncing with energy while you desperately need a moment to finish your coffee? As a mom of two, I remember watching my babies eagerly kick their legs, yearning to find their newfound strength.

The question isn’t just when they can start using a jumper – it’s about ensuring they’re truly ready for this exciting milestone.

While jumpers might seem like a magical solution for active babies (and tired parents!), timing is everything.

Just like how we wouldn’t expect a seedling to flower before it’s ready, our babies need to hit certain developmental markers before they can safely enjoy the bouncing fun.

Today, we’ll walk through everything you need to know about when your baby can start using a jumper. 

What is a Baby Jumper?

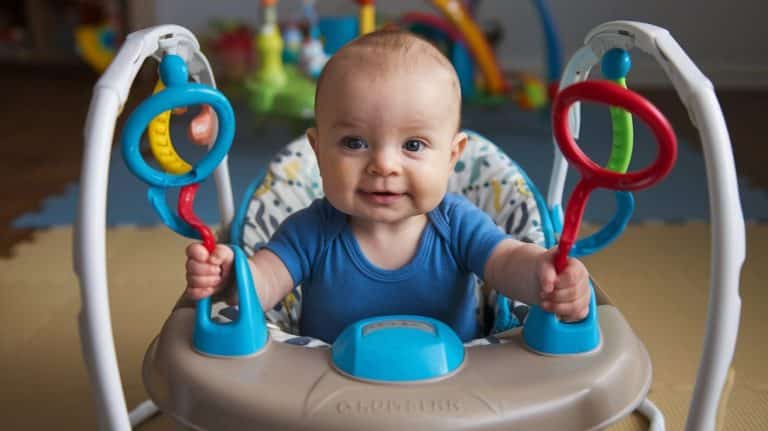
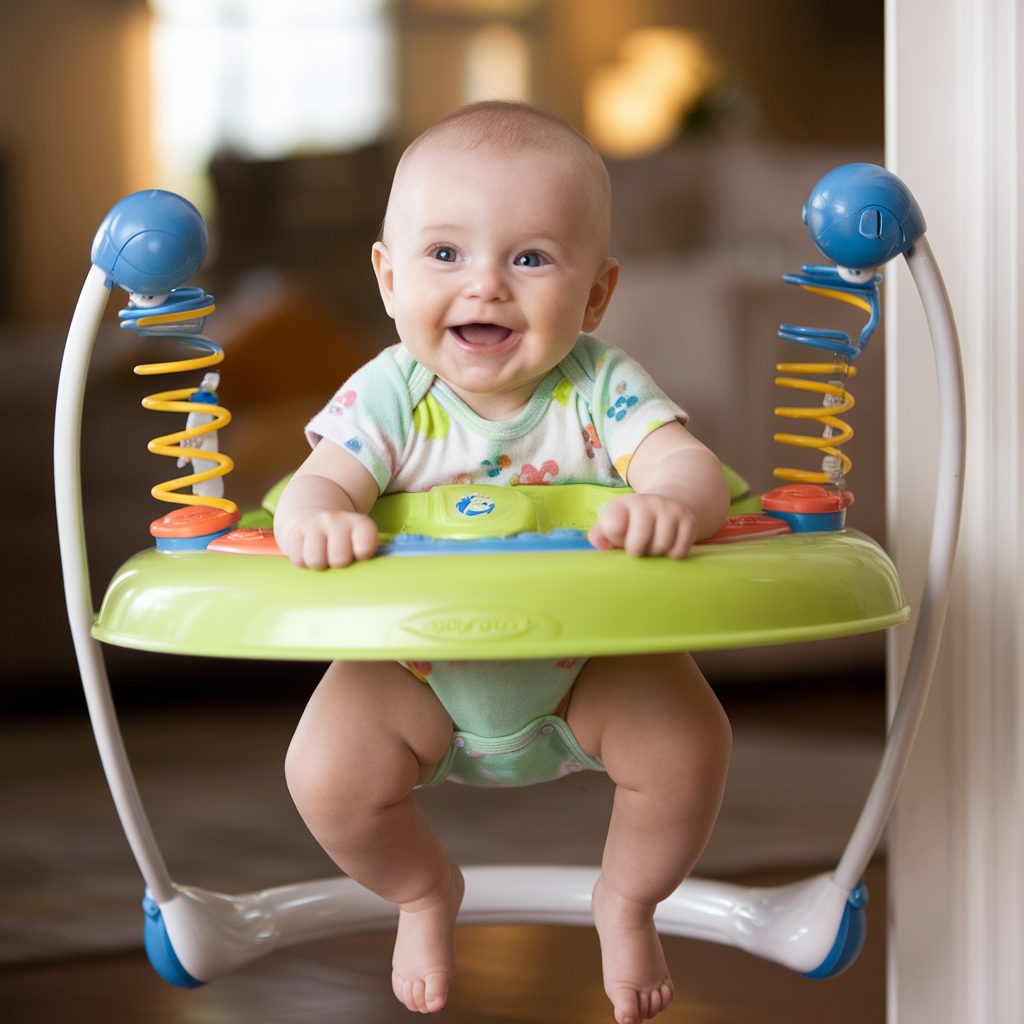
A baby jumper is a play device featuring a suspended seat that allows babies to bounce using their toes against the floor. The seat connects to either a doorframe or a standalone frame using springs or rubber cables.

Types Available

  1. Stand-Based Jumpers: Come with their own frame, include toys, and provide the most stable bouncing experience with a full surround playpen area.

  2. Doorway Jumpers: Attach to door frames with rubber harnesses or springs, offering a space-saving and portable solution.

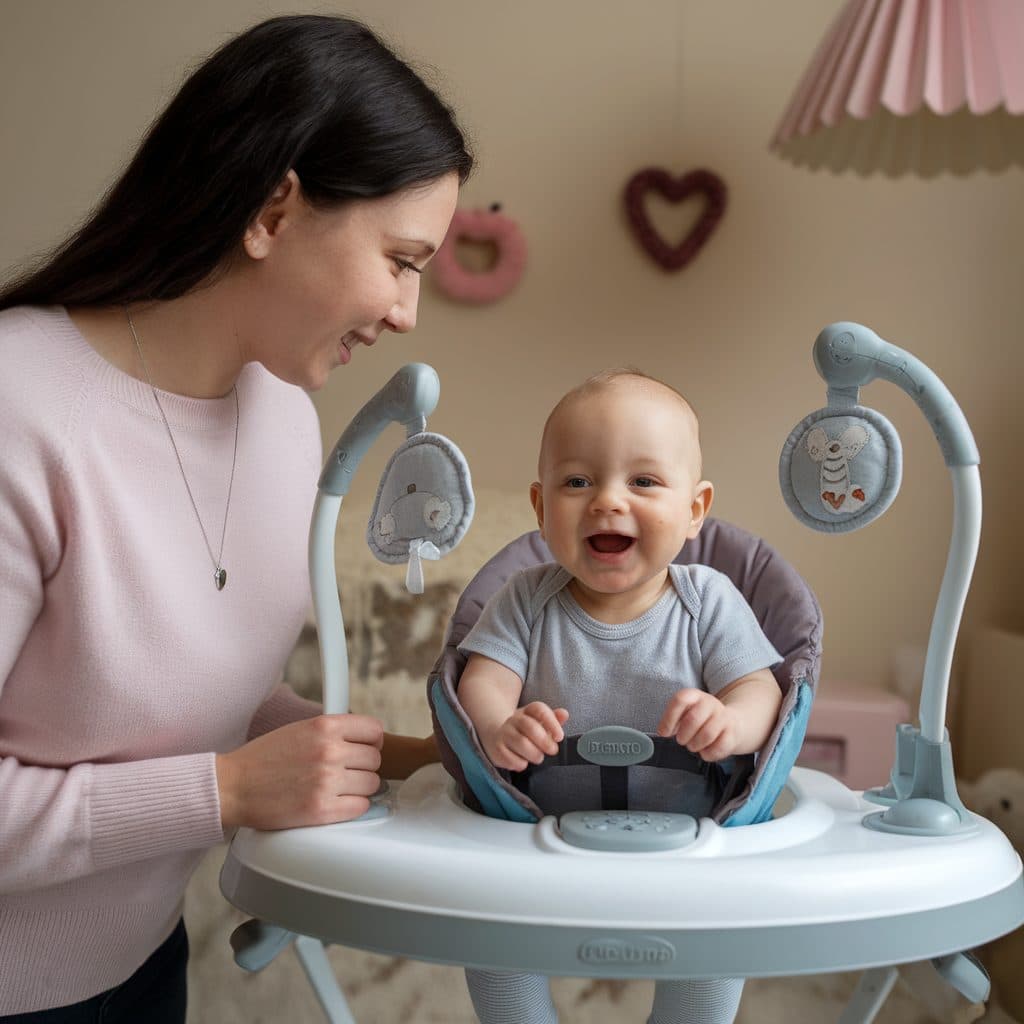
  3. Playpen-Style Jumpers: Feature springs beneath the seat and a contained play area with toys, combining bouncing activity with entertainment features.

When Can Babies Start Using a Jumper?

When Can Babies Start Using a Jumper?

Babies can start using a baby jumper around 5 to 6 months of age, when they have developed enough neck and head control to sit upright without assistance.

At this stage, they are typically able to hold their head steady and have the muscle strength required for safe use of the jumper.

Always check with your pediatrician before introducing a jumper, especially if you have concerns about your baby’s development.

Signs Your Baby Is Ready

  • Strong head and neck control (typically around 4-6 months)
  • Able to support their weight on their legs
  • Must be able to sit independently or nearly independently
  • Height and weight within manufacturer’s guidelines
  • Trunk control to maintain an upright position
  • Actively pushing with legs when held in standing position
  • Shows interest in bouncing movements when held
  • Can hold head steady during movement
  • Demonstrates good core strength
  • Shows enthusiasm for upright positions

Remember: Every baby develops differently. These guidelines help ensure safe jumper use when your baby shows the right signs of readiness.

How to Use a Baby Jumper Safely?

Baby jumpers can be an exciting activity for infants, but they require careful supervision and understanding to ensure your child’s safety.

The journey into jumper usage begins with assessing your baby’s physical readiness. Not all infants are prepared for this activity at the same age, making individual assessment crucial.

The implementation of a baby jumper requires more than just placing an infant into the device. 

This includes understanding the jumper’s structural integrity, ensuring appropriate usage duration, and maintaining constant, attentive supervision.

  • Ensure the jumper is assembled correctly according to the manufacturer’s instructions
  • Place the jumper on a level, non-slippery floor surface
  • Keep the area around the jumper clear of furniture, walls, and other hazards
  • Check that doorway-mounted jumpers are securely fastened and the door frame is strong enough to support the weight

How Long Should a Baby Stay in the Jumper?

A baby should stay in a jumper for no longer than 15-20 minutes at a time.

It’s important to limit sessions to avoid putting too much strain on their developing muscles and joints. Overuse can lead to issues like delayed motor skills and muscle tightness.

Ideally, jumpers should only be used once or twice a day to ensure a balance of movement and developmental activities. Always supervise your baby while they are in the jumper.

Signs to End a Session

  • Baby’s head starts drooping or they have difficulty maintaining proper posture
  • Movements become slower or less coordinated
  • Legs appear to be dragging rather than pushing actively
  • Baby slumps or leans to one side repeatedly
  • Excessive drooling (more than usual) which can indicate tiredness
  • Eyes appear heavy or they start rubbing their eyes

Benefits of Baby Jumpers

Benefits of Baby Jumpers

1. Physical Development and Exercise

Your baby gets a fun workout in a jumper! As they push off with their toes and bounce, they’re strengthening their leg muscles and developing coordination.

This movement helps them understand how their body works and builds the muscle strength they’ll need later for walking.

Plus, it’s a great way for babies to burn off energy, especially on days when outdoor play isn’t possible.

2. Entertainment and Sensory Stimulation

Most baby jumpers come with attached toys, mirrors, and sometimes even music.

These features create an engaging play station that keeps your baby entertained while stimulating multiple senses.

They learn cause and effect (when they touch something, it makes a sound), develop hand-eye coordination as they reach for toys, and start understanding spatial awareness as they move around in the jumper.

3. Independent Play Time

Jumpers give babies a taste of independence in a safe, contained environment.

While you’re nearby, your baby can explore, play, and move on their own terms. This independent play time is valuable for their emotional development and helps them build confidence in their abilities.

It’s also a chance for them to practice self-entertainment skills, which is important for their overall development.

4. Parent Convenience

Let’s be honest – sometimes you need both hands free to do essential tasks like preparing a meal or folding laundry.

A jumper can be a lifesaver during these moments, keeping your baby safely contained and happily entertained while you’re nearby getting things done.

It gives you a much-needed break while still allowing you to interact with your baby through smiles, words, and gestures as you go about your tasks.

Are Baby Jumpers Bad for Babies?

Are Baby Jumpers Bad for Babies?

While baby jumpers can be part of your baby’s daily routine, parents often worry about potential risks. The truth is that jumpers aren’t inherently harmful when used correctly.

However, improper use or excessive time in jumpers can affect your baby’s development. The key is understanding both the risks and proper usage guidelines to make informed decisions about jumper use.

1. Hip Development Concerns

Extended time in a jumper can put your baby’s hips in an unnatural position, causing strain on developing hip joints.

The way babies hang in jumpers forces their legs to point downward and spread apart, which isn’t ideal for proper hip socket formation.

This position, especially during crucial developmental stages, could potentially contribute to hip problems or delay proper hip development. 

2. Delayed Motor Skill Development

While jumpers might seem like they’re helping your baby learn to walk, they can actually interfere with natural movement patterns.

In a jumper, babies tend to tip forward and use their toes in an unnatural way, which doesn’t match how they’ll need to move when learning to walk.

This can delay important motor skills like crawling, cruising, and walking.

3. Safety Hazards

Even with supervision, jumpers pose several safety risks. Babies can bump into doorframes or walls while bouncing, potentially causing head injuries.

There’s also a risk of the jumper tipping if your baby pushes off too hard or reaches too far for toys.

Some babies have gotten fingers pinched in jumper springs or door frames, and there have been cases of jumpers detaching from door frames or ceiling mounts, leading to serious falls.

Remember: When used according to guidelines (15-20 minutes, twice daily), jumpers can be a safe part of your baby’s routine.

Alternatives to Baby Jumpers

While baby jumpers are a popular way to keep your little one entertained, they’re not the only option out there.

If you’re looking for alternatives that provide similar benefits but focus more on development or safety, you’re in the right place.

  • Use play mats with engaging toys and mirrors
  • Create sensory spaces with different textures
  • Place toys just out of reach to encourage movement
  • Get down on the floor with your baby to encourage interaction
  • Use tummy time pillows for added support and comfort

Key Safety Features to Check Before Buying Baby Jumper

Before purchasing a baby jumper, focus on safety features and proper fit. Your choice between doorway-mounted or freestanding models will impact both safety and convenience.

  • Verify the base is constructed from durable, high-grade materials that won’t bend or warp under regular use
  • The support frame should have a wide, balanced stance to prevent any wobbling or tipping during active bouncing
  • Look for rubberized, non-slip feet that maintain position on both carpeted and hard surfaces
  • Check for deep, ergonomic back support that promotes proper spinal alignment
  • Padding should be thick enough for comfort but firm enough to maintain structure
  • Multiple height adjustment levels that lock securely in place

Wrapping Up!

As a mom who’s been through the jumper journey twice, I can tell you that every baby finds their bouncing legs at their own pace.

I remember watching my firstborn show all the signs of readiness at 4 months, while my second needed almost 6 months before she was ready to take her first bounce.

Through my experience and countless conversations with other parents, I’ve learned that rushing these milestones never does anyone any favors.

I always tell the parents in my mommy group: trust your gut, watch your baby’s cues, and remember that safety trumps convenience every single time.

But I promise you, whether your baby starts using a jumper sooner or later, they’ll get there.

For now, maybe we can both enjoy our cold coffees together, knowing we’re putting our babies’ needs first!

Frequently Asked Questions

Can I Put My 3 Month Old in A Jumper?

No. Wait until your baby is at least 6 months old and has strong head/neck control. Using a jumper at 3 months is unsafe and could cause injury.

Are Baby Jumpers Ok for Development?

Baby jumpers are okay when used correctly – 15-20 minutes, twice daily. Too much use can affect muscle and hip development. Floor play is better for natural development.

What Happens if You Put a Baby in A Jumper Too Early?

Using a jumper too early risks neck injury and improper muscle development. Babies need head control and strong neck muscles first, which typically happens around 6 months.

The clock reads 5 AM, and you hear those familiar sounds coming from your toddler’s room. Another day is starting way too early, leaving you tired and your child potentially cranky for the rest of the day.

If you’re dealing with your Toddler Waking up At 5 AM, you’re not alone. Many parents face this challenge, trying different tactics with limited success.

This guide breaks down why your little one might be waking so early and offers practical, tested methods to shift their wake-up time to a more reasonable hour.

We’ll look at the science behind toddler sleep patterns, factors that might be disrupting their rest, and step-by-step solutions you can start using tonight.

With some adjustments and persistence, both you and your toddler can enjoy more restful mornings and better days ahead.

How Do You Know if Your Toddler Is Waking up Too Early?

While every child is different, most experts consider anything before 6 AM to be an early wake-up for toddlers.

The ideal wake-up time for most toddlers falls between 6:00 AM and 7:30 AM.

Remember that what matters most is how your child feels and functions throughout the day. If they wake up at 5:30 AM but are happy and well-rested all day, their body might simply be programmed to wake up earlier.

If your child shows signs like yawning, eye-rubbing, or crankiness within 1-2 hours of waking or if they’re struggling with mood, attention, or tiredness, their early rising is likely a problem worth addressing.

Understanding the Problem: Why Your Toddler Wakes Up Early 

Why Your Toddler Wakes Up Early

Here are some of the most common things that contribute to this problem:

  • Circadian Rhythm: Toddlers have a natural body clock, called the circadian rhythm, which causes them to wake up early, typically between 4:00 AM and 6:00 AM. This is just how their bodies are programmed.
  • Sleep Pressure: Sleep pressure refers to how tired someone feels. In the early morning, after a long night of sleep, toddlers may experience low sleep pressure, making it easier for them to wake up.
  • Light Exposure: Bright morning light can trick your toddler’s brain into thinking it’s time to wake up. If their room isn’t dark enough, it could contribute to early wake-ups.
  • Noise: Sounds from outside or even inside the house can disturb your toddler’s sleep, causing them to wake up too early.
  • Sleep Regressions: Around 18 months or when they turn 2, toddlers experience sleep regressions. This can disrupt their sleep patterns and cause early wake-ups.
  • Teething: Teething can be painful and can cause your toddler to wake up earlier than usual.
  • Milestones: Big changes like potty training or transitioning to a toddler bed can disrupt their sleep, leading to early mornings.

How to Fix Baby’s Early Waking Problem?

How to Fix Baby's Early Waking Problem?

Here are some proven strategies that works:

  • Make an Optimal Bedtime: The key to solving early wake-ups might be adjusting bedtime. Aim for a bedtime between 6:30 PM and 8:00 PM to ensure your toddler gets enough rest overnight.
  • Small Shifts: Try moving bedtime earlier by just 15 minutes each night to help them sleep later.
  • Block Out Light: Use blackout blinds or heavy curtains to keep the room dark. This helps signal to their brain that it’s still time to sleep.
  • Control Noise: A white noise machine can help block out any sounds that might be waking them up.
  • Encourage Their Physical Activity: Make sure your toddler has plenty of physical activity during the day, like running around or playing outside. This helps them burn off energy and sleep better at night.
  • Make a Relaxing Routine: Create a calming evening routine—dim the lights, read a book, and avoid active play or screens 1-2 hours before bedtime.
  • No Screens after evenings: Avoid letting your toddler watch TV or play with electronics right before bed. These can overstimulate their brain, making it harder for them to fall asleep.
  • Create a Morning Routine: Avoid fun activities like playing games or turning on cartoons when your toddler wakes up early. Instead, teach them that fun starts later in the morning, after 6 AM.
  • Consistency: Stick to the rule that early morning is for rest, not playtime.
  • Nap Duration: Naps should be 2-3 hours long for toddlers. However, if your toddler naps too long during the day, it may affect nighttime sleep and cause early wake-ups.
  • Adjust Nap Timing: If your toddler wakes up early, try adjusting nap times so they don’t nap too close to bedtime.
  • Manage Separation Anxiety: If your toddler is dealing with separation anxiety while transitioning, create a sense of security by using a favourite blanket or stuffed animal.

Other Considerations for Addressing the Issue 

Other Considerations for Addressing the Issue

While the 7 steps we discussed should help with your toddler’s early wake-ups, there are times when the issue persists despite the adjustments.

It’s essential to consider other factors that could be affecting their sleep. Let’s talk about them: 

Consult a Pediatrician for Better Sleep

If none of the above strategies work, it might be time to consult a pediatrician.

Sleep issues can sometimes be related to underlying health conditions, such as sleep apnea, which may require medical attention.

A pediatrician can assess your toddler’s health and determine if there are any physical issues affecting their sleep.

By addressing any medical concerns early, your toddler’s sleep quality can improve, leading to better rest and overall health.

Consider a Sleep Specialist Referral

If sleep disturbances continue despite adjustments in routine, your pediatrician may recommend seeing a sleep specialist.

A sleep specialist can evaluate your toddler’s sleep patterns and offer personalized solutions tailored to their specific needs.

They will take a deeper look at your child’s sleep environment, habits, and any potential medical conditions. 

Gentle Sleep Training

If your toddler continues waking up early, gentle sleep training methods like the “Ferber method” can help. This method involves gradually extending the time between your toddler’s wake-up and your response.

For example, if they wake up at 5 AM, wait a few minutes before going to them. Over several nights, you gradually increase the waiting time before offering comfort.

This process teaches your toddler to self-soothe and fall back asleep without immediately needing you. 

Conclusion: Managing Expectations and Consistency

Early morning wake-ups can be tough on the whole family, but with patience and the right approach, you can help your toddler develop better sleep habits.

Start by looking at their sleep environment, daily routine, and bedtime practices. Make small changes consistently and give them time to work.

Remember that each child is different – what works for one may not work for another. Don’t get discouraged if the first few strategies don’t bring immediate results.

By understanding the causes of early wake-ups and applying these practical solutions, you’ll help your toddler (and yourself!) get more restful sleep.

With time and consistency, those 5 AM wake-ups can become a thing of the past.

Sweet dreams!

FAQs

How to Tell if Your Toddler’s Early Wake-Ups Are Due to Hunger

If your toddler is waking up early and seems unusually hungry, it might be due to not eating enough during the day or a growth spurt. Consider adjusting their dinner time or offering a small bedtime snack to see if it helps.

Can Teething Affect My Toddler’s Early Wake-Ups?

Yes, teething pain can disrupt your toddler’s sleep and cause them to wake up earlier or more frequently. Using teething gels, providing comfort, or offering a chilled teething toy may help soothe their discomfort.

Can a Toddler’s Nap Schedule Affect Their Early Wake-Ups?

Yes, if your toddler naps too late or for too long during the day, it can interfere with their nighttime sleep and lead to early wake-ups. Try adjusting nap times and durations to ensure they’re not too close to bedtime.

How to Know if Your Toddler Is Ready to Transition to One Nap?

If your toddler consistently resists their afternoon nap or takes a long time to fall asleep at bedtime, it might be a sign they’re ready to transition to one nap. Typically, this happens around 2 to 3 years old. 

Choosing the right stroller for your child can be overwhelming, especially when you’re unsure about age limits.

At what age should you start using a stroller, and when is it time to stop?

Many parents struggle with this decision, juggling safety, comfort, and their child’s growing independence.

In this guide, we simplify the process by offering clear, age-appropriate recommendations.

From newborn-friendly designs to the best options for toddlers, we’ll help you understand the stroller age limits and when it’s time for your child to leave the stroller behind.

When Can Your Baby Start Using a Stroller?

When Can Your Baby Start Using a Stroller?

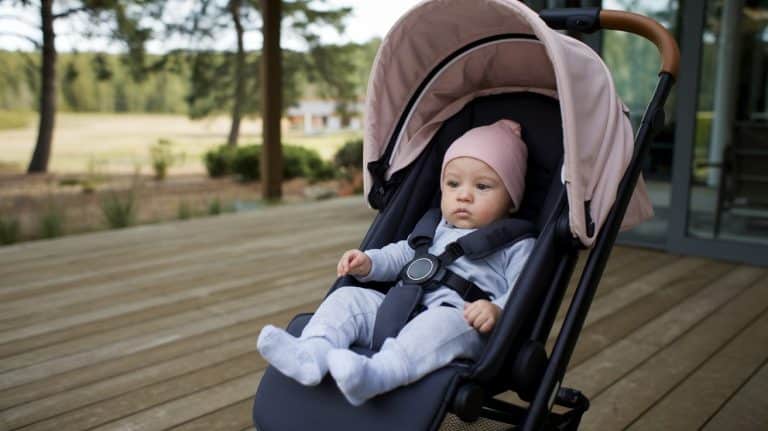
Babies can start using strollers right from birth, but it’s important to choose the right one.

In the first few months, babies lack the strength to sit up or support their head, so strollers designed for newborns are essential for their safety and comfort.

Typically, babies develop better neck and head control around 6 months, at which point they can begin using strollers with more upright seating options.

Until then, ensure you select strollers that offer full recline and proper support for your newborn.

For newborns, the best stroller options include:

  • Bassinet Strollers: Provide a fully reclined position for optimal support, perfect for newborns.
  • Travel System Strollers: Include a detachable car seat, allowing easy transitions between car and stroller without disturbing the baby.
  • Full-Feature Strollers: Offer adjustable reclines, handles, large canopies, and ample storage, and grow with your baby.

Choosing the right stroller for your baby ensures both comfort and safety during outings.

Key Considerations When Picking a Stroller for Different Ages

Key Considerations When Picking a Stroller for Different Ages

As your child grows, their stroller needs will evolve. It’s important to choose a stroller that supports each stage of development while keeping safety in mind. Here’s what to look for at different ages:

Age-Based Stroller Features

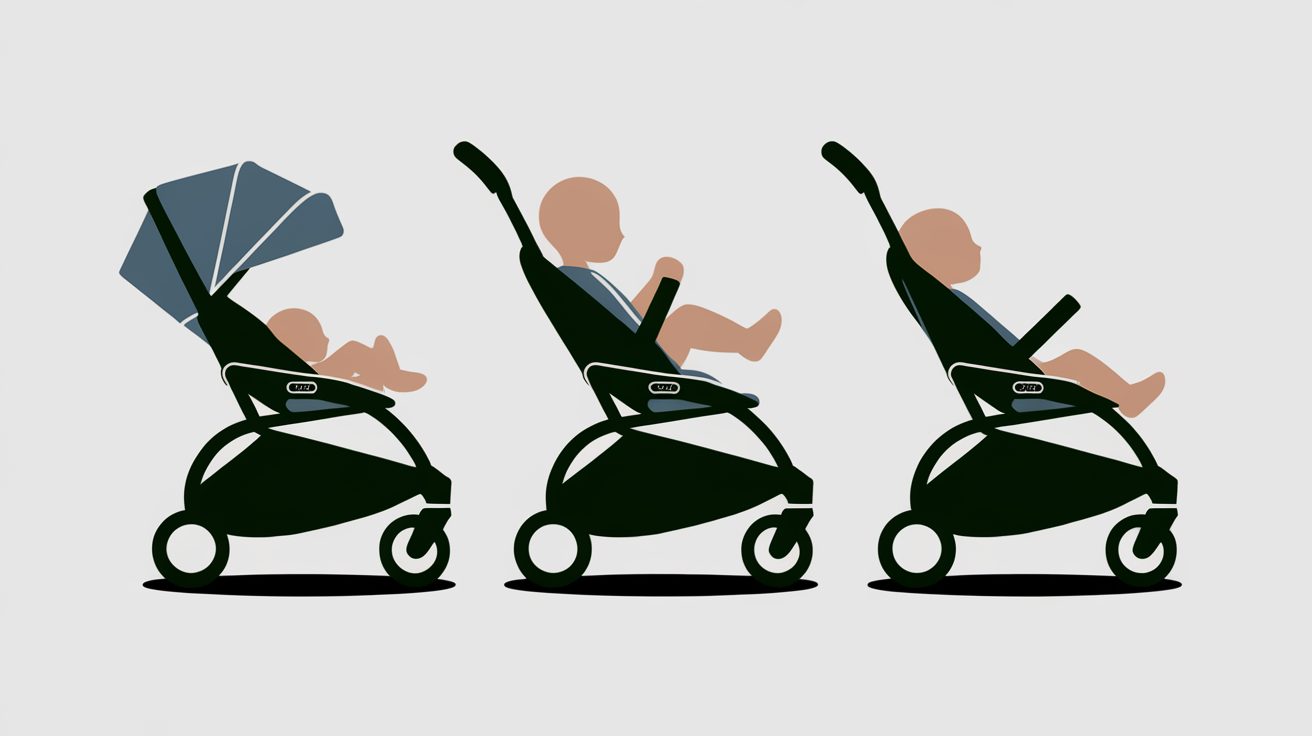
0-6 Months:
Newborns need full head and neck support. Choose strollers with fully reclining seats, allowing your baby to lie flat for safety and comfort. Smooth suspension is essential to absorb bumps for a stable ride.

6-12 Months:
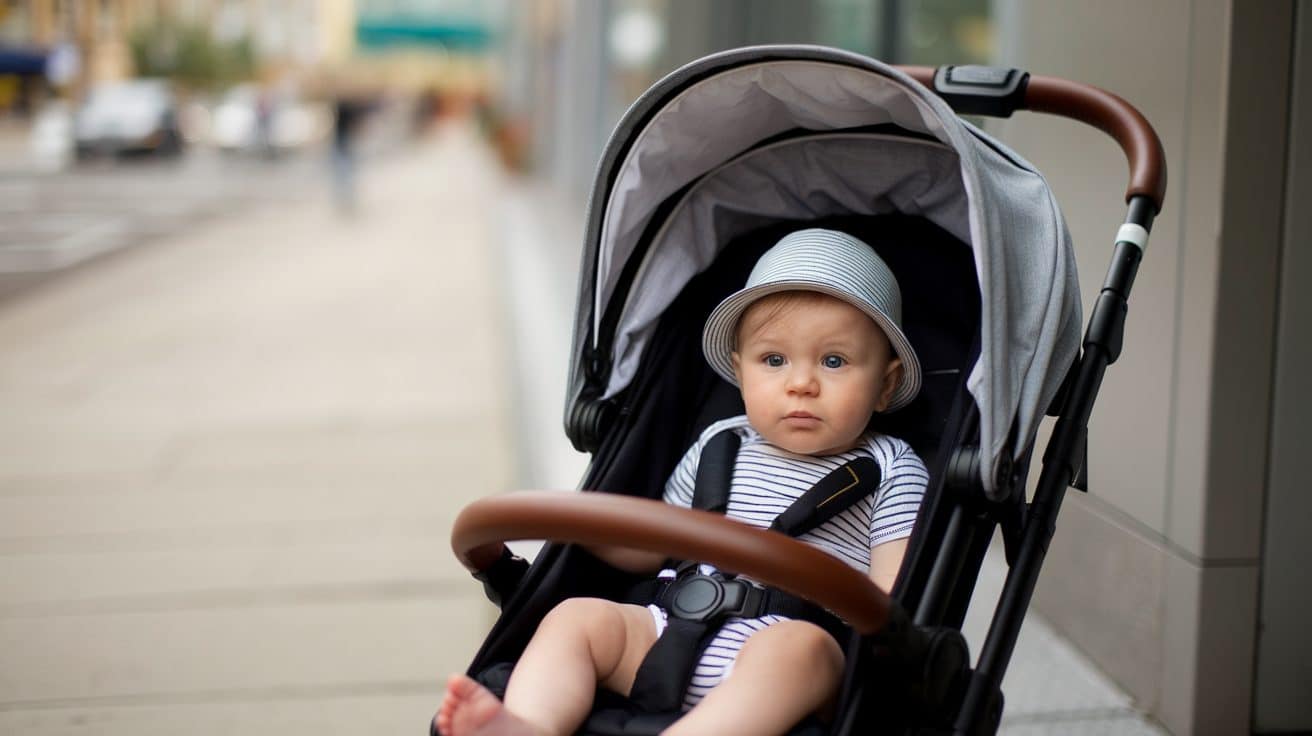
Once your baby gains neck control, look for strollers with adjustable seats. Choose models that can be rear-facing (for bonding) or forward-facing (for exploration). This flexibility helps your baby transition as they become more curious.

12-24 Months:
For active toddlers, opt for lightweight, compact strollers that are easy to fold and carry. These are perfect for quick trips and are easy to store in tight spaces like car trunks or closets.

Safety Guidelines

Brakes:

  • Ensure the stroller has reliable, easy-to-use brakes.
  • Brakes should be simple to engage, especially on slopes or uneven surfaces.
  • Whether foot-operated or hand-operated, strong brakes help prevent accidents and keep your child safe.

Five-Point Harness:

  • A five-point harness is essential for all ages.
  • Includes straps over shoulders, around the waist, and between the legs.
  • Keeps your child securely in place and prevents slipping or climbing out.
  • Always use the harness every time your child is in the stroller.

Stability:

  • Opt for a stroller with a wide base for extra stability.
  • A wider frame reduces the risk of tipping over.
  • Stability is crucial for active toddlers, who tend to wiggle or reach out during stroller rides.

When Is Your Child Too Old for a Stroller?

When Is Your Child Too Old for a Stroller?

Most pediatric experts agree that children around the age of 3 to 4 years are generally ready to transition out of regular stroller use.

By this age, most toddlers have developed enough strength, balance, and coordination to walk independently for longer periods.

At this point, extended stroller use might interfere with their natural urge to explore and be active.

While strollers are helpful for long outings, parents are encouraged to reduce stroller time once their child shows signs of independence.

Signs your child may be ready to graduate from the stroller include:

  • Walking Confidently: If your child can walk without stumbling or needing frequent rests, they may no longer need the stroller.
  • Expressing a Desire to Walk: If your child prefers walking over riding or asks to get out of the stroller, it’s a sign they are ready for less stroller use.

Experts recommend toddlers get at least three hours of physical activity daily. Prolonged stroller use can limit this, so encouraging walking helps build strength, coordination, and social skills.

How to Gradually Move Your Child Away from Stroller Use?

How to Gradually Move Your Child Away from Stroller Use?

As your child grows, transitioning out of stroller use becomes an important step toward promoting independence.

This change can be gradual, allowing both you and your child to adjust without it feeling too abrupt.

  • Short Walks: Start with short walks, like around the block or to a nearby park. Gradually increase the distance as your child becomes more comfortable with walking.

  • Ride-On Boards: For longer outings, consider using ride-on boards that attach to the stroller. These allow your child to stand and rest when needed while still using the stroller when necessary.

Encouraging walking independence is key. Here are some ways to make the process smoother:

  • Positive Reinforcement: Praise your child for walking on their own to help build their confidence.
  • Making Walking Fun: Turn walking into a game, point out interesting things, or let your child carry small items to make the experience more enjoyable.

Final Thoughts

There’s no strict age limit for when to stop using a stroller—every child develops at their own pace.

While strollers are convenient, it’s important to encourage walking as your child grows. Walking helps with both physical and cognitive development.

Look for signs that your child is ready to move away from the stroller, like walking independently or expressing a desire to walk.

Gradual transitions, with lots of praise, can make this shift easier. The key is to find a balance between supporting your child’s independence and still enjoying the convenience a stroller offers when needed.

By being mindful of these changes, you’ll help your child become a confident walker while still having the stroller on hand for those long days or when they’re just too tired.

Frequently Asked Questions (FAQs)

What Age Do You Stop Using a Stroller?

Most children stop using a stroller around 3 to 4 years old when they can walk confidently for longer periods.

What Is a Stroller Suitable For?

A stroller is suitable for safely carrying babies and toddlers, especially during long walks, outings, or when they need a break from walking.

Does My Seven-Year-Old Need a Stroller at Disney?

A seven-year-old may not need a stroller, but for long days at Disney, having one can be helpful if they get tired from walking.

What Type of Stroller Is Best for Newborns?

A bassinet stroller or travel system is best for newborns as it offers full reclining support, which is necessary for proper neck and back alignment.

Are you a new parent trying to figure out all those baby expenses? You’ve probably got a baby monitor on your shopping list—but did you know it might be FSA eligible?

That little device that brings peace of mind when your baby sleeps might actually save you money on taxes. Many parents don’t realize they could use their Flexible Spending Account funds for this essential item.

Between diapers, formula, and all the gear babies need, every dollar counts. Finding out which baby items qualify for FSA coverage can make a real difference in your budget.

Are you wondering if your baby monitor makes the cut?

Before we discuss the FSA details, let’s first understand baby monitors and why they’ve become a must-have for today’s parents.

What’s a Baby Monitor?

What's a Baby Monitor?

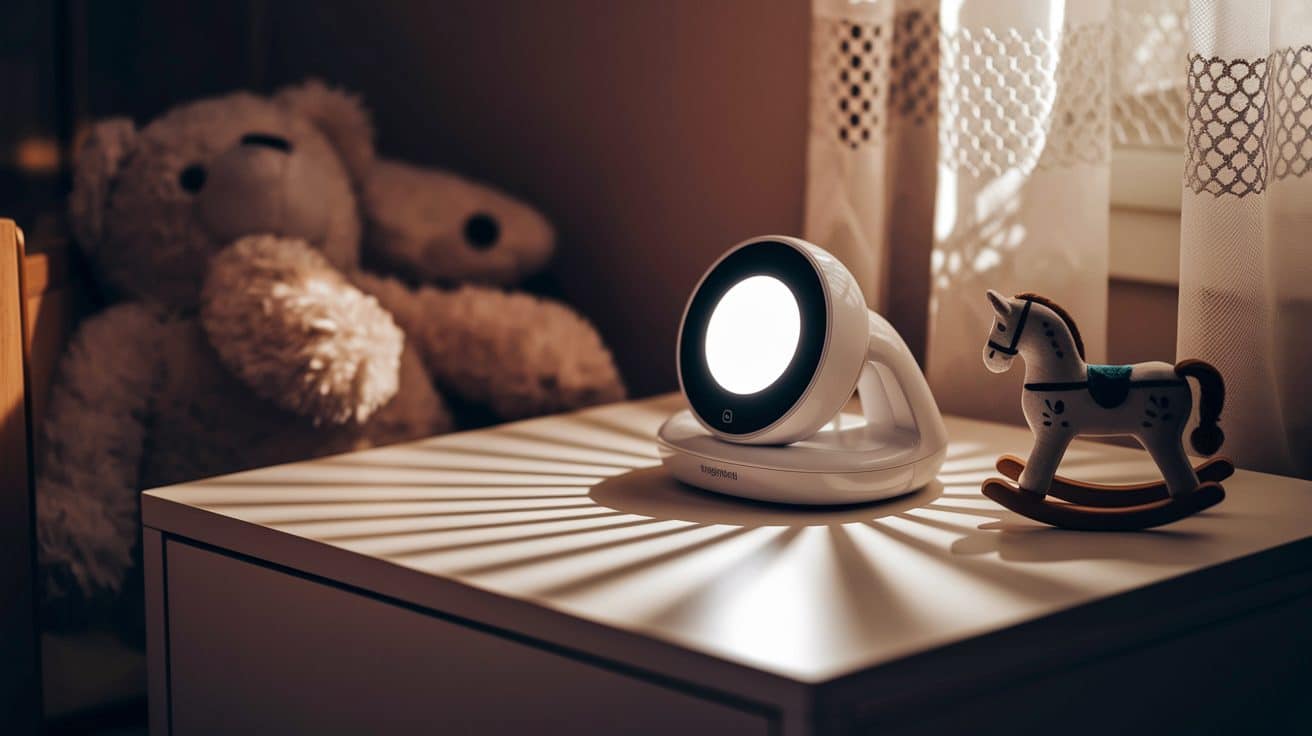
A baby monitor is your extra set of eyes and ears when you can’t be in the same room as your little one. Think of it as a window into your baby’s world when you’re doing dishes, taking a shower, or trying to get some sleep yourself.

Why Would You Need One?

Ever wished you could be in two places at once? That’s exactly what a baby monitor does for tired parents! It lets you know when your baby needs you,

For first-time parents, these devices can be a lifesaver during those nerve-wracking early weeks. They help you balance hovering over the crib and getting much-needed personal space.

Now that you know about these handy devices, let’s examine how baby monitors work to keep your little one safe.

How Do Baby Monitors Work?

Baby monitors use technology to help you keep tabs on your child. They connect a device in your baby’s room to a receiver you carry.

The basic setup includes:

  • A transmitter unit in your baby’s room
  • A parent unit you keep with you
  • A range of about 600-1,000 feet in most homes

Newer models connect to your smartphone through Wi-Fi. This lets you check on your baby even when you’re not at home.

These little devices bring peace of mind to parents everywhere. But can you pay for one with your FSA account? Let’s find out next.

FSA Basics: What You Need to Know

FSA Basics What You Need to Know

An FSA (Flexible Spending Account) helps you save money on health costs. It lets you set aside money from your paycheck before taxes are paid.

What is an FSA? This special account holds money just for health expenses. Since the money isn’t taxed, you get more bang for your buck. Think of it as getting a discount on medical items you’d buy anyway.

How does it work? When you buy something that qualifies, you can use FSA funds to pay for it. This means you’re using pre-tax dollars, which can save you 20-30% compared to using regular money.

Who decides? The IRS creates rules about what items qualify for FSA spending. Your specific FSA provider may have additional guidelines, too. The IRS updates these rules occasionally, so checking before purchasing is smart.

But the big question for new parents is: Which baby monitors actually qualify for FSA coverage? Let’s find out which models you can buy using your pre-tax dollars.

Which Baby Monitors Can You Buy with FSA?

FSA-Eligible Monitors:

Type of Monitor Features Requirements Additional Information
Medical-grade monitors Track breathing, heart rate, oxygen levels Letter of Medical Necessity from pediatrician explaining specific health concern Often more expensive than standard monitors ($150-$400)
Smart sock monitors Monitor vital signs through the foot sensor Doctor’s note stating medical reason, such as premature birth or respiratory issues The battery typically lasts 18-24 hours before recharging
Specialized breathing monitors Alert for apnea or breathing pauses Prescription or detailed note from the doctor explaining risk factors May require a monthly subscription for advanced tracking ($5-$15/month)
Medical condition monitors For babies with specific health concerns Detailed documentation of the baby’s condition and why monitor is necessary Some insurances may cover part of the cost before FSA is used

Regular Monitors Don’t Qualify:

Standard audio or video baby monitors don’t make the FSA cut. These everyday monitors help you hear crying or see if your baby is awake, but they don’t have medical tracking features.

The IRS views regular monitors as ordinary parenting tools, not medical devices. This means the basic monitor on your registry likely won’t qualify for those tax-free FSA dollars.

What’s the key difference? FSA-eligible monitors must serve a medical purpose beyond just letting you know when your baby is fussing.

Things to Check Before Buying

Things to Check Before Buying

Before spending your hard-earned FSA dollars on a baby monitor, here are some important things to consider:

  • Medical Need: Think about whether your baby truly needs a medical monitor for health reasons. Is your pediatrician concerned about breathing issues, heart rate, or oxygen levels? Regular parenting worries usually don’t qualify, but genuine medical concerns might.
  • FSA Provider Rules: Each FSA administrator has their own set of guidelines. Some providers are more flexible than others about what they’ll approve. It’s worth a quick call to your specific provider before making a purchase.
  • Documentation: Most FSA providers will ask for a letter of medical necessity from your doctor. This note should explain your baby’s condition and why this specific monitor is needed for their health—not just for your peace of mind.
  • Product Features: Look for monitors specifically marketed as “medical-grade” or “health tracking.” These usually mention vital sign monitoring rather than just audio or video capabilities. The packaging or product description often states if it’s FSA/HSA eligible.

Making sure you check these boxes can save you from the headache of denied claims and help you make the most of your healthcare funds.

How to Use FSA Funds for a Baby Monitor

How to Use FSA Funds for a Baby Monitor

Ready to put those tax-free dollars to work for your baby’s health? Here’s how to use your FSA funds to purchase an eligible monitor:

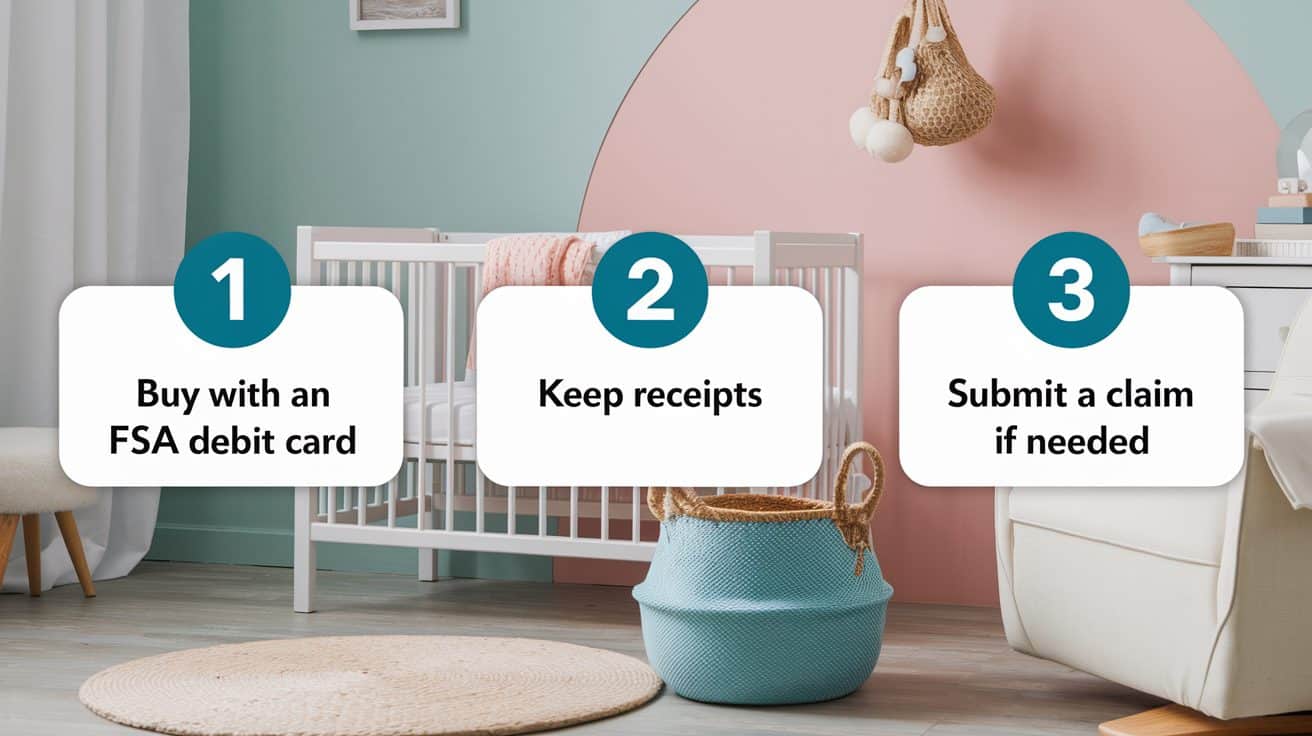
  • FSA Debit Card: The simplest way is to pay with your FSA debit card at checkout. Many medical supply stores and online retailers specializing in FSA-eligible items will process these transactions automatically. Just swipe your card like you would a regular credit card.
  • Reimbursement: If you prefer another payment method, keep your itemized receipt. You must submit this receipt to your FSA administrator along with a claim form. Most providers offer online portals where you can upload photos of your receipts and get paid back within a few weeks.
  • Double-Check Before Buying: Contact your FSA provider directly before spending money. Ask them specifically about the monitor you plan to purchase. This quick phone call can save you from the disappointment of a rejected claim.

Remember that the rules can change, so what qualified last year might not qualify this year. A little preparation can save you frustration later when using your FSA benefits for your baby’s needs.

Making the Most of Your FSA!

Navigating the world of FSA-eligible baby monitors doesn’t have to be complicated. With the right information and some preparation, you can put those pre-tax dollars to work for your family.

Remember that medical necessity is the key factor in whether your baby monitor qualifies. While standard video monitors typically don’t cut, those that track vital health metrics often do—with proper documentation.

Before you shop, call your FSA provider to check if your chosen monitor qualifies. This small step can save you money and stress.

Ready to find the right monitor for your family?

Check out our recommended FSA-eligible baby monitor guide and start shopping with confidence. Your baby’s health—and your wallet—will thank you!

Ever found yourself pacing the floor at 3 AM with a wide-awake baby? Your eyes burn tired while your little one seems ready to party all night!

This upside-down sleep schedule wasn’t covered in any baby books you read.

This flipflop between day and night leaves parents desperate for answers. Why do babies mix up their sleep times? And when will this exhausting phase finally end?

The struggle is real—but there’s hope! Most babies don’t keep this backward schedule forever. Their tiny bodies are learning how the world works, including when to sleep and when to play.

Ready for good news? This article explains exactly when most babies start sleeping more at night, what causes this confusing phase, and practical tricks to speed up the process.

Better sleep might be just around the corner!

Understanding Day-Night Confusion

Understanding Day-Night Confusion

The first weeks with your baby often bring unexpected sleep surprises that catch parents off guard.

What Is Day-Night Confusion?

Imagine your baby’s internal clock is like a watch without hands—it exists but doesn’t track time correctly yet.

Babies haven’t synced up with our 24-hour cycle during their first weeks. Their bodies produce sleep hormones at random times, creating those unpredictable napping patterns.

This biological mix-up means your little one might be energized at midnight and dozing deeply at noon.

When Does It Start?

Babies bring their womb habits into the world from their first breath. Inside their moms, the gentle rocking and muffled sounds often lull them to sleep during daytime activities.

Then suddenly—welcome to planet Earth! The stillness of night feels strange and unfamiliar to them, while daylight hours feel like the comfort they knew before birth.

Most pediatricians recognize this reversed pattern as a universal first step in sleep development, not a sign of future sleep troubles.

Why Do Babies Get Their Days and Nights Mixed Up?

Why Do Babies Get Their Days and Nights Mixed Up?

Looking at your baby’s recent history, the puzzle of backward sleep schedules makes more sense.

1. Their Internal Clock Isn’t Developed Yet
Your baby arrives without the built-in sleep timer adults take for granted. This natural body clock—called the circadian rhythm—needs time to form after birth.

During these early weeks, your baby’s brain hasn’t learned to release sleep hormones like melatonin when it gets dark. Instead, sleep comes in random chunks throughout the day and night.

2. They Slept Opposite in the Womb
Think about life before birth—your movements during the day gently rocked your baby to sleep. Your walking, talking, and daily activities created a soothing cradle effect.

When you settle down at night, that familiar motion stops. Without this rocking, babies often perk up and start their strongest kicks and movements.

3. Lack of Natural Daylight Cues
Sunlight plays a key role in teaching our bodies when to be alert and when to rest. But your newborn just spent months in darkness.

Their brand-new eyes and brains need time to recognize these light signals. Until they learn these cues, their bodies don’t know how to wind down when the sun sets.

This natural learning process takes weeks as their tiny systems adjust to life outside the womb.

Common Mistakes Parents Make with Newborn Sleep

While helping your baby adjust to day and night, certain approaches can make the process harder. Being aware of these common pitfalls can save you time and frustration.

  • Using bright lights during night wakings confuses your baby’s developing circadian rhythm.
  • Engaging in playful interaction at night teaches babies that darkness is playtime.
  • Allowing excessively long daytime naps reduces the sleep pressure needed for night sleep.
  • Following inconsistent daily schedules makes it harder for babies to recognize sleep cues.
  • Creating too much excitement before bedtime can overstimulate and prevent drowsiness.
  • Keeping your home at the same noise and light levels day and night removes important day-night signals.

Small adjustments to your approach can help your baby learn day-night differences more quickly.

Help Your Baby Differentiate Day from Night

Help Your Baby Differentiate Day from Night

1. Use Natural Light: Natural sunlight is a powerful teacher for your baby’s developing body clock. Exposure to morning light sends signals to their brain that it’s time to be awake.

  • Open curtains during morning feedings
  • Enjoy the short outdoor time when possible
  • Keep the house bright during daytime hours

2. Create a Calm Night Environment: Creating contrast between day and night helps babies learn when sleep should happen. The darker and quieter your home is at night, the faster they’ll catch on.

  • Dim lights during evening feeds and changes
  • Keep nighttime interactions boring and brief
  • Use white noise to block household sounds

3. Keep Days Active: Daytime engagement helps wear babies out in the right way. Simple activities can make a big difference in assisting them to stay awake when they should.

  • Talk, sing, and make eye contact during the day
  • Keep daytime naps in bright rooms
  • Gently wake them if daytime naps stretch too long

4. Start a Simple Routine: Babies thrive on predictability, even when tiny. A basic bedtime pattern creates sleep cues they’ll begin to recognize.

  • Follow the same steps each night before bed
  • Start your routine around the same time
  • Keep it short and sustainable

Still need more help with your baby’s sleep?

Check out our other articles on
Nap Training Guide
Sleep Training Your Newborn
Sleep Training Not Working

When Will the Day-Night Confusion Finally End?

When Will the Day-Night Confusion Finally End?

Every tired parent wants this question answered! 

The good news is that day-night confusion doesn’t last forever. As their brains develop, most babies naturally sort out their sleep timing.

Many babies show real progress in their sleep patterns by 6 to 8 weeks. This doesn’t mean they’ll sleep through the night, but you should notice positive changes.

Encouraging signs that your baby is figuring things out:

  • Sleep stretches at night, gradually extending to 3-4 hours
  • More alert and playful periods during daylight hours
  • Easier to wake up for daytime feedings
  • Less fussiness in the evenings

 Every baby works through this phase at their own pace. Some babies might catch on quickly, while others need a few extra weeks to figure it out. 

The consistent routines you establish now build the foundation for healthy sleep habits later.

Remember that this challenging phase is temporary. Even if progress seems slow, your baby learns and adapts daily!

Note: If your baby still seems to have significant day-night confusion beyond two months, or if you’re concerned about their sleep patterns, it’s always a good idea to check with your pediatrician to rule out any underlying issues.

The End of Confusion!

Your baby’s mixed-up sleep schedule won’t last forever, Promise! Most little ones sort out their days and nights within a few weeks.

Be patient. Stay consistent. Small changes make big differences during this challenging time.

Watch for signs of progress. Maybe your baby sleeps a bit longer at night. Perhaps they’re more alert during daytime hours. These small wins show you’re heading in the right direction.

Every baby is unique. Some figure it out quickly, and others need more time to adjust. Either way, clearer days and calmer nights are coming soon.

Want better sleep for the whole family? Try one tip from this article today. 

Better sleep is just around the corner!

A cuddly bear in a red shirt, sitting with a pot of honey – who doesn’t smile at the thought of Winnie the Pooh?

There’s something so sweet and simple about Pooh Bear and his friends that makes both kids and grown-ups feel right at home.

Maybe it’s those gentle life lessons hidden in every story or just how Pooh sees the world through honey-tinted glasses.

Either way, this lovable bear has been making hearts happy for nearly 100 years!

So grab your favorite stuffed animal, and Come along as I share how we turned our baby shower into a cozy corner of the Hundred Acre Wood!

Setting the Scene: Decor Ideas

1. Hundred Acre Wood Entrance Sign

Hundred_Acre_Wood_Entrance_Sign

Welcome guests with a wooden sign pointing to ‘Hundred Acre Wood.’ Use old planks or cardboard painted to mimic wood texture, adding charming imperfections for an authentic feel. Include playful arrows for places like ‘Pooh’s House’ or ‘Rabbit’s Garden.’

Budget Tip:

  • Use scrap wood from old furniture or pallets.
  • Print and glue wood textures from free online resources.
  • Hand-paint signs with leftover paint or marker for details.

2. Balloon Honeycomb Backdrop

Balloon_Honeycomb_Backdrop

Stack yellow and gold balloons in a honeycomb pattern for a cheerful photo spot. Add paper bees with smiling faces for a playful touch. The backdrop can serve as a main focal point for photos and is easy to assemble with minimal supplies. 

Budget Tip:

  • Buy balloons in bulk from dollar stores or online sales.
  • DIY bee cutouts from colored paper or printable templates.
  • Use double-sided tape or fishing line instead of pricey balloon strips.

3. Pooh’s Honey Pot Centerpieces

Poohs_Honey_Pot_Centerpieces

Fill mason jars labeled ‘Hunny’ with bright flowers, twine, or gingham fabric wraps for extra charm. Add small bee decorations or honey drips painted on the jars. These centerpieces tie the theme together beautifully and can be placed on every table for a consistent look.

Budget Tip:

  • Repurpose mason jars from your kitchen or collect from friends.
  • Use wildflowers or seasonal blooms for a cost-effective option.
  • Print labels on plain paper, glue them on, and coat with clear tape.

4. Storybook Quote Banners

Storybook_Quote_Banners

Print classic Pooh quotes on cardstock, cut into banner shapes, and string them with pastel ribbons or twine. Hang them above tables, entrances, or the photo booth for a nostalgic and heartwarming touch. This decor piece adds literary charm to the event.

Budget Tip:

  • Use free printable templates found online.
  • Repurpose old ribbons, twine, or string from home.
  • Print multiple quotes per page to save on paper and ink.

5. Stuffed Pooh & Friends Display

Stuffed_Pooh__Friends_Display

Scatter plush toys of Pooh, Piglet, Tigger, and Eeyore around tables, gift areas, and seating corners. Add honey pots and tiny paper bees for extra detail. This display creates a cozy, playful atmosphere that feels straight out of the Hundred Acre Wood.

Budget Tip:

  • Borrow plush toys from family, friends, or local swaps.
  • Check thrift stores or second-hand shops for budget-friendly options.
  • DIY small bees from cotton balls, pipe cleaners, and paint.

6. Bee and Honey-Themed Garland

Bee_and_Honey-Themed_Garland

String paper bees and honey pots along walls or tables. Cut shapes from colored paper and add small wings for a 3D effect. This charming garland adds a buzzing touch to the decor and pairs well with the theme.

Budget Tip:

  • Use scrap paper or cardstock from old projects.
  • Print free bee templates from craft sites.
  • Hang with twine or yarn you already have.

7. Tigger’s Bounce Zone

Tiggers_Bounce_Zone

Set up a playful bounce area with pillows or mini trampolines for kids to jump like Tigger. Add Tigger plush toys and stripes for fun. It keeps little guests entertained and adds energy to the event.

Budget Tip:

  • Use pillows and cushions from home.
  • Borrow mini trampolines if possible.
  • Decorate with paper stripes instead of fabric.

8. Pastel Yellow & Soft Brown Color Scheme

Pastel_Yellow__Soft_Brown_Color_Scheme

Use pastel yellow and brown for tablecloths, balloons, and banners. This color palette feels warm, inviting, and unmistakably Pooh-themed without being overwhelming.

Budget Tip:

  • Reuse linens or tableware in matching colors.
  • Buy paper decor in bulk from dollar stores.
  • Mix in neutral decor items you already own.

9. ‘Hunny Pot’ Balloon Display

Hunny_Pot_Balloon_Display

Create a balloon display shaped like a honey pot spilling over. Add paper honey drips for detail. This eye-catching piece adds whimsy and charm to your decor.

Budget Tip:

  • Use cardboard for the pot base.
  • Buy balloons in bulk to save money.
  • DIY honey drips from construction paper.

10. Floral Hundred Acre Wood Backdrop

Floral_Hundred_Acre_Wood_Backdrop

Make a backdrop with artificial flowers, greenery, and cut-outs of Pooh characters. It serves as a stunning photo spot and brings the outdoors inside.

Budget Tip:

  • Buy faux flowers from dollar stores.
  • Reuse old craft supplies for cutouts.
  • Borrow greenery decor if possible.

Invitations & Stationery

11. Handmade Winnie the Pooh Invitations

Handmade_Winnie_the_Pooh_Invitations

Design custom invitations featuring Pooh and friends using printable templates or simple illustrations. Include cute phrases like “A little hunny is on the way!” These handmade invites add a personal touch and set the mood for the baby shower.

Budget Tip:

  • Design invitations with free online tools like Canva.
  • Print at home on cardstock.
  • Use envelopes you already have or buy in bulk.

12. Beeswax-Sealed Envelopes

Beeswax-Sealed_Envelopes

Add a honeybee wax seal to each envelope for a charming finish. Use gold or yellow wax for a honey-like effect. This little detail makes invites feel extra special.

Budget Tip:

  • Use bee-themed stickers instead of wax.
  • Buy a wax seal kit from discount stores.
  • Melt crayons for a DIY wax seal.

13. Scroll Invitations

Scroll_Invitations

Roll up paper invites like a map to the Hundred Acre Wood. Tie with twine or ribbon for a vintage feel. It’s unique and adds an adventurous charm to your baby shower.

Budget Tip:

  • Use printer paper aged with tea or coffee.
  • Tie with yarn instead of ribbon.
  • Print in black and white to save on ink.

14. Personalized Pooh-Themed Thank You Cards

Personalized_Pooh-Themed_Thank_You_Cards

Send thank-you notes featuring Pooh characters and heartfelt messages. Handwritten notes add sincerity, and Pooh designs keep the theme alive.

Budget Tip:

  • Design and print cards at home.
  • Use blank note cards and add Pooh stickers.
  • Send digital thank-you notes to save costs.

15. Table Number Signs with Pooh Quotes

Table_Number_Signs_with_Pooh_Quotes

Label tables with numbered cards featuring Pooh quotes like “Sometimes the smallest things take up the most room in your heart.” This adds sweetness and helps guests find their seats.

Budget Tip:

  • Print and frame at home.
  • Use small chalkboards if available.
  • Handwrite quotes on cardstock.

Fun Activities and Games

16. Pin the Tail on Eeyore

Pin_the_Tail_on_Eeyore

A classic party game with an adorable twist. Draw or print Eeyore on a large board and have guests pin the tail while blindfolded. It’s fun, easy, and loved by all ages.

Budget Tip:

  • Draw Eeyore yourself or print a free template.
  • Use yarn or fabric scraps for the tail.
  • Borrow a blindfold or use a scarf.

17. Guess the Baby’s Name with Pooh Quotes

Create cards with famous Pooh quotes and have guests match them to baby name suggestions. It sparks creativity and laughter during the party.

Budget Tip:

  • Print cards on plain paper.
  • Use online Pooh quote collections for free.
  • Repurpose index cards or scrap paper.

18. Hunny Pot Toss Game

Hunny_Pot_Toss_Game

A ring toss game using honey pots as targets. Paint or decorate containers as honey pots and let guests aim for them. It’s simple and fun.

Budget Tip:

  • Use plastic containers from your kitchen.
  • Make rings from paper plates.
  • Decorate with leftover craft supplies.

19. Winnie the Pooh Trivia Game

Winnie_the_Pooh_Trivia_Game

Test guests’ knowledge with a trivia game about Pooh and his friends. Prepare questions on the books, movies, and characters.

Budget Tip:

  • Create trivia sheets with free templates.
  • Print questions at home.
  • Use small prizes like candy for winners.

20. Honey Bee Relay Race

Honey_Bee_Relay_Race

Guests race while balancing a plush bee on a spoon. It’s a lighthearted and engaging activity for all ages.

Budget Tip:

  • Use a stuffed toy or paper bee.
  • Borrow spoons from your kitchen.
  • Use masking tape to create a race track.

21. Who Said It? Pooh or Parents?

Who_Said_It_Pooh_or_Parents

Create cards with classic Pooh quotes and fun phrases from the parents-to-be. Guests guess who said each line, making for plenty of laughs and memories.

Budget Tip:

  • Use free printable templates.
  • Print at home on scrap paper.
  • Handwrite quotes if needed.

22. Guess the Honey Flavor

Guess_the_Honey_Flavor

Offer small samples of various honey flavors for guests to taste and identify. It’s a sweet and interactive game that fits the theme perfectly.

Budget Tip:

  • Buy honey samples in bulk or local markets.
  • Use small cups for sampling.
  • Borrow honey dippers.

23. Storytime with Classic Pooh Books

Storytime_with_Classic_Pooh_Books

Set aside a cozy corner with classic Pooh books for guests to enjoy. Have someone read aloud for a nostalgic touch.

Budget Tip:

  • Borrow books from a library.
  • Use cushions and blankets from home.
  • Print Pooh images for decor.

24. Baby Onesie Decorating with Pooh Designs

Baby_Onesie_Decorating_with_Pooh_Designs

Guests decorate plain onesies with Pooh-inspired designs using fabric markers and stencils. It’s a fun activity with a lasting keepsake.

Budget Tip:

  • Buy plain onesies in bulk.
  • Use DIY stencils from printed images.
  • Provide fabric markers from craft stores.

25. Tigger Bounce Challenge

Tigger_Bounce_Challenge

Host a jumping contest inspired by Tigger’s endless energy. Guests compete to see who can bounce the longest or highest.

Budget Tip:

  • Use jump ropes or trampolines you already own.
  • Borrow equipment if possible.
  • Use a stopwatch app for timing.

Food & Drinks

26. Hunny Jar Cupcakes

Hunny_Jar_Cupcakes

Bake cupcakes with honey drizzle on top, decorated with small bee toppers or Pooh character picks. These sweet treats are easy to make and a hit with guests.

Budget Tip:

  • Bake cupcakes at home with basic ingredients.
  • Use printable toppers instead of store-bought.
  • Buy honey in bulk for savings.

27. Beehive Cake

Beehive_Cake

A beehive-shaped cake with honey-colored frosting and fondant bees is a stunning dessert. It serves as a centerpiece and a delicious treat.

Budget Tip:

  • Use a bundt pan for the beehive shape.
  • Decorate with simple icing instead of fondant.
  • Bake at home to save money.

28. Piglet’s Pink Lemonade

Piglets_Pink_Lemonade

Serve pink lemonade in clear cups with Piglet-themed straws or tags. This refreshing drink adds a pop of color and a nod to Piglet’s charm.

Budget Tip:

  • Make lemonade from concentrate.
  • DIY straw tags with printed Piglet images.
  • Use cups from discount stores.

29. Tigger’s Striped Macarons

Tiggers_Striped_Macarons

Macarons decorated with orange and black stripes to resemble Tigger’s playful pattern. They’re fun, flavorful, and fit the theme perfectly.

Budget Tip:

  • Make sugar cookies with striped icing instead.
  • Buy macarons in bulk and decorate at home.
  • Use food coloring for stripes.

30. Pooh’s Pudding Jars

Poohs_Pudding_Jars

Individual jars filled with banana pudding labeled ‘Hunny.’ Add a dollop of whipped cream and a honey drizzle for extra sweetness.

Budget Tip:

  • Reuse small jars from home.
  • Make pudding from instant mix.
  • Print labels yourself.

31. Eeyore’s Blueberry Muffins

Eeyores_Blueberry_Muffins

Blueberry muffins inspired by Eeyore’s blue-gray color palette. Serve in blue liners for an extra touch. Add a small Eeyore image or quote next to the serving tray. 

Budget Tip:

  • Bake muffins from a mix or scratch for cost savings.
  • Use plain liners and color them with markers or stamps.
  • Buy blueberries in bulk when on sale for better value.

32. Rabbit’s Garden Veggie Platter

Rabbit’s Garden Veggie Platter

Arrange a veggie platter to resemble Rabbit’s garden with carrots, celery, and other fresh produce. Add small signs like ‘Rabbit’s Garden’ made from craft paper or sticks. This healthy snack adds color and freshness to the table.

Budget Tip:

  • Use seasonal vegetables from local markets for lower costs.
  • Make garden signs from recycled craft paper or cardboard.
  • Buy veggies in bulk and prep them yourself.

33. Hundred Acre Wood Punch

Hundred Acre Wood Punch

Serve a fruit punch with floating gummy bears to represent Pooh and friends. Use a large bowl labeled ‘Hundred Acre Wood Punch’ for added fun. This drink is colorful, refreshing, and perfect for both kids and adults.

Budget Tip:

  • Use store-brand juice mixes for affordability.
  • Add frozen fruit instead of expensive garnishes.
  • Buy gummies in bulk to save money.

34. Kanga’s Roo-cakes (Mini Pancakes)

Kangas_Roo-cakes_Mini_Pancakes

Mini pancakes drizzled with honey and syrup, served as ‘Roo-cakes.’ Stack them neatly and add a small sign with Roo’s face. These bite-sized pancakes make a sweet breakfast treat or snack.

Budget Tip:

  • Make pancakes from scratch with simple ingredients.
  • Use honey packets from bulk stores for serving.
  • Serve on paper plates or reusable trays to cut costs.

35. Christopher Robin’s Tea Station

Christopher_Robins_Tea_Station

Create a tea station with various tea flavors, honey, and lemon slices. Decorate with a sign saying ‘Time for Tea with Christopher Robin.’ Add small jars of honey and cute cups for a cozy corner.

Budget Tip:

  • Use tea bags you already have or buy in bulk.
  • Reuse jars for honey and lemon slices from home.
  • DIY labels using free templates.

Favors & Keepsakes

36. Mini Jars of Honey

Mini_Jars_of_Honey

Fill mini jars with honey as party favors. Attach tags saying ‘Sweet as Hunny’ with ribbons or twine. This charming takeaway fits the theme perfectly and is practical for guests.

Budget Tip:

  • Buy honey in bulk and fill recycled jars yourself.
  • Use leftover ribbons or twine from past projects.
  • Print tags at home with free designs.

37. Bee-Shaped Soaps

Bee-Shaped_Soaps

Give honey-scented bee-shaped soaps as favors. Wrap them in clear bags tied with a small tag. These fragrant soaps are adorable, useful, and easy to make.

Budget Tip:

  • Make soaps at home using DIY kits.
  • Use bee molds from dollar stores.
  • Wrap with tissue paper or recycled materials.

38. Pooh Bear Cookie Bags

 Pooh Bear Cookie Bags

Send guests home with cookies shaped like Pooh Bear in clear bags tied with ribbons. Add a small thank-you note to each bag for a personalized touch.

Budget Tip:

  • Use cookie cutters you already have.
  • Bake cookies from a mix or scratch.
  • Buy clear bags in bulk from discount stores.

39. Winnie the Pooh Candles

Winnie_the_Pooh_Candles

Small honey-scented candles in jars with Pooh-themed labels make charming favors. Decorate the jars with Pooh images or quotes for added charm.

Budget Tip:

  • Buy plain candles in bulk and add DIY labels.
  • Reuse small jars for a budget-friendly option.
  • Print labels using free online templates.

40. Pooh & Friends Bookmarks

Pooh__Friends_Bookmarks

Create bookmarks featuring Pooh and friends with cute quotes. Laminate them for durability and hand them out as keepsakes.

Budget Tip:

  • Print bookmarks at home on sturdy paper.
  • Use cardstock from old projects or recycled paper.
  • Laminate with clear tape instead of buying laminating sheets.

41. DIY Honey Lip Balm Kits

DIY_Honey_Lip_Balm_Kits

Prepare small honey lip balm kits with tins, ingredients, and labels for guests to take home. Include instructions for a personal touch.

Budget Tip:

  • Buy DIY lip balm kits in bulk.
  • Use bulk ingredients for cost savings.
  • Make labels at home using free design tools.

42. Custom Pooh Bear Tote Bags

Custom_Pooh_Bear_Tote_Bags

Hand out reusable tote bags with Pooh designs. They’re perfect for carrying gifts and are useful after the party too.

Budget Tip:

  • Buy plain tote bags and add iron-on designs.
  • Use fabric markers for hand-drawn details.
  • Purchase in bulk from online stores.

43. Baby Shower Photo Booth Prints

Baby_Shower_Photo_Booth_Prints

Set up a Pooh-themed photo booth with paper props and print instant photos for guests. Add Pooh frames or borders for a cute touch.

Budget Tip:

  • Use a phone camera and portable printer.
  • Make props from colored paper and sticks.
  • Print photos in bulk to save ink.

A Sweet Ending to Our Tale

Like Pooh’s stories, a baby shower brings friends together and makes sweet memories. A Winnie the Pooh theme brings the perfect mix of childhood magic and heartfelt moments to welcome a little one.

Best part? This theme works like magic without breaking the bank. Any space can turn into the Hundred Acre Wood with some creativity and love.

Ready to start your own Pooh-themed celebration?

Save this guide to help you plan! And if you try any of these ideas, tag us in your photos – we’d love to see how you bring the magic of the Hundred Acre Wood to life.

After all, as Pooh says, “A day with friends is a day well spent!”

Every baby goes through thousands of diaper changes. That’s a lot of time with something pressed against your little one’s skin.

Many parents are unaware that regular diapers can contain chemicals that might irritate sensitive skin. The good news is that you have better options.

This guide dispels the confusion about non-toxic diapers. It teaches you what to look for, what to avoid, and which brands actually deliver on their promises.

Whether expecting your first baby or searching for solutions to your child’s diaper rash, you’re in the right place.

We’ll help you find gentle diapers on your baby’s skin, better for the planet and won’t break the bank.

Let’s get to the bottom of what makes a diaper healthier for your little one.

Do Diapers Contain Toxic Chemicals?

Do_Diapers_Contain_Toxic_Chemicals

Regular diapers often contain chemicals that many parents are unaware of. These hidden ingredients deserve a closer look.

Most commonly used diapers contain chlorine, phthalates, and synthetic fragrances.

Chlorine makes diapers white. Phthalates make plastic parts flexible. Fragrances mask odors but hide many undisclosed ingredients.

Some diapers also contain VOCs, dyes, and latex. The absorbent gel layer contains sodium polyacrylate, a super-absorbent polymer that can irritate some babies’ skin.

How these chemicals may affect your baby’s health

These chemicals can cause problems for your baby’s skin. Rashes are common. Allergic reactions happen often. Skin irritation appears where diapers touch.

The long-term effects are more concerning. Some diaper chemicals disrupt hormones, and others are linked to asthma.

Babies have thinner skin than adults, and their skin absorbs chemicals more easily.

Studies and reports on diaper toxicity

Studies have raised red flags about diaper safety. A 2019 report by a French health agency found harmful chemicals in many brands.

Testing detected dioxins, PCBs, and formaldehyde, which can enter a baby’s body through skin contact. Consumer groups have pushed for more transparency, and many companies have removed harmful ingredients.

Now that you know what might be hiding in regular diapers, let’s look at what ingredients you should avoid when shopping for your baby.

What to Avoid in Baby Diapers?

When shopping for safer diapers, check labels carefully. Some ingredients are worth avoiding.

  • Chlorine-based bleaching gives diapers a bright white look, but it creates harmful byproducts called dioxins, which can irritate your baby’s skin and harm the environment.
  • Fragrances and dyes contain dozens of undisclosed chemicals that offer no benefits but can trigger allergic reactions and skin irritation in sensitive babies.
  • Phthalates and parabens lurk in waterproof layers and as preservatives. They can disrupt hormones and absorb through your baby’s delicate skin over time.
  • Lotions and petroleum-based materials are unnecessary additives that prevent the skin from breathing properly. They trap heat and moisture, which can lead to rashes and discomfort.
  • Plastics and synthetic materials, such as polyethylene, prevent proper airflow to your baby’s skin and take hundreds of years to break down in landfills.

Look for diapers with plant-based materials when possible. These breathe better and often cause fewer reactions.

Understanding Diaper Bleaching: TCF vs ECF

Understanding_Diaper_Bleaching_TCF_vs_ECF

Not all “chlorine-free” claims are equal. Let’s break down what those labels mean for your baby.

TCF (Totally Chlorine-Free) uses oxygen or hydrogen peroxide instead of chlorine. No harmful dioxins form. Your baby’s skin never touches chlorine byproducts. The planet thanks you too!

ECF (Elemental Chlorine-Free) skips pure chlorine but uses chlorine dioxide. It creates fewer toxins than traditional bleaching. Some harmful compounds still form. It’s better than regular diapers but not perfect.

Which one is preferable?

TCF wins for the most sensitive babies. No chlorine means no chlorine problems. Your little one gets the gentlest treatment possible. The price difference is often small. Peace of mind comes standard.

Imagine choosing between a swimming pool with diluted chlorine and fresh spring water. Wouldn’t you pick the purest option for something that touches your baby 24/7?

How to Choose Non-Toxic Diapers?

Finding the right diaper for your baby doesn’t have to be complicated. Focus on what matters most to your family.

  • When choosing diapers, consider your baby’s unique needs. Watch for signs of sensitivity, such as red marks or rashes. Test absorbency with overnight wear. Set a budget that works for your family. 
  • Deciding between disposable and clothing diapers depends on your lifestyle. Disposables offer convenience but create waste. Cloth diapers cost less long-term but require washing. 
  • Look for trusted certifications that verify safety claims. OEKO-TEX ensures textiles are tested for harmful substances. EWG Verified means strict ingredient standards. USDA Certified Biobased tells you the percentage of plant-based materials.

The perfect diaper balances your baby’s comfort, values, and budget. Start with small packs to test before buying in bulk.

Some Best Non-Toxic Diapers for Your Baby

Terra Diapers

Terra_Diapers

Terra diapers are made from sustainable, plant-based materials. They are soft, breathable, and great for sensitive skin. They are also free from chlorine, fragrance, and lotions, making them a safer choice for your baby.

Pros Cons
Made from plant-based materials Slightly pricier than regular brands
No chlorine, fragrance, or lotions Not available in all local stores
Soft and breathable for comfort Limited size options

Know more: Terra Diapers

Pampers Pure

Pampers_Pure

Pampers Pure diapers offer a gentle, hypoallergenic option for babies.

They are made with plant-based fibers and are free of fragrances, parabens, and chlorine. Their impressive absorbency will keep your baby dry for hours.

Pros Cons
Hypoallergenic and gentle on the skin Higher cost compared to standard Pampers
Free from chlorine, parabens, and fragrance It may not be as absorbent for overnight use
Soft with strong absorbency Some parents find the fit a bit snug

Know more: Pamper Pure

Hello Bello

Hello_Bello

Hello Bello diapers are affordable and non-toxic. They are soft, absorbent, and come in fun designs. The plant-based liner keeps your baby’s skin happy while the diapers stay free from harsh chemicals.

Pros Cons
Budget-friendly non-toxic option Runs slightly smaller than other brands
Fun and cute designs Not the best choice for overnight use
Free from chlorine, phthalates, and fragrances Some users report occasional leaks

Know more: Hello Bello

Coterie

Coterie

Coterie diapers feel extra soft and luxurious. They are dermatologist-tested and great for babies with sensitive skin. These diapers absorb well and use clean, sustainable materials to keep your baby dry and comfortable.

Pros Cons
Ultra-soft and premium-quality More expensive than other brands
High absorbency for day and night use Only available online
Free from fragrances, dyes, and lotions Some parents find the sizing runs big

Know more: Coterie

Seventh Generation

Seventh_Generation

Seventh Generation diapers are eco-friendly and made from responsibly sourced materials.

They contain no fragrances, lotions, or harmful chemicals. The design is simple yet effective, offering good absorbency without irritating delicate skin.

Pros Cons
Made from FSC-certified plant-based materials Slightly bulkier fit
No chlorine, fragrance, or latex It may not feel as soft as some other brands
It has good absorbency and is gentle on the skin The design is plain compared to other brands

Know more: Seventh Generation

Bamboo Nature

Bamboo_Nature

Bamboo Nature diapers are made with certified eco-friendly materials and are incredibly soft.

These diapers are free from harsh chemicals, making them a great choice for babies with extra-sensitive skin. They are lightweight but still super absorbent.

Pros Cons
Made from sustainable bamboo fibers Slightly more expensive
Free from chlorine, latex, and dyes Not as widely available in stores
Breathable and gentle on baby’s skin It may run a bit larger than standard sizes

Know more: Bamboo Nature

Every baby is different, so the “best” diaper is the one that works for your unique child. Many parents start with one of these top recommendations and adjust based on their baby’s needs.

Are Non-Toxic Diapers Worth the Cost?

Are_Non-Toxic_Diapers_Worth_the_Cost

Non-toxic diapers cost about 5-10 cents more per diaper. This adds up to $150-300 extra yearly.

For this price, your baby will receive less chemical exposure, and many parents will notice fewer rashes and skin problems. More sustainable materials also benefit the planet.

You can save money on better diapers. Buy in bulk. Sign up for subscriptions. Watch for sales. Some families use non-toxic during the day and regular diapers at night.

Your baby will wear thousands of diapers. Small improvements in quality make a big difference over time.

Healthy Diapers, Happy Baby: The Final Thought

Choosing the right diaper matters for your baby’s comfort and health. Non-toxic options reduce exposure to harmful chemicals while being gentle on sensitive skin.

Remember that every small choice adds up. Whether you choose Bamboo Nature for excellence or extremely sensitive skin, Coterie’s ultra-soft diapers prevent reactions.

Start by trying a small pack of non-toxic diapers. Watch how your baby responds. Compare different brands until you find the perfect match for your unique child.

Ready to make the switch?

Take the first step today by choosing healthy diapers for your child’s skin, health, and future. Your little one can’t make this choice, but you can.

Are you dragging yourself through the afternoon slump again? You’re not alone. Most of us hit that wall when our energy crashes and focus fades.

But here’s something that might change your day: a 3-nap schedule could be the fix you need.

Breaking your rest into short naps works with how your body naturally wants to recharge. These little sleep breaks act like reset buttons for your brain throughout the day.

The beauty of this approach is that it can boost your mood, sharpen your thinking, and give you steady energy all day. No special gadgets are needed—just a few minutes and a quiet spot.

Want to wake up to a more refreshed version of yourself? Let’s look at how these power naps can transform your sleep.

Finding Your Baby’s Sweet Sleep Spot: When and Why 3 Naps Work

Finding Your Baby's Sweet Sleep Spot

Babies usually do best with 3 naps a day between 4 and 8 months old. They’re not quite ready for just two naps, but they don’t need to sleep all day like newborns anymore.

How can you tell if your little one is ready for this schedule?

  • He/She gets cranky after two naps
  • Fussy in the late afternoon
  • Wakes up early from morning naps
  • Can’t make it to bedtime without melting down

Babies love routine. A 3-nap pattern helps their little bodies know what to expect. Think of each nap as filling up their energy tank so they can enjoy being awake.

When you stick to regular nap times, other things become easier. Feeding times become more predictable, playtime is more fun, and those tough evening hours get better when your baby isn’t overtired.

Some babies need three naps as early as three months, while others might follow this pattern until nine months. Every baby is different, so watch what your baby does, not what the calendar says.

3-Nap Schedules Samples for Different Stages

3-Nap Schedules Samples for Different Stages

Moving to a 3-nap rhythm happens at different times for different babies. Some are ready by 4 months, while others need more time. Let’s look at what works best at each stage.

Early Transition to 3 Naps (Around 4-5 Months)

Shorter wake windows work best when your baby first moves forward from the newborn stage to more structured naps.

They’re still getting used to longer stretches of being awake. This schedule helps them ease into the new pattern without getting too tired.

Time Activity Notes
6:30 AM Wake up Start the day with feeding
8:00 AM Nap 1 1-1.5 hours (Wake window: 1.5 hrs)
11:00 AM Nap 2 1-1.5 hours (Wake window: 2 hrs)
2:30 PM Nap 3 30-45 mins (Wake window: 2.5 hrs)
6:30 PM Bedtime (Wake window: 3 hrs)

During this stage, the morning nap is often the longest and easiest, while the third nap is just a short recharge to make it to bedtime.

Later Transition to 3 Naps (Around 6-7 Months)

As your baby grows, they can stay awake longer between naps. You’ll notice they’re not as tired at their usual naptime, or they might fight going down.

That’s your cue to stretch those wake windows a bit.

Time Activity Notes
7:00 AM Wake up Start the day with feeding
9:30 AM Nap 1 1-1.5 hours (Wake window: 2.5 hrs)
1:30 PM Nap 2 1-1.5 hours (Wake window: 3 hrs)
5:00 PM Nap 3 30 mins (Wake window: 3 hrs)
8:00 PM Bedtime (Wake window: 2.5-3 hrs)

This schedule gives your baby more awake time to explore and learn. The third nap is a short booster to help them make it to bedtime without getting cranky.

Some babies take longer to fall asleep at this stage, so starting the naptime routine a bit earlier can help.

Preparing for Transition (Around 8-10 Months)

By this age, many babies are getting ready to drop to 2 naps, but some still need that third nap a little longer. This schedule stretches wake windows further while keeping that short third nap as a bridge to bedtime.

Time Activity Notes
7:00 AM Wake up Start with breakfast
10:00 AM Nap 1 1-1.5 hours (Wake window: 3 hrs)
2:30 PM Nap 2 1-1.5 hours (Wake window: 3.5 hrs)
5:30 PM Nap 3 20-30 mins only (Wake window: 3 hrs)
8:30 PM Bedtime (Wake window: 2.5-3 hrs)

This third nap is often just a quick power nap. Some days, your baby might skip it entirely and do fine with an earlier bedtime. That’s a sign they’re getting ready for the 2-nap schedule.

During this stage, be flexible. On some days, you might follow the 3-nap schedule and on others, a 2-nap schedule with an early bedtime.

How Long Will Your Baby Stay on a 3-Nap Schedule?

How Long Will Your Baby Stay on a 3-Nap Schedule?

Most babies follow a 3-nap pattern for about 2-3 months. By 7-9 months, they’re usually ready to drop to 2 naps a day.

Think of the third nap as training wheels for your baby’s sleep. You’ll know it’s time to remove them when:

  • Their third nap becomes a struggle instead of a relief.
  • Bedtime starts getting pushed too late because of that last nap.
  • Morning and midday naps get longer and stronger on their own.

Don’t worry if your baby needs three naps on some days and only two on others during this transition. Sleep rarely follows a perfect schedule.

Ready to make the change? Check out our guide to Babies Dropping to 2 Naps for help.

Common Mistakes Parents Make with 3-Nap Schedules

Common Mistakes Parents Make with 3-Nap Schedules

Even with the best plans, nap schedules can go off track. Here are the bumps most parents hit along the way:

1. Letting naps get too short or too long
Balance makes all the difference. The first two naps should last about an hour each. The third should be shorter.
Watching the clock helps. Sometimes, gently waking a baby preserves the daily rhythm, keeping everyone content.

2. Inconsistent wake-up times
Weekends tempt parents to sleep in. Keeping morning wake-ups consistent solves many problems. The baby’s body clock adjusts quickly. Maintain a 30-minute wake-up time daily, and the entire routine will become smoother.

3. Skipping the last nap too early
At seven months, many babies seem ready to take a 3rd nap. Suddenly, bedtime turns into crying sessions. A short late-afternoon nap can fix everything. Just 30 minutes prevents overtiredness. Watching for real readiness matters more than following schedules. 

4. Not adjusting wake windows as baby grows.
Suddenly, the baby fights the morning nap. The schedule worked perfectly last month. Extending the morning wake time by 30 minutes helps. Each month requires small adjustments. Their development demands it. Watching for these transitions keeps everyone sleeping well.

What to Expect While on a 3-Nap Schedule?

What to Expect While on a 3-Nap Schedule?

During the 3-nap phase, most babies need 14-16 hours of total sleep daily. This typically breaks down to 3-4 hours spread across three daytime naps, with 10-12 hours at night.

Every baby’s needs are unique. Watch your little one’s mood to gauge if they’re getting enough rest.

Common Sleep Challenges

Every parent faces bumps along the road to sleep success. These typical challenges often appear just when you think you’ve got your baby’s schedule figured out.

Negative sleep associations

  • Avoid rocking, feeding, or holding to sleep if possible
  • Try putting baby down drowsy but awake
  • Start with one nap a day to practice independent sleep

When babies rely on certain actions to fall asleep, they struggle to stay asleep independently. Help them learn to self-soothe by gradually reducing these associations.

Teething

  • Teething pain often disrupts the third nap first
  • Extra comfort may be needed during teething periods
  • A cool teether before naptime can provide relief

Those tiny teeth can cause big disruptions in your nap schedule. Teething affects the third nap most because babies are already fighting sleep by late afternoon.

Sleep regression

  • Often occurs around 4 months when sleep cycles mature
  • May need extra soothing during this period
  • Stick with your schedule even during regressions
  • Learn more in our sleep regression guide

Sleep regressions often occur just as you establish a three-nap routine. Stay consistent with your schedule even when it seems nothing’s working.

How to Handle Days When Naps Don’t Go as Planned

How to Handle Days When Naps Don't Go as Planned

Nap disasters happen to every parent. Your perfect schedule will fall apart some days. That’s completely normal. Here’s how to recover quickly:

  • Move the next nap 30 minutes earlier if one nap runs short
  • Consider an earlier bedtime if the third nap is missed entirely
  • Don’t extend wake windows when your baby is already tired
  • Watch for sleepy cues instead of watching the clock
  • Reset with your normal morning wake-up time the next day

Bad nap days don’t mean your schedule is failing. They’re just part of having a baby. Stay flexible, but return to your routine as soon as possible. 

Wrapping it Up!

Finding your baby’s perfect three-nap rhythm might take trial and error, but the payoff is worth it. A well-rested baby means a happier family.

Remember that consistency is key, but flexibility matters, too. Some days will not go as planned, and that’s perfectly normal.

Trust your instincts. You know your baby better than anyone else. Watch their cues, adjust as they grow, and celebrate the small victories along the way.

Ready for your baby’s 3-nap routine?

Bookmark this page for your baby’s nap schedule guide. Use it to create a happier, well-rested home for you and your baby today.