Planning your first international trip with your baby and feeling overwhelmed?
Traveling internationally with an infant brings unique challenges and wonderful moments that require careful planning and preparation.
Your baby will need special attention, extra documentation, and different travel arrangements compared to adult-only trips.
From passport applications to feeding schedules during long flights, every detail requires thoughtful consideration.
When you prepare well, you can handle unexpected situations calmly and focus on creating positive memories with your little one.
This comprehensive guide walks you through each step of planning and executing successful international travel with your infant.
What You Need to Know Before You Travel
Before you pack those tiny socks and board that plane, there are some super important things to know!
First, your baby needs their very own passport, even if they’re just a few weeks old – no sharing with mom or dad allowed!
Next, schedule a consultation with your pediatrician to ensure your little traveler is healthy enough to fly and up-to-date on any necessary vaccines for your destination.
Don’t forget to ask about managing ear pressure during takeoff and landing, as well as what to pack in case your baby gets sick while you’re away. A little planning now means a whole lot more fun later!
Step-by-Step Guide for International Travel with an Infant
Planning international travel with an infant requires more time and attention than regular trips. Starting early gives you the best options and reduces last-minute stress that can affect your baby’s comfort.
1. When to Book Your Flights
Book flights 2-3 months early to secure better seating options and times that match your baby’s routine.
Airlines limit infants per flight section, so early booking ensures your spot and access to direct flights that reduce travel stress.
Consider your baby’s sleep and feeding schedule when choosing flight times.
Red-eye flights work for good nighttime sleepers, while daytime flights suit babies who nap during the day. Avoid peak travel periods when delays are more common.
2. Obtain Your Baby’s Official Documents ASAP
Your baby needs a certified birth certificate and a Social Security number for international travel and passport applications.
Contact your local vital records office immediately after birth for certified copies, and apply for the Social Security number at the hospital or SSA office.
Having these documents ready prevents delays in travel planning, as some airlines require age verification for infant tickets.
3. Attend Your Passport Application Appointment as a Family
Both parents must attend the passport appointment or provide notarized consent from the absent parent. Schedule at a passport facility that offers expedited processing if traveling soon.
Bring the required documents: birth certificate, parent IDs, and a recent baby photo.
Infant photo requirements are specific: the baby’s eyes open, looking at the camera, no pacifiers or other people visible. Professional photographers familiar with these requirements can help ensure acceptance.
Booking Tickets for an International Flight with an Infant
Understanding airline policies for infant travel helps you make the best decisions for your family’s comfort and budget. Each airline has different rules about infant seating, documentation, and services.
1. Infant Seating Options
Most airlines allow children under 2 years old to fly as lap infants for free or at a reduced fee on international flights.
However, purchasing a separate seat for your baby provides more space and allows you to use an approved car seat during the flight.
This option is safer and more comfortable, especially on long international flights.
If you choose the lap infant option, you’ll hold your baby during takeoff, landing, and when the seatbelt sign is on.
Some airlines provide special infant seatbelt extenders that attach to your seatbelt. Consider your baby’s size, temperament, and flight length when deciding between these options.
2. Documentation You Will Need
Your baby needs a valid passport for international travel, regardless of age. Some countries also require visas for infants, so check the destination country’s requirements well in advance.
Keep the birth certificate easily accessible as proof of age, especially if your baby looks older or younger than their actual age.
Organize all documents in an easily accessible folder or travel wallet. Make copies of important documents and store them separately from the originals.
Consider storing digital copies on your phone or cloud storage as a backup.
3. Other Things to Consider
Beyond basic ticket booking, several important factors can make your international flight much more comfortable for both you and your baby.
These considerations help ensure smooth travel and reduce stress during your long voyage.
No Layovers
Choose direct flights to reduce total travel time
Avoid the stress of changing planes with baby gear
Eliminate the risk of delays and missed connections
Prevent disruption to the baby’s feeding and sleep schedule
If layovers are unavoidable, choose the shortest connection time
Scheduling/Flight Times
Match flight times to the baby’s natural sleep patterns
Consider if the baby sleeps well during car rides
Plan around regular feeding schedules
Factor in time zone changes at the destination
Think about jet lag effects on a baby’s routine
Bassinet
Available on most international airlines for long flights
Weight limit: typically 20-25 pounds
Must request when booking (limited availability)
Assigned on a first-come, first-served basis
Only available in bulkhead seats
Baby Meals
Ask the airline about bottle-warming policies
Some airlines heat bottles, others don’t
Bring extra formula and baby food in a carry-on
Check TSA guidelines for baby food quantities
Pack feeding supplies for the entire flight duration
4. How Young Can Your Baby Fly?
Most airlines allow babies to fly after they’re 7-14 days old but check with your specific airline for their minimum age requirements.
Pediatricians generally recommend waiting until babies are at least 2 months old for international travel, as their immune systems are stronger and they’ve had time to establish feeding routines.
Consider your baby’s health, feeding schedule, and recovery from childbirth when deciding on travel timing. Premature babies or those with health concerns may need medical clearance before flying.
Planning and Packing with A Baby
Choosing the right accommodation and packing efficiently make your international trip more comfortable and manageable.
Research your destination’s baby-friendly options and local resources before departure.
Planning Your Stay
• Baby-Friendly Accommodations Research hotels or vacation rentals that offer cribs, high chairs, and other essential baby items. Confirm availability when booking and consider places with kitchen facilities for preparing baby food and sterilizing bottles.
• Local Resources Research: Look into pharmacies carrying familiar baby products, pediatric clinics, and baby supply stores at your destination. Research local water quality to determine if it’s safe for mixing formula or if you need bottled water.
Packing
• Essential Baby Supplies Pack enough diapers, wipes, and baby clothes for the trip, plus 50% extra in case of delays. Bring familiar comfort items like favorite toys, blankets, and pacifiers to help your baby feel secure.
• Organization and Accessibility Use packing cubes to keep baby items separated and easily accessible throughout your trip. Pack complete outfit changes for both you and your baby in carry-on luggage, since accidents happen during travel.
• Climate Consideration: Research your destination’s weather and pack appropriate clothing for your baby’s comfort. Include any special medications and care items your baby needs regularly.
Boarding the Plane with an Infant
• Priority Boarding Advanta:Take advantage of family priority boarding to get extra time to settle in before other passengers board. Use this time to organize your seat area and set up baby gear comfortably.
• Pre-Flight Preparation: Prepare feeding supplies and comfort items before boarding so they’re easily accessible during the flight. Keep all travel documents readily available for quick airline staff verification during the boarding process.
In-Flight Carry-On Items
Organizing your carry-on items strategically helps you handle your baby’s needs during the flight without disturbing other passengers or creating stress for yourself.
Category
Essential Items
Quantity/Notes
Purpose
Diaper Supplies
Diapers, baby wipes, hand sanitizer, plastic bags
Flight duration + extras for delays
Handle diaper changes and cleanup
Clothing
Complete outfit change for baby and yourself
At least 1 full set each
Accidents and spills happen
Feeding Supplies
Bottles, formula, baby food, snacks
More than flight duration
Keep baby fed and happy
Entertainment
Age-appropriate toys, books, and tablets with videos
3-4 different options
Prevent boredom and fussiness
Health Items
Regular medications, infant pain reliever
All prescribed + basics
Handle ear pressure and health needs
Diaper Bag Organization
Portable changing pad, frequently used items in outer pockets
Easy access design
Quick changes in airplane bathrooms
Personal Comfort
Neck pillow, headphones, snacks, phone charger
Your comfort essentials
Take care of yourself to care for the baby
Pro Tip: Keep most-needed items in easily accessible pockets • Pack entertainment items you haven’t used before to maintain novelty
Ready for Your International Experience with Baby
International travel with an infant requires extra planning and preparation, but it opens up wonderful opportunities for family experiences and memories.
Starting your planning early, organizing proper documentation, and packing thoughtfully set the foundation for a successful trip.
Focus on the positive aspects of sharing new experiences with your little one, and don’t worry about minor setbacks or changes to your original plans.
Every family’s travel experience is different, so adapt these guidelines to fit your baby’s specific needs and your family’s travel style.
Start planning your international experience today and create lasting memories with your little traveler.
“Should I wake my sleeping baby?” Every parent has whispered this question while watching their little one sleep peacefully.
It’s a tough spot. You know sleep is precious for babies, but sometimes you wonder if you should interrupt that peaceful moment. I know it feels wrong to wake a sleeping baby.
But there are times when a gentle wake-up helps keep your baby’s daily routine on track.
In this guide, you’ll learn:
When it’s okay (and needed) to wake your baby
How to do it softly and calmly
Simple tips to keep nap times working well
Let’s get started!
When and Why It’s Necessary to Wake Your Sleeping Baby?
Sometimes, waking your sleeping baby helps them stay healthy and grow well. Let me share the most important times when and why you should wake your little one.
1. Newborns Need Regular Feeding
If your baby is under 4 weeks old or hasn’t regained their birth weight, it’s important to wake them every 2–3 hours for feeding. Their tiny stomachs can’t hold much, so regular feeding supports healthy growth.
I had to do this often, and it really helped my baby stay on track early on.
2. Jaundice Or Other Health Issues
When my baby had mild jaundice, I had to wake her more often. Your doctor might ask you to do the same. Feeding helps flush out extra bilirubin.
If your baby has a medical reason, sticking to a set feeding schedule, even during naps, can make a big difference in recovery and energy levels.
3. Nap Is Too Long
Sometimes, long naps can affect bedtime. If your baby naps for over 2 hours during the day, they may not be tired at night. I learned to gently wake my baby so we could stay on schedule.
It helped keep bedtime easier and prevented late-night wakeups that threw off the rest of our day.
4. Nap Is Too Close To Bedtime
A late nap can make it harder for your baby to fall asleep at night. I’ve found that if my baby sleeps too close to bedtime, waking them early helps.
Keeping a little space between naps and bedtime made our evenings smoother and helped everyone in the house get better rest.
5. Long Gaps Between Feedings
Even after my baby started sleeping longer, I watched for long gaps. If it had been more than 4 hours since their last feed during the day, I’d wake them. This helped them get enough milk during the day and sleep better at night.
How Long Will Your Newborn Sleep?
Newborn sleep is very different from adult sleep. I didn’t know what to expect at first, and you might feel the same. Your baby will sleep a lot, but in short stretches.
1. Total Daily Sleep: Newborns usually sleep around 14 to 17 hours a day, but not all at once. I was surprised by how much my baby slept in short bursts. Your baby may nap throughout the day and night, waking for feedings every few hours.
2. Short Sleep Stretches: At first, your newborn may only sleep 1 to 3 hours at a time. I remember those quick naps well. Since their tummies are small, they wake often to eat. These short sleep cycles help them stay full and grow.
3. No Real Day or Night: In the early days, babies didn’t know the difference between night and day. Expect sleep to be spread out around the clock. Their internal clock is still developing, so nighttime sleep may take some time.
4. Changes After a Few Weeks: After 6 to 8 weeks, many babies start sleeping a little longer at night. I noticed longer stretches of sleep, which gave me some relief. Your baby may sleep 4 to 5 hours in a row at night as they grow and eat more at each feeding.
5. Every Baby Is Different: Some babies sleep more, and some sleep less. As long as your baby is eating, growing, and seems content, their sleep pattern is likely just fine. If you’re unsure, your doctor can help you understand what’s normal for your baby’s age and health.
Signs of Healthy Sleep
Wakes for feeds
Makes small movements while sleeping
Has alert periods during the day
Shows tired signs before sleep
Some babies sleep more, others less. Your baby might not match these numbers exactly – that’s okay. What matters is that they’re growing well and seem happy when awake.
What Are the Risks of Not Waking Your Sleeping Baby?
Letting your baby sleep sounds harmless, but sometimes it can cause problems. I’ve had moments when I wasn’t sure if I should wake my baby or let them rest.
If you’re wondering about the risks, this is what I learned and what you might want to keep in mind.
1. Missed Feedings
In the early weeks, babies need to eat often. If your baby skips feedings, they might not get enough calories to grow well. I had to wake mine to keep up with feeding goals.
You may feel unsure at first, but staying on track with feeding helps your baby stay healthy and gain weight steadily.
2. Slower Weight Gain
I once noticed my baby wasn’t gaining as quickly as expected. Long sleep stretches can lead to fewer feedings, which may slow weight gain.
If your baby hasn’t regained their birth weight or is struggling to grow, waking them for regular feeds makes a big difference. It’s something your doctor will likely recommend, too.
3. Worsening Jaundice
My baby had mild jaundice, and sleep made it harder to treat. Jaundice can get worse if your baby isn’t feeding enough, since feeding helps flush out bilirubin.
Waking them to eat keeps things moving. You might feel bad disturbing their sleep, but it supports recovery and keeps them hydrated.
4. Disrupted Sleep Patterns Later
Letting your baby nap too long during the day affected our nights. Over-sleeping during the day can shift your baby’s body clock, leading to less nighttime sleep.
I learned to keep naps balanced, even if it meant gently waking my baby. It helped build a better routine over time.
5. Missed Signs Of Illness
There were days my baby slept more than usual, and I almost missed the early signs of sickness. If a baby sleeps too long or too deeply, it could be a clue that they’re not feeling well.
Waking them to feed or check in can help you spot changes early and get help if needed.
Signs Your Baby Needs to Be Woken Up
Sometimes it’s hard to know when it’s okay to let your baby sleep and when it’s better to wake them.
I’ve faced this question many times. If you’re unsure too, here are some signs that told me it was time to gently wake my baby.
Feeding Warning Signs
If your newborn goes more than 3 hours without eating, it’s usually time to wake them. I also noticed fewer wet diapers when my baby missed feedings, which told me something was off.
If they sleep through their regular feeding times or don’t finish a full feed when awake, it’s a sign they may need some help staying on schedule.
Sleep Pattern Changes
Sometimes naps get too long. If your baby sleeps for more than 2.5 hours during the day or sleeps past their normal morning wake-up time, it may throw off the rest of the day.
I’ve also seen issues when my baby took late evening naps or missed regular social and play times. These changes can make nighttime sleep harder.
Physical Signs to Watch
I always keep an eye on my baby’s color and comfort. If their skin looks extra pale or yellow, or they’re too warm or sweaty, I check in.
Deep sleep is fine, but if your baby is hard to wake or seems too still, that’s something to act on. Breathing that sounds different from usual is also a sign to wake them and check.
Daily Schedule Signs
When I noticed my baby’s morning wake time getting later every day, it started to affect everything else.
If feedings keep getting delayed or your baby mixes up day and night sleep, that’s a sign they may be getting too much sleep at the wrong times. I also try not to let them miss active or playtime during the day.
How to Wake Your Sleeping Baby?
Sometimes you’ll need to wake your baby, and doing it gently makes a big difference. I’ve tried different methods to make wake-ups easier for both of us. These are some simple ways you can try:
Gently rub their back, arms, or legs
Undress them down to their diaper
Use a soft voice
Open the curtains or turn on a soft light
Change their diaper
Tickle the soles of their feet
Hold them upright against your chest
Offer the breast or bottle
When Should You Avoid Waking Your Baby?
I’ve learned that not all sleep needs to be interrupted. In many cases, it’s better to let your baby rest. Here are times when waking up your little one isn’t necessary:
Birth weight has been regained
Resting calmly during nighttime sleep
Moved beyond the newborn phase
Getting enough food throughout the day
Fell asleep a short time ago
Conclusion
I know how hard it can be to decide if you should wake your sleeping baby. I’ve faced those same questions and worries. The truth is, sometimes it’s necessary, especially for feedings, health reasons, or routine.
But other times, it’s okay to let your baby sleep, as long as they’re growing and doing well.
You don’t have to get it perfect every time. Watching your baby’s cues and following your doctor’s advice will help you make the best choice.
I found that using gentle wake-up methods and keeping things calm made a big difference. And when it wasn’t needed, I let my baby rest without guilt.
Every baby is different, and you’ll learn what works best over time. Trust yourself, you’re doing a great job. If you’re ever unsure, just ask your pediatrician.
If your baby keeps waking up at night and you’re beyond tired, you’re not alone.
Most parents hit this phase, confused, frustrated, and desperate for answers. My blog breaks down what might be waking your baby up and what you can do about it.
We’ll look at:
Common sleep disruptors
Strategies to Promote Good Sleep Habits
Tips to manage better rest
Every baby is different, but knowing what’s normal and what might need attention can really help.
You’ll see possible reasons based on age, sleep patterns, and changes in your baby’s routine. It doesn’t have to feel like a guessing game.
Whether it’s teething, gas, or just a growth spurt, I’ll help you sort it out, so you and your little one can finally get some rest. Let’s get straight into it.
Reasons Why Your Baby Wakes Up at Night
There are many reasons your baby might wake up during the night, and most of them are normal. I’ve listed the most common ones below to help you figure out what’s going on.
Knowing the cause can make it easier to find a fix and get better sleep for both of you.
1. Hunger or Feeding Needs
Babies often wake up because they’re hungry, especially during the first few months. Their stomachs are small and don’t hold much milk.
Growth spurts can also make them hungrier at night. If your baby didn’t eat enough during the day, they might wake up needing more.
Feeding before bedtime can sometimes help stretch sleep a little longer.
2. Sleep Regression
Sleep regressions happen during growth or development stages. Around 4, 8, or 12 months, your baby might wake more often.
They could be learning to roll, sit, or crawl. These changes affect sleep. It’s normal and won’t last forever.
I’ve gone through this, and while it’s frustrating, knowing it’s temporary helped me stay calm and adjust my expectations.
3. Teething Discomfort
Teething can wake your baby up at night. Sore gums or general discomfort may make it hard for them to sleep.
Signs include drooling, chewing on things, or being extra fussy. I’ve noticed that chilled teethers or rubbing their gums gently can ease the pain.
If it gets worse, check with your doctor for baby-safe relief options.
4. Too Hot or Too Cold
Temperature plays a big role in sleep. If your baby is too warm or too cold, they might wake up.
I try to keep the room between 68–72°F and use light sleepwear. Feeling their neck, not hands or feet, helps check if they’re comfy.
A sleep sack or swaddle can also help keep them cozy without overheating.
5. Habitual Waking
Sometimes babies wake simply out of habit. If your baby is used to being rocked or fed to sleep, they might expect the same when they wake during the night.
It’s common, and I’ve had to slowly change routines. Helping them learn to fall asleep on their own can lead to fewer night wakings over time.
6. Illness or Discomfort
If your baby has a cold, reflux, or an ear infection, sleep gets interrupted.
They may feel uncomfortable lying down or struggle to breathe easily. I watch for coughing, fussiness, or pulling at their ears.
When I notice signs like these, I check in with our pediatrician to make sure there’s nothing more serious going on.
7. Noise or Light
Loud sounds or too much light can disturb your baby’s sleep. I use white noise to block outside sounds and blackout curtains to keep the room dark.
This creates a better sleep space. Some babies are more sensitive to noise, so even a door creaking or a car outside might wake them unexpectedly during the night.
8. Separation Anxiety
This usually starts around 6 to 9 months. Your baby may wake up just to check if you’re nearby. It’s a normal part of development, but it can interrupt sleep.
I’ve learned to comfort without always picking up, sometimes a soft voice or gentle pat works. Over time, babies learn that you’re still close even while they sleep.
Effective Strategies to Promote Good Sleep Habits
Good sleep doesn’t just happen; it’s something you build over time. I’ve had nights where nothing seemed to work, but once I made small changes and stuck with them, things started to improve.
These strategies helped me create better sleep habits for my baby, and I hope they make a difference for you too.
1. Set a Consistent Bedtime
A set bedtime gives your baby’s body a clear signal that it’s time to wind down.
I used to shift bedtime based on naps or how the day went, but once I picked a time and stuck with it, my baby adjusted. I aim for the same bedtime every night, even on weekends.
It helps their internal clock settle into a steady rhythm. This kind of routine helps reduce night wakings and makes bedtime feel expected rather than forced.
2. Create a Calm Bedtime Routine
Having a relaxing routine before bed really helped my baby understand that sleep was coming. I keep it simple: bath, pajamas, bottle, and a short story.
No screens, no bright lights, and nothing loud. I’ve found that a calm routine helps my baby feel safe and relaxed.
You don’t need anything fancy, just quiet, loving steps you repeat each night. Over time, this consistency made bedtime smoother and reduced resistance from my baby.
3. Use a Dark and Quiet Room
Where your baby sleeps matters more than I expected. Too much light or noise can interrupt sleep, even during naps. I added blackout curtains and a white noise machine, and it made a huge difference.
The darkness tells their body it’s time to rest, and the white noise covers up sudden sounds like dogs barking or doors closing.
A good sleep space sets the right mood and helps your baby stay asleep longer.
4. Watch for Sleep Cues
Learning my baby’s signals was a big turning point. If I waited too long, they’d get overtired and cranky, making bedtime harder.
Now I look for signs like yawning, rubbing eyes, or zoning out. When I spot them, I start our routine right away. Putting your baby down before they’re overtired can make sleep easier and smoother.
It took me a while to recognize these cues, but once I did, it helped me avoid bedtime battles.
5. Encourage Daytime Naps
At first, I thought keeping my baby up during the day would make them sleep better at night, but I was wrong. Skipping naps led to cranky evenings and poor night sleep.
More rest during the day usually means better sleep at night. I started paying closer attention to nap timing and length.
It doesn’t have to be perfect, but aiming for regular naps during the day helped reset their body clock.
6. Be Patient and Stay Consistent
I know how hard it is when nothing seems to work. But one thing I’ve learned is that consistency makes a big difference.
Pick a plan and stick with it for a while. Babies need time to adjust, and new habits don’t form overnight. I had nights when I wanted to give up, but staying patient paid off.
If you try something new, give it a few days or even a week before deciding it doesn’t work.
Tips for Parents to Manage Nighttime Wakefulness
These tips helped me manage the stress and take better care of myself while still being there for my baby. You don’t have to be perfect; you just need tools that work for you.
Stay Calm and Keep the Lights Low
When your baby wakes up, try to stay calm and quiet. I keep the lights dim and my voice soft.
This helps send the message that it’s still nighttime, not playtime. If you turn on bright lights or talk too much, your baby might wake up more.
A calm response helps both of you settle back to sleep faster.
Don’t Rush in Right Away
It’s tempting to respond the second you hear crying, but I’ve learned to pause and listen first. Sometimes my baby fusses for a minute and falls back asleep without help.
Waiting 60 seconds can make a difference. Of course, if they keep crying or sound distressed, I go in, but giving them space sometimes prevents full wake-ups.
Keep a Log of Wake-Ups
I started writing down when and why my baby woke up, fed, diapered, comforted, etc.
And over time, I noticed patterns. This helped me adjust our routine and understand what my baby needed. A simple notebook or phone note works fine.
It also gave me something to show the pediatrician when I had questions about sleep.
Create a Simple Comfort Plan
When my baby woke, I used to do something different every time: pick up, rock, feed, or sing.
Now I stick to a simple comfort routine like a pat, a soft “shhh,” or brief rocking. Doing the same thing each time keeps things clear and calm.
Over time, this helped reduce the number of full wake-ups we dealt with.
How to Soothe a Crying Baby at Night?
These are the simple things that helped me calm my baby and get us both back to sleep. You don’t need fancy tricks, just a few gentle methods that work.
Check for basic needs: Start with the basics. I check the diaper, see if my baby is too hot or cold, or offer a quick feed. Sometimes it’s just hunger or discomfort that’s easy to fix.
Hold or rock gently: Holding my baby close and rocking them slowly often helps. I keep the movement soft and steady. Skin-to-skin contact works wonders, especially for younger babies.
Offer a pacifier if your baby uses one: If your baby takes a pacifier, offering it can calm them quickly. I always keep one nearby at night for those moments when nothing else works right away.
Try gentle back pats or rubs: Sometimes, I just place a hand on their chest or back and rub in small circles. It’s a simple way to offer comfort without overstimulating them.
Use white noise or calming music: A white noise machine or soft lullaby helps block out sudden sounds. I’ve found it keeps my baby more relaxed, especially during light sleep phases.
When to Speak with Your Pediatrician?
Sometimes, I’m not sure if what my baby’s doing is normal or something to worry about.
If you ever feel the same, it’s okay to reach out to your pediatrician. You should call if your baby cries for hours without calming down, has a fever, trouble breathing, or isn’t feeding well.
Also, if they seem overly sleepy, not gaining weight, or just don’t seem like themselves, trust your gut.
I’ve learned it’s better to ask and feel silly than to miss something important. You know your baby best; if something feels off, it’s worth checking in.
Even a quick call can give you peace of mind when you’re tired and unsure.
Conclusion
Night wakings are common, but I understand how frustrating and tiring they can be.
I’ve gone through the same thing, and it’s not easy. Most babies wake up for a reason, like hunger, teething, or needing comfort.
Figuring it out takes time, and that’s okay. Some nights will be tough, and others will go more smoothly. What helped me was keeping a simple routine and trying one change at a time.
If something feels off or your baby just isn’t acting like usual, don’t wait to check with your pediatrician.
Getting help can give you peace of mind. You’re not alone, and you’re not failing. This is just part of learning what your baby needs.
Keep doing your best, and remember, it gets easier with time.
At some point, every parent starts asking the same question: When will bedtime get easier?
You’re probably hoping for the day your baby starts sleeping earlier in the evening, giving you a bit of quiet before your own head hits the pillow.
In this post, I’ll walk you through when babies typically begin shifting to an earlier bedtime and what signs to look for along the way.
I’ll cover:
Common age ranges for earlier sleep
Why does bedtime suddenly change
Tips to help guide the process
It’s about understanding your baby’s natural sleep patterns so you can work with them, not fight them.
If you’re feeling exhausted and craving a better evening rhythm, you’re in the right place. Let’s take a simple look at what really helps and when those earlier nights usually begin.
Signs Your Baby Is Ready for an Earlier Bedtime
Every baby is different, but there are a few common signs that can tell you it’s time to shift bedtime earlier. I’ll walk you through what I noticed with my own baby, so you can spot these changes too.
1. Getting Fussy in the Evening
If your baby starts crying or acting irritable earlier in the evening, that’s often a sign they’re overly tired.
I used to think fussiness just meant they were hungry or bored, but when it happened regularly around the same time, I realized they needed sleep.
A baby who’s too tired has a harder time falling asleep and staying asleep. By watching for that crankiness window and putting my baby down sooner, bedtime got easier and less stressful.
2. Waking Up More at Night
Frequent night wakings might mean your baby isn’t getting to bed at the right time.
I used to assume my baby just wasn’t a good sleeper, but then I learned that an overtired baby often wakes up more, even after falling asleep.
Once I shifted bedtime 30 minutes earlier, the night wakings dropped. Your baby may be too exhausted by the time they’re finally in bed, which can affect how deeply they sleep.
Earlier sleep helps the brain settle, which leads to longer, more restful stretches overnight.
3. Waking Up Too Early
It seems backward, but early wake-ups can sometimes mean your baby’s bedtime is too late.
When your baby goes to bed overtired, they might wake up before they’re fully rested. Try bumping bedtime earlier by 15–30 minutes and give it a few days.
That change alone helped my baby wake up at a more reasonable time. You might be surprised how much difference a small shift can make.
4. Taking Shorter Naps
Your baby’s naps and nighttime sleep are connected. I learned that when my baby went to bed too late, naps the next day were shorter and less restful.
A late bedtime can throw off their whole rhythm. You might notice your baby resisting naps or waking up from them cranky. That could be their body struggling to reset after a rough night.
Earlier bedtime helped me smooth out the whole day and made naps more consistent.
5. Showing Sleepy Cues Sooner
Pay attention to when your baby starts rubbing their eyes, yawning, or staring off quietly.
If you’re seeing those signs earlier than usual, bedtime might need adjusting. Once you notice those signals earlier in the evening, don’t wait; start the bedtime routine soon after.
Catching that sleep window can make all the difference. I found that my baby fell asleep faster and with less fuss when I followed their cues instead of the clock.
Effective Strategies to Encourage Earlier Sleep
Helping your baby shift to an earlier bedtime doesn’t have to be complicated. These tips are all about keeping things calm, consistent, and easy to follow.
1. Watch for Sleepy Cues
Start by paying attention to signs your baby is getting tired. I noticed eye rubbing, yawning, or quiet staring meant it was time to start winding down.
If you wait too long, they can get overtired and wired. That makes bedtime tougher.
As soon as you spot those signs, even if it feels early, start your bedtime routine. It helps your baby relax and fall asleep more easily.
2. Start the Routine 15 Minutes Earlier
You don’t need to shift bedtime all at once. Begin by moving your bedtime routine just 15 minutes earlier for a few nights.
Once my baby adjusted, I moved it earlier again. Slow, small changes work better than big ones.
It keeps your baby from getting overwhelmed. Stick to the same steps, bath, bottle, story, or whatever works for you. The key is being predictable and calm.
3. Get Daytime Sleep on Track
Daytime naps matter more than I thought. When my baby was overtired from skipping naps, nighttime sleep got harder.
A well-rested baby during the day usually sleeps better at night. Try to keep nap times fairly regular and avoid skipping them. If naps are all over the place, start by focusing on a consistent morning nap.
That one can help set the tone for the rest of the day.
4. Use Light to Guide Their Rhythm
Light helps your baby’s body understand when it’s time to be awake or asleep. I found that exposing my baby to natural sunlight in the morning made a big difference.
Then in the evening, I kept the lights low and avoided screens. Dim lighting sends a clear signal that bedtime is coming.
After a few days of doing this, falling asleep earlier started to come more naturally.
5. Avoid Too Much Stimulation Late in the Day
Too much excitement in the evening can keep your baby wired. I used to play active games close to bedtime and didn’t realize it made sleep harder.
Now I keep things calm and quiet after dinner, just cuddles, stories, or gentle music. This helps my baby settle down faster when it’s time for sleep.
Try skipping anything loud or over-stimulating in the hour before bedtime.
Overcoming Common Sleep Challenges
I’ve dealt with plenty of sleep struggles, and I know how frustrating they can be.
These are some of the most common issues I’ve seen, along with what usually causes them and what helped in my experience:
Baby wakes up 30-45 minutes after falling asleep: This often happens when a baby finishes one sleep cycle and can’t settle into the next. Earlier bedtime or smoother wind-down helps with this.
Fighting sleep at bedtime: If your baby resists bedtime, they may be overtired or overstimulated. Start looking for sleepy cues and avoid active play right before bed, which made a big difference.
Short naps during the day: When naps only lasted 20–30 minutes, I realized the nap schedule wasn’t consistent enough. Creating a quiet nap routine helped stretch nap times.
Early morning wakeups: Waking before 6 a.m. can be linked to a bedtime that’s too late or too much light in the room. I moved bedtime earlier and used blackout curtains to help.
Waking frequently overnight: Frequent waking can be tied to hunger, teething, or needing help falling back asleep. I checked for those first, then worked on helping my baby learn to self-soothe.
Skipping naps altogether: Some days, naps just didn’t happen, especially during regressions. Still, you can offer quiet time in a dark room to give my baby rest, even if they didn’t sleep.
When to Seek Professional Advice on Baby Sleep?
Sometimes, no matter what you try, sleep just doesn’t improve. I’ve been there, and it can be really frustrating.
If your baby is older than 6 months and still wakes up often, has a hard time falling asleep even with a routine, or shows signs of discomfort at night, it’s worth checking in with your pediatrician.
You should also ask for help if your baby isn’t gaining weight as expected, or if sleep issues are making daily life more stressful.
I’ve learned that reaching out early can make a big difference. A doctor or sleep consultant can rule out medical concerns and give you useful guidance.
It’s okay to ask questions and get support when things aren’t improving on their own.
Conclusion
know how hard it is when your baby’s bedtime feels like it’s always getting pushed later.
You’re tired, and you just want a little evening peace. The good news is that most babies start going to bed earlier around 3 to 6 months, though every baby is different.
If your little one seems ready, showing signs like longer naps or earlier wake-ups, you can start making gentle changes. Keep things consistent.
Stick to a calm routine. And don’t stress if it doesn’t happen overnight. Watch your baby’s cues, not the clock. That’s what helped me the most.
You don’t need to do it perfectly. You just need to keep trying. And if you ever feel unsure, talking to your pediatrician can give you some peace of mind.
If you’re here, you’re likely wondering when it’s the right time to stop the dream feed.
That’s a common question for many tired parents looking for more uninterrupted sleep, for themselves and their baby.
This article gets right to the point and helps you decide based on your baby’s:
Age
Weight gain
Sleep habits
Night waking patterns
I’ll walk you through what the dream feed is, why it’s used, and the signs that it’s time to drop it. You’ll also learn how to stop the dream feed gently without causing too much disruption.
Whether your baby is 3 months or 9 months, you’ll find clear guidance here so you can focus on what matters most: a good night’s rest for the whole family.
Each baby is different, but with the right timing and approach, dropping the dream feed can be smooth and simple.
Understanding the Dream Feed
The dream feed is when you feed your baby while they’re still mostly asleep, usually between 10 p.m. and midnight.
I used it to help stretch my baby’s sleep so they wouldn’t wake up hungry a few hours later. You gently pick them up, feed them without fully waking them, and put them right back to sleep.
It’s not about starting a new wake-up, it’s about filling their tummy to avoid one.
Some babies take to it really well, and it gives you a longer stretch of sleep, too. But not every baby needs it, and it’s not meant to be a long-term solution.
It works best for young babies who still need extra night calories but are starting to sleep longer stretches.
Over time, as your baby gets older and starts eating more during the day, the dream feed usually becomes less useful. That’s when many parents think about dropping it.
Signs It’s Time to Drop the Dream Feed
Knowing when to stop the dream feed can feel a little uncertain. You don’t want to disrupt your baby’s sleep, but you also don’t want to hold onto a habit that’s no longer helpful.
These will help you decide if your baby is ready to let go of the dream feed and sleep through the night.
1. Your Baby Sleeps Through It
One of the biggest signs I noticed with my own baby was when the dream feed barely woke them up.
If your baby stays mostly asleep and doesn’t latch well or only sucks for a few minutes, that’s a red flag. Babies who are still hungry will usually feed with purpose, even if they’re drowsy.
Once they stop doing that, the feed becomes more of a disturbance than a help. Try skipping it one night and see what happens. If they sleep the same or better, that’s your answer.
2. Baby Still Wakes Later in the Night
Dream feeds are meant to help your baby sleep a longer stretch without waking.
But if your baby still wakes up in the middle of the night, even after a dream feed, the feed might not be doing its job anymore. When a feed doesn’t prevent night waking, it’s time to rethink it.
I suggest tracking sleep patterns for a few nights. If the 2 AM wake-up happens with or without the dream feed, dropping it may lead to better long-term sleep.
3. Baby Is Old Enough
There’s no exact age that fits every baby, but many don’t need nighttime feeds after 6 to 9 months, especially if they’re eating solids and gaining weight steadily.
I always remind parents: a baby who gets enough calories during the day usually doesn’t need extra at night.
Check with your pediatrician if you’re unsure, but once your baby is in that age range and growing well, you can try removing the feed gradually and see how they do.
4. Feeding Seems to Disrupt Sleep
Sometimes, instead of making sleep better, the dream feed causes more wake-ups. This happened with my second child. After feeding, he’d stir more or have a harder time falling into deep sleep.
If your baby wakes more often after the dream feed, it could be making things worse, not better. Pay close attention to what happens after the feed.
If sleep quality drops or your baby seems unsettled, try stopping the feed for a few nights and monitor the change.
5. Your Routine Is Ready for a Change
Let’s be real, dream feeds aren’t easy for parents either. Waking up late at night, even for a quiet feed, can wear you down.
If your baby shows signs of being ready and you feel confident, it’s okay to try dropping it.
You know your baby better than anyone else. If they’re sleeping well overall, feeding great during the day, and showing less interest at night, you don’t have to wait for a perfect sign.
How to Gradually Drop the Dream Feed?
If you’re ready to stop the dream feed, doing it slowly can make things smoother for both you and your baby. I took a gradual approach with my own kids, and it helped avoid sudden night wakings. This is how you can do the same.
1. Move the Feed Earlier
Start by shifting the dream feed to an earlier time. If you usually feed at 10:30 p.m., try moving it to 10:00 p.m. for a few nights.
Then shift to 9:30 p.m., and so on. This small change helps your baby adjust to longer stretches without waking for food. I found this step really helpful because it didn’t change too much at once.
2. Reduce the Amount
Once the feed is earlier, begin cutting back the amount you give. If you’re bottle-feeding, reduce the ounces slowly, maybe by half an ounce every few nights. If you breastfeed, shorten the feeding time a little at a time.
This helps your baby’s body adjust to eating more during the day instead of relying on that late-night feed.
3. Watch for Signs of Readiness
As you cut back, pay close attention to how your baby responds. If they sleep just as well, or even better, you’re on the right path.
But if they start waking more often or seem extra hungry during the day, you may need to slow down or pause. I’ve done that before, and it’s okay to take a step back if needed.
4. Keep the Bedtime Routine Steady
One thing that really helped me was sticking to our bedtime routine. Even while dropping the feed, I made sure bath, story, and lullaby time stayed the same.
A familiar routine helps your baby feel secure during changes. You don’t need to change everything, just the dream feed part.
5. Give It Time
Don’t expect it to work in one or two nights. Every baby is different, and slow progress is still progress.
I gave it a week or two before fully dropping the dream feed, and it worked well for us. Trust your gut, stay patient, and adjust as needed.
Pros and Cons of Dropping the Dream Feed
Let me break down what happens when you stop dream feeding. I’ve put together this clear table to help you weigh your options.
Good Things About Stopping
Not-So-Good Things
You get more sleep at night without that late feed
Your baby might wake up hungry at first
Your evening becomes more open and free
You’ll need to fit in more milk during the day
Your baby’s natural sleep patterns get better
Your daytime schedule needs to change
The bedtime routine gets simpler
You might miss the quiet feeding time
Your baby might eat better during the day
Some babies take longer to adjust
Both you and the baby can have deeper sleep
Early days might mean less sleep
Conclusion
Figuring out when to stop the dream feed can be a bit tricky, but it doesn’t have to be stressful. You’re just looking for what works best for your baby right now.
If the dream feed isn’t making much of a difference anymore, it’s okay to try dropping it.
I’ve gone through the same process, testing things out, making small changes, and adjusting based on how my baby reacted.
You don’t need to do it all at once. Take your time, stay consistent, and make changes based on what you see, not what you “should” do. Some nights might not go as planned, but that’s normal.
What matters is that you’re paying attention and doing what feels right.
A few small changes can lead to longer, more restful sleep for both you and your baby, and that’s a win in my book.
Are you struggling with your baby’s sleep patterns? You’re not alone. The 4-month wake window can feel like a maze of confusion for new parents.
Managing your baby’s wake windows can be challenging. Wake windows are when your baby is awake between naps, and they are essential for their daily routine and development.
In this guide, you’ll learn:
Understanding wake windows
Typical sleep patterns at four months
Essential tips and common mistakes
I know parenting isn’t always easy, that’s why I’m here to help you manage your 4-month-old’s wake times effectively.
Trust my advice to make your days smoother. Read on to solve your wake window challenges and create a happier routine for both you and your baby.
Understanding Your Four-Month Wake Window
When my first child hit the four-month mark, I thought I had baby sleep figured out. But I was wrong.
The four-month wake window is a critical developmental stage that turns everything you know about infant sleep upside down.
Think of it like a sleep revolution happening in your baby’s brain. Their sleep cycles are maturing, becoming more adult-like, which means shorter naps and more frequent wake-ups.
What exactly does this mean for you?
Babies start connecting sleep cycles differently
Nighttime sleep becomes more fragmented
Nap times become shorter and less predictable
Imagine your baby’s brain like a new smartphone updating its operating system.
During this phase, their sleep software is getting a major upgrade. Some days will be smooth, others will feel like a tech glitch.
My top tip? Watch your baby’s unique signals. Some infants need 1.5-hour wake windows, others closer to 2 hours.
Why Are Wake Windows Important?
Wake windows are the golden hours between your baby’s sleep cycles.
They’re crucial for understanding your infant’s natural rhythm, preventing overtiredness, and supporting healthy sleep development.
1. The Sleep-Awake Balance
I learned about wake windows the hard way – through many sleepless nights and cranky days. Think of wake windows like a delicate dance between alertness and tiredness.
When you understand this, you unlock the secret to smoother days and more predictable nights. Your baby’s body has an internal clock that tells them exactly when they need rest.
By watching for subtle cues, you can help them transition from playtime to naptime with minimal fuss.
2. Preventing Overtiredness
Overtiredness is a parent’s worst nightmare. When babies stay awake too long, their bodies release stress hormones like cortisol, making it harder to fall asleep.
By respecting their wake windows, you prevent this meltdown scenario. You’ll notice fewer tears, shorter settling times, and more consistent sleep patterns.
3. Brain Development Connection
Every moment of awake time is a learning opportunity for your baby’s developing brain. Wake windows aren’t just about sleep – they’re about growth.
During these periods, your infant absorbs information, practices new skills, and processes the world around them. When you time these windows correctly, you’re supporting their cognitive and physical development.
Bonus: you’ll see more engaged playtime and quicker learning of new motor and social skills.
4. Individual Patterns Matter
No two babies are identical, and wake windows prove this perfectly. What works for one infant might not work for another.
I’ve seen parents follow strict schedules only to realize their baby marches to a different beat. Tracking your baby’s unique signals becomes an art form.
Some need shorter wake times, others can handle longer periods of alertness. The secret is observation – watching their eye rubs, yawns, and mood shifts to understand their personal rhythm.
Typical Sleep Patterns at Four Months
At four months, your baby’s sleep world changes dramatically.
This is when childhood sleep starts to look more like adult sleep patterns, bringing both challenges and exciting developmental milestones.
1. Daytime Nap Landscape
Naps become a strategic mission at this age. Typically, your four-month-old will take 3-4 naps daily, each lasting 30-90 minutes.
Unpredictability is the name of the game. Some days, naps might feel like a well-choreographed dance; other days, they’ll resemble a chaotic improvisation.
Watch for your baby’s unique tired signals – eye rubbing, mild fussiness, or decreased interaction are your primary clues.
2. Nighttime Sleep Transitions
Nighttime sleep starts to consolidate, but don’t expect uninterrupted bliss. Most four-month-olds still wake 1-2 times for feeding. Imagine sleep as a bumpy road with occasional smooth patches.
Your little one might sleep 10-12 hours total at night, broken into segments. Some babies start sleeping 6-8 hour stretches, while others continue frequent wake-ups.
3. Sleep Cycle Maturation
Your baby’s sleep cycles are growing up. Gone are the newborn days of constant drowsiness. Now, they experience distinct sleep stages similar to adults – light sleep, deep sleep, and REM.
These cycles typically last 45-60 minutes. When they transition between cycles, they might briefly wake up.
Pro tip: learning to self-soothe becomes crucial during this phase.
4. Emerging Sleep Patterns
Circadian rhythms start taking shape around four months. Your baby begins distinguishing between day and night more clearly.
Melatonin production increases, helping regulate sleep-wake cycles. Creating a consistent bedtime routine – dim lights, soft music, gentle cuddles – helps signal sleep time.
What to Do with the Baby During Wake Windows?
Wake windows aren’t just about waiting for the next nap. They’re golden opportunities for bonding, learning, and development. Let’s see how to make the most of these precious moments.
1. Sensory Exploration
Babies at four months are like tiny scientists constantly exploring their world. Texture becomes their favorite research project. I found that simple household items can be magic entertainment.
Soft scarves, wooden spoons, and crinkly paper become fascinating tools. Try laying your baby on a textured blanket, let them touch different surfaces, or create a mini sensory basket.
2. Tummy Time Adventures
Tummy time isn’t just an exercise – it’s a strength-building superhero activity. Your little one develops neck, shoulder, and arm muscles critical for future milestones.
Some babies hate it, others love it. Make it fun. Use mirrors, place interesting toys just out of reach, or join them on the floor.
I used to sing silly songs during tummy time, turning potential frustration into giggles.
3. Communication and Interaction
Four-month-olds are communication sponges, and they’re learning the art of conversation long before they can speak.
Talk to your little one about everything – what you’re doing, what they’re seeing. Make eye contact, use animated facial expressions, and respond to their coos and babbles.
4. Gentle Movement and Play
Movement is your secret weapon during wake windows. Gentle bouncing, swaying, or baby-wearing can be both soothing and stimulating.
Try different positions – supported sitting, gentle leg bicycles, or soft stretches. I found that changing locations – from floor to chair to outside – kept my baby engaged and curious.
Remember: short bursts of activity are key.
5. Quiet Observation Time
Not every moment needs intense stimulation. Some wake windows are perfect for quiet observation. Place your baby near a window and let them watch leaves move, or sit in a room with soft background sounds.
These moments of calm exploration are crucial for brain development. It helps them learn to be comfortable with themselves.
Sample Sleep and Feeding Schedule for Your Four-Month-Old?
Finding the right schedule can make life easier for you and your baby. At four months, most babies follow a pattern of waking, feeding, playing, and sleeping. Refer to this example for guidance:
Morning
7:00 AM: Wake up and feed (breastfeeding or formula).
7:30-8:30 AM: Playtime (tummy time, gentle games).
8:30-9:30 AM: Morning nap.
Midday
9:30 AM: Wake up and feed.
10:00-11:30 AM: Playtime and short outings if needed.
6:30-7:00 PM: Bath or bedtime routine (singing, cuddling).
7:00 PM: Down for the night.
Essential Tips for Your Baby’s Wake Windows
Figuring out your baby’s wake windows can feel like solving a complex puzzle. These easy tips will help you understand, manage, and maximize these critical developmental moments.
Watch for subtle signs of baby fatigue
Learn to recognize unique tired cues
Track wake windows between 1.5 and 2 hours
Use a simple timer or smartphone app
Pay attention to decreased social interaction
Notice early signs of eye rubbing
Be flexible with timing
Rotate interesting toys during awake time
Practice gentle tummy time
Common Mistakes in Managing Four-Month Wake Windows
Parenting is tough, and managing wake windows can be difficult too. Learn about these common mistakes that can disrupt your baby’s sleep routine.
Ignoring your baby’s tired signals
Keeping the baby awake too long
Sticking to a strict, inflexible schedule
Missing the perfect sleep window
Waiting until the baby is completely exhausted
Not adjusting wake times as the baby grows
Comparing your baby to others
Skipping tummy time
Letting the baby get bored
Conclusion
Mastering the 4-month wake window doesn’t have to feel like rocket science. I’ve covered everything from understanding sleep patterns to avoiding common mistakes.
Your key takeaways:
Recognize your baby’s unique signals
Create flexible wake window routines
Understand developmental changes
Remember, every baby is different. What works for one might not work for another. Trust your instincts and be patient with yourself. Parenting is a learning journey, not a perfect performance.
If you’re feeling overwhelmed, take a deep breath. Small adjustments can make huge differences in your baby’s sleep and your family’s peace.
Keep tracking, stay flexible, and celebrate the little victories.
Is bedtime at your house all over the place? You’re not alone. Most new parents dream of the day when their little one will go to sleep at a normal hour instead of partying until midnight!
The good news? Your baby will start going to bed earlier – and it might happen sooner than you think. Those short, random sleep bursts do turn into more regular sleep patterns with an actual bedtime.
In this post, we’ll discuss when babies start going to bed earlier, why this shift happens, and how you can help the process along.
You’ll learn simple steps to set up a bedtime routine that works for both you and your baby.
Better sleep is coming – for everyone in your house! Let’s find out how to get there.
How Do New Born Babies Sleep?
Before your baby can settle into an earlier bedtime, it’s important to understand how their sleep works in the first few months.
Newborns need a lot of sleep—usually around 14-17 hours a day—but it’s not in long stretches. They sleep in short bursts of 2-3 hours, often waking to feed.
This sleep pattern happens because their brains haven’t fully developed the ability to distinguish between day and night.
As a result, babies often wake up throughout the night. This can be tough for parents, but it’s a normal part of your baby’s early life.
As your baby grows, it will start to develop its circadian rhythm (the body’s natural 24-hour clock).
What Does an Early Bedtime Mean?
When parents talk about an “early bedtime” for babies, they usually mean putting the baby to bed between 6:00 PM and 7:30 PM.
This might seem very early, especially if you’re used to staying up later yourself!
Many sleep experts say that 7:00 PM is a good target time for most babies. But the right time can be anywhere in that 6:00-7:30 PM range, depending on your baby.
Some signs you’ve found the right bedtime:
Your baby falls asleep within 15-30 minutes of being put down
Your baby wakes up happy in the morning
Your baby doesn’t seem too tired during the day
When Do Babies Start Going to Bed Earlier?
Many parents notice their baby starts to have a more set bedtime around 3-4 months old. This is often the first time babies begin to sleep on a more regular schedule.
During this time, you might see your baby:
Start to get sleepy at the same time each evening
Sleep for longer stretches at night (4-6 hours)
Wake up at more regular times in the morning
By 3-4 months, many babies do well with a bedtime between 7:00 PM and 8:30 PM. This is earlier than the late evening bedtimes that most newborns have.
Why This Change Happens at 3-4 Months
This shift to an earlier, more set bedtime happens for several important reasons:
Brain Growth: Around 3-4 months, babies begin producing melatonin, the sleep hormone, in a regular pattern, helping them feel sleepy as it gets dark.
Sleep Cycle Changes: Babies start developing longer, deeper sleep cycles similar to adults, which helps them stay asleep for extended periods at night.
Less Daytime Sleep: As they transition to 3-4 naps instead of 5-6, babies need more sleep at night to make up for shorter daytime naps.
More Alert Time: Babies begin staying awake longer between naps, leading to increased tiredness by evening, which prepares them for an earlier, longer sleep.
These natural developments work together to gradually shift your baby toward longer nighttime sleep with an earlier bedtime.
Common Sleep Challenges that Might Arise
While your baby’s sleep patterns mature, you might encounter specific hurdles. Here are some frequent issues and how to address them:
Night Wakings: Babies might still wake up during the night, even after transitioning to an earlier bedtime, due to hunger, discomfort, or developmental changes.
Daytime Sleep Struggles: Adjusting to fewer naps can sometimes make babies overtired, leading to difficulty falling asleep or staying asleep at night.
Sleep Regression: Around 3-4 months, some babies experience sleep regression, where they temporarily have more difficulty sleeping, often due to changes in their sleep cycles or developmental milestones.
Short Naps: Babies may struggle with taking longer naps, which can lead to an overtired baby by the evening and make it harder to settle for bedtime.
Difficulty Self-Soothing: Babies at this age are still learning how to self-soothe and might rely on being held or rocked to fall asleep, which can disrupt their sleep routine.
Understanding these challenges can help you respond effectively and support your baby’s transition to more structured sleep patterns.
How Can You Encourage an Earlier Bedtime for Your Baby?
Creating the right conditions can help your baby settle into an earlier bedtime routine. Here are some practical approaches that many parents find helpful:
1. Create a Consistent Bedtime Routine
Starting around 3 months, introduce calming bedtime routines that signal sleep time to your baby.
One important part of this is to begin with a warm bath, as the gentle warmth helps relax your baby’s muscles and signals that bedtime is approaching. Here are some more helpful tips:
Change into special sleep clothes: Use specific pajamas only for bedtime to help create another sleep association.
Read a quiet story: Reading a short, calming story—even for very young babies—helps them unwind, as the soft sound of your voice reading a simple book is soothing.
Stick to a consistent routine: Try to follow the same sequence of activities at approximately the same time each evening for consistency.
2. Optimize the Sleep Environment
The right environment plays a significant role in helping your baby fall asleep easily. Follow these tips to successfully optimize your baby’s sleep Environment
Control light exposure: Dim the lights 30-60 minutes before bedtime and consider using room-darkening curtains to block out light.
Maintain a comfortable room temperature: Ideally, keep the room temperature between 68-72°F (20-22°C) to avoid your baby getting too hot or cold.
Use white noise: A gentle, consistent sound can mask household noises and remind babies of the sounds they heard in the womb.
For babies under 3-4 months who aren’t yet rolling, swaddling can provide added comfort, helping them feel secure and reduce the chances of startling.
3. Watch for and Respect Sleep Windows
Timing is crucial to helping babies transition smoothly to sleep.
Learn your baby’s tired signals: Each baby shows unique cues like rubbing their eyes, turning away from stimulation, or becoming less active.
Prevent overtiredness: When babies become too tired, stress hormones can make it more difficult for them to settle down.
Follow age-appropriate awake times: Young babies (0-3 months) may only stay awake for 45-90 minutes, while older babies can stay awake for 2-3 hours. Be flexible but consistent—adjust bedtime earlier if your baby shows tiredness cues before the usual time.
Why is an Early Bedtime Beneficial for Babies?
An early bedtime offers several key benefits for babies. First, it aligns with their natural sleep cycles, making it easier for them to fall asleep and stay asleep for longer periods.
Babies’ bodies are wired to feel sleepy earlier in the evening, so an early bedtime ensures they’re getting the rest they need when they’re naturally tired.
This deeper and longer sleep not only helps babies feel more refreshed but also supports their physical and mental development.
A predictable bedtime also promotes better sleep habits, which can lead to more restful nights for both the baby and the parents.
Ultimately, an early bedtime is essential for helping babies establish healthy sleep patterns and supporting their growth and well-being.
Conclusion
Babies typically start going to bed earlier, around 3-4 months, when their sleep patterns mature. Recognizing the signs of tiredness and establishing a bedtime routine will help your baby transition to an earlier bedtime.
By being consistent and patient and by responding to your baby’s sleep needs, you can help them settle into a healthier sleep schedule.
Remember, you’re not just helping your baby sleep—you’re building a foundation of comfort, security, and trust.
Parenting is the hardest job in the world, but you’re doing an incredible job. One night at a time, one sweet dream at a time, you’re helping your baby to develop and grow.
If you’re looking for more tips on creating a peaceful bedtime routine, be sure to check out our other parenting guides or join the discussion in the comments below!
Frequently Asked Questions
Is It Normal for My Baby to Sleep Only in Short Bursts?
Yes, newborns typically sleep 2-3 hours at a time due to their need for frequent feedings. Sleep periods naturally lengthen as babies grow.
Is It Safe for My Baby to Sleep on Their Stomach?
No. Always place babies on their backs to sleep to reduce SIDS risk. Use a firm mattress without soft bedding or pillows.
How Can I Help My Baby Learn to Self-Soothe?
Put your baby down drowsy but awake. Use gentle pats and soft sounds to provide comfort while allowing them to fall asleep independently.
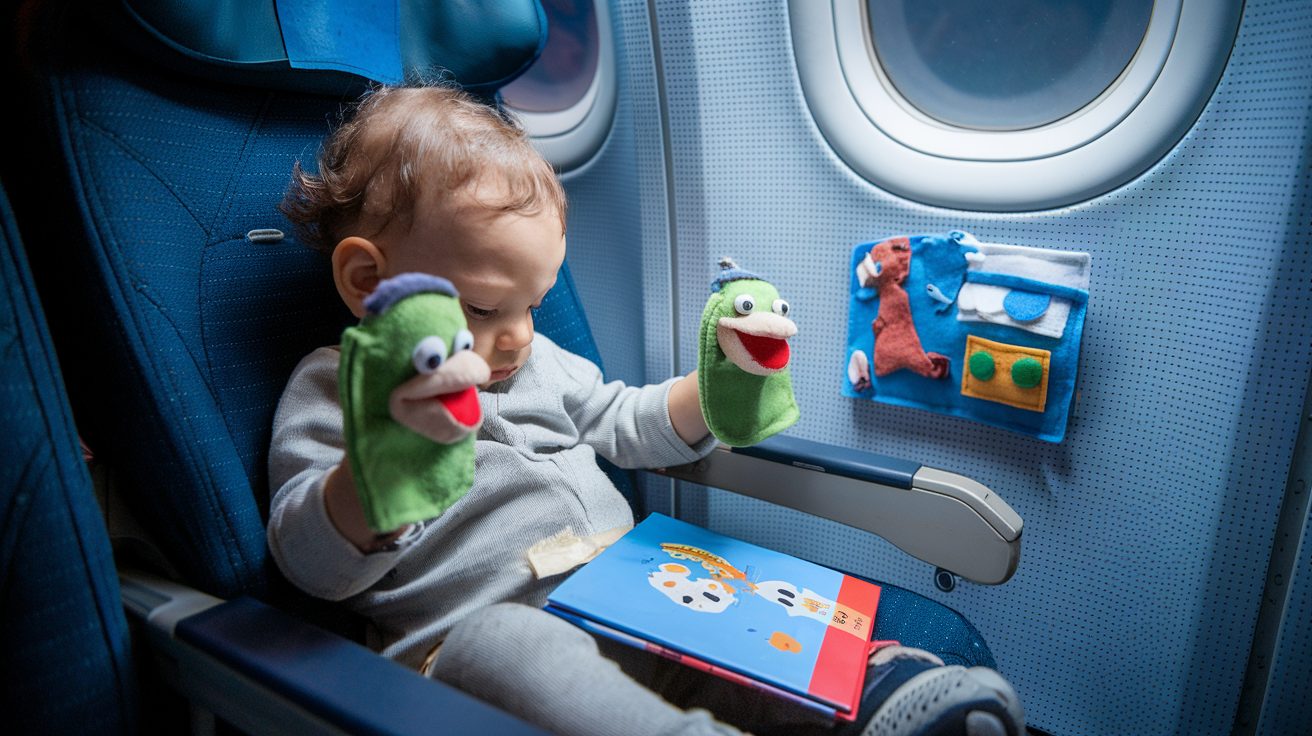
Flying with toddlers strikes fear into even the most seasoned parents—the confined space, the inability to run free, and the dreaded meltdown potential.
But with strategic planning, your flight can shift from survival mode to genuine enjoyment.
This collection of airplane activities specifically tackles the challenges of entertaining 1-3-year-olds at 30,000 feet.
These aren’t just generic kids’ activities—they’re tailored for the limited space, noise considerations, and attention spans of toddlers in flight.
From mess-free art options to sensory play that fits on a tray table, we’ve tested these ideas through turbulence and tired tantrums.
Pack these parent-proven activities in your carry-on, and watch your little one stay engaged while fellow passengers breathe sighs of relief. Air travel with toddlers doesn’t have to be the nightmare everyone warns about.
How to Prepare for the Trip
Success with toddlers in the air begins before you ever board the plane. Taking time to understand and anticipate their needs can make all the difference.
Understanding Your Toddler’s Needs
Toddlers aren’t simply small adults – they process travel differently, with shorter attention spans and a greater need for physical activity.
Before selecting activities, consider your child’s specific temperament.
Is your little one drawn to tactile experiences? Do they prefer familiar objects or get excited by novelty? Are they morning-energetic but afternoon-drowsy?
Matching activities to your child’s natural rhythms and preferences increases your chances of a smoother flight.
Remember that most toddlers can focus on a single activity for roughly 2-5 minutes per year of age, so plan to rotate through options frequently.
Strategic Packing
Organization becomes your greatest ally when flying with toddlers. Consider these strategic packing approaches:
Use clear zip-top bags to separate activities by type (art supplies in one, small toys in another)
Create individual activity packets that contain everything needed for one activity
Pack a “surprise bag” with new items to be revealed only when necessary
Keep essentials (snacks, wipes, favorite comfort item) in an easily accessible outer pocket
Consider using a hanging organizer that attaches to the seat back to keep activities visible and within reach
This systematic approach prevents the frustrating digging through bags mid-flight and helps you quickly access the perfect activity when you need it most.
Creative & Mess-Free Art Activities
1. Color Wonder Markers and Paper
Age Group: 2-3 years Materials Needed: Crayola Color Wonder markers, Color Wonder paper
Step-by-Step Instructions:
Pack Color Wonder markers and special paper in a ziplock bag.
Give your toddler one marker at a time to prevent dropping.
Show them how the “magic” works by making a mark on the special paper.
Rotate marker colors throughout the flight to maintain interest.
Benefits
Mess-free, won’t mark clothes or tray tables
Duration
10-15 minutes
Tips for Engagement
Bring paper with outlines of favorite characters
Safety Considerations
Non-toxic, cap may be a choking hazard
Variations
Travel-sized sets available with smaller paper
Why Toddlers Love It: The “magical” appearance of colors on blank paper creates an exciting cause-effect experience that feels like a special power.
2. Reusable Sticker Books
Age Group: 2-3 years Materials Needed: Reusable vinyl sticker books with scenes
Step-by-Step Instructions:
Introduce the sticker book by showing the scene pages first.
Demonstrate how stickers can be placed and peeled off repeatedly.
Start with just a few stickers for younger toddlers to manage.
Create simple “find and place” games like “put the dog near the tree.”
Benefits
Develops fine motor skills, no mess, reusable
Duration
15-20 minutes
Tips for Engagement
Narrate stories about the stickers’ placement
Safety Considerations
Supervise to prevent putting stickers in mouth
Variations
Melissa & Doug, Usborne, and Sassafras offer different themes
Why Toddlers Love It: The tactile satisfaction of peeling and sticking combines with the power of controlling where things go.
3. Water Reveal Pads
Age Group: 2-3 years Materials Needed: Water reveal coloring books, water pen
Step-by-Step Instructions:
Fill the special water pen before boarding (only partially to prevent leaks).
Show your toddler how colors or pictures appear when the pen touches the page.
Let them experiment with making marks on different parts of the page.
When the page dries, it can be used again, extending the activity’s lifespan.
Benefits
No mess, reusable as it dries, airplane-friendly
Duration
15-25 minutes
Tips for Engagement
Ask questions about what they’re revealing
Safety Considerations
No choking hazards if pen cap is secured
Variations
Water Wow! pads, Aquadoodle books, Crayola Color Wonder Water Books
Why Toddlers Love It: The magical reveal effect of hidden pictures appearing feels like a special trick only they can perform.
4. Magnetic Drawing Board
Age Group: 2-3 years Materials Needed: Travel-sized magnetic drawing board with attached stylus
Step-by-Step Instructions:
Secure the drawing board on the tray table or child’s lap.
Show how the stylus creates lines and the slider erases them.
Take turns drawing simple shapes or lines for your toddler to copy.
Create a game of “guess what I’m drawing” for older toddlers.
Benefits
Completely mess-free, reusable, develops fine motor skills
Duration
10-20 minutes
Tips for Engagement
Draw outlines of simple objects for them to complete
Safety Considerations
Ensure stylus is securely attached
Variations
Mini versions available with finger-sized stylus
Why Toddlers Love It: The immediate visual feedback combined with the satisfying sensation of making marks attracts toddlers, while the instant-erase feature prevents frustration.
5. Flip Books with Moving Tabs
Age Group: 1-3 years Materials Needed: Interactive board books with pull tabs, flaps, or sliding elements
Step-by-Step Instructions:
Select books with sturdy mechanisms that won’t tear easily.
Demonstrate how to gently pull tabs or lift flaps.
Create anticipation by asking “What do you think is behind this flap?”
Let your toddler take the lead once they understand how the book works.
Benefits
Builds fine motor skills while encouraging focus and prediction
Duration
10-15 minutes
Tips for Engagement
Use exaggerated surprise reactions when discovering hidden elements
Safety Considerations
Reinforced tabs hold up better to enthusiastic handling
Variations
Books with textured elements add sensory engagement
Why Toddlers Love It: The immediate cause-and-effect relationship of moving a tab and seeing the result satisfies toddlers’ curiosity.
6. Crayon Rolls with Mini Coloring Pages
Age Group: 2-3 years Materials Needed: Fabric crayon roll with 5-6 crayons, small coloring sheets
Step-by-Step Instructions:
Pack a crayon roll with individually secured crayons to prevent dropping.
Bring quarter-page sized coloring sheets rather than full books.
Demonstrate coloring within a small area first.
Offer just 1-2 pages at a time to prevent overwhelm.
Benefits
Develops fine motor control and color recognition
Duration
10-15 minutes
Tips for Engagement
Create simple challenges like “Can you find all the blue spots?”
Safety Considerations
Triangle or egg-shaped crayons won’t roll off tray tables
Why Toddlers Love It: The familiar activity provides comfort while the special travel-sized materials make it feel like a unique experience.
7. Roll-up Chalkboard Mat
Age Group: 2-3 years Materials Needed: Travel-sized fabric chalkboard mat, dustless chalk
Step-by-Step Instructions:
Spread mat flat on tray table or lap.
Show how to draw with chalk and erase with attached cloth.
Start with simple mark-making or tracing shapes.
Roll up and secure with attached tie between uses.
Benefits
Provides drawing practice with minimal dust and easy storage
Duration
10-15 minutes
Tips for Engagement
Play simple games like tic-tac-toe or connect dots
Safety Considerations
Use dustless chalk to minimize mess; wipe hands after use
Variations
Some mats feature printed outlines or games for added engagement
Why Toddlers Love It: The novelty of chalk compared to regular crayons creates interest, while the roll-up design feels special and different.
8. Mini Whiteboard with Marker
Age Group: 2-3 years Materials Needed: Small whiteboard with attached marker, cleaning cloth
Step-by-Step Instructions:
Pack a compact whiteboard with marker securely attached by string.
Demonstrate drawing simple shapes or lines.
Show how to erase with the cloth when board gets full.
Play games like taking turns adding to a drawing or playing tic-tac-toe.
Benefits
Develops pre-writing skills with renewable drawing surface
Duration
10-15 minutes
Tips for Engagement
Trace your toddler’s hand or draw simple pictures for them to identify
Safety Considerations
Use low-odor markers; keep cap attached when not in use
Variations
Double-sided versions offer more drawing space
Why Toddlers Love It: The ability to create and erase repeatedly encourages experimentation without fear of mistakes.
9. Dry-erase Activity Boards
Age Group: 2-3 years Materials Needed: Small dry-erase board with attached marker, simple activity cards
Step-by-Step Instructions:
Pack a board with marker securely attached by string.
Bring 2-3 simple activity cards with traceable lines or shapes.
Demonstrate how to make marks and erase with tissue or cloth.
Encourage free drawing between structured activities.
Benefits
Develops pre-writing skills and hand control with erasable mistakes
Duration
10-15 minutes
Tips for Engagement
Take turns drawing something for the other to guess
Safety Considerations
Low-odor markers are best; keep caps secured when not in use
Variations
Magnetic drawing alternatives eliminate marker concerns
Why Toddlers Love It: The ability to create and erase repeatedly without consequence encourages experimentation and reduces frustration.
Sensory & Fine Motor Skill Builders
10. Threading Beads on Pipe Cleaners
Age Group: 2-3 years Materials Needed: Large wooden or plastic beads, pipe cleaners
Step-by-Step Instructions:
Bend one end of pipe cleaner to prevent beads from falling off.
Demonstrate how to thread beads onto the straight end.
Offer a small container of large beads to select from.
Create patterns using different colored beads for older toddlers.
Benefits
Develops fine motor coordination and focus
Duration
10-15 minutes
Tips for Engagement
Create a “necklace” or “snake” story while threading
Safety Considerations
Use beads larger than 1 inch diameter; keep pipe cleaner ends tucked
Variations
Pony beads for older children; foam beads for quieter play
Why Toddlers Love It: The satisfying sensation of successfully threading beads provides immediate accomplishment and visual progress.
11. Lacing Cards
Age Group: 2-3 years Materials Needed: Premade lacing cards, thick shoelace or yarn with taped end
Step-by-Step Instructions:
Pack 2-3 different lacing cards with colorful designs.
Secure one end of the lace to the card to prevent it from pulling through.
Demonstrate simple in-and-out threading motions.
Encourage your toddler to create any pattern, not just following holes in order.
Benefits
Develops fine motor skills, hand-eye coordination, and concentration
Duration
10-15 minutes
Tips for Engagement
Use cards with familiar objects or characters
Safety Considerations
Ensure lace ends are secured with tape to prevent fraying
Variations
DIY versions can be made with cardboard and hole puncher
Why Toddlers Love It: The repetitive threading motion provides a calming, focused activity with visible progress that toddlers can control.
12. Velcro Craft Kits
Age Group: 2-3 years Materials Needed: Premade sets with Velcro-backed pieces and base board
Step-by-Step Instructions:
Choose age-appropriate kits with large, simple pieces.
Demonstrate the satisfying “stick” of Velcro attachments.
Start with a theme like making a face or building a vehicle.
Allow free creation rather than following a specific pattern.
Benefits
Encourages creativity while developing fine motor skills
Duration
15-20 minutes
Tips for Engagement
Name colors and shapes as your toddler selects them
Safety Considerations
Ensure pieces are large enough to prevent choking hazards
Variations
DIY kits can be made with Velcro dots and felt shapes
Why Toddlers Love It: The distinctive Velcro sound and sensation provides immediate feedback that pieces are correctly placed.
13. Sensory Bags
Age Group: 1-3 years Materials Needed: Premade or DIY sealed bags with colored gel/liquid and small objects
Step-by-Step Instructions:
Create or purchase double-sealed bags filled with hair gel and small objects.
Secure edges with strong packing tape for flight safety.
Show how to press and move objects through the gel.
Create games like “Can you find the star?”
Benefits
Provides sensory stimulation and visual tracking practice
Duration
10-15 minutes
Tips for Engagement
Use themed items like ocean creatures or alphabet letters
Safety Considerations
Triple-check seals before flight; keep away from sharp objects
Variations
Dry sensory bags with rice or beans offer different sensory feedback
Why Toddlers Love It: The squishing sensation combined with visual hunt activities creates a focused sensory experience without mess.
14. Pop Tubes
Age Group: 1-3 years Materials Needed: Expandable plastic pop tubes (sensory toy)
Step-by-Step Instructions:
Pack 2-3 pop tubes of different colors in a ziplock bag.
Demonstrate how they expand, contract, and make popping sounds.
Show how tubes can connect together to make longer tubes.
Create shapes like circles or letters for older toddlers.
Benefits
Provides sensory input, fine motor practice, and cause-effect learning
Duration
10-15 minutes
Tips for Engagement
Whisper into one end and listen from the other
Safety Considerations
Use under supervision to prevent tangling or squeezing too hard
Variations
Mini versions available that make less noise for airplane use
Why Toddlers Love It: The satisfying sensory feedback—both tactile and auditory—creates an engaging experience that feels slightly mischievous.
15. Suction Cup Toys
Age Group: 1-3 years Materials Needed: Small toys with suction cup bases
Step-by-Step Instructions:
Pack 3-4 toys with strong suction cup bases.
Demonstrate pressing firmly on window or tray table to attach.
Show how to pull to remove and reposition.
Create games like moving characters through an imaginary story.
Benefits
Develops fine motor strength while preventing dropped toys
Duration
10-15 minutes
Tips for Engagement
Create a story about the characters traveling on the plane
Safety Considerations
Test suction strength before flight; clean surfaces first for better stick
Variations
Character-based options cater to specific interests
Why Toddlers Love It: The stability of secured toys provides control in the unfamiliar plane environment, while the suction/release action is satisfying.
16. Stretchy Fidget Strings
Age Group: 2-3 years Materials Needed: Silicone or rubber stretchy strings in various colors
Step-by-Step Instructions:
Pack 2-3 colorful stretchy strings in a small container.
Demonstrate safe stretching techniques without snapping.
Show how to wrap around fingers or make simple shapes.
Create loops or figures like circles and figure-eights.
Benefits
Provides sensory input and fine motor practice with minimal noise
Duration
10-15 minutes
Tips for Engagement
Create challenges like “Can you make a triangle?”
Safety Considerations
Choose thicker strings that won’t break easily; supervise to prevent tangling
Variations
Some strings feature different textures or subtle differences in stretchiness
Why Toddlers Love It: The resistance and stretch sensation provides calming proprioceptive input that many toddlers find regulating.
17. Sensory Balls or Squishy Toys
Age Group: 1-3 years Materials Needed: Small textured balls or squishy toys
Step-by-Step Instructions:
Pack 2-3 different textured sensory balls or squishies.
Demonstrate squeezing, rolling, or examining textures.
Create simple games like rolling back and forth on the tray table.
Name sensations: “This one is bumpy!” or “This feels squishy!”
Benefits
Provides sensory input and hand strengthening in a compact form
Duration
5-10 minutes
Tips for Engagement
Hide a small ball in your hand for a simple guessing game
Safety Considerations
Choose washable materials without small parts
Variations
Balls with different fillings offer various resistance levels
Why Toddlers Love It: The tactile stimulation helps regulate sensory input during the overwhelming experience of flying.
18. Soft Activity Cubes
Age Group: 1-3 years Materials Needed: Fabric cube with different activities on each side
Step-by-Step Instructions:
Choose a cube with a variety of textures and simple interactive elements.
Introduce one side at a time, demonstrating each feature.
Allow exploration of buckles, zippers, or textures at child’s pace.
Name colors, shapes, and actions as your toddler engages with the cube.
Benefits
Provides multiple sensory experiences in one compact toy
Duration
10-20 minutes
Tips for Engagement
Create simple challenges like “Can you find something red?”
Safety Considerations
Ensure all attachments are securely sewn; supervise play
Variations
Themed cubes available with specific skills or concepts
Why Toddlers Love It: Every side offers a different activity, providing variety without overwhelming with too many separate toys.
Puzzle & Problem-Solving Fun
19. Magnetic Puzzles
Age Group: 2-3 years Materials Needed: Travel magnetic puzzle with contained pieces
Step-by-Step Instructions:
Choose a puzzle with 5-10 large pieces for younger toddlers.
Show how pieces stick to the magnetic board.
Start by removing only 1-2 pieces, then work up to the full puzzle.
Create simple challenges like “Find the red piece” or “Where does the dog go?”
Benefits
Develops spatial awareness and problem-solving skills
Duration
10-15 minutes
Tips for Engagement
Name each piece and its position to build vocabulary
Safety Considerations
Select puzzles with pieces too large to swallow
Variations
Layered puzzles for older toddlers; simple shapes for younger ones
Why Toddlers Love It: The satisfying click of magnetic pieces provides immediate feedback and success, even when tiny hands are still developing coordination.
20. Puzzle Books
Age Group: 2-3 years Materials Needed: Board books with simple puzzles built into pages
Step-by-Step Instructions:
Select books with 2-5 piece puzzles embedded in sturdy pages.
Show how puzzle pieces fit in specific spots on each page.
Read the story first, then focus on completing puzzles.
For younger toddlers, remove only one piece at a time.
Benefits
Combines literacy with problem-solving and fine motor skills
Duration
10-15 minutes
Tips for Engagement
Relate puzzle images to real things your child recognizes
Safety Considerations
Choose books with firmly attached puzzle pieces
Variations
Options range from simple shapes to more complex scenes
Why Toddlers Love It: The combination of familiar stories with the satisfaction of completing puzzles creates an engaging multi-sensory experience.
21. Puzzle Cubes
Age Group: 2-3 years Materials Needed: Simple 2×2 or 3×3 puzzle cube with large pieces
Step-by-Step Instructions:
Select a cube with 4-9 large pieces that create complete pictures.
Show how pieces rotate to align different images.
Start with aligning just one row or side before attempting full puzzles.
Point out how pictures connect across pieces.
Benefits
Develops spatial reasoning and problem-solving skills
Duration
10-15 minutes
Tips for Engagement
Focus on the process rather than solving the entire puzzle
Safety Considerations
Choose cubes with rounded edges and secure construction
Variations
Photo cubes with family pictures provide personalized engagement
Why Toddlers Love It: The transformative nature of the changing pictures creates an element of surprise with each turn.
22. Stacking Cups
Age Group: 1-3 years Materials Needed: Nesting/stacking cups (plastic or silicone)
Step-by-Step Instructions:
Pack a set of 5-8 stacking cups that nest for compact storage.
Demonstrate building a tower by stacking largest to smallest.
Show how cups can nest inside each other for storage.
Create games like hiding small toys under cups or sorting by color.
Benefits
Teaches spatial relationships, size sequencing, and cause-effect
Duration
10-15 minutes
Tips for Engagement
Count cups as you stack or create dramatic tower collapses
Safety Considerations
Soft silicone cups are safest for youngest toddlers
Variations
Some sets include holes for water play (best saved for after the flight!)
Why Toddlers Love It: The versatility of stacking, nesting, and knocking down provides multiple play patterns that satisfy different developmental urges.
23. Fabric or Plastic Stacking Rings
Age Group: 1-3 years Materials Needed: Compact stacking ring set with 4-6 rings
Step-by-Step Instructions:
Select a set with a stable base that won’t tip easily.
Demonstrate placing rings from largest to smallest.
Mix up the rings and encourage your toddler to try stacking.
Create variations like stacking in reverse or alternating colors.
Benefits
Teaches size sequencing, fine motor control, and spatial relationships
Duration
10-15 minutes
Tips for Engagement
Name each color and size as rings are stacked
Safety Considerations
Fabric or soft plastic versions are quieter and safer
Variations
Some sets feature textured rings or rings that make subtle sounds
Why Toddlers Love It: The clear goal with visible progress creates a satisfying activity with definite completion.
24. Simple Shape Sorters
Age Group: 1-3 years Materials Needed: Compact shape sorter with 3-5 basic shapes
Step-by-Step Instructions:
Choose a shape sorter with large, easy-to-grip pieces.
Introduce shapes one at a time, naming each one.
Show how each shape fits through its matching opening.
For younger toddlers, start with the circular opening which is easiest.
Benefits
Teaches shape recognition, problem-solving, and persistence
Duration
10-15 minutes
Tips for Engagement
Create excitement when shapes fall through with “Whee!” or “It worked!”
Safety Considerations
Select sorters with pieces too large to swallow
Variations
Travel versions with fabric pouches instead of hard containers are quieter
Why Toddlers Love It: The clear success/failure feedback helps toddlers learn through trial and error with immediate results.
25. Clip-and-Snap Toys
Age Group: 2-3 years Materials Needed: Set of connecting plastic shapes that snap together
Step-by-Step Instructions:
Bring 15-20 pieces in a small container or bag.
Demonstrate how pieces connect and disconnect.
Start by making a simple chain or circle.
For older toddlers, suggest creating specific objects like flowers or faces.
Benefits
Builds fine motor strength, hand coordination, and spatial thinking
Duration
15-20 minutes
Tips for Engagement
Create a challenge of connecting all pieces into one structure
Safety Considerations
Choose pieces large enough to prevent choking hazards
Variations
Some sets feature animals or vehicles that appeal to specific interests
Why Toddlers Love It: The satisfying click of pieces connecting provides immediate feedback and success, encouraging continued exploration.
26. Zipper Pouch Sorting Games
Age Group: 2-3 years Materials Needed: Small zippered pouches, sets of sorted items (buttons, pom-poms)
Step-by-Step Instructions:
Create sorting collections with 2-3 categories (by color or shape).
Mix items together in one container.
Label zippered pouches with colors or pictures showing what goes inside.
Demonstrate sorting one of each type into correct pouches.
Benefits
Develops categorization skills, color recognition, and fine motor control
Duration
10-15 minutes
Tips for Engagement
Count items as they’re sorted; compare which group has more
Safety Considerations
Use items larger than 1 inch for younger toddlers
Variations
Themed sorting (animals to habitats, shapes to matching cards)
Why Toddlers Love It: The systematic organization appeals to toddlers’ developing sense of order while zippered pouches add a practical life skill.
Imaginative & Pretend Play
27. Finger Puppets
Age Group: 1-3 years Materials Needed: Set of soft finger puppets (animals, people, or characters)
Step-by-Step Instructions:
Introduce puppets one at a time, demonstrating how they fit on fingers.
Create simple interactions between puppets (like greeting each other).
Use different voices for each character.
Encourage your toddler to place puppets on their own fingers when ready.
Benefits
Stimulates imagination, language development, and storytelling
Duration
10-20 minutes
Tips for Engagement
Incorporate familiar scenarios like bedtime or mealtime
Safety Considerations
Choose washable puppets without small detachable parts
Variations
Paper finger puppets can be colored during flight then played with
Why Toddlers Love It: Finger puppets transform parent and child into storytellers, giving toddlers control over a miniature world.
28. Busy Board
Age Group: 1-3 years Materials Needed: Travel-sized busy board with zippers, buttons, latches
Step-by-Step Instructions:
Choose a compact busy board with securely attached elements.
Introduce one feature at a time to prevent overwhelm.
Demonstrate how each element works, then let your toddler try.
Create simple challenges like “Can you open all the zippers?”
Benefits
Teaches practical life skills while keeping hands busy
Duration
15-25 minutes
Tips for Engagement
Name each action as your child performs it to build vocabulary
Safety Considerations
Ensure all parts are firmly attached with no small detachable pieces
Variations
Travel versions fold up compactly; fabric options are quieter
Why Toddlers Love It: Busy boards simulate adult actions toddlers observe daily, satisfying their desire to mimic parents’ behaviors.
29. Mini Felt Play Sets
Age Group: 2-3 years Materials Needed: Portable felt board with themed felt pieces (farm, vehicles, etc.)
Step-by-Step Instructions:
Pack a small felt board with themed felt pieces in a zip pouch.
Introduce the theme and characters before starting play.
Show how pieces stick to the board and can be moved around.
Begin with a simple story prompt like “The cat is looking for a place to sleep.”
Benefits
Encourages storytelling, creativity, and quiet imaginative play
Duration
15-20 minutes
Tips for Engagement
Take turns adding pieces to collaborate on a story
Safety Considerations
Use larger felt pieces for younger toddlers
Variations
DIY sets can be made with specific interests like favorite books
Why Toddlers Love It: The open-ended nature allows children to create and change scenes at will, providing control over their own stories.
30. Pretend Play Sets (Mini Version)
Age Group: 2-3 years Materials Needed: Compact themed play set (doctor kit, kitchen tools, etc.)
Step-by-Step Instructions:
Select a small set with 5-6 themed items that fit in a pouch.
Introduce the theme and demonstrate each item’s purpose.
Invite pretend play scenarios appropriate to the theme.
Incorporate stuffed animals or finger puppets as “patients” or “diners.”
Benefits
Encourages imagination, role-playing, and storytelling
Duration
15-20 minutes
Tips for Engagement
Take on a character role yourself to extend the play scenario
Safety Considerations
Choose sets with larger pieces and no sharp edges
Variations
DIY sets in mint tins or small containers can be customized to interests
Why Toddlers Love It: Miniature versions of adult tools satisfy toddlers’ desire to mimic grown-up activities in a manageable, toddler-sized way.
31. Story Dice (Roll and Make a Story)
Age Group: 2-3 years Materials Needed: Soft fabric or foam dice with pictures on each side
Step-by-Step Instructions:
Pack 2-3 story dice in a small container.
Demonstrate rolling one die and identifying the picture.
Make up a simple sentence about the picture that appears.
For older toddlers, roll multiple dice and connect the pictures in a story.
Benefits
Develops language skills, creativity, and narrative thinking
Duration
10-15 minutes
Tips for Engagement
Take turns adding to the story with each new roll
Safety Considerations
Soft foam or fabric dice won’t make noise when rolling
Variations
Themed dice sets (animals, actions, places) create different story types
Why Toddlers Love It: The element of chance creates excitement while the storytelling builds confidence in language use.
32. DIY Photo Book of Family Faces
Age Group: 1-3 years Materials Needed: Small photo album with familiar faces, secured photos
Step-by-Step Instructions:
Create a small book with 5-10 photos of familiar people or pets.
Laminate or secure photos to prevent removal during travel.
Label each photo with the person’s name and relationship.
Ask “Who’s this?” or “Where’s Grandma?” as you look through together.
Benefits
Provides emotional connection to family during travel
Duration
5-10 minutes
Tips for Engagement
Add simple phrases or memories with each photo
Safety Considerations
Use durable materials that can withstand handling
Variations
Theme-based versions showing favorite places or activities
Why Toddlers Love It: Recognizing familiar faces creates comfort and security during the unfamiliar experience of flying, while practicing naming loved ones builds confidence and connection.
Learning & Travel-Friendly Flash Fun
33. Magnetic Play Scenes
Age Group: 2-3 years Materials Needed: Magnetic board with themed character pieces
Step-by-Step Instructions:
Pack a compact magnetic board with 8-10 themed pieces.
Introduce the scene theme (farm, vehicles, etc.) before adding pieces.
Demonstrate how pieces stick to the board and can be repositioned.
Create simple story prompts to encourage imaginative play.
Benefits
Encourages storytelling and imaginative play without pieces falling
Duration
15-20 minutes
Tips for Engagement
Take turns adding pieces and building on the story
Safety Considerations
Choose sets with pieces too large to swallow
Variations
Travel-sized options include fold-up cases that become the play surface
Why Toddlers Love It: The combination of storytelling freedom with pieces that stay put creates an ideal plane activity with minimal frustration.
34. Quiet Books (Fabric-based)
Age Group: 1-3 years Materials Needed: Fabric book with interactive elements on each page
Step-by-Step Instructions:
Select books with age-appropriate fasteners and activities.
Introduce one page at a time, demonstrating each activity.
Allow plenty of time for mastering each page before moving on.
Gradually let your toddler explore independently as they learn.
Benefits
Develops fine motor skills through various fastening activities
Duration
15-25 minutes
Tips for Engagement
Narrate activities using action words and descriptive language
Safety Considerations
Check for securely sewn elements before each use
Variations
Themed books available from simple skills to advanced challenges
Why Toddlers Love It: Each page offers a new challenge and skill to master, providing a sense of accomplishment and progressive difficulty.
Learning & Travel-Friendly Flash Fun
35. Interactive Sound Books
Age Group: 2-3 years Materials Needed: Interactive sound books with buttons
Step-by-Step Instructions:
Choose books with volume control to be considerate of other passengers.
Pre-set the volume to low before offering to your toddler.
Start by reading the story, pointing to buttons when appropriate.
Gradually let your toddler take control of pressing buttons as they learn the story.
Benefits
Multi-sensory engagement, familiar stories provide comfort
Duration
10-15 minutes
Tips for Engagement
Use headphones for older toddlers on longer flights
Safety Considerations
Check battery compartment is secure
Variations
Look for options with textures or lift-the-flap features
Why Toddlers Love It: The power to create sounds by pushing buttons gives toddlers a sense of control and cause-effect understanding that’s deeply satisfying.
36. Flashcards with Animals or Shapes
Age Group: 1-3 years Materials Needed: Set of sturdy flashcards with simple, bold images
Step-by-Step Instructions:
Pack 10-15 cards with familiar objects, animals, or shapes.
Present cards one at a time, naming each image clearly.
For older toddlers, ask “What’s this?” before offering the answer.
Create games like finding all the animals or matching colors.
Benefits
Builds vocabulary and recognition while providing focused activity
Duration
5-10 minutes
Tips for Engagement
Make animal sounds or shape motions to increase interest
Safety Considerations
Rounded-corner cards prevent paper cuts
Variations
Ring-bound cards prevent loss; double-sided cards offer more content
Why Toddlers Love It: The predictable pattern of viewing and naming creates a comfortable rhythm that toddlers find reassuring.
37. Ring Flashcards on a Clip
Age Group: 1-3 years Materials Needed: Set of flashcards connected by metal or plastic ring
Use blocks too large to fit in mouth; avoid small connecting pieces
Variations
Foam blocks are quieter when they fall; magnetic blocks stay together better
Why Toddlers Love It: The satisfaction of creating and (sometimes) deliberately knocking down structures appeals to toddlers’ sense of control and physical cause-effect.
Conclusion
The secret to successful air travel with toddlers isn’t hoping for a miracle—it’s arriving prepared with the right activities timed strategically throughout your flight.
These airplane-friendly options address the core needs of toddlers: movement (even when limited), sensory engagement, novelty, and comfort.
While no single activity will last the duration of a cross-country flight, rotating through this collection will help the hours pass more quickly for everyone.
Remember that perfection isn’t the goal—even experienced traveling families face challenges. The confidence you gain from each flight makes the next one smoother, building your family’s travel muscles flight by flight.
Which of these ideas are you most excited to try on your upcoming trip?
Share your experiences in the comments—your insight might save another parent’s sanity on their next flight!
Ever spent the night with tiny feet kicking your back and little hands grabbing your face?
Are you ready to reclaim your bed after months (or years) of co-sleeping with your toddler? You’re not alone!
While those snuggly moments are precious, many parents reach a point where separate sleep spaces become necessary for everyone’s well-being.
The good news? Moving your 2-year-old to their own bed isn’t just about getting your personal space back- it often leads to better sleep quality for your child, too.
Without the distraction of parents moving around, toddlers typically sleep more soundly, leading to improved daytime moods. Want to transition but feeling uncertain about how to start?
Let’s get into the process that makes this milestone smoother for everyone involved.
Why Sleep Training Your Toddler is Important?
Transitioning your 2-year-old from co-sleeping to independent sleep creates valuable benefits for the entire family.
Enhanced sleep quality for your child – Without parental movements, position changes, or sleep sounds disturbing their natural sleep cycles.
Critical self-soothing skill development – Children learn to manage their own comfort and emotions, building confidence and independence
Restored parental sleep patterns – Enjoy uninterrupted rest without midnight kicks, covers being pulled away, or whispered demands
Reclaimed adult space and relationship time – Reestablish your bedroom as a place for privacy, conversation, and connection with your partner
Research shows that children who learn healthy sleep habits early tend to maintain better sleep patterns throughout childhood and adolescence.
The short-term challenges of sleep training are outweighed by the long-term benefits of establishing consistent, independent sleep routines that support overall family well-being.
When to Transition from Co-Sleeping?
There’s no magical age when co-sleeping becomes a problem. Some families happily co-sleep for years, while others are counting down the days until they can reclaim their mattress!
So At What Age Should a Toddler Stop Sleeping with Their Parents?That said, around age two is often a sweet spot for transition. At this age, kids can understand simple explanations but haven’t become too set in their sleep habits.
Look for these readiness signs:
Your toddler sometimes sleeps alone for the first part of the night
They’re showing interest in their own room or “big kid” things
Everyone’s sleep is suffering in the family bed
You’re ready for the change (this matters too!)
Parents often share that waiting too long can make the transition harder.
What to Do with Separation Anxiety of Co-Sleeping?
Here’s the thing about separation anxiety: it’s completely normal. At around 18 months to 2.5 years, many toddlers go through a phase where they’re extra clingy and want reassurance that you’re nearby.
Co-sleeping can sometimes mask these feelings rather than help children work through them.
When toddlers learn to fall asleep independently, they build confidence in their ability to be okay without you right beside them—a valuable skill that extends beyond bedtime.
One pediatric sleep specialist explains it this way: “Learning to sleep alone is like learning to ride a bike. There might be some wobbles and tears at first, but the pride that comes with mastering this skill is worth it.”
Sleep Training Methods for 2-Year-Olds
Transitioning your toddler from co-sleeping requires a structured approach.
These proven methods can help you make the switch successfully, depending on your child’s temperament and your approach to parenting.
1. Chair Method
Sit next to your toddler’s bed while they fall asleep, gradually moving the chair farther away each night until you’re outside the door.
Best For: Former co-sleepers, children needing physical reassurance, and parents preferring a gradual approach. Expected Timeline: 1-2 weeks for initial progress, 2-3 weeks for completion.
2. Sleep Lady Shuffle
Similar to the Chair Method but with slower transitions, staying closer to the bed for more nights and moving the chair in smaller increments.
Best For: Highly sensitive children, kids with separation anxiety, and parents wanting to minimize tears. Expected Timeline: 2-3 weeks for initial progress, up to 4 weeks for completion.
3. Ferber Method (Check & Console)
Put your child to bed awake and return for timed check-ins at progressively longer intervals (e.g., 3, 5, 10 minutes).
Best For: Children who get more upset with parent presence, kids needing brief reassurance, and parents seeking faster results. Expected Timeline: 3-7 days for initial progress, 1-2 weeks for completion.
4. Camping Out Method
Sleep in your child’s room for a few nights, then transition to sitting in a chair and eventually brief check-ins.
Best For: Former co-sleepers, children with strong attachment needs, and parents seeking a gradual transition. Expected Timeline: 1-2 weeks for the initial phase, 2-3 weeks for completion.
Key Tips for Success with 2-Year-Olds
Provide Explanations: “We sleep in our own beds so everyone gets good rest” is more effective than “because I said so.”
Use Visual Aids: Sticker charts and reward systems can motivate your toddler.
Celebrate Independence: Praise your child for their efforts in sleeping alone.
Be Consistent: The method matters less than being consistent in your approach.
How Long Does It Take?
Let’s be real—sleep training a toddler who’s used to co-sleeping isn’t an overnight fix. Most families see significant improvement within 1-2 weeks, but complete adjustment might take 3-4 weeks.
Factors that affect the timeline include:
Your child’s temperament: Strong-willed children often take longer.
Your consistency: Giving in occasionally resets the clock.
Previous sleep associations: The stronger the association with parent presence, the longer the adjustment.
Method chosen: Gentler methods typically take longer but may cause less resistance.
As one sleep consultant puts it: “The first three nights are usually the hardest, the first week is tough, the second week shows improvement, and by week three, you’re seeing the light at the end of the tunnel.”
When to Consult a Sleep Expert
While most sleep training challenges can be resolved at home, some situations may benefit from professional guidance.
Recognizing when to reach out for additional support is an important parenting skill.
Consider reaching out for professional support if:
Sleep problems persist for more than 2-3 weeks of consistent effort
Your child seems unusually anxious or afraid
There are signs of sleep apnea or unusual breathing patterns
Your child’s daytime behavior has significantly worsened
Your own mental health is suffering significantly
Pediatricians, family doctors, and sleep specialists can offer personalized advice and rule out medical issues.
It’s a Wrap!
Whew! Sleep training a co-sleeping toddler isn’t always a smooth ride, but the destination is so worth it. Stick with it, even when it gets tough!
Your most powerful tools?
Consistency, patience, and a good sense of humor.
That same kid who’s clinging to your leg at bedtime now might be proudly showing off their “big kid bed” to visitors in just a few weeks.
Remember, there’s no one-size-fits-all approach. Trust your gut, adjust as needed, and celebrate every tiny win along the way. The first full night in their own bed deserves a happy dance!
Before you know it, everyone will be sleeping better—just not in a tangled heap together. Sweet dreams!
Frequently Asked Questions (FAQs)
Is It Too Late to Sleep Train a 2 Year Old?
It’s not too late to sleep-train a 2-year-old. This age is actually an excellent time to transition, as toddlers can understand explanations and are developing independence.
How Long Do I Let My 2-Year-Old Cry It Out?
Avoid extended crying. Choose a gentle method, such as the Chair Method or Sleep Lady Shuffle, that provides comfort while gradually promoting independent sleep.
What are the Psychological Effects of a Child Sleeping with Parents?
Co-sleeping can impact child development. Independent sleep helps toddlers build confidence, improve sleep quality, and develop crucial self-soothing skills.
Imagine never buying another crib for your child again.
What if one piece of furniture could take your baby from newborn to toddler? A single investment adapting to your child’s changing needs throughout their growth journey.
Picture this: the same cozy haven that cradles your newborn transforms to keep your curious toddler safe, then evolves again as your child grows taller and needs more space.
Is this magical furniture real? And more importantly—is it right for your family?
Join us as we unveil this revolutionary sleep solution that’s forever changing how parents plan their nurseries.
What Is a Convertible Crib?
A convertible crib is a baby bed that changes into different types of beds as your child grows. Unlike regular cribs that serve only babies, convertible cribs can be taken apart and combined in new ways to create toddler beds, daybeds, or even full-size beds.
Think of it as building blocks that can make different structures. When your baby is small, the convertible crib has four high sides to keep them safe.
Later, when your child is old enough to climb in and out safely, you can remove one side and add a toddler rail. As they continue to grow, you can change it again into a daybed or a regular bed.
The main idea behind convertible cribs is to give you a bed that lasts for many years, not just the short time your child is a baby.
How Does a Convertible Crib Work?
Convertible cribs are designed with special parts that can be removed, rearranged, or added to change the bed as your child grows. Here’s how they work:
When you first set up a convertible crib, it looks like a regular baby crib with four high sides. These sides keep your baby safe and prevent them from falling out.
You can lower the mattress as your baby grows to keep them from climbing out. This is the first adjustment you’ll make, and most cribs have 3-4 different height settings.
When your child is ready to move from a crib to a toddler bed:
Remove the front rail of the crib
Add a toddler guardrail in its place (this usually comes with the crib or is sold separately)
Keep the mattress at the lowest setting
How Long Can Convertible Cribs Be Used?
Babies typically use a standard crib from birth until they’re about 18 months to 3 years old. The timing varies based on your child’s development and when they start trying to climb out.
For safety, your child should be moved out of the crib when they reach 35 inches in height, can climb out on their own, or the rail height is less than 3/4 of their height.
With convertible cribs, the usage timeline extends:
Crib stage: Birth to 18-36 months
Toddler bed stage: 18 months to 5 years
Daybed/youth bed stage: 5 to 10 years
Full-size bed: 10 years and up
This extended use is what makes convertible cribs popular with many families. While the mattress will need to be replaced as you convert to larger bed sizes, the frame itself will continue to serve your child through different growth stages.
Benefits of Having a Convertible Crib
Convertible cribs offer several advantages for families with growing children:
1. Cost-effective in the long run
Instead of buying multiple beds as your child grows, you invest in one piece of furniture that adapts to different stages.
2. Less furniture waste
Using one frame for many years means fewer discarded pieces of furniture, which is better for the environment and reduces clutter in your home.
3. Consistent style
Your child’s room maintains a consistent look over the years since the bed frame stays the same design, even as it changes form.
4. Easier transitions for children
Many children adjust better to sleeping in a “new” bed when it’s made from their familiar crib. The gradual change helps them feel secure during transitions.
5. Space-saving option
For smaller homes or apartments, having one piece of furniture that grows with your child saves valuable space that would otherwise be used to store unused beds.
6. Quality construction
Convertible cribs are typically built to last many years, so they’re often made with better materials and craftsmanship than standard cribs.
What to Consider When Choosing a Convertible Crib
Selecting the right crib involves careful consideration of safety, functionality, and long-term value. Here are the most critical factors that should guide your decision-making process when investing in this essential nursery item.
1. Safety Standards:
Ensure the crib meets JPMA and ASTM certifications for current safety requirements. Look for certification seals on packaging and avoid older models that may not comply with updated standards.
2. Construction Quality:
Choose cribs made from solid wood rather than particle board for durability. Check for smooth edges, secure hardware, and overall stability with no wobbling.
3. Conversion Options:
Consider how many stages the convertible crib offers, from toddler bed to full-size bed options. More conversion options typically provide better long-term value but may require additional conversion kits.
4. Mattress Height Adjustability:
Select a crib with multiple mattress height positions to lower as your baby grows. This crucial safety feature prevents climbing accidents as your child becomes more mobile.
5. Size and Space:
Measure your nursery dimensions before purchasing to ensure proper fit. Standard cribs are approximately 28 inches wide by 52 inches long, but dimensions vary between models.
Best Convertible Cribs in the Market
The convertible crib market offers exceptional options combining safety, functionality, and style for growing families. These top performers stand out for their quality construction, versatility, and value.
This versatile crib transitions from a baby crib to a toddler bed, daybed, and full-size bed, offering long-term use and built-in storage for convenience.
Certification: JPMA certified, safety tested to meet or exceed all applicable safety standards
Adjustability: Three adjustable mattress height options for growing babies
Assembly: Assembly required with easy-to-follow instructions
Durability: Crafted with sustainable New Zealand pine wood and engineered wood for lasting strength
This crib easily transforms from a crib to a toddler bed, daybed, and full-size bed, offering lasting comfort and versatility for your growing child.
Certification: JPMA certified to meet or exceed CPSC and ASTM safety standards, tested for lead and other toxic elements
Adjustability: Three mattress height adjustments to accommodate your baby’s growth
Assembly: Easy assembly with clear instructions for convenience
Durability: Strong and sturdy wood construction for long-lasting use
Tips for Sleeping Safely in A Convertible Crib
Ensuring your baby’s safety during sleep is paramount for peace of mind and proper development. Following established safety guidelines can significantly reduce risks associated with infant sleep environments.
1. Always place the baby on its back to sleep, following the AAP’s “back to sleep” recommendation. This position significantly reduces the risk of sudden infant death syndrome (SIDS).
2. Use a firm mattress that fits snugly within the crib frame, with no gaps larger than two fingers between the mattress and crib sides. An ill-fitting mattress creates dangerous gaps where infants can become trapped.
3. Keep the crib bare, with no pillows, blankets, stuffed animals, or bumper pads. Use only a fitted sheet and consider a wearable blanket or sleep sack instead of loose bedding.
4. Position the crib away from windows, blinds, cords, and furniture that could pose entanglement or falling hazards. Ensure nothing can be pulled into the crib from outside.
5. Regularly check hardware to ensure all parts remain tight and secure, and periodically inspect the crib for damage, splinters, or loose components that could create safety hazards.
To Sum It Up
Convertible cribs offer a smart solution for parents seeking long-term value in nursery furniture. By transforming from a crib to a toddler bed, daybed, and sometimes a full-size bed, these versatile pieces grow with your child through different stages.
This practical approach saves money by avoiding multiple furniture purchases and creates consistency in your child’s sleep environment.
When selecting a convertible crib, focus on safety certifications, proper mattress fit, and adjustment features to ensure years of safe use.
With proper maintenance, a quality convertible crib provides both functionality and peace of mind, making it a worthwhile investment for your growing family.