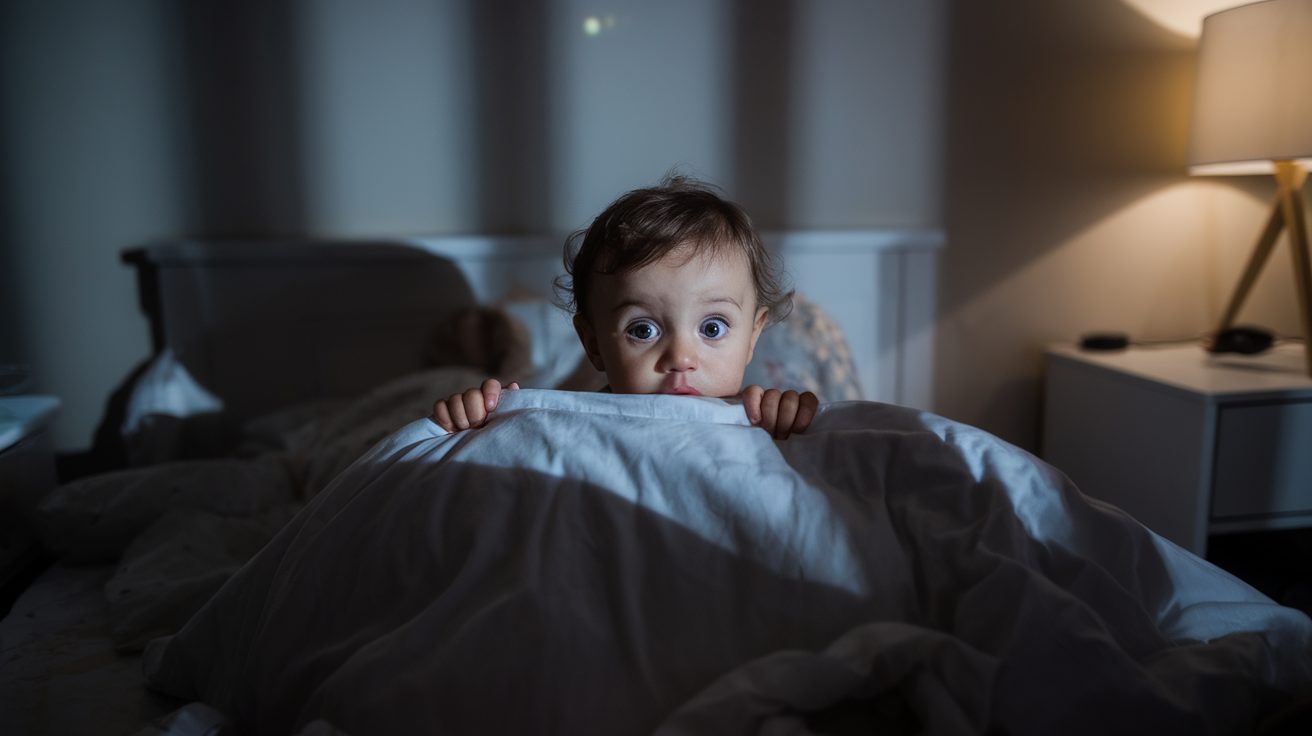
Sleep troubles with toddlers can test any parent’s patience. If your 3-year-old keeps popping out of bed at 2 AM, you’re not alone. As a child sleep consultant, I’ve helped thousands of families get better rest.
Parents often tell me: “I’ve tried everything, but my toddler still won’t stay in bed!” I hear you. The constant wake-ups leave everyone tired and frustrated.
Here’s the good news: You can help your toddler sleep through the night with the right approach. In this guide, I’ll share proven methods that work based on sleep science and real results from families I’ve worked with.
You’ll learn:
Why your 3-year-old wakes up
Simple steps to keep them in bed
How to handle middle-of-night visits calmly
Let’s help your family get the rest you need.
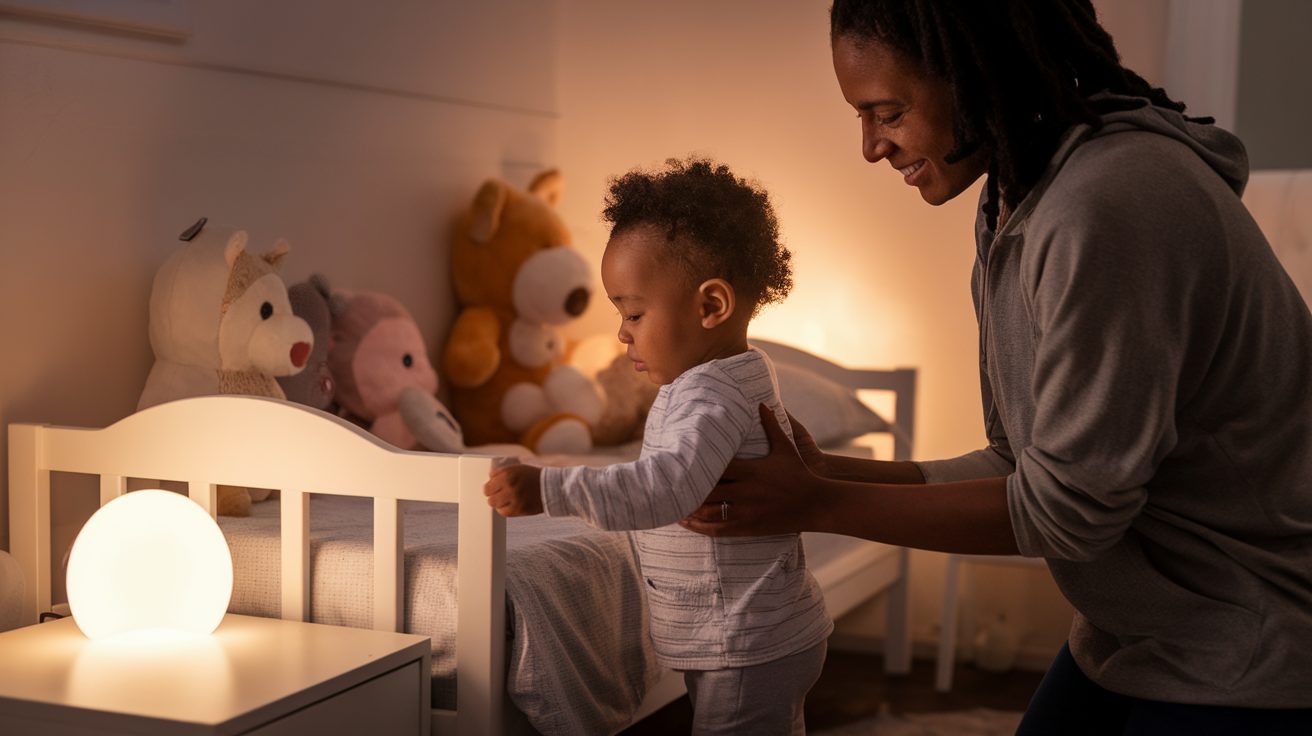
How to Transition From Crib To Bed?
The crib-to-bed switch is a huge milestone.
But here’s the thing: not every 3-year-old is actually ready for this change. Sometimes, our excitement about moving forward pushes us to transition too early.
Think about it: your crib is like a cozy nest with clear boundaries. A big bed? That’s like giving your toddler the keys to freedom.
Some key signs your child might not be ready:
Frequent middle-of-night wandering
Anxiety about the new sleeping space
Difficulty staying in bed during initial tucking in
Showing no interest in the new bed
There’s no shame in keeping your little one in their crib longer if that’s working.
Remember: every child moves at their own pace.
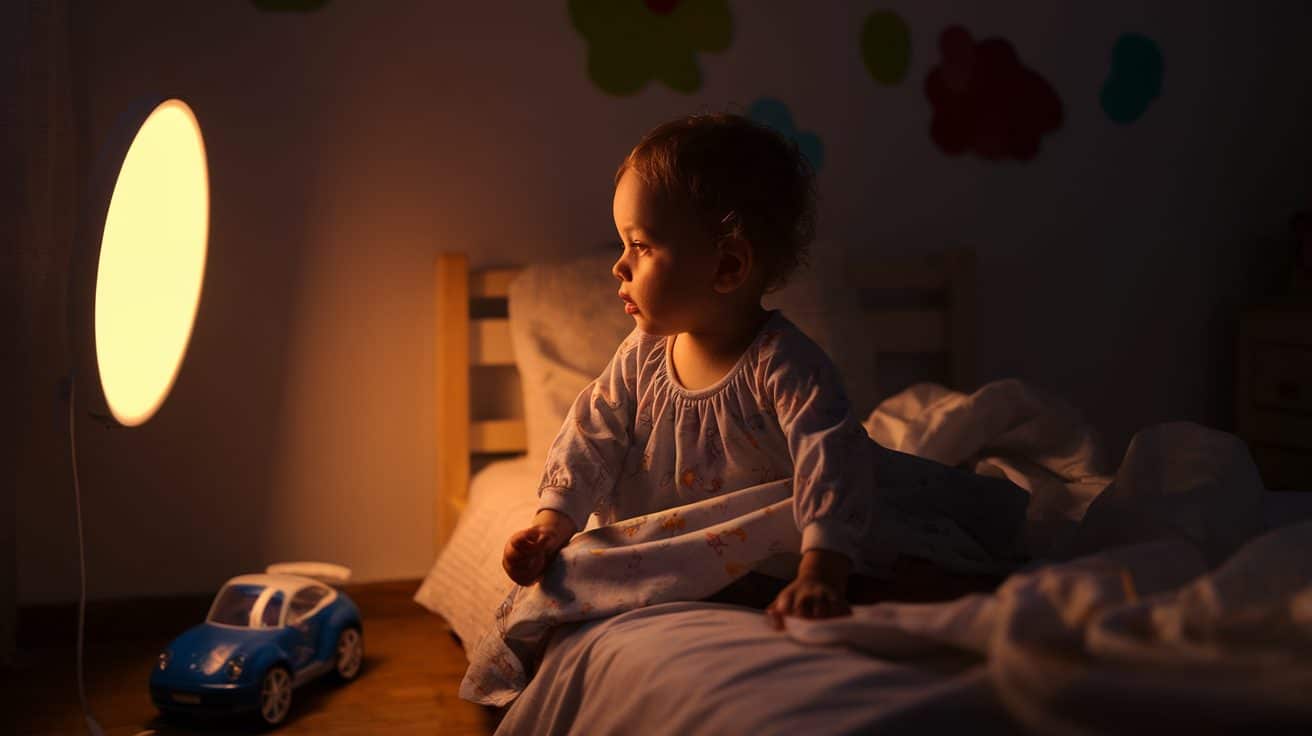
What’s Really Behind Those Bedtime Escapes?
Every parent knows that look – the one where your toddler has a million reasons not to sleep. But let’s dig deeper into what’s actually pushing them out of bed.
The Monster Under the Bed
Your child’s imagination is blossoming at age 3
Those shadows on the wall? They’re suddenly very real and scary
That stuffed bear might look different in the dark
Growing Pains and Brain Changes
Your 3-year-old’s body and mind are developing at warp speed
Sleep patterns can get messy during growth spurts
New skills and thoughts can keep their brain buzzing at bedtime
When They Don’t Feel Good
Stuffy noses make lying down uncomfortable
Teething can strike even at this age
Sometimes, they just need extra cuddles when feeling under the weather
The key? Understanding their reasons isn’t making excuses – finding solutions that work.
How to Get Your Child to Stay in Bed?
Let’s talk about real strategies – no fancy tricks, just proven methods.
Create a Bedtime Ritual They Can Count On
Keep the same steps every night: bath, books, cuddles, sleep
Start winding down 30 minutes before bedtime
No tablets or TV – they mess with sleep hormones
Think calm activities like coloring or quiet play
The “Silent Return” Method
When they get up, walk them back without talking
Keep your face neutral – no angry looks or smiles
Be boring – this isn’t playtime
Repeat as many times as needed (yes, it might be 100 times the first night)
Gentle but Firm Boundaries
Use a sticker chart for staying in bed
Try a “bedtime pass” – one free pass to get up, then done
Keep your cool – getting frustrated only makes it harder
This isn’t a sprint. You’re teaching a life skill that takes time to master.
Your Bedtime Victory Is Closer Than You Think
The bedtime battles with your 3-year-old won’t last forever, I promise.
It might feel like you’ll never have an evening to yourself again right now. But you’re one step closer to success every time you calmly walk them back to bed.
Remember:
Your toddler isn’t trying to drive you crazy
This is just a phase in their growing journey
Small changes can lead to big improvements
Keep being that patient, loving parent – even when you’re tired. Before you know it, bedtime will become the peaceful transition it’s meant to be.
You’ve got this! One bedtime at a time.
Frequently Asked Questions
Why Does My 3-Year-Old Not Want to Sleep in His Bed?
It could be due to separation anxiety, fear, or changes in routine.
Is There a Growth Spurt at 3 Years?
Yes, many 3-year-olds experience physical and developmental growth spurts.
Is It Normal for A 3-Year-Old to Sleep with Parents?
Yes, co-sleeping is common, but transitioning to independent sleep is encouraged.
What Is the Cry It out Method?
It’s a sleep training method where parents let the child cry for set periods before comforting them.
When your baby drops to 2 naps, it might feel like solving a puzzle. One day, they’re happy with 3 naps; the next, they fight and sleep like tiny warriors.
Sounds familiar?
Most babies move to 2 naps between 6 and 9 months old. But here’s the thing – every baby writes their own sleep story.
If you’re wondering why your baby’s sleep schedule seems off, take a deep breath. We’ll walk through this together.
Let’s look at the signs that show your baby is ready for this big change. And don’t worry – you’re doing better than you think.
When Do Babies Drop to 2 Naps?
Most babies switch to 2 naps between 6.5 and 8 months old.
But your baby might have other plans. Some babies drop their third nap as early as 6 months. Others hold onto it until 9 months.
Think of it like your baby’s timeline, not a strict rule.
Watch for your baby’s signals, not the calendar.
Each baby moves at their own pace.
Early or late transitions are both normal.
Remember, this is a gradual change, not an overnight switch.
Signs Your Baby Is Ready for 2 Naps
Your baby’s way of saying “I’m ready” isn’t with words. It’s with their sleep patterns.
Watch for these clear signs:
Your little one fights that third nap like it’s their job
Bedtime keeps getting pushed later and later
They wake up at 5 AM, ready to party
Naps turn into mini cat naps instead of solid sleep
They seem more tired but still resist sleep
These changes might show up slowly or all at once.
Think of these signs as your baby’s sleep language. When you see three or more of them regularly, it’s probably time.
The key word here is “regularly.” A one-off day doesn’t mean it’s time to change everything.
Common Mistakes Parents Make During 2 Nap Transition
Let’s talk about speed bumps on this sleep journey.
The biggest slip-up? Rushing the change. Your baby needs time to adjust to longer wake windows.
Many parents switch back and forth between schedules too quickly. Give each new pattern at least 4-5 days before deciding it’s not working.
Another common trap is sticking to strict clock times. Focus on wake windows instead of the clock.
Missing your baby’s sleepy cues can lead to overtiredness. Watch their behavior, not the schedule.
Some parents keep bedtime the same during the transition. Your baby might need an earlier bedtime while adjusting to fewer naps.
3 to 2 Nap Transition Waking Time of Babies
Let’s break down the daily clock.
Your baby’s wake windows will stretch like a rubber band during this time. Think 2.5 hours awake in the morning, growing to 3-4 hours by bedtime.
Morning wake window: 2.5-3 hours. Afternoon wake window: 3-3.5 hours. Final wake window: 3.5-4 hours.
Which Nap Gets Dropped?
That last nap is the first to go.
Why? It’s simple math:
Longer wake times = fewer naps fit in the day
The third nap starts pushing bedtime too late
Your baby needs deeper sleep periods now
The late afternoon mini-nap disappears as your baby learns to stay awake longer.
How Long Does the 3-2 Naps Transition Take?
Most babies need 2-3 weeks to settle into their new rhythm. Some days, you’ll stick with 3 naps. Other days, you’ll manage with 2.
Think of it like a dance – two steps forward, one step back.
What affects the timing:
How long your baby naps
Their mood and energy levels
Big life changes (like starting solids)
Growth spurts
Sleep environment
Short naps might mean you need that third nap some days.
Long, solid naps? You might skip that last nap sooner.
What If the 2-Nap Transition is Not Working?
Some transitions take longer than others. That’s normal.
Take a step back. Watch your baby’s behavior for a few days. Sometimes what looks like resistance is just a phase.
Sometimes, we rush into changes our babies aren’t ready for yet.
Signs Your Baby Isn’t Ready
They’re taking solid 3 naps with no fuss
Bedtime is still smooth with 3 naps
They can’t stay awake for longer stretches
They seem overtired with longer wake windows
How to Fix the Rough Patches
Go back to 3 naps for a week. There’s no rush. Try a mixed schedule – some days 3 naps, others 2. Let your baby lead the way.
Keep an eye on total sleep hours. Most babies need 12-14 hours total at this age—work on extending wake windows gradually. Add just 15 minutes every few days.
Can the 3 to 2 Nap Transition Cause Early Wakings?
Yes, those 5 AM wake-ups might show up during this change. But don’t worry – they’re usually temporary.
Here’s what happens:
Your baby’s body clock is adjusting to new wake windows
They might wake up early feeling ready to start the day
This happens because their sleep pressure is different now
How to handle those early birds:
Keep the room dark until your desired wake time
Don’t start the day before 6 AM if possible
Stick to your new schedule even on early-wake days
Most early wakings fix themselves within 2 weeks as your baby settles into their new rhythm.
Stay consistent. This, too, shall pass.
The 2-Nap Game Plan: Setting Your Baby Up for Success
Let’s turn this big change into small, manageable steps.
Think of it like learning a new dance – one move at a time. Your daily rhythm will look like this:
First nap: 2.5-3 hours after wake-up
Second nap: 3-3.5 hours after first nap
Bedtime: 3.5-4 hours after last nap
Rough days happen, and that’s okay. Move bedtime up 30 minutes if naps are short. If your baby’s extra tired, a quick car ride might help. On fussy evenings, start that bedtime routine early.
Start with tiny steps each day:
Push that first nap 15 minutes later
Stretch the middle wake window bit by bit
Keep your nap routine rock-solid
Keep your sleep cues steady. Your dark room, white noise, and quick snuggle routine tell your baby it’s time to rest.
Take it slow. Watch your baby’s cues. Some days will be smoother than others – and that’s perfectly normal.
Sample 2-Nap Schedules for Different Sleepers
Every baby has their own rhythm. Here are two sample schedules to help you plan your day.
Early Riser Schedule
Time
Activity
6:00 AM
Wake up
8:30-10:00 AM
First nap
10:00-1:30 PM
Awake time
1:30-3:00 PM
Second nap
3:00-7:00 PM
Awake time
7:00 PM
Bedtime
Late Sleeper Schedule
Time
Activity
7:00 AM
Wake up
9:30-11:00 AM
First nap
11:00-2:30 PM
Awake time
2:30-4:00 PM
Second nap
4:00-8:00 PM
Awake time
8:00 PM
Bedtime
Remember: These are just guides. If your baby takes shorter naps, increase bedtime by 30-45 minutes. Your baby’s sleep cues matter more than the clock.
You’ve Got This: Moving Forward with Confidence
The shift from 3 to 2 naps isn’t just about sleep – it’s about growth. Your baby is getting bigger, stronger, and more ready for longer days.
Remember to trust your instincts. You know your baby better than any guide or expert.
Some days will feel messy, and that’s okay. Progress isn’t perfect – it’s about small steps forward.
Got questions about your baby’s unique sleep needs? Drop them in the comments below. Let’s figure this out together.
Sweet dreams to you and your little one!
Frequently Asked Questions
How Long Will This Transition Take?
Most babies need 2-3 weeks to adjust fully, but each baby sets their own pace.
What If I Can’t Tell If It’s A Transition or Sleep Regression?
Sleep regressions pass in about 2 weeks, while true nap transition signs stay consistent and get stronger.
Should I Expect Early Morning Wake-ups?
Some babies wake early during the switch, which usually improves once they adjust to the new schedule.
Every mom has those days. The dishes are piled up. The kids are cranky. The house is a mess.
And that little voice whispers, “Am I doing enough?”
Here’s the truth: being a “better mom” isn’t about being perfect. It’s not about Pinterest-worthy lunches or Instagram-ready playrooms.
It’s about small, everyday choices that make a big difference.
Think of these tips as your friendly mom-to-mom chat. They’re simple shifts that any mom can try – even with a toddler hanging onto her leg.
Ready to discover how small changes can transform your motherhood journey?
Key Tips for Better Motherhood
1. Prioritize Self-Care
You can’t be your best self when you’re running on empty. As moms, we often forget about our own needs. But here’s the truth: taking care of yourself isn’t selfish.
Why It Matters:
A rested mom brings more patience to daily challenges. Your emotional energy stays higher throughout the day. Kids learn important lessons about valuing self-care by watching.
Quick Action Steps:
Use naptime for meditation or reading
Wake up 15 minutes early for quiet time
Take 5-minute breathing breaks
Pick up a forgotten hobby
Schedule short walks
2. Communicate Effectively
Good communication goes beyond daily chatter. It’s about building trust and understanding with your child.
Why It Matters:
Your kids feel emotionally safe sharing their thoughts and feelings. They learn better ways to express themselves as they grow. These skills strengthen your family bonds for years to come.
Quick Action Steps:
Get down to eye level when talking
Put away your phone during talks
Ask specific questions about their day
Listen without interrupting
Share appropriate stories from your life
3. Spend Quality Time Together
Being present beats being perfect. Your child needs your attention more than picture-perfect moments.
Why It Matters:
One-on-one time deepens your emotional connection each day. These moments create lasting memories they’ll carry into adulthood. Good behavior comes naturally when children’s emotional needs are met.
Quick Action Steps:
Set aside 15-30 minutes of uninterrupted time daily
Turn off phone notifications
Let your child choose activities
Make routine tasks fun together
Have real conversations during car rides
4. Embrace Child-like Curiosity
Let your child’s wonder guide you to rediscover the magic in everyday moments. Sometimes, the smallest things bring the biggest joy.
Why It Matters:
Natural learning happens when you follow your child’s interests. Daily routines become adventures when seen through curious eyes. Your connection grows stronger through shared discoveries.
Quick Action Steps:
Get down and explore with them
Ask “what if” questions
Join their pretend play
Stop to examine their discoveries
Share their excitement
5. Set Boundaries and Say ‘No’
Setting healthy limits makes you a better mom. You don’t have to do everything for everyone.
Why It Matters:
Clear boundaries prevent exhaustion and burnout. Your children learn valuable lessons about self-respect. Kids develop an understanding of healthy limits. Your family finds a better balance in daily life.
Quick Action Steps:
Block off phone-free family time
Take short breaks when needed
Say no without over-explaining
Keep some time just for yourself
Choose commitments carefully
6. Be Present in the Moment
Your undivided attention is the greatest gift you can give your child. Quality beats quantity.
Why It Matters:
Children feel secure when they have your full attention. Trust grows in these focused moments together. Your child learns their thoughts and feelings matter.
Quick Action Steps:
Put your phone in another room
Focus on one task at a time
Listen to their full stories
Notice small details
Share in their emotions
7. Learn to Ask for Help
Motherhood isn’t meant to be a solo journey. Reaching out makes you stronger, not weaker.
Why It Matters:
Support from others prevents feeling overwhelmed. A community of helpers enriches your parenting journey. Sharing the load makes motherhood more enjoyable. Strong support systems last through all stages of parenting.
Quick Action Steps:
List tasks others can help with
Join parent support groups
Connect with school parents
Be specific when asking
Accept help when offered
8. Accept Imperfection
Perfect moms don’t exist. Real moms who try their best do.
Why It Matters:
Letting go of perfection reduces daily stress and anxiety. Your children learn it’s okay to make mistakes. Everyone in the family develops better resilience. Your home becomes a happier, more relaxed place.
Quick Action Steps:
Acknowledge mistakes openly
Share your learning moments
Celebrate small wins
Practice self-compassion
Focus on progress, not perfection
9. Encourage Emotional Regulation
Help your children understand and manage their big feelings.
Why It Matters:
Kids who understand emotions make better choices. Children learn healthy ways to handle stress. These skills help them succeed in school and friendships.
Quick Action Steps:
Create a calming corner
Practice deep breathing together
Use feeling charts
Model managing your emotions
Validate feelings first
10. Build Positive Experiences
Small moments of joy add up to lasting memories.
Why It Matters:
Happy memories strengthen your family bond. Your child develops a positive outlook on life. These experiences build their sense of security. Joy becomes a natural part of your daily routine.
Quick Action Steps:
Start simple family traditions
Make ordinary moments special
Take photos of daily life
Create weekly rituals
Plan mini-adventures together
11. Practice Patience
Every mom knows those moments when keeping cool feels impossible. But patience isn’t about being perfect – it’s about progress.
Why It Matters:
A calm response helps your child feel safe and understood. Your relationship grows stronger through peaceful moments. Children learn better when emotions are steady. These skills help everyone handle future challenges.
Quick Action Steps:
Count to ten before responding
Take deep breaths in tough moments
Step away briefly when needed
Use simple calming phrases
Remember this phase will pass
12. Show Appreciation for Your Children
Small words of encouragement can make a big difference in your child’s day.
Why It Matters:
Kind words create a positive home atmosphere. Children who feel valued try harder at new things. Your relationship grows stronger with each acknowledgment.
Quick Action Steps:
Notice small efforts
Give specific praise
Celebrate daily wins
Write little thank-you notes
Share proud moments
13. Create a Structured Routine
Kids thrive on knowing what comes next. A simple routine brings comfort and clarity.
Why It Matters:
Predictable days help children feel secure and calm. Regular routines make transitions easier for everyone. Good habits form naturally through consistent schedules. Children learn responsibility through regular expectations.
Quick Action Steps:
Set consistent meal times
Create a bedtime ritual
Make a visual schedule
Plan regular activities
Keep weekends predictable
14. Teach Empathy and Kindness
Raising kind kids starts with small daily actions.
Why It Matters:
Understanding others’ feelings prevents conflicts. These skills help them succeed in school and life. Your family creates a positive impact in your community. Empathy makes the world a better place for everyone.
Quick Action Steps:
Discuss others’ feelings
Read books about kindness
Practice random acts of kindness
Help others together
Acknowledge kind choices
15. Foster Independence
Let them try, fail, and succeed. Small steps lead to big confidence.
Why It Matters:
Independent kids become capable adults. Learning from mistakes builds real confidence. These skills prepare them for future challenges. Your child develops trust in their abilities.
Quick Action Steps:
Assign age-appropriate chores
Let them make simple choices
Teach basic life skills
Allow safe mistakes
Praise effort over perfection
Your Journey to A Better Mother Starts Now!
Motherhood is a beautiful journey of growth, learning, and love. These simple strategies aren’t about being perfect but about being present, authentic, and intentional in parenting.
Start by choosing just one or two areas to focus on this week.
Maybe it’s spending ten minutes uninterrupted time with your child or taking a few moments for self-care. Build from there.
Ready to Transform Your Parenting Journey? Share your experience below and take the first step toward more joyful, confident parenting.
Frequently Asked Questions
What Is The Hardest Age to Be A Mom?
Answer based on different stages and personal experiences, addressing the challenges of each age group.
How Do I Know I am A Good Mom?
Recognize that being a good mom is about love, learning, and doing your best. Self-reflection and feedback from children can guide you.
Which Stage Of Motherhood Is The Hardest?
Discuss various stages of motherhood and the unique challenges of each, from infancy to adolescence.
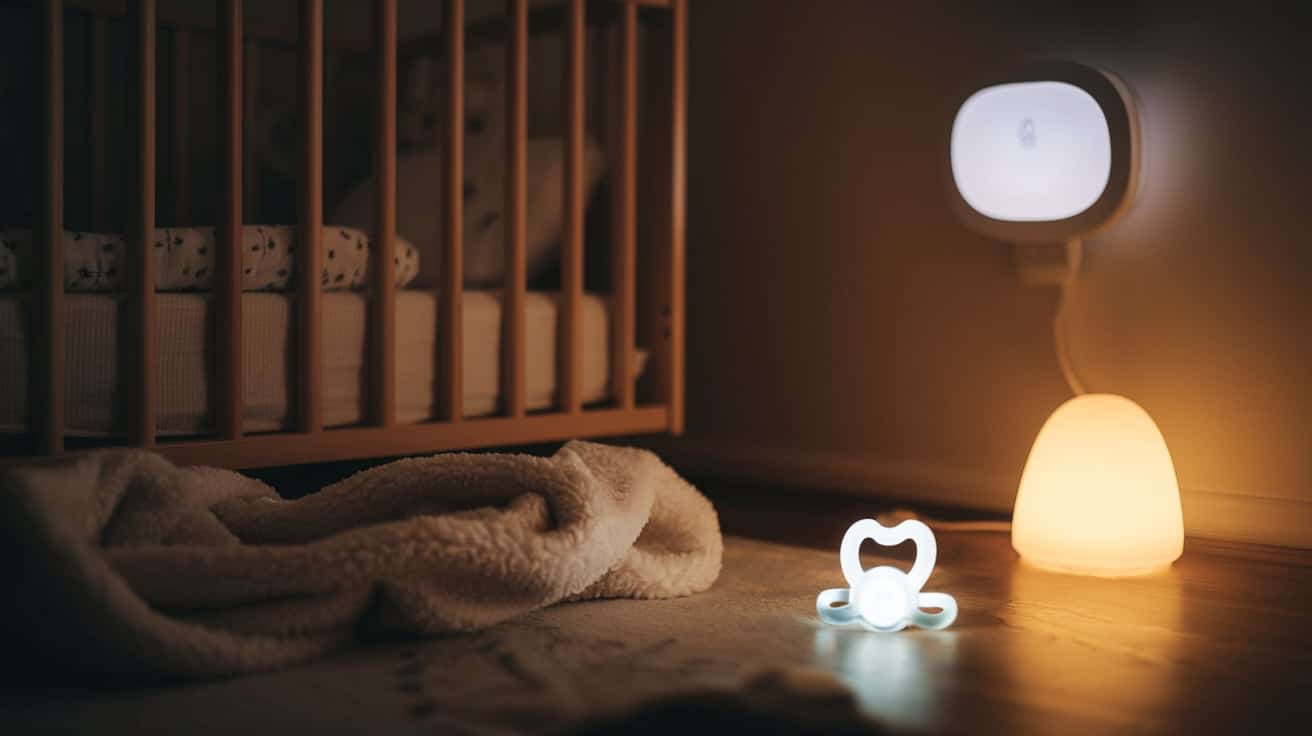
I still remember those sleepless nights when my baby would wake up crying the moment her pacifier fell out.
I’d rush in, pop the pacifier back in, and hope for some uninterrupted sleep — only for her to wake up again minutes later. It felt like a never-ending cycle, and I was completely exhausted.
If you’re going through this, trust me, you’re not alone. Many parents face the same struggle, wondering if they’ll ever get a full night’s sleep.
The good news? There are ways to reduce these wake-ups and help both you and your baby sleep better.
It takes a bit of patience and some trial and error, but the results are worth it. In this blog, I’ll share some practical tips that worked for my family so you can find a solution that fits yours.
Let’s work together to make those nights a little less exhausting!
Why Does Your Baby Wake Up When the Pacifier Falls Out?
As a mom of two little ones, I’ve spent countless nights picking up fallen pacifiers and trying to soothe my crying babies back to sleep.
If you’re dealing with the same situation, I know exactly how frustrating it can be. Let me share what I’ve learned about why this happens and how you can handle it.
The Comfort Association
Picture this: your baby has just fallen asleep with their favorite pacifier, and suddenly – plop! It falls out, and your little one starts crying.
I’ve been there more times than I can count. Here’s what’s actually happening: your baby has created a strong connection between the pacifier and feeling safe and cozy.
Think of it like this – imagine falling asleep with your favorite pillow every night. If someone took it away while you were sleeping, you’d probably notice too!
Our babies form an even stronger attachment to their pacifiers because sucking is naturally comforting for them. It reminds them of feeding time, which makes them feel secure and loved.
When my first baby was around 4 months old, she would wake up every single time her pacifier fell out.
I noticed she needed it to fall back asleep because she had learned that sucking meant it was time to rest. This is completely normal – babies make these connections very early in life.
The Startle Reflex
Have you ever noticed your baby suddenly jerking their arms and legs while sleeping? That’s called the startle reflex (or Moro reflex), and it’s something all babies are born with.
I remember being amazed the first time I saw my son do this – it looked like he was falling in his sleep!
The pacifier actually helps keep this reflex under control. When babies have something to suck on, they feel more stable and secure.
I noticed that both my kids were startled less when they had their pacifiers. But here’s the tricky part – when the pacifier falls out, they might startle more easily, which can wake them up.
This is especially true for younger babies under 6 months old, when the startle reflex is strongest.
My daughter would often wake herself up with a big startle right after losing her pacifier. It was like a chain reaction – the pacifier would fall out, she’d startle, and then she’d wake up crying for the pacifier again.
Understanding these reasons helped me feel less frustrated during those long nights. Remember, this phase won’t last forever – both my kids eventually outgrew their strong pacifier attachment.
Until then, know that you’re not alone in this common parenting challenge.
How to Keep Pacifier From Falling Out of Mouth?
After countless nights of pacifier drama, I discovered some helpful tricks that really worked for my babies. Let me share what I learned through trial and error (and lots of middle-of-the-night experiments!).
First, make sure you’re using the right size pacifier for your baby’s age. I made this mistake with my first child – using a pacifier that was too big made it harder for her to keep it in her mouth.
Each of my kids needed different styles, too. My son preferred the orthodontic-shaped ones, while my daughter liked the round nipples better.
Here’s what worked best for my babies:
For younger infants (0-6 months): I found that lightweight pacifiers were much easier for my little ones to hold onto.
Those cute decorative shields often made the pacifier too heavy! I also noticed that pacifiers with curved shields fit better against their faces, which helped keep them in place.
For older babies (6+ months): Once my babies got better at handling things, we switched to pacifiers with handles.
This was a game-changer. They could actually grab the handle and put the pacifier back in by themselves. I still remember how proud my son was when he first managed to do this at around 8 months.
A warning from my own experience: while you might see suggestions online about pacifier clips or straps, please don’t attach anything to your baby’s pacifier during sleep time.
I know it’s tempting, but it’s not safe. Instead, I kept several pacifiers in the crib corners so I could easily find one when needed during those nighttime wake-ups.
One more tip that really helped: I gently held the pacifier in place for a minute or two after putting it in.
This gave my babies time to start sucking strongly enough to keep it in place. It took a little extra time, but it meant fewer wake-ups later!
Are Pacifiers Okay for Breastfed Babies?
As a mom who breastfed both my children, I worried about this question, too. I remember sitting in my glider at 3 AM, searching online to make sure I wasn’t causing problems with my baby’s feeding by using a pacifier.
Let me share what I learned through my experience and from talking with my lactation consultant.
Here’s the honest truth: yes, pacifiers can be fine for breastfed babies, but timing is everything.
I waited until my babies were about 4 weeks old before introducing the pacifier, which really helped. By then, they were pros at latching, and my milk supply was well established.
When my first baby was born, my lactation consultant gave me some great advice. She said to watch for hunger cues and never use the pacifier to delay feedings.
I learned that my daughter would spit out the pacifier and root around when she was actually hungry – babies are smart that way.
She used different sucking patterns for comfort versus hunger, and over time, I got better at telling the difference.
Some moms worry that pacifiers will create “nipple confusion.” I was concerned about this, too.
But I found that as long as I waited those first few weeks to establish breastfeeding, my babies had no trouble switching between breast and pacifier.
In fact, my son seemed to understand the difference right away – he knew food came from mom and comfort came from his pacifier.
Remember, though, every baby is different. My daughter took to the pacifier right away, while my son was pickier about his pacifiers.
If you’re unsure, talking to your lactation consultant or pediatrician can help you make the best choice for your baby.
They helped me feel confident in my decision to use pacifiers while continuing to breastfeed successfully.
Should I Take the Pacifier Out After the Baby Falls Asleep?
I remember googling this exact question at 2 AM, watching my baby peacefully sleeping with her pacifier!
It’s one of those things that seems simple but actually needs some thought. After trying different approaches with both my kids, here’s what I learned.
For younger babies (0-6 months): I found it was better to leave the pacifier in. Why? Because young babies often still need to suck for comfort, even during sleep.
When I tried removing my son’s pacifier after he dozed off, he’d often startle and wake up within minutes, searching for it.
Those light sleep cycles in young babies mean they might still need that comfort, even when they seem deeply asleep.
For older babies (6+ months): Once my babies got older, I started gently removing the pacifier after they fell into a deeper sleep – usually about 20 minutes after they dozed off.
You’ll know they’re in deeper sleep when their arms are relaxed and their breathing is steady and regular. I learned this timing trick the hard way after many failed attempts!
But here’s something important I discovered: if your baby regularly wakes up when the pacifier falls out, removing it yourself probably won’t help them learn to sleep without it.
My daughter actually slept better when I left it in and let her naturally drop it during sleep. She eventually learned to find it herself or self-soothe without it.
Trust me, I know how tempting it is to try to “fix” the pacifier situation during sleep. But sometimes, the best approach is the simplest one – let your baby lead the way.
Both my kids eventually figured out their own sleep patterns with their pacifiers, and now they sleep just fine (most nights, anyway!).
Pros and Cons of Using a Pacifier
As a mom who’s been through the pacifier journey twice, I want to share the real benefits and challenges I’ve experienced. Every parenting choice has its ups and downs, and pacifiers are no exception!
The Pros of Using a Pacifier
I found that pacifiers were absolute lifesavers in many situations. During long car rides, my son would fuss unless he had his pacifier – it was like magic.
The pacifier also helped calm both my babies during vaccinations, which made those tough doctor visits much easier.
One big plus I noticed was how the pacifier helped my daughter fall asleep independently. Instead of needing a nurse to sleep, she could self-soothe with her pacifier.
This was especially helpful when I went back to work, and my husband could put her down for naps.
The most surprising benefit? Both my pediatrician and my mom’s friends told me that pacifiers might help reduce the risk of SIDS (Sudden Infant Death Syndrome).
That gave me extra peace of mind during those anxious newborn months.
The Cons of Using a Pacifier
I’ll be honest – there were some downsides, too. Those middle-of-the-night pacifier hunts were exhausting.
My son went through a phase where he needed his pacifier replaced multiple times per night, and I felt like a pacifier-finding zombie.
When my daughter was around 18 months old, we realized her pacifier habit was affecting her speech development – she was trying to talk with it in her mouth all the time.
That’s when we knew it was time to start thinking about saying goodbye to the pacifier.
Also, staying on top of cleaning and replacing pacifiers can be a lot of work. I learned the hard way that they need regular inspections for wear and tear.
Things to Keep in Mind While Using Pacifiers
Through my experience with two very different babies, I’ve picked up some important safety tips and tricks that every parent should know:
Safety comes first! I make it a habit to regularly check pacifiers for:
Any cracks or tears (my son could really work those pacifiers over!)
Loose parts that could become choking hazards
Discoloration might mean it’s time for a replacement
The right size for your baby’s age (I had to remind grandparents about this one a lot)
I also learned to keep things clean but not to stress too much. I started out boiling pacifiers after every drop on the floor but eventually found that a good wash with hot, soapy water was enough for daily cleaning. For young babies under 6 months, though, I still sterilized more frequently.
One thing that really helped me was having a system: I kept clean pacifiers in designated spots around the house and in the diaper bag.
This saved me from those frantic searches when my babies were crying and needed their pacifiers right away!
And here’s something I wish someone had told me earlier: write down the date you started using each pacifier.
They need to be replaced every 2 months or so, and it’s easy to lose track. I used to write the date on the plastic case they came in.
Most importantly, trust your instincts! You know your baby best. If something doesn’t feel right about how your little one uses their pacifier, don’t hesitate to bring it up with your pediatrician.
I did this several times, and it always helped ease my worries.
Tips to Help Your Baby Sleep Without the Pacifier
After months of midnight pacifier searches, I knew it was time to help my babies learn to sleep without relying so heavily on their pacifiers. Let me share what worked for our family – it wasn’t always easy, but it was definitely worth it!
Teach Your Baby to Self-Soothe
When my daughter turned six months old, I started working on helping her find and replace her own pacifier. At first, it seemed impossible – she’d just cry until I came to help.
But then I tried something that really worked: I’d gently guide her hand to the pacifier during the day when she was calm and alert. It took time and patience, but eventually, she got the hang of it!
I also discovered that placing multiple pacifiers in her crib corners made a huge difference. Sometimes, she’d roll around until she found one – it was like a peaceful little treasure hunt! The key was staying consistent and not rushing to help every time she lost it.
Use Sleep-Friendly Pacifiers
Here’s something that really helped us: switching to glow-in-the-dark pacifiers! My son could spot them easily during night wakings. I also found that pacifiers with slightly bigger shields were easier for his little hands to grasp.
A word of caution, though: while pacifier clips are great during awake time, they’re not safe for sleep.
Instead, I used sleep-friendly pacifiers that were easier for my babies to handle on their own. The ones with little stuffed animals attached (designed specifically for sleep) worked wonderfully for my daughter – just make sure they’re safety-tested for sleep time.
Establish a Strong Bedtime Routine
This was a game-changer for both my kids. We created a calming routine that helped them rely less on the pacifier to fall asleep. Our routine included:
A warm bath (this always made them drowsy)
Gentle baby massage with lotion
Reading two short books in a dimly lit room
Soft lullabies or white noise
A final feeding
I noticed that when we stuck to this routine, my babies were naturally more relaxed and didn’t fuss as much about the pacifier.
The consistency helped them understand it was time for sleep, even if the pacifier wasn’t perfectly in place.
What surprised me most was that as we strengthened our bedtime routine, both my kids gradually became less dependent on their pacifiers.
They started finding other ways to soothe themselves – my son would twirl his hair, and my daughter would hug her stuffed bunny.
Remember, this transition takes time and patience. Some nights will be harder than others, and that’s okay.
I found that taking small steps worked better than trying to make big changes all at once. Trust your baby’s pace, and celebrate the small victories along the way.
Conclusion
We’ve covered why babies wake up when their pacifier falls out and some practical solutions to make those wake-ups less frequent.
From teaching your baby to self-soothe to adjusting your bedtime routine, these small changes can lead to big improvements in everyone’s sleep.
Remember, every baby is different. What works for one child might not work for another, so give yourself grace as you figure out what works best for your little one.
It may take time, but with patience and consistency, you’ll get there.
If you’ve found something that worked or are still struggling with pacifier wake-ups, I’d love to hear from you.
Share your tips or experiences in the comments — your advice might just be what another tired parent needs to hear. Let’s support each other through this journey.
Frequently Asked Questions
When Should I Start Giving My Baby a Pacifier?
If you’re breastfeeding, wait until nursing is well established – usually around 3-4 weeks old. That’s what worked for both my babies.
For bottle-fed babies, you can start earlier if you want to. Remember, though – some babies never take to pacifiers, and that’s perfectly fine.
What Should I Do If My Baby Becoming Too Dependent on the Pacifier?
I went through this with my daughter! Start by limiting pacifier use to sleep times and moments of distress.
During playtime or when they’re content, try distracting them with toys or interactive games instead.
What is the Best Way to Clean Pacifiers?
For everyday cleaning, warm, soapy water works fine. I sterilize new pacifiers and clean them thoroughly after they’ve been dropped outside.
One tip I learned: keep a clean spare in your pocket or diaper bag – it saves you from having to clean one while your baby is crying!
How Can I Break the Middle-of-Night Pacifier Habit?
This was tough! Start by placing multiple pacifiers in the crib corners so your baby can find them easily.
Teaching my son to find his own pacifier took time, but it was worth it for all of us to get more sleep.
Is it Normal for My Baby to Need the Pacifier to Fall Asleep?
Absolutely normal! Both my babies went through this phase. It’s a natural sleep association, like how some of us need our favorite pillow to sleep well.
As they grow, you can gradually work on reducing this dependency through consistent bedtime routines.
I still remember my first time shopping for a baby crib, wondering exactly what to look for in a crib. The moment felt huge – after all, this would be where my little one would rest their head night after night.
I know your mind might be racing with questions like… Should you choose wood or metal? What’s the deal with safety ratings? How much should you spend?
Don’t stress – I’ve been exactly where you are.
I learned so much during my search, from checking safety seals to finding the right size. Now, I want to share those lessons with you.
Let’s work together to find your precious baby a perfect, safe sleep spot.
What Factors to Consider When Choosing a Crib
I want to tell you what really counts when picking a crib. Yes, I know those glossy catalogs make everything look perfect, but let’s talk about what your baby truly needs.
First, take a deep breath – you don’t need the fanciest crib on the market. What matters is keeping your little one safe and snug.
Safety Basics
JPMA certification is a must
Slats should be close together (no more than 2⅜ inches apart)
Smooth edges and sturdy joints
Size & Space Tips
Standard size: 52×28 inches
Mini cribs work for smaller rooms
Leave space for easy baby access
Materials Matter
Solid wood: Durable but pricey
Metal: Strong and often cheaper
Composite wood: Budget-friendly option
Remember, your baby will spend a lot of time here, so choose something that makes both of you feel good. And trust me—those adjustable mattress heights will save your back!
Types of Cribs: Finding Your Perfect Match
After trying out different cribs for my kids, I want to share what each type really brings to the table. No fancy talk – just real info from someone who’s been there!
Traditional Cribs
Simple, no-fuss design that works great
Easy to move around the room
Often more budget-friendly
Convertible Cribs
Changes into a toddler bed, then a full-size bed
It saves money in the long run
Most popular with first-time parents
Think of mini and portable cribs as your space-saving friends. Mini cribs fit perfectly in cozy rooms, while portable ones fold up when grandma wants a sleepover.
These smaller options keep your baby safe and comfy – just in a more compact package!
How to Find the Perfect Crib Mattress
I remember checking mattress firmness with my mom’s instinctive press test. Let me share what I learned after countless mattress squishes and size checks.
Getting the Right Feel
Firm is best for babies – if it feels soft to you, it’s too soft
Two-sided options have a firmer baby side
Push the center – it shouldn’t keep your handprint
Skip the memory foam for infants
Size Matters – A Lot!
The two-finger test: no more than 2 fingers should fit between the mattress and crib
The standard size is 28 x 52 inches
Check the thickness – usually 5 to 6 inches is right
Corner test: press each corner snugly against the crib frame
A snug mattress keeps your baby safe, and that’s what we’re all about! Take your time finding one that fits just right – no shortcuts when it comes to sleep safety.
Keep It Simple and Safe: Your Crib Bedding Guide
As a mom who once wanted all those cute crib extras, I learned that simple is best (and safest!). Let me tell you what your baby needs for sweet dreams.
Skip These Items
No fluffy blankets or quilts
No crib bumpers (even the mesh ones)
No pillows or stuffed toys
No sleep positioners
What your baby truly needs is basic and safe. Just grab 2-3 fitted sheets that wrap snugly around the mattress. Add a waterproof mattress cover underneath – trust me, you’ll be glad you did!
For warmth, use a sleep sack instead of blankets. That’s it!
A bare crib is a safe crib.
Smart Spending: Your Crib Budget Guide
I know that price tag shock when you first start crib shopping! Let me share how to get the most value without spending more than you need to.
What You Get At Each Price
Under $200: Basic, fixed-side cribs with simple designs
$200-400: Good quality with maybe 1-2 special features
$400-800: Convertible options, better materials
$800+: Premium finishes, brand names (but not necessarily better!)
What’s Worth Extra Money?
Convertible features if you’ll use them long-term
Sturdy construction that won’t wobble
Easy-clean surfaces for those midnight messes
Multiple mattress heights
My honest advice? Pick your must-haves first. Want a crib that converts to a toddler bed? Worth spending more. Just need something solid for a year or two? Save that money for diapers instead!
Remember – all cribs meet the same safety standards, no matter the price.
Making Your Perfect Crib Choice!
After going through two babies and many crib questions, here’s what I know for sure about what to look for in a crib. Don’t let all the choices stress you out!
Focus on what matters most – safety, size for your space, and what fits your budget. Skip the extras and stick to the basics. A solid crib, a firm mattress, and a few fitted sheets are all you need to start.
While setting up, consider adding a baby monitor and maybe a changing table nearby. These make nighttime much easier.
Trust your gut and pick what works for your family. At the end of the day, your baby doesn’t care about fancy features – they need a safe, cozy spot to rest and grow.
Frequently Asked Questions
What Is Important When Buying A Crib?
Look for sturdy construction, adjustable mattress height, and safety certifications.
How To Know If A Crib Is Safe?
Ensure it meets safety standards, has slats less than 2 3/8 inches apart, and no drop sides.
How Do I Know What Crib To Buy?
Choose a crib with safety certifications, adjustable features, and solid reviews.
What Is Needed In A Crib?
A firm mattress, fitted sheet, and no additional pillows, blankets, or bumpers.
If you’re anything like me, you’ve probably wondered why does my 6-month-old won’t nap longer than 30 minutes, especially when you’re hoping for a nice, long rest.
So, why does your 6-month-old only nap for 30 minutes? It’s a common struggle, and trust me, you’re not alone in this!
Around this age, babies grow and develop rapidly, and their sleep patterns are still evolving.
That means nap time can be a bit of a rollercoaster ride. But don’t worry; there are a few reasons why this might be happening, and there are even some tricks to help your baby get those longer, more restful naps.
Stick with me, and let’s get into why those short naps are happening and what you can do about it!
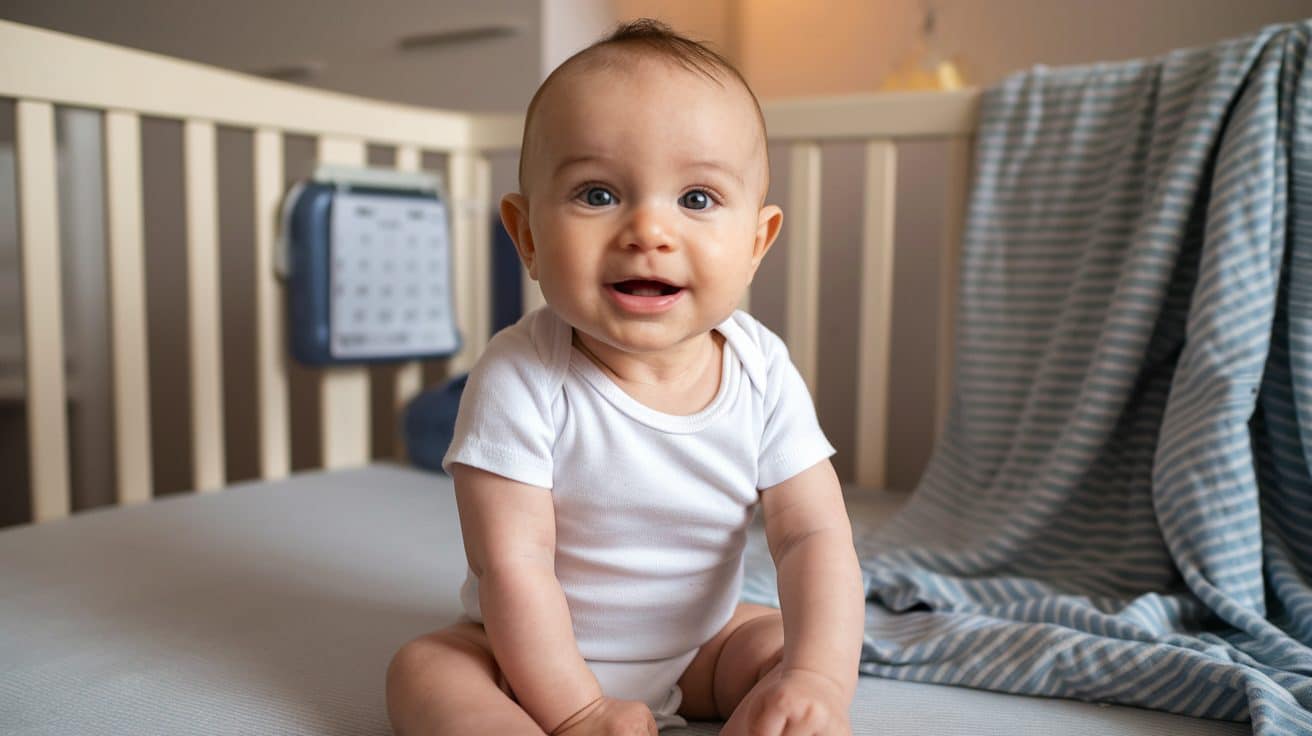
How Much Sleep Does a 6-Month-Old Need?
At 6 months old, your baby needs 12 to 15 hours of total sleep daily to support its rapid growth and development. This typically consists of 10-12 hours of nighttime sleep and 2-3 daytime naps totaling 2-4 hours.
While every baby is unique, most 6-month-olds follow a pattern of three naps a day, each lasting about 1-2 hours.
However, don’t worry if your little one’s sleep schedule looks a bit different – what matters most is the total quality of sleep they get in 24 hours.
Signs If Your 6-Month-Old Baby Is Getting Enough Sleep
Here are the signs of a well-rested baby:
Wakes up with bright eyes and a possible morning smile
Engages happily during playtime, interacting with toys and you
Shows alertness and interest in food during mealtime
Can go between naps without meltdowns
Has clear, bright eyes when awake
Hits developmental milestones with energy and enthusiasm
Remember, even the happiest babies can have off days!
What Are Your Baby’s Sleep Patterns Throughout the Day?
Think of your baby’s sleep schedule as a puzzle, with each piece fitting perfectly into their day. By 6 months, most babies do well with 2-3 naps, adding up to 3-4 hours of daytime sleep.
Their first nap typically comes about 2-3 hours after they wake up in the morning, and the second nap follows about 2-3 hours after they wake from the first.
Nighttime sleep is the biggest puzzle—aiming for 10-12 hours of restful sleep, though a feeding or two during the night is completely normal!
Some babies enjoy a quick third nap in the late afternoon, while others are fine with two longer naps.
Finding the rhythm that feels just right for your little one is the key. Just like adults have their sleep preferences, babies have unique sleep patterns, too!
Reasons for Short Naps in Your 6-Month-Old Baby
At 6 months, your baby’s sleep patterns are still evolving, and shorter naps are common. While it might feel frustrating, there are a few key reasons behind those quick 30-minute naps, many of which are normal as your baby grows.
Let’s break down the main reasons so you can understand what’s going on and how to help.
Developmental Changes in 6 Months Babies
At 6 months, your little one is growing fast and picking up exciting new skills like rolling over and sitting up. While this is all super exciting, it can also make them restless, affecting their sleep.
Their brain is busy processing all these changes, so don’t be surprised if they wake up more often after naps. It’s normal!
This stage of development can be challenging, but remember, it’s just a phase. Your baby will eventually adjust to their new routine, and those peaceful naps will come back before you know it.
Sleep Cycle Shifts and Transitions Of 6 Months Babies
At around 6 months, your baby’s sleep starts to resemble an adult’s, with light and deep stages. During these lighter stages, they might wake up, leading to those short, 30-minute naps.
It’s normal! As they grow, they’ll transition more smoothly between these sleep cycles. Before you know it, those little naps will stretch into longer, more restful ones.
This is all part of their natural sleep development, so hang in there – longer naps are on the way! Just give them time to adjust and grow.
How To Create The Right Nap Environment For Babies?
For a baby to sleep peacefully, it is best to make a dark, quiet room with a comfortable temperature so that they can sleep longer, and using blackout curtains and white noise can help. Here is what you can do
1. Make the Baby’s Room Dark and Quiet
Aim to make your baby’s room as dark and quiet as possible
Blackout curtains can work for blocking out sunlight
A white noise machine or app can also help reduce household noises and lull your baby into a deeper sleep.
2. Keep a Comfortable Temperature For Babies
An ideal room temperature for infant sleep is between 68-72°F (20-22°C). Try to keep it this way.
When Babies are comfortable, they sleep more peacefully
So dress your baby in lightweight, breathable layers.
You can use sleep sacks or wearable blankets as they can’t kick them off like loose blankets.
3. Use a Safe and Cozy Sleep Space For The Baby
According to The American Academy of Pediatrics, if your baby sleeps in a bare crib or bassinet without any pillows, blankets, or toys, it can be at risk of suffocation.
Here is what you can do to make a safe, cozy area for babies to sleep:
Make your baby sleep on a firm mattress or fitted sheets in a bassinet or crib.
Avoid napping in car seats or swings.
Using sleep sacks or wearable blankets can be a good option.
How to Create a Consistent Nap Routine for 6-Month-Old Baby?
Routines are best for babies. Creating a pre-nap routine and putting them down at the same time each day will make a routine and will help the baby sleep longer.
Follow a Predictable Nap Schedule For The Baby
Most 6-month-olds do well with a 2-3-4 schedule.
Wake time is 2 hours in the morning, 3 hours between the first and second naps, and 4 hours before bedtime.
Every Baby is different, so watch your child’s routines
If they seem tired after just 2 hours after the wake time, try putting them down then.
Create a Calm Pre-Nap Routine For The Baby
Creating a 5-10 mins soothing ritual can help babies feel relaxed and prepare them to sleep
Here are some activities you can try:
Reading
Singing
Snuggling with lovey
Massage
Feeding before naps
Do it at the start of the routine so the baby doesn’t rely on it to fall asleep.
Watch for Sleep Cues Of The Baby
There are some signs you can see if your baby is ready to nap:
Yawning
Eye rubbing
Looking glazed
Fussiness.
Its best to put babies down drowsy but awake.
They will likely wake sooner if they are not tired enough to sleep.
How to Help Your 6-Month-Old Baby Take Longer Naps?
It is easy for babies to make habits of sleeping in your arms or your laps, but it would be helpful if you allow them to self-soothe back to sleep if they wake up early.
Help Your Baby Learn to Self-Soothe
Don’t let your baby rely on feeding often; it can’t link sleep cycles to extended naps.
Put your baby down awake to practice them falling asleep independently.
You can gently pat or shush them if needed, but let them do their work of getting sleep.
Extend Short Naps Of Baby
If your baby sleeps less than an hour, try a quick 5-10-minute resettle without picking them up.
But, If your baby takes a 40-45 minute nap, consider a nap done, and if you want, adjust the bedtime earlier.
Adjust the Feeding and Wake Windows Of The Baby
If you want your baby to take good naps, it’s important to find the right balance of wake time to build up enough sleep pressure, but do not go to the point of overtiredness.
Please make sure they get full feedings after naps rather than snacking all day.
A satisfied tummy leads to a long sleep.
When To Seek Help For Your Baby
Even if, after using all the healthy sleep habits and still your baby’s sleep continues to be shorter, consult your pediatrician to rule out underlying issues.
Signs of Sleep Issues
Sometimes, If your baby is taking short naps, it can be a sign of an underlying issue like:
Reflux
Allergies
Sleep apnea
You have to consult your pediatrician if your baby is
Extremely fussy
Not gaining weight
Has concerning symptoms
But you don’t have to worry about it,
Some babies go through sleep regressions around this age too, usually these phases pass in 1-2 weeks.
When to Talk to a Pediatrician For Baby Naps Issues
If your little one is still having trouble sleeping, even after you’ve tried everything from healthy sleep habits to a consistent bedtime routine, it might be time to reach out to a pediatrician.
A pediatrician is a specialist who understands children’s sleep patterns and can provide expert advice tailored to your child’s needs.
They can offer practical tips, rule out any potential medical causes, and guide you through strategies that work best for your child’s age and development.
It’s always comforting to know that when you feel stuck, you have a trusted professional to help you navigate through it.
To Sum It Up
Managing your 6-month-old’s nap schedule is a journey, but trust me, it’s worth every bit of effort.
With a little patience and a few tweaks, you’ll be amazed at how quickly your baby’s sleep patterns can improve.
Remember, every baby is unique, and finding the right rhythm takes time—but when you do, it’ll make a world of difference for both of you.
As you work through the ups and downs, keep in mind that each step brings you closer to a solid routine. A well-rested baby means a happier, healthier little one.
Let’s not forget—you’ll feel better too! So, stay committed, enjoy the process, and know that you’re building a foundation for your baby’s growth and your own peace of mind. You’ve got this!
Frequently Asked Questions
Why Does My 6-Month-Old Won’t Nap Longer than 30 Minutes?
Six-month-old babies often take naps in short cycles. Factors like hunger, discomfort, or overtiredness may cause early waking. Regular routines can help extend naps.
How Can I Get My 6-Month-Old Nap Longer?
You can create a consistent nap routine, ensure a calm, dark environment, watch for sleep cues, and avoid overtiredness. Patience and regularity will help increase longer sleep.
Why Is My 6-Month-Old Not Sleeping Well Anymore?
Your 6-month-old might be going through a growth phase or sleep changes. Changes in routine, teething, or new skills can also affect sleep patterns.
When my first baby was born, I didn’t plan on co-sleeping, but after a few sleepless nights, it felt like the easiest way for both of us to get some rest.
I loved having my little one close, hearing those tiny breaths, and knowing they were safe. But as time went on, I started to realize that none of us were getting the best sleep.
My baby would wake at every movement, and I couldn’t relax, constantly worried about rolling over or disturbing their sleep.
When my second baby arrived, I knew I had to transition them to their own sleep space sooner. But let me tell you, it wasn’t easy.
There were tears (from both of us), moments of doubt, and nights when I thought about giving up. If you’re going through this, you’re not alone.
Co-sleeping is common, and many parents struggle with making this change. The good news? With patience, consistency, and a bit of flexibility, your baby can learn to sleep independently—and so can you!
How to Stop Co-Sleeping?
As a mom who’s been through the co-sleeping transition, I know exactly what you’re dealing with. Breaking the co-sleeping habit isn’t easy, but with patience and consistency, it’s definitely possible. Let me share what worked for my little one and me.
Why I Decided to Stop Co-Sleeping?
Like many of you, I cherished those nighttime cuddles with my child. But reality hit when I noticed both of us struggling with sleep quality.
My little one would constantly wiggle around, and I’d often wake up with either tiny feet in my face or hanging off the edge of the bed!
The lack of proper rest started affecting our daytime moods, and I realized we needed a change.
After talking with our pediatrician and doing some research, I understood that helping my child sleep independently would benefit their development and our overall well-being.
Start with Baby Steps
The key to our success was taking it slow and steady. I started by creating a cozy space in their room that felt special to them.
We went shopping together for soft bedding, picked out their favorite character pillowcases, and set up a gentle night light. During daytime hours, we’d spend time playing in their room to build positive associations.
We began with afternoon naps in their bed, making it feel like an adventure rather than a punishment. This gradual approach helped them see their room as a safe, comfortable space.
Create a Bedtime Routine That Works
Our turning point came when we established a consistent bedtime routine. It starts with a warm, calming bath around 7 PM, followed by changing into cozy pajamas.
Then, we spend time reading their favorite stories – usually two or three books – while cuddling in their room. We talk about the best parts of our day and do some gentle stretching exercises.
The routine ends with a special “goodnight song” and our secret handshake. This predictable sequence signals their brain that it’s time to wind down and sleep.
Dealing with Middle-of-Night Visits
Let me be real, those midnight visits can test your patience! When my little one would appear at my bedside, I’d calmly walk them back to their room without starting a conversation.
I found that keeping the lights dim and speaking softly helped maintain the sleepy atmosphere.
If they were scared, I’d do a quick “monster check” and remind them of their brave superhero status.
Sometimes, I’d sit near their bed for a few minutes, gradually moving farther away each night until they felt secure sleeping alone.
Celebrate Small Wins
Making progress deserves recognition! When my child stayed in their bed until morning, we’d celebrate with their favorite breakfast and lots of high-fives.
We created a sticker chart where they could track their “sleep victories.” After collecting enough stickers, they could choose a small reward like a new book or extra playground time.
These celebrations made independent sleeping feel like an achievement rather than a chore. The excitement of earning stickers often outweighed their desire to sleep in my bed.
Be Patient with Yourself
This journey isn’t always smooth sailing, and that’s perfectly normal. There were nights when I felt discouraged, especially during sleep regressions or when they were sick.
I learned to forgive myself for the occasional setback and remember that progress isn’t linear.
Some children take longer to adjust, and that’s okay. The key is staying consistent with your approach while showing lots of love and understanding.
Remember, you’re teaching them a valuable life skill, even if it feels challenging right now.
I hope these tips help you navigate your own co-sleeping transition. Every child is unique, so feel free to adapt these suggestions to fit your family’s needs.
Trust your instincts, stay patient, and celebrate each step forward. You’re doing a great job, mama.
Understanding Why You Might Want to Stop Co-Sleeping
As a mom who’s been through this journey, let me share my personal experience about why transitioning from co-sleeping can be beneficial for both you and your child.
The Benefits of Independent Sleep for Your Child
When I first moved my little ones to their own bed, I noticed remarkable changes in their development.
They started learning how to self-soothe – something they couldn’t do while sleeping next to me.
Instead of relying on my touch or presence to fall back asleep, they began developing their own comfort strategies, like hugging their favorite stuffed animal or using gentle breathing techniques we practiced together.
Their sleep quality improved significantly, too. Without the distraction of my movements or the warmth of my body, they started sleeping more deeply and for longer stretches.
I noticed they were more refreshed in the morning, had better moods throughout the day, and even showed improved concentration during preschool activities.
The independence they gained went beyond just sleep. Their confidence grew as they mastered this new skill.
I remember how proud they were telling their grandparents, “I sleep in my big-kid bed now!”
This newfound independence also positively affected other areas of their development – they became more willing to try new things and handle other challenges with greater confidence.
The Benefits for Parents
Let me be honest – the benefits for us parents are just as significant! After months of sleeping in awkward positions and constantly being on alert, getting my own sleep space back was revolutionary.
I could finally stretch out, adjust my blankets without worry, and even read a book before bed if I wanted to.
The quality of my sleep improved dramatically. No more tiny elbows in my ribs or midnight kicks to my back!
Better rest meant I had more energy during the day, was more patient with my child, and could be more present in our daily activities together.
Having personal space again helped me feel more like myself. I could have uninterrupted conversations with my partner after our child’s bedtime, creating much-needed adult time.
This strengthened our relationship and helped maintain a healthy family dynamic.
The boundaries we established through independent sleeping also created a framework for other healthy habits.
It became easier to set and maintain other routines, like mealtime schedules and playtime limits. My child began to understand that different times of day have different purposes and that sleep time is special and important.
Most importantly, this transition helped me be a better parent. With more rest and personal time to recharge, I found myself more energetic and creative in our daytime interactions.
Instead of feeling drained from broken sleep, I could fully engage in playtime, learning activities, and those precious moments of connection that make parenting so rewarding.
Remember, mama, while these benefits are significant, every family’s journey is unique. The key is finding what works best for you and your little one, moving at a pace that feels right for your family.
When Is the Right Time to Stop Co-Sleeping?
The right time to stop co-sleeping depends on your child’s readiness and your family’s situation.
Look for signs like your child falling asleep without needing to be held, showing interest in a “big kid” bed, or becoming more independent during the day.
Age plays a role too, by around three years old, many children are developmentally ready for their own sleep space.
Choose a stable period without big changes, like starting school or welcoming a sibling, to make the transition easier.
Ultimately, trust your instincts and move at a pace that feels right for both you and your child.
Signs Your Child Is Ready for the Transition
I remember feeling unsure about when to start this journey, but my little one actually showed me some clear signs.
The biggest clue was when they started falling asleep during storytime without needing to be in my arms.
They also began showing more independence in other areas of life – getting dressed by themselves and exploring their surroundings with confidence.
One day, they got super excited about a “big kid” bed they saw at their friend’s house. That enthusiasm was a golden opportunity!
They started talking about having their own special sleep space and would sometimes drift off for naps in their play area rather than seeking me out.
I also noticed they were developing better emotional regulation skills during the day. They could calm themselves down after minor upsets and didn’t always need immediate physical comfort.
These were all signs that they were building the skills needed for independent sleep.
Factors to Consider Before Making the Change
Looking back, I realized the timing wasn’t just about my child’s readiness but our whole family’s situation.
The first thing I considered was their age and developmental stage. Around age three, they started understanding simple explanations about sleep and could follow two-step bedtime instructions, which made the transition smoother.
Our family’s schedule played a big role, too. I waited until we had a relatively stable period – no major changes like starting school or welcoming a new sibling.
This stability gave us the mental space to focus on this transition without added stress.
I also made sure my partner and I were both ready for the change. Some nights would be challenging, requiring extra patience and consistency from both of us.
We needed to be united in our approach and prepared for some temporary sleep disruption.
The setup of our home was another consideration. We took time to create a sleep-friendly environment in their room, with proper temperature control, darkness levels, and safety measures in place. This preparation helped us feel more confident about the transition.
Most importantly, I checked in with my own emotional readiness. While co-sleeping had its challenges, it had also been a special bonding time.
I needed to feel genuinely ready to encourage this new phase of independence, knowing it was the right choice for our family’s well-being.
Remember, every family’s timeline is different. Trust your instincts about when the time feels right for you and your little one.
There’s no universal “perfect age” – it’s about finding the right moment when both you and your child are ready for this important step forward.
Preparing for the Transition
When I decided it was time to stop co-sleeping, I learned that preparation was key to making this big change smoother for everyone involved. Let me share how I approached this important transition with my little one.
Talk to Your Child About the Change
I remember sitting with my child during a calm moment after lunch, their favorite stuffed bunny in hand, as we talked about the upcoming change.
Instead of making it seem scary, I turned it into an exciting adventure. “You’re getting so big now! Soon you’ll have your very own special sleeping space, just like mommy and daddy.”
We read books about children sleeping in their own beds and made up stories about their toys having cozy bedtime routines.
I made sure to address their worries with patience: “Even though we’ll sleep in different beds, I’ll always be nearby if you need me.”
We practiced with daytime “pretend sleep” sessions, making it feel more like a game than a big change.
Create a Comfortable Sleep Space
This was honestly one of the most fun parts of our transition! We went shopping together, and I let my little one pick out their own bedding – they chose one with their favorite cartoon characters.
Seeing their eyes light up while selecting their own special pillowcase made me realize they were getting excited about their new sleep space.
We worked together to make their room feel magical. They helped choose a star-shaped night light that cast gentle patterns on the ceiling.
We arranged their stuffed animals like a protective sleep crew and hung family photos where they could see them from their bed.
Adding their favorite books within reach and a soft rug beside the bed made the whole room feel like their own cozy haven.
I also made sure the room was sleep-friendly – installing blackout curtains, setting up a white noise machine, and keeping the temperature comfortable.
We even created a special “brave kid corner” with a dream catcher they helped make. Every little touch helped them feel more secure and excited about their new sleeping arrangement.
Remember, involving your child in these preparations helps them feel more in control of the change.
Their excitement about their new sleep space can help overcome any anxiety about the transition.
Take it from this mama, the more they feel like it’s their special place, the smoother the transition will be.
Practical Steps to Stop Co-Sleeping
After trying different approaches with my own child, I discovered some methods that actually work. Let me share these practical steps that helped us transition successfully.
Gradual Transition Method
This gentle approach worked wonders for us! We started by having my little one fall asleep in their own bed for the first part of the night.
I’d tell them, “Let’s try sleeping in your big-kid bed until the moon is high in the sky!” At first, they’d usually end up in my bed around midnight, and that was okay.
Gradually, we extended the time. I used a sticker chart to track their progress – one sticker for making it to midnight and two for staying until morning!
What really helped was telling them they could come to my room for morning cuddles as soon as the sun came up. This gave them something to look forward to and made the separation feel less scary.
Chair Method
This method was a game-changer for us! I started by sitting in a comfy chair right next to their bed. Each night, I’d move the chair a tiny bit further away.
I’d say, “Mommy’s still here, keeping you safe.” The key was staying quiet – no chatting or playing – just being a calming presence.
Every few nights, I’d move the chair closer to the door. My little one could still see me but learned to fall asleep without needing me right beside them.
When they’d get anxious, I’d whisper, “You’re so brave, and I’m right here.” After about two weeks, I was able to sit outside their room, and eventually, they felt secure enough to fall asleep on their own.
Stay Consistent with a Bedtime Routine
Our bedtime routine became our secret weapon! We kept it simple but special: bath time with their favorite rubber duck, putting on cozy pajamas, brushing teeth together (making silly faces in the mirror), reading two stories in their special reading nook, and ending with our special “sleepy time” song.
The routine helped signal their brain that sleep time was coming. We stuck to the same order every night, even on weekends.
What made it work was keeping the timing consistent – starting at 7:00 PM meant they were usually drowsy by 7:45 PM.
I found that when we followed this routine faithfully, bedtime battles decreased significantly.
Dealing with Resistance and Setbacks
As someone who’s been through countless midnight wake-ups and “Mom, I’m scared” moments, I’ll share how I handled these challenging situations while staying calm (most of the time).
What to Do If Your Child Returns to Your Bed
Those tiny footsteps at 2 AM? Oh, I know them well! When my little one would appear beside my bed, I learned to handle it without drama.
I’d quietly take their hand and walk them back to their room, keeping the lights dim and my voice soft. “Let’s get you tucked back into your cozy bed,” I’d whisper.
Sometimes, they’d come back five times in one night – exhausting, yes, but consistency was crucial. I made a point to never scold them or show frustration.
Instead, I’d remind them, “You’re safe in your bed, just like we practiced.” I found that getting angry or giving in only confused them about our expectations.
I made their return trips boring (no fun conversations or snuggles) but always loving. A quick back rub, a gentle tuck-in, and a quiet “I love you” before leaving.
When they stayed in their bed all night, we’d celebrate with special morning pancakes or extra playtime.
Handling Night Wakings
Night wakings were tricky, but I discovered that comforting them in their own space made a huge difference.
When they’d call out, I’d go to their room instead of bringing them to mine. I’d sit on the edge of their bed, pat their back gently, and reassure them with simple phrases like “You’re safe” or “Everything’s okay.”
I learned to address their specific fears without making a big deal about them. If they were scared of shadows, we’d do a quick “brave check” of the room.
If they wanted water, we had a small cup ready on their nightstand. The key was keeping these interactions brief and calm, helping them feel secure without turning it into a long ordeal.
For those extra tough nights (like during thunderstorms or when they weren’t feeling well), I’d stay in their room a bit longer but still avoided taking them to my bed.
Sometimes, just knowing I was nearby helped them drift back to sleep in their own space.
Remember, setbacks are normal – especially during big changes, illnesses, or transitions. Stay patient and consistent, and you’ll get back on track.
You’re teaching them valuable skills, even on the tough nights!
Conclusion
We’ve covered why parents choose to stop co-sleeping and how to make the transition smoother for your little one.
It’s important to remember that this process takes time, patience, and a lot of love. There will be nights when things don’t go as planned, and that’s perfectly normal.
Your child is learning a new skill—sleeping independently—and just like any new milestone, it takes practice to master.
Don’t be discouraged if there are setbacks. Some nights might feel like you’re starting over, but consistency is what makes the biggest difference.
Keep reinforcing your bedtime routine and offering comfort in your new sleep space. Eventually, your child will adjust, and you’ll both sleep better.
Most importantly, trust your instincts. You know your child best, and every family’s journey will look different.
Be patient with yourself and your baby. I’d love to hear how your transition is going. Share your tips or challenges in the comments—let’s support each other through this big step in parenting!
Frequently Asked Questions
How Long Will the Transition Take?
Every child is different! From my experience, a successful transition typically takes 2-4 weeks for most children.
Some adjust within a few days, while others might need a couple of months. The key is staying consistent with your approach.
My little one took about three weeks to fully adjust, with gradual improvements each night.
What if My Child Has a Major Sleep Regression During the Process?
Sleep regressions are completely normal! When this happened with my child, we stuck to our routine but added extra comfort measures.
Sometimes, taking a step back temporarily (like sitting closer to their bed for a few nights) helped us get through rough patches. Remember, regression doesn’t mean failure – it’s just part of the journey.
When Should I Start the Transition if I’m Expecting Another Baby?
Start at least 2-3 months before the new baby arrives or wait until 2-3 months after. We began our transition well before my second pregnancy to avoid my firstborn feeling “replaced” in our bed.
This timing gives your child enough time to adjust without feeling pushed out because of the baby.
What if My Partner Disagrees with Stopping Co-Sleeping?
Open communication is crucial. My partner and I had different views initially, but we discussed our concerns and agreed on a plan that felt right for our family.
Consider talking to a pediatrician together or reading about sleep transitions to make an informed decision as a team.
Is it Normal for My Child to Be More Clingy During the Day?
Absolutely, During our transition, my child wanted extra cuddles during daytime hours. This is their way of ensuring the connection is still strong.
I made sure to provide plenty of physical affection and one-on-one time during the day, which actually helped them feel more secure at night.
Is your 10-month-old waking up after just 30 minutes of napping?
I know how hard it can be – you’ve barely had time to rest yourself when those little eyes pop open again.
As a sleep consultant, I’ve helped many parents through this exact situation. Short naps can leave you feeling stuck at home, watching the clock, and wondering if you’ll ever get a break.
They can affect your baby too, leading to a tired, fussy little one who struggles to sleep well at night.
But here’s the good news: you’re not alone, and there are clear reasons why your 10-month-old might be taking short naps.
Let me help you understand what’s happening and show you practical ways to help your baby sleep longer.
Why are Short Naps Common in Babies?
Every parent wants their baby to take long, peaceful naps, but the reality often looks different. Understanding why short naps happen can help you feel better about your baby’s sleep patterns.
A short nap typically lasts less than 50 minutes – that’s one sleep cycle for babies.
When your baby wakes up after just 30-45 minutes, they’re usually ending their first sleep cycle but haven’t learned to link to the next one yet. This is completely normal, especially for younger babies.
Let’s break down how naps work at different ages:
Newborns to 4 months: Naps can last anywhere from 20 to 120 minutes, and this variation is perfectly normal
4-5 months: Babies start developing more regular nap patterns
5+ months: Naps begin to get longer and more regular as babies learn to connect sleep cycles
A longer nap usually means your baby has successfully moved from one sleep cycle to another, lasting 90 minutes or more.
This skill develops over time, just like crawling or walking. Some babies master it earlier, while others need more time – and both scenarios are fine.
When Do Babies Begin Taking Longer Naps?
3-4 Months
Your baby starts showing more regular sleep patterns. While naps might still vary between 30 minutes and 2 hours, you’ll begin to notice a more predictable schedule. At this age, babies usually take 4-5 naps per day.
4-5 Months
This is when naps often start getting longer. The morning nap is usually the first to lengthen, lasting between 45-90 minutes. Your baby might still take shorter naps later in the day.
5-6 Months
By now, you should see at least one nap lasting an hour or more. Most babies take 2-3 naps at this age, with the morning and early afternoon naps becoming more regular.
6-8 Months
The first two naps of the day should last about 1-2 hours each. The third nap (if your baby still takes one) is often shorter, acting as a brief rest before bedtime.
Remember that every baby develops at their own pace. While some babies naturally take longer naps early on, others might need more time to develop this skill. The key is consistency with your daily schedule and sleep routine.
Top Reasons Why Babies Take Short Naps
Understanding why your baby takes short naps is the first step to helping them sleep longer. Here are the main reasons behind brief naps:
1. Sleep Props and Helping Baby Fall Asleep
When babies are helped to sleep through rocking, feeding, or bouncing, they often wake up after one sleep cycle (30-45 minutes).
This happens because they expect the same help to fall back asleep between cycles. If your baby falls asleep in your arms and wakes up in their crib, they might become confused and have trouble continuing their nap.
2. Timing Matters
Your baby’s sleep schedule plays a big role in nap length. At 10 months, babies need about 2.5-3.5 hours of wake time between naps. If this timing is off:
Too short wake windows: Your baby isn’t tired enough to sleep deeply
Too long wake windows: Your baby becomes overtired, making it harder to stay asleep
3. Signs of Being Too Tired or Not Tired Enough
A tired baby might:
Fight sleep
Take short naps
Wake up grumpy
Show fussy behavior
4. Sleep Room Setup
Your baby’s sleep space can affect nap length. Key factors include:
Room darkness (if you can see your hand, the room needs to be darker)
Room temperature (slightly cool works best)
Background noise (consistent white noise can help)
Comfort (appropriate clothing and room temperature)
What Can Parents Do to Help Extend Short Naps?
Creating a Nap-time Routine
Just like bedtime, a simple nap routine tells your baby it’s time to sleep. Keep it short – about 8-10 minutes:
Change diaper and put on sleep sack
Dim the lights
Read one short book
Turn on white noise
Close curtains
Place baby in crib drowsy but awake
The Nap Hour Technique
If your baby is 5-6 months or older and wakes early from a nap:
Leave them in their crib for the full hour
Give them a chance to fall back asleep
Offer brief comfort without picking up if needed
Remember: even quiet rest time benefits your baby Note: This works best for the first two naps of the day
Watch Wake Windows
Getting the timing right makes a big difference:
Track when your baby shows tired signs
Plan activities during wake times
Keep wake windows between 2.5-3.5 hours for 10-month-olds
Don’t shorten wake windows after a short nap – this can create a cycle of brief naps
Remember: Consistency is key. It might take a week or two of following these steps before you see longer naps.
Final Thoughts
Remember, helping your baby take longer naps is a step-by-step process that requires patience. Some babies master long naps quickly, while others need more time – and that’s perfectly fine.
Focus on creating a consistent routine, watching your baby’s tired signs, and setting up a good sleep environment.
If you’re feeling worn out from short naps, know that this phase won’t last forever. Keep track of what works for your baby, adjust as needed, and celebrate small improvements.
Even extending one nap can make a big difference in your day.
Still have questions about your baby’s naps? Talk to your pediatrician about your concerns. They can offer personalized advice based on your baby’s specific needs and development.
Frequently Asked Questions (FAQs)
Why does my baby only nap for 30 minutes?
Short naps are common in younger babies due to their sleep cycle length. It can also be due to overstimulation, hunger, or difficulty transitioning between sleep cycles.
How do I get my baby to nap longer?
Ensure your baby is tired enough, has a consistent routine, and a comfortable, dark environment. Avoid overstimulation and help them link sleep cycles by offering a calm environment.
Can short naps be a sign of sleep regression?
Yes, short naps can happen during sleep regressions, especially when babies experience developmental changes, like learning new skills or transitioning to fewer naps.
What to do when my baby wakes up early from a nap?
Let your baby try to fall back asleep for 10–15 minutes. If they don’t, start the next wake window and avoid shortening it to prevent reinforcing short naps.
Parents share a familiar story: babies who won’t sleep, no matter how hard they try.
I know how hard it can be when your baby fights sleep and wakes up crying throughout the night. It makes you feel helpless and tired.
I’ll help you understand what’s happening when your baby can’t get proper rest.
In this guide, I’ll show you clear signs that point to sleep problems in babies. Plus, you’ll get practical tips that work for both naps and bedtime.
I’ll share steps for spotting sleep issues early, fixing poor sleep habits, and creating better rest patterns for your baby.
With these insights, you’ll help your little one sleep better and grow healthier.
Understanding Baby Sleep Cycles
A baby’s sleep cycle lasts about 40-50 minutes, much shorter than an adult’s. Babies spend more time in light, active sleep, which is why they wake up often.
Most babies develop regular sleep patterns around 3 to 4 months of age. During active sleep, they might twitch, move, or make sounds—this is normal and helps brain development.
Babies have less deep sleep than adults. As they grow, their sleep cycles lengthen, leading to longer rest periods.
Understanding these patterns helps you create better sleep routines for your baby.
What Causes A Baby To Become Chronically Overtired?
1. Inconsistent Sleep Schedule: A changing sleep routine confuses your baby’s body clock. When nap times and bedtimes shift each day, your baby’s body can’t set its natural sleep rhythm, making it hard for it to fall asleep when it needs to.
2. Poor Sleep Environment: Your baby needs a quiet, dark room to sleep well. Too much light, noise, or a room that’s too hot or cold can keep them from good rest. A peaceful sleep space helps your baby settle down naturally.
3. Growth Spurts and Developmental Milestones: When babies learn new skills like rolling over or crawling, their sleep often gets worse. Their brains stay active as they practice these new abilities, and this extra brain activity can make it harder for them to calm down for sleep.
4. Overstimulation During Wake Time: Too many activities, bright lights, or loud sounds can make your baby too alert. Playing too long without rest tires out their small bodies and minds. When this happens, their bodies make stress hormones that fight against sleep.
Behavioral Signs Of A Chronically Overtired Baby
1. Frequent Crying And Fussiness
Your baby cries more than usual and seems hard to comfort
Small things now trigger tears and upset reactions
Your usually happy baby appears cranky for long periods
Mood swings happen more often throughout the day
2. Difficulty Settling For Sleep
Your baby fights sleep even when clearly tired
They arch their back when you try to put them down
They turn their head away from their sleep space
Bedtime routines take longer than normal
3. Short Naps And Frequent Night Wakings
Naps last only 20-30 minutes instead of full cycles
Your baby wakes up often during the night
They struggle to fall back asleep after waking
Morning wake-ups come too early
4. Clinginess And Increased Separation Anxiety
Your baby cries when you leave their sight
They need more holding and comfort than before
They get upset with new people or situations
They show less interest in independent play
Physical Signs Of A Chronically Overtired Baby
Physical Sign
Description
Common Behaviors
Red or Puffy Eyes
Overtired babies often have visible signs of tiredness around their eyes.
Dark circles under the eyes. Glassy or unfocused eyes. Swollen or puffy eyelids. Bloodshot or red eyes.
Yawning, Rubbing Eyes, and Face
Babies yawn and rub their faces as self-soothing actions when they are overtired.
Frequent eye rubbing. Pulling at ears when tired. Increased face-rubbing. Yawning throughout the day.
Hyperactivity or Restlessness
Instead of winding down, overtired babies may become unusually active and restless.
Moving more than normal. Difficulty staying still. Tense or stiff body movements. Sudden bursts of energy.
Delayed Physical and Emotional Development
Chronic overtiredness can slow down a baby’s physical and emotional milestones.
Slower to learn new skills. Less interest in daily activities. Changes in eating patterns. Reduced responsiveness to voice or smile
How To Help A Chronically Overtired Baby
A set schedule helps your baby’s body learn when to sleep. Create a simple bedtime pattern with a warm bath, soft songs, and gentle rocking. Keep these steps the same each night.
Watch for sleep signs during the day. When your baby slows down or gets quiet, start your sleep routine. Set regular nap times to help their body clock.
Make their room sleep-friendly with dark curtains and white noise. Keep the temperature comfortable and remove distracting items.
Keep activities calm before sleep. Play quiet games and speak softly. This helps your baby wind down naturally.
If your baby continues to struggle with sleep despite a consistent routine, it may indicate an underlying issue.
Frequent night wakings, short naps, or difficulty settling for sleep over an extended period should be discussed with a pediatrician.
Sleep disorders, such as sleep apnea or reflux, might be contributing to the problem.
2. Signs Of Developmental Delays
Sleep deprivation can impact your baby’s growth and development.
If your baby is slower to reach milestones like crawling, sitting up, or babbling, it’s essential to consult a doctor.
Emotional delays, such as a lack of responsiveness or reduced social interaction, can also signal concerns.
3. Concerns About Baby’s Overall Health And Well-being
Chronic sleep issues may point to broader health concerns.
If your baby shows signs of poor weight gain, unusual irritability, or frequent illnesses, it’s time to seek professional advice.
A pediatrician can assess if underlying medical conditions, such as allergies, reflux, or colic, are affecting your baby’s sleep.
Conclusion
Sleep matters deeply for your baby’s growth and happiness. Poor sleep can affect how your baby learns, grows, and feels each day.
By watching for signs of tiredness and setting good sleep patterns, you can help your baby rest better.
Small changes in your daily routine often make big differences.
A dark room, steady bedtimes, and calm activities before sleep help your baby wind down naturally. Remember that each baby has its own sleep needs, so what works for one might not work for another.
Trust your instincts as a parent. You know your baby best.
Pay attention to their sleep signs, maintain steady routines, and contact your doctor when you need help.