Author

Dr. Emily Clarke

Browsing

I remember staring at my pump at 3 AM, desperately wanting to skip the session and go back to sleep.

Like many pumping moms, I wondered: “Would my milk supply tank if I slept through the night? Is it really that bad to go 8 hours without pumping?”

If you’re asking yourself these same questions, you’re not alone.

As someone who’s pumped for two babies, I know the mental and physical struggle of nighttime pumping. The constant battle between needing sleep and worrying about your milk supply is real.

Whether you’re considering dropping that middle-of-the-night session or worried about accidentally sleeping through it, I get it.

Today, let’s talk honestly about what happens when you go 8 hours without pumping.

I’ll share what I’ve learned from my own experience, as well as practical information to help you make the best decision for you and your baby.

What Can Happen If You Don’t Pump for 8 Hours?

What Can Happen If You Don't Pump for 8 Hours

The prospect of going 8 hours without pumping can trigger anxiety and uncertainty, especially for new mothers who are still learning their body’s rhythms.

When a mother goes an extended period without expressing milk, her body responds in complex ways.

Understanding these potential consequences is crucial for making informed decisions about nighttime pumping.

1. Milk Supply Impact

When you go 8 hours without pumping, your body starts receiving signals to slow down milk production.

This can lead to a noticeable decrease in milk supply over time. Your breasts operate on a supply-and-demand basis, so consistently missing pumping sessions tells your body that less milk is needed.

For many moms, this could result in a 20-30% reduction in daily milk output if it becomes a pattern.

2. Hormonal Changes

Missing pumping sessions affects your body’s natural hormone rhythm.

Regular pumping maintains stable levels of prolactin (milk-making hormone) and oxytocin (let-down hormone).

When you skip sessions, these hormone levels can become irregular, making it harder to maintain consistent milk production even after you resume regular pumping.

3. Physical Discomfort & Engorgement

Skipping pumping for 8 hours can cause painful breast engorgement. Your breasts will become uncomfortably full, hard, and tender to touch.

This pressure can lead to blocked milk ducts, which feel like hard, painful lumps in your breasts.

The discomfort can make it harder for milk to flow when you finally do pump, as overly full breasts can actually inhibit let-down.

Factors that Affect Nighttime Pumping

Factors that Affect Nighttime Pumping

Making decisions about nighttime pumping can feel overwhelming. Between managing your milk supply and getting enough rest, there’s a lot to consider. 

Just like every baby is unique, every mom’s body responds differently to pumping schedules. Here are the main factors that affect your nighttime pumping needs.

1. Pumping Schedule & Timing

Your body’s milk production follows a natural rhythm, with prolactin levels highest between 1 AM and 5 AM.

Consistently pumping during these early morning hours can significantly impact your milk output.

The time between pumping sessions also matters – going too long without pumping overnight can signal your body to produce less milk, while pumping too frequently might not give your breasts enough time to refill.

2. Sleep Quality & Stress Levels

The amount and quality of sleep you get directly affect your milk production. High-stress levels can interfere with your let-down reflex and decrease milk output.

When you’re overtired or anxious, your body produces cortisol, which can inhibit oxytocin (the hormone responsible for milk release).

Finding ways to relax and get adequate rest between pumping sessions is crucial.

3. Hydration & Nutrition

What you eat and drink, especially in the evening hours, can impact your nighttime milk production.

Staying well-hydrated throughout the day and evening affects milk volume, while certain foods can influence milk production.

 Evening snacks high in protein and healthy fats can help maintain energy levels for night pumping sessions.

Why Should You Pump Breast Milk at Night?

Nighttime pumping is more than just a feeding routine – it’s a complex process deeply connected to your body’s natural rhythms.

Understanding the key reasons can help you make informed decisions about your breastfeeding journey.

  • Maintain Milk Supply: Nighttime pumping helps increase and maintain milk supply by taking advantage of higher prolactin levels at night.

  • Prevent Engorgement: Pumping at night prevents engorgement and reduces the risk of clogged ducts or mastitis.

  • Create a Stash for Future Use: Nighttime pumping helps build a milk stash for times when you’re away from your baby.

  • Support Baby’s Growth: Night milk is richer in fat, supporting your baby’s growth and development.

  • Balance Between Night and Day Feeds: Pumping at night ensures your baby gets enough milk during the day, even if they sleep through some feedings.

How to Pump at Night: Practical Tips

How to Pump at Night Practical Tips

Successful nighttime pumping is about more than just the act of expressing milk. It’s about creating a sustainable, comfortable process that supports both mother and baby.

  • Set up your breast pump and necessary supplies before going to bed to save time and make the process smoother during the night.

  • Find a quiet, dimly lit area to pump, making the environment calming and conducive to relaxation, so you can easily return to sleep afterward.

  • Pump at the same time each night to help your body adjust to the routine and maintain a consistent milk supply.

  • Consider using a hands-free pumping bra to increase comfort and efficiency, allowing you to relax or rest while pumping.

  • Stay hydrated and have a light snack before pumping to support milk production and ensure you have enough energy.

  • Aim to pump for around 10-15 minutes to avoid over-stimulation and get back to sleep as quickly as possible.

When Can You Stop Pumping at Night?

The decision to stop night pumping is a significant milestone in your breastfeeding journey.

While the idea of uninterrupted sleep is appealing, it’s important to make this transition at the right time and in the right way to maintain your milk supply and keep both you and your baby comfortable.

You can typically begin reducing nighttime pumping sessions when your baby is between 4-6 months old, your milk supply is well established, and you’re consistently meeting daily milk needs through daytime pumping.

Look for signs like your baby sleeping longer stretches, stable weight gain, and your comfort level with longer gaps between sessions.

Start by gradually dropping one-night session at a time, monitoring your supply for 1-2 weeks before making further changes.

Remember, every mom’s journey is different – some may need to continue night pumping longer, while others can stop earlier based on their body’s response and baby’s needs.

Conclusion: Making the Right Choice for You and Your Baby

As a pumping mom who’s been through the late-night sessions and early-morning alarms, I know how tempting it can be to skip that middle-of-the-night pump.

The decision to go longer between pumping sessions is deeply personal, and what works for one mom might not work for another.

While going 8 hours without pumping might work for some moms with established supplies, others might need more frequent sessions to keep their supply strong.

Listen to your body’s signals. There’s no shame in needing to pump more frequently, just as there’s no shame in being able to go longer between sessions.

Whether you’re pumping every few hours or managing longer stretches, you’re doing an amazing job nourishing your little one.

Trust your instincts, stay in tune with your body, and remember – this phase of your journey won’t last forever.

Frequently Asked Questions

Will My Milk Dry up If I Don’t Pump at Night?

Not pumping at night can affect your supply, especially in the first 12 weeks. After that, most moms can safely reduce night pumping if their daytime supply is well-established.

How Long Can You Go Without Pumping Before It Affects Your Supply?

In the first 3 months, going more than 4-5 hours can impact supply. After 3 months, many moms can go 6-8 hours at night if their supply is stable and the baby is growing well.

Can Not Pumping at Night Cause Mastitis?

Yes, if your breasts become too full. To prevent mastitis, reduce night pumping gradually and watch for signs of engorgement or painful lumps. Express milk if you feel uncomfortable.

If you’re a parent of a newborn, you’ve likely faced the challenge that your baby won’t sleep unless held.

While the cuddling is wonderful, it can become exhausting over time. You’re probably asking, “How can I get my baby to sleep on their own?”

Rest assured, you’re not alone. Many parents go through this, and it’s perfectly normal for newborns who need the comfort of their caregivers to feel secure.

The good news is that with patience and consistency, you can help your baby sleep independently.

This blog offers practical tips to guide you through the process and ensure both you and your baby can get the rest you deserve. 

Why Babies Sleep Only When Held

Why Babies Sleep Only When Held

Let’s be honest—babies sleep better when they’re in your arms. And it’s not just because it’s cute (though, let’s admit, it totally is).

It’s because they really need you. Here’s why:

1. Attachment and Bonding

First off, babies are hardwired to want to be close to their caregivers. They feel safe and secure when they’re held. This is super important for their emotional development.

So, if your baby seems to need you to hold them to sleep, it’s because they trust you. And that’s a good thing! You’re building that bond.

2. Temperature and Breathing Regulation

Babies can’t regulate their body temperature the way adults can. When you hold them, your warmth helps keep them cozy. They also rely on your steady breathing to calm themselves down.

It’s no surprise they sleep better in your arms—it’s like having their own personal comfort zone.

3. Learned Behaviour from the Womb

For nine months, your baby was in a snug, warm place, hearing the gentle rhythm of your heartbeat and feeling you move around.

No wonder they love being close to you! They’ve learned that your presence means safety and sleep.

So, when you try to lay them down in their crib, they’re probably thinking, “Wait, where did my warm, cozy comfort go?”

4. The Startle Reflex

And then there’s the Moro reflex—basically, your baby’s startle response. It makes them jerk awake whenever they feel like they’re falling.

When you hold them, that reflex doesn’t get triggered, and they can stay asleep.

But as soon as they feel the sensation of falling into the crib, their reflex kicks in, and boom, they’re wide awake.

Is It Safe for My Baby to Sleep on Me?

Is It Safe for My Baby to Sleep on Me?

Although it’s tempting to let your baby sleep on you because it feels safe and cozy, there are some risks involved.

Sleeping on a soft surface like an armchair or bed can be dangerous due to the risk of suffocation or sudden infant death syndrome (SIDS).

The American Academy of Pediatrics advises against bed-sharing for this reason.

If you fall asleep too, your baby could slip into a dangerous position or get trapped between your body and furniture.

Instead, place your baby on their back in a crib with a firm mattress, keeping the sleep area free of blankets, pillows, and toys.

Tips to Get Your Baby to Sleep Without Being Held 

Is It Safe for My Baby to Sleep on Me?

Here are 11 practical tips for it:

  1. Set Age-Appropriate Expectations: Newborns need help to fall asleep until 4-6 months. Be patient and understand this phase is temporary.
  2. Try Swaddling: Swaddle safely to mimic the womb’s snug feeling and reduce the startle reflex. Avoid tightness around the hips.
  3. Spend Extra Time Snuggling: Cuddle your baby until drowsy before placing them in their crib to provide security and reassurance.
  4. Introduce the Sleep Space During Awake Times: Let your baby play or relax in the crib when not tired, helping them associate it with comfort.
  5. Give Your Baby Opportunities to Self-Soothe: Place your baby in the crib while drowsy but not fully asleep to encourage self-soothing. Be patient if they don’t succeed immediately.
  6. Start with One Crib Nap Per Day: Begin with one crib nap daily, even if it’s short, to help your baby adjust to sleeping independently.
  7. Gradual Weaning from Holding: Slowly reduce physical contact by offering gentle touches instead of picking your baby up every time they fuss, helping them learn to fall asleep without being held.
  8. Don’t Rush the Process: Be patient during the transition. Crying is normal, and consistency is key as your baby learns to self-soothe, which may take days or weeks.
  9. Make Sure the Environment is Comfortable: Ensure the room is the right temperature—between 68-72°F is ideal. A cool room with soft, breathable clothing will keep your baby comfortable throughout the night.
  10. Use White Noise: A white noise machine can help mimic the sounds your baby heard while in the womb, creating a soothing environment that encourages sleep.
  11. Avoid Feeding to Sleep: Feeding your baby to sleep can create a sleep association that may be hard to break. 

Snoo: An Alternative to Make Your Baby Sleep Without You

Snoo An Alternative to Make Your Baby Sleep Without You

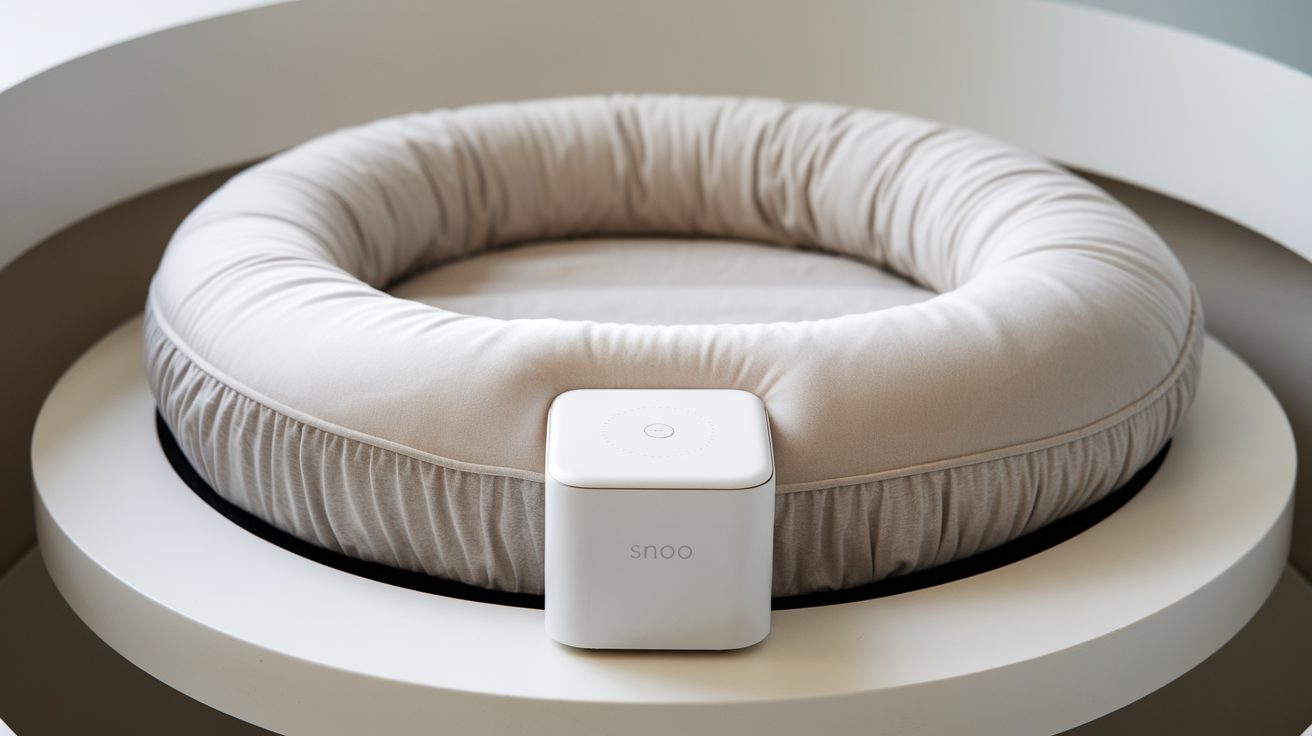
If you’re struggling with your baby only sleeping when held, the Snoo Smart Sleeper might offer the solution you’ve been searching for.

This high-tech bassinet is designed to help your baby sleep independently without the need for constant holding.

The Snoo mimics the comforting motions and sounds your baby experienced in the womb, offering gentle rocking and soothing white noise.

This helps your baby settle into a deep sleep while still feeling secure in their sleep space.

With features like automatic motion adjustment based on your baby’s crying, it takes some of the guesswork out of soothing, allowing your baby to self-soothe more easily.

It’s an ideal alternative if you’re looking to reduce the need for constant holding but still want your baby to feel secure during sleep.

Conclusion

Remember, your baby wanting to be held to sleep is completely natural.

They’re adjusting to life outside the womb and need your comfort to feel safe. While this phase can feel tiring, it won’t last forever.

Start with small changes – try one crib nap daily, use swaddling, or create a cozy sleep space with white noise.

Be patient with yourself and your little one during this process. Some days will be harder than others, and that’s okay.

If you’re feeling worn out, reach out to other parents or your pediatrician for support. You’re doing a great job, and with time and consistency, your baby will learn to sleep independently.

Ready to start? Pick one tip from our guide and try it today during your baby’s next nap.

Frequently Asked Questions

How to Help My Baby Adjust to A Crib?

Gradually introduce your baby to their crib by starting with short naps and making the crib a familiar space for them.

When Should I Stop Holding My Baby to Sleep?

You don’t have to rush. Around 3-4 months, your baby may start being more ready to sleep independently, but every baby is different.

How to Handle Overnight Wakings?

Allow your baby some time to self-soothe when they wake during the night. Give them a few minutes before picking them up, and they may fall back asleep on their own.

As expecting parents prepare their nursery checklist, one common question remains: “How many swaddles do I need?”

Whether you’re a first-time parent meticulously planning your baby’s arrival or already amid those sleep-deprived newborn days, figuring out your swaddle needs can feel overwhelming.

Some parents start with just one or two, only to do emergency laundry at 3 AM after a diaper blowout.

Others might overcompensate and end up with a drawer full of unused swaddles their baby quickly outgrows.

This guide is designed to simplify the process of building your perfect swaddle collection. It will help you balance being well-prepared with avoiding unnecessary excess.

The Magic Number: The 3-2-1 Rule

The_Magic_Number_The_3-2-1_Rule

Every parent’s swaddle journey becomes clearer with our tried-and-tested “3-2-1 Rule” – a simple yet effective approach to building your swaddle collection:

For Your Newborn (0-3 months)

Three swaddles during these early months ensure you’re perfectly prepared. This gives you one to wear, one to wash, and one ready as a backup for those surprise diaper leaks or spit-ups that always seem to happen at 2 AM!

As Baby Grows (3-6 months)

Two swaddles become your sweet spot. By this age, your baby’s routine is more established, and you’ll deal with fewer surprise changes throughout the day.

The Emergency Backup

One extra swaddle is pristine for unexpected situations, such as an overnight stay at grandma’s or a washing machine breakdown right when needed.

This carefully balanced formula prepares you for every situation while ensuring you don’t overspend or overwhelm your nursery storage. It’s about having enough without too much – perfect for your peace of mind and wallet!

Why Three Swaddles for Newborns?

Why_Three_Swaddles_for_Newborns

Those tiny bundles of joy can create surprisingly big messes! Having multiple swaddles isn’t just convenient; it’s essential during the newborn phase.

Feeding Time

Newborns eat often – every few hours, day and night. Milk dribbles and spit-ups happen a lot. Your swaddle catches most of these messes, so it needs frequent changes.

Diaper Duty

Leaks happen, especially in the early weeks. You’re learning how diapers fit best, and your baby moves unexpectedly. Sometimes, these surprises end up on the swaddle.

Laundry Facts

With milk spots and diaper leaks, you’ll use your washing machine more than you think. Having enough swaddles means you won’t run out while waiting for laundry to finish.

Sleep Patterns

Your newborn might take five naps a day. Each time they wake up, they might need a fresh swaddle. Clean swaddles help them stay comfortable and sleep better.

These daily challenges are normal. They’re part of having a newborn. Plan for them, and your days will go smoother.

Swaddles Through the First Six Months

The First Three Months

Newborns need special care when wearing swaddles. Start with three light ones, you’ll need them for those middle-of-the-night changes.

Pick soft, breathable fabrics that feel gentle on new skin. Look for swaddles with easy diaper access. Quick changes help everyone get more sleep.

Good newborn swaddles should:

  • Feel soft against the skin
  • Let the airflow through
  • Open easily for diaper changes
  • Wash well after messes

Months Three to Six

Your baby grows fast, and their swaddle needs to change, too. You’ll need just two swaddles, which should be bigger and stronger.

Look for ones with arm openings – babies start rolling around this time and need more movement freedom.

Choose swaddles that:

  • Give room to grow
  • Let arms move when needed
  • Stand up to more movement
  • Clean easily

Seasonal Considerations

Creating the perfect sleep environment for your baby means adapting their swaddles to the seasons. Let’s break down exactly what your little one needs to stay cozy all year round.

Summer Swaddling (Room Temperature 24-27°C/75-80°F)

Summer_Swaddling_Room_Temperature_24-27C_75-80F

Hot weather calls for smart swaddle choices. Your baby needs the right fabric and weight to stay comfortable through summer days and nights.

The best summer swaddles are light and breezy. Look for ones with TOG ratings between 0.2 and 1.0 – these are made for warm weather.

Cotton and bamboo work great because they let air flow through naturally.

The right summer swaddle keeps your baby wrapped securely without getting too hot. Choose materials that feel cool to the touch—they’ll likely feel good to your baby, too.

Winter Swaddling (Room Temperature 16-20°C/61-68°F)

Winter_Swaddling_Room_Temperature_16

Cold nights need smart swaddling choices. Your baby can sleep safely and comfortably with the right approach to winter wrapping.

Look for swaddles rated 2.5-3.5 TOG. They’re made for cooler temperatures, and the best winter swaddles have special features that work together.

It has layers that hold warmth, adjustable parts that you can loosen or tighten as needed, and careful padding in just the right spots.

Using lighter layers allows you to control your baby’s temperature throughout the night. If your baby feels too warm, you can remove a layer. Too cool? Add one back.

Care and Rotation Tips

Care_and_Rotation_Tips

  • Smart swaddle care helps your collection last longer and work better for your baby. Simple habits can greatly affect how well your swaddles serve you through those early months.
  • Keep your swaddles fresh by washing them every few days or immediately if they get messy. Babies are sensitive to smells and feel most comfortable in clean wraps.
  • A regular rotation between your swaddles helps them wear evenly and last longer.
  • These small steps add up to make your daily routine smoother. With a good care routine, even a small collection of swaddles can meet all your baby’s needs.
  • Taking care of your swaddles means they’ll care for your baby better. It’s as simple as that.

Wrapping it Up!

Choosing the right number of swaddles marks one of your first steps into parenthood.

While our guide suggests starting points, your baby’s unique needs will shape your final collection. You can trust that you’ll quickly determine whether you need more or fewer swaddles.

Start with three swaddles in your baby’s current size, plus one backup in the next size up. This gives you room to learn what works best without overbuying.

Some babies run warm, others cool. Some need frequent changes, and others stay clean and dry. Your daily experience will guide you better than any expert advice. 

Remember that building your swaddle collection isn’t about hitting a magic number. It’s about finding what makes your daily routine smoother and your baby more comfortable. 

The perfect swaddle setup doesn’t involve following strict rules. Instead, it involves creating a system that works for you, your baby, and your lifestyle. Please keep it simple, stay flexible, and let your experience guide the way.

Frequently Asked Questions

How Many Swaddles Should I Have for A Newborn?

For a newborn, aim for 3-4 swaddles – this allows one to wear, one to wash, and one or two as a backup for unexpected messes.

How Many Swaddles Do You Need to Bring to The Hospital?

Pack two to three swaddles in your hospital bag—one for first use, one for backup, and an extra in case of an extended stay.

Is It Safe to Use Two Swaddles?

Never layer multiple swaddles, as this can cause heating and increase the risk of SIDS. Instead, choose one appropriately weighted swaddle for the room temperature.

Do I Have to Swaddle My Newborn Every Time?

While swaddling is recommended for sleep times, it’s unnecessary during awake periods when your baby needs freedom to move and develop motor skills.

Every new parent dreams of forming an instant, magical connection with their baby. But what happens when that bond doesn’t come so easily?

If you’re worried you’re not bonding with your little one, you’re not alone. In this quick guide, we’ll explore some common signs you’re not bonding with your baby, such as feeling disconnected, uninterested, or even resentful towards your baby.

We’ll also discuss why bonding issues sometimes occur and share tips for nurturing that special relationship. Most importantly, remember that bonding is a process – it doesn’t always happen overnight.

With patience, support, and a few helpful strategies, you can strengthen your attachment and build a loving, lasting bond with your baby.

Let’s jump in and start cultivating that connection today.

Some Usual Signs Of Weak Bonding

Some Usual Signs Of Weak Bonding

While every parent-child bond is unique, certain signs can indicate that bonding might not be happening as smoothly as you’d like. Here are the top three signs:

Lack of Eye Contact and Responsiveness

Eye contact is one of the most powerful ways to connect with your baby. Babies learn to trust you when they see your face and can look into your eyes.

If your baby avoids looking at you or doesn’t seem to notice when you try to engage, this may be a sign of a weak emotional connection.

Difficulty Soothing Your Baby

Babies naturally seek comfort from their parents. When you try to soothe your baby but your efforts don’t seem to work, this can indicate a disconnect.

Struggling to calm your baby’s crying or being unable to comfort them may point to bonding difficulties.

Negative Emotions Toward Your Baby

Feeling frustrated, angry, or disconnected from your baby can be tough to handle. It’s normal to feel overwhelmed at times, but consistent negative feelings like resentment could be a sign that bonding isn’t happening as it should.

It’s important to address any feelings of frustration as they may affect both you and your baby’s emotional health.

Common Causes of Bonding Struggles

Common Causes of Bonding Struggles

Several factors can make bonding harder, and it’s crucial to understand what might be affecting your connection.

Postpartum Depression (PPD)

I get it—becoming a parent isn’t always the magical moment we imagine. Instead of feeling joy, you might feel overwhelmed, sad, or even anxious.

If you’re dealing with Postpartum Depression (PPD), these emotions can really stand in the way of bonding with your baby. You might find it difficult to feel connected or even exhausted by the idea of holding your baby. Please know that it’s okay to ask for help.

Physical and Mental Exhaustion

I think most new parents can relate to feeling like they’ve just run a marathon every day—except the marathon never ends. Sleepless nights, constant baby care, and the weight of new responsibilities can leave you physically and mentally drained.

When you’re running on empty, it’s hard to focus on bonding or even feeling emotionally present. You might feel guilty, but taking care of yourself isn’t selfish—it’s necessary. It’s tough to be emotionally connected to your baby if you’re not looking after your own health.

Traumatic Birth Experiences

Not all birth experiences are smooth, and some can be downright traumatic. If you’ve gone through a difficult or stressful delivery, it’s completely understandable if you’re struggling to bond with your baby.

It might feel like there’s a wall between you two, and that’s okay. You’re not alone in this—many parents face this challenge. It’s crucial to give yourself grace during this time.

Take the time to process the emotions that come with a traumatic birth.

Isolation and Loneliness

Parenthood can be incredibly isolating, especially if you don’t have a solid support system around you. If you find yourself feeling like you’re on this journey alone, it’s no wonder the bond with your baby might feel distant.

You’re exhausted, isolated, and missing your old life. It’s hard to give your baby the attention they deserve when you feel disconnected from the world.

Practical Solutions to Strengthen the Bond

Practical Solutions to Strengthen the Bond

Now that we’ve talked about the signs and reasons for struggling to bond, let’s look at some simple ways to strengthen that connection with your baby.

1. Skin-to-Skin Contact

Holding your baby close, skin-to-skin, is one of the best ways to create a strong bond. When you hold your baby against your bare chest, your body releases oxytocin, also known as the “love hormone.”

This helps both you and your baby feel calm and connected. Try doing this while feeding or just cuddling your baby for a few minutes each day.

2. Responsive Parenting

Pay attention to your baby’s needs and respond quickly. If your baby is hungry, tired, or needs comfort, meeting those needs helps build trust and a secure bond.

The more you respond to your baby’s cues, the stronger your emotional connection will grow.

3. Engage in Talking, Singing, and Reading

Your voice is a powerful tool for bonding. Talking, singing, or even reading aloud to your baby helps them get used to the sound of your voice. Narrate your actions, like “Let’s put on your socks!” or sing a lullaby to comfort them.

These small moments make a big difference in helping your baby feel connected to you.

4. Seek Support and Professional Help

Parenting can be overwhelming, and it’s okay to ask for help. If you’re feeling stressed or dealing with things like Postpartum Depression (PPD), talking to a counselor or joining a support group can be very helpful.

Professionals can give you advice, tools, and emotional support to improve your mental health and your bond with your baby.

5. Self-Care for Parents

Taking care of yourself is key to being able to bond with your baby. Make sure you’re eating well, getting enough sleep, and taking breaks when needed.

The better you feel, the easier it will be to give your baby the care and love they need. Don’t feel guilty about needing time for yourself; it’s important for your well-being.

Conclusion

A strong bond is crucial for your baby’s emotional development. It builds trust, encourages social skills, and creates a foundation for long-term mental health and well-being.

Bonding doesn’t happen overnight. It’s a gradual process that may take months, not days. Each interaction you have with your baby builds this connection over time.

Recognizing that you may not be bonding with your baby right away is an important first step.

Remember, bonding takes time and is a process that will evolve with each passing day. Be patient, seek help when needed, and continue nurturing the connection with your baby.

The bond you form now will shape your relationship for years to come.

Frequently Asked Questions

How Do I Know If My Baby Is Bonding With Me?

Your baby may show affection by smiling at you, making eye contact, or cooing when they hear your voice. These are signs that your baby feels secure and connected to you.

Can I Bond With My Baby If I Don’t Feel an Immediate Connection?

Yes! Bonding is a process that can take time. It’s okay if you don’t feel an instant connection. Keep making an effort, and the bond will grow.

What Are Some Signs That My Baby Loves Me?

Babies show love by reaching for you, smiling, and reacting positively to your presence. These are signs that your baby is beginning to form a bond with you.

Does Co-Sleeping Help Bond With My Baby?

Co-sleeping can increase physical closeness, which may help foster bonding. However, it’s important to follow safe sleep guidelines to ensure your baby’s safety while co-sleeping.

Parenting is a journey filled with love, joy, and yes, sleepless challenges. If you’re struggling with your baby’s nap routine, you’re not alone.

Many parents find themselves exhausted, desperate for a solution that brings peace to their daytime hours. Short, unpredictable naps can leave both babies and parents feeling cranky and overwhelmed.

The constant battle of trying to get your little one to sleep—and stay asleep—can feel like an endless cycle of frustration. But what if there was a way to transform your baby’s nap time from a source of stress to a consistent, restful experience?

This guide will walk you through proven sleep training for naps that can help your baby (and you) get the daytime rest you desperately need.

Understanding Sleep Training for Naps

Understanding Sleep Training for Naps

Understanding sleep training for naps goes beyond simply implementing a method—it’s a thoughtful approach to help your baby build healthy sleep habits throughout the day.

What is Nap Training?

Nap training is when you teach your baby how to fall asleep by themselves and have longer, more restful naps. It focuses on “sleep learning,” which means helping your baby learn to sleep independently, at their own pace, rather than following strict routines.

This way, the approach fits your baby’s unique needs, allowing them to develop sleep skills that help them sleep better during the day.

Why Naps are Harder than Night Sleep?

Naps can be trickier than nighttime sleep because during the day, babies are more likely to be distracted by light, noise, and activity.

Also, they don’t feel as sleepy during the day as they do at night, so it’s harder for them to settle down.

Their natural sleep drive (how sleepy they feel) isn’t as strong, making it harder for them to nap like they do at night when their body is more ready to sleep.

What Happens When Babies Are Not Napping Well?

When babies don’t nap well, they can become fussier and more irritable. Poor naps may also lead to difficulty falling asleep at night due to overtiredness.

Lack of rest affects their growth and development, as naps are essential for brain and physical growth. Additionally, inadequate sleep weakens their immune system, making them more vulnerable to illness.

Without enough rest, babies may struggle to learn new skills and can become overstimulated, making it harder for them to process their surroundings calmly.

Benefits of Nap Training for Babies

Starting nap training early can have several great benefits for both your baby and you:

  1. Better Sleep Patterns: Teaching your baby to sleep independently from a young age helps them develop healthier sleep habits and a more consistent nap routine.

  2. Improved Brain Development: Quality naps are crucial for brain growth. Babies who nap well have better cognitive development, memory, and learning ability.

  3. Healthier Growth: Napping allows your baby’s body to rest, recharge, and grow properly, supporting physical health and development.

  4. Reduced Irritability: Babies who take regular, restorative naps are less likely to become overtired or cranky, leading to a happier, more content baby.

  5. Easier Transition to Independent Sleep: Early nap training helps babies learn to fall asleep on their own, which makes it easier when transitioning to longer, independent nighttime sleep.

  6. Helps Parents Rest Too: When your baby naps well and independently, it gives you a break to relax or take care of other tasks, which is important for your well-being too.

Practical Tips for Successful Nap Training

Practical Tips for Successful Nap Training

Here’s a more natural, mixed approach with paragraphs and points:

1. Establish a Consistent Nap Routine

Creating a predictable pre-nap routine is like sending a gentle signal to your baby that sleep time is approaching. This routine acts as a bridge between active playtime and restful sleep, helping your little one transition smoothly. A typical routine might look simple but powerful:

  • Change diaper
  • Read a short, calming book
  • Sing a quiet lullaby
  • Dim the lights
  • Use consistent white noise

The key is consistency. By following the same sequence each time, you’re helping your baby’s brain recognize and anticipate sleep time.

2. Master Wake Windows

Understanding wake windows is crucial in preventing overtiredness, which can make falling asleep much harder. These windows represent the ideal time between waking and when your baby should be put down for a nap.

Age-specific wake windows include:

  • 0-3 months: 60-90 minutes
  • 4-6 months: 90-120 minutes
  • 7-9 months: 2-3 hours
  • 10-12 months: 3-4 hours

Timing is everything. Putting your baby to bed during these optimal windows helps them fall asleep more easily and enjoy more restful naps.

3. Create an Optimal Sleep Environment

Your baby’s sleep environment plays a critical role in nap success. Think of it as creating a sleep sanctuary that promotes relaxation and rest.

Key elements include:

  • Blackout curtains to minimize light
  • Room temperature between 68-72°F
  • Consistent white noise machine
  • Comfortable, breathable clothing

A well-designed sleep space can significantly improve nap quality and duration.

4. Learn to Read Sleep Cues

Recognizing early sleep signals can make nap training much smoother. These subtle signs indicate your baby is ready for sleep:

  • Slight eye rubbing
  • Mild, subtle yawning
  • Decreased physical activity
  • Staring off into space

Catching these cues early prevents overtiredness and makes falling asleep easier.

5. Be Consistent but Flexible

Nap training requires a delicate balance of structure and adaptability:

  • Stick to your chosen sleep training method
  • Allow occasional variations
  • Don’t get discouraged by temporary setbacks

Remember, progress isn’t always linear. Some days will be better than others, and that’s perfectly normal.

6. Practice Self-Soothing Techniques

Helping your baby learn to self-soothe is a crucial part of nap training:

  • Put baby down drowsy but awake
  • Allow short periods of mild fussing
  • Gradually increase time between check-ins

This approach helps build independent sleep skills gradually and gently.

Technology and Sleep Tracking

By using technology and sleep tracking, you can better understand your baby’s sleep patterns and adjust their routine to improve nap quality and overall restfulness.

  • Use baby sleep tracking apps
  • Monitor wake windows
  • Identify patterns in sleep behavior
  • Adjust routine based on data insights

When Should I Start Sleep Training for Naps?

When Should I Start Sleep Training for Naps?

The best time to start sleep training for naps is typically around 4-6 months of age. At this stage, babies have developed the necessary neurological capacity to self-soothe and begin learning independent sleep skills.

Starting sleep training too early, before this developmental milestone, can be challenging, as younger babies may not be ready to sleep on their own.

However, you can start laying the foundation for good nap habits earlier by creating a consistent sleep environment and recognizing early sleep cues.

At 4-6 months, you can gradually introduce nap training, helping your baby learn to fall asleep independently during the day.

Conclusion

Sleep training for naps isn’t a one-size-fits-all solution, but a personalized journey of understanding your baby’s unique sleep needs.

The path to perfect naps requires patience, consistency, and compassion. Some days will feel challenging, and that’s okay.

Don’t get discouraged by setbacks. It is a skill both you and your baby are learning together. Trust the process, be kind to yourself, and remember that restful naps are possible.

If you feel overwhelmed, seek support from pediatric sleep consultants, experienced parents, or your pediatrician.

You’re not alone in this journey. 

Sweet dreams await!

Frequently Asked Questions

What Is the 2/3/4 Nap Rule?

The 2/3/4 nap rule is a sleep schedule where babies have 2 naps at 4-6 months, 3 naps at 6-9 months, and 2 naps by 9-12 months.

How Long Do You Let a Baby Cry It Out for Naps?

Let your baby cry for about 5-10 minutes before intervening. If crying continues, offer gentle soothing, but try to avoid picking them up immediately.

What Age Should I Stop Holding Baby for Naps?

Stop holding your baby for naps around 4-6 months when they can start learning self-soothing skills and take naps independently.

How to Break Contact Nap Habit?

Gradually reduce holding time by putting your baby down drowsy but awake, then using soothing methods like patting or shushing until they fall asleep on their own.

Exersaucers is a popular stationary playpen designed to keep babies entertained while helping them develop motor skills.

These stationary play areas provide a safe alternative to baby walkers, allowing babies to bounce, spin, and interact with attached toys.

But the key question is, when is the right exersaucer age for the baby? While age is a factor, readiness is more about your baby’s development.

Typically, babies are ready for an exersaucer after a certain age, but this depends on key milestones like head control, the ability to sit up independently, and overall physical strength.

Introducing an exersaucer before these milestones can lead to issues with posture or motor development.

It’s crucial to wait until your baby can safely support themselves and interact with the toys in a way that benefits their growth.

Developmental Readiness: Understanding the Right Age and Milestones

Developmental Readiness Understanding the Right Age and Milestones

Babies go through a series of important developmental stages before they are ready for an exersaucer.

While exersaucers can be a fun and engaging tool, it’s vital to wait until your baby reaches the right physical milestones to avoid any negative effects.

One of the most important milestones is the ability to sit up independently, typically around 6 to 7 months.

Using an exersaucer before this can lead to poor posture, as babies may not yet have the strength or control to support their bodies properly.

It can also cause delayed motor skills, as babies miss out on crucial floor time needed for crawling, which helps strengthen their muscles and coordination.

Key Milestones for Starting Exersaucer Use

Before introducing an exersaucer, babies must have a few key abilities:

  • Head and neck control: Babies should be able to support their head and neck independently, usually around 4 months.
  • Independent sitting: Babies should be able to sit without assistance, which typically happens between 6 and 7 months.
  • Interest in standing: While not required, showing interest in standing is helpful as it indicates readiness for activities like bouncing in an exersaucer.

Age Guidelines from Experts

Experts, including the American Academy of Pediatrics (AAP), recommend waiting until your baby reaches these milestones before using an exersaucer.

They caution against introducing the device too early, especially before 6 months, as babies’ hip joints are still developing.

Premature use can increase the risk of hip dysplasia or other developmental issues.

Always follow your baby’s natural growth patterns, and consult with your pediatrician if you have concerns about when to start using an exersaucer.

Pros and Cons of Using Exersaucers

Pros and Cons of Using Exersaucers

Pros

  • Develops Motor Skills: Helps build core strength, balance, and coordination through bouncing and leg movements.
  • Fine Motor Development: Encourages grasping and manipulating objects, improving hand-eye coordination.
  • Short-Term Entertainment: Provides a safe, engaging activity for babies, giving caregivers a brief break.
  • Safer than Walkers: Offers a stationary play area, reducing the risks associated with baby walkers.

Cons

  • Limits Mobility: Restricts movement, missing out on important crawling and free play.
  • Poor Posture and Hip Development: Can affect posture and hip growth if used too long.
  • Overstimulation: Excessive sensory input from toys, lights, and sounds can overwhelm babies.
  • Risk of Container Baby Syndrome: Overuse may delay motor development and cause physical issues like flat head syndrome.

Alternatives to Exersaucers

alternative to exersaucers

Here are some of the best alternatives to exersaucers:

  1. Tummy Time Mats – Great for strengthening neck and core muscles.
  2. Activity Cubes – Encourage fine motor skills and exploration.
  3. Playpens – Provide a safe space for free movement and play.
  4. Sensory Balls – Help with grip and tactile development.
  5. Baby-Safe Fabric Books – Stimulate sensory skills and early learning.
  6. Musical Mobiles – Engage auditory senses and encourage reaching and grabbing.
  7. Baby Play Gyms – Offer interactive toys to promote movement and coordination.

Conclusion

Exersaucers can be a great way to engage and entertain your baby, but they should be used carefully and at the right time.

It’s important to wait until your baby reaches key developmental milestones, such as sitting independently and having head control, before introducing an exersaucer.

Even then, limit usage to 10–15 minutes at a time to avoid overstimulation or strain.

While exersaucers offer some benefits, alternatives like tummy time mats, activity cubes, and playpens give your baby more freedom to move and develop motor skills naturally.

The goal is to encourage your baby’s development through a balance of safe play, floor time, and movement.

With the right approach, exersaucers can be a helpful tool in your baby’s early development, but they should never replace important opportunities for free play and exploration.

Frequently Asked Questions

Can a 3-Month-Old Use an Exersaucer?

No, babies typically need to have head control and be able to sit independently, usually around 4-6 months, before using an ExerSaucer.

Can Exersaucers Cause Hip Dysplasia?

Yes, using an ExerSaucer too early can place improper pressure on the joints, potentially increasing the risk of hip dysplasia.

What Is the Weight Limit for an Exersaucer?

Weight limits vary by model but are typically around 25 pounds, depending on the specific ExerSaucer.

When Should You Stop Using an Exersaucer?

Stop using an ExerSaucer around 12 months or when your baby can stand and move independently.

If you’re a new parent and finding the perfect solution for your baby’s sleep routine can feel overwhelming.

Lack of sleep in babies can lead to irritability, developmental delays, and weakened immune function.

For this problem, the Snoo Smart Sleeper Bassinet is very popular—a high-tech, automated bassinet that promises to help your baby sleep longer and, by extension, help you sleep, too.

But here the question arises, is the snoo really worth it?

The answer isn’t straightforward. For some parents, the Snoo is a game-changer that offers extra hours of rest and peace of mind.

However, there are drawbacks. The Snoo is expensive, it doesn’t work for every baby, and it’s only suitable for a limited period before your baby outgrows it.

This blog will give you practical guidance on what to look for before buying the snoo. We’ll examine the benefits, drawbacks, and key points to consider before making this big investment.

What Is the Snoo?

What Is the Snoo?

The Snoo Smart Sleeper is a high-tech bassinet designed to help babies sleep better by mimicking womb-like conditions.

Created by Dr. Harvey Karp, the bassinet uses automated swaddling, gentle rocking motions, and soothing white noise to calm and comfort babies, all with the goal of promoting longer stretches of sleep.

Key features include:

  • Automated swaddling: Keeps the baby safely on their back to reduce the risk of SIDS.
  • Gentle rocking and white noise: Designed to replicate the 5 S’s (swaddle, side/stomach, shush, swing, suck) to soothe a fussy baby.
  • Smart technology: The Snoo detects your baby’s cries and adjusts the rocking speed and volume of the white noise to help settle them back to sleep.

A good Snoo can be bought at around $1500 to $1700, though it can also be rented on a monthly basis.

For families unsure about committing to the purchase, renting provides a more flexible option, especially if you are only looking for short-term use.

What Are the Pros and Cons of the Snoo?

Pros 

Some Parents rave about the Snoo for its ability to promote longer, more restful sleep for both baby and parents.

Here are some of the top reasons why families love this high-tech bassinet:

  • The Snoo helps babies sleep longer, providing much-needed rest for parents during the challenging newborn phase.

  • It’s easy to use, with an app that lets parents adjust motion speed, white noise volume, and track sleep patterns.

  • Safety is prioritized with a secure swaddle that keeps babies on their backs, following safe sleep practices to reduce SIDS risks.

  • The Snoo encourages independent sleep by using gentle rocking and white noise, allowing babies to self-soothe and fall asleep.

  • The accompanying app tracks your baby’s sleep patterns, provides valuable insights, and offers tips to improve their sleep routine.

Cons 

While it offers convenience and enhanced sleep, its limitations may outweigh the benefits for some parents.

These drawbacks should be considered carefully before deciding if the Snoo is right for your family.

  • The Snoo is expensive, especially for short-term use (5-6 months before outgrowing it).

  • Babies may become dependent on the Snoo’s motion and noise, making transitions to a crib harder.

  • It’s heavy, making travel inconvenient, and lacks storage space.

  • Not all babies respond well to the Snoo, and false crying detections can trigger unnecessary soothing.

  • The Snoo requires its own sleep sacks, which can be costly to replace as babies grow.

What Types of Parents or Babies Might Actually Benefit from the Snoo?

What Types of Parents or Babies Might Actually Benefit from the Snoo?

The Snoo is a great option for parents who are struggling with sleep deprivation or those whose babies have trouble falling asleep on their own.

If you’ve tried everything—rocking, swaddling, or white noise machines—and nothing seems to work, the Snoo’s automatic motion and soothing sounds might offer the solution you’ve been searching for.

  • Parents dealing with sleep deprivation: If you’re exhausted and need help getting your baby to sleep longer stretches, the Snoo’s calming features could provide relief by reducing the amount of time spent soothing your baby.

  • Babies who need extra help falling asleep: Some babies struggle with self-soothing, and the Snoo can provide gentle assistance by mimicking the comfort and rhythm they experienced in the womb.

  • Parents looking for new technology-driven solutions: If you enjoy using smart technology and value features like app controls and sleep tracking, the Snoo could fit perfectly into your routine.

It also shines during the transition from being held to sleeping in a crib, offering a more gentle and gradual shift for both baby and parents.

Alternatives to Choose Over the Snoo

Alternatives to Choose Over the Snoo

If the Snoo doesn’t feel like the right fit, there are other excellent bassinets to consider. Here are a couple of alternatives:

1. HALO Bassinest

The HALO Bassinest is another popular choice for newborns, offering features like a swivel base that allows you to easily reach your baby at night without getting out of bed.

It’s height-adjustable, making it great for parents recovering from a C-section or those who prefer co-sleeping but want a safe option.

The HALO doesn’t offer automatic rocking or white noise, but it provides a stable, secure environment for baby.

  • Pros: Adjustable height, great for C-section recovery.
  • Cons: No automatic soothing features, larger size.

2. Traditional Bassinets

Traditional bassinets come in various styles, offering simple designs that can be more affordable than the Snoo.

Many of these bassinets have portable designs, making them easy to move around the house.

Some also come with gentle rocking features, but without the advanced technology that the Snoo offers.

  • Pros: Budget-friendly, lightweight, portable.
  • Cons: Lacks automated soothing features, may require more manual intervention.

3. Chicco LullaGo Anywhere Bassinet

The Chicco LullaGo is a portable, compact bassinet that’s easy to set up and take down, making it perfect for families who need something lightweight and travel-friendly.

It features breathable mesh sides for visibility and airflow, and it has a simple, modern design. 

  • Pros: Portable, easy to assemble, breathable mesh sides.
  • Cons: Lacks automated soothing features, basic design without advanced tech.

Conclusion and Final Recommendation

The Snoo Smart Sleeper is a high-tech bassinet designed to help babies sleep better by mimicking womb-like conditions, offering parents more rest and peace of mind.

While it has impressive features like automatic rocking, white noise, and app control, it’s not a one-size-fits-all solution.

In our opinion, the Snoo is a fantastic tool for parents who need extra help during the tough newborn phase, especially if you’ve tried everything else and nothing works.

Its tech-driven features are impressive, and we can see how they could make a huge difference for some families.

However, if you’re on a budget or prefer more traditional solutions, it might not be the best investment. There are  more affordable alternatives that are simpler but provide satisfactory results.

Thank you for reading!

Frequently Asked Questions

How Long Should You Use the SNOO For?

You should use the Snoo until your baby reaches 5-6 months old or when they begin rolling over, whichever comes first.

Do Doctors Recommend SNOO?

Doctors recommend the Snoo for its safety features, like swaddling and sleep positioning, which align with guidelines to reduce the risk of SIDS.

Why Is SNOO FDA Approved?

The Snoo is FDA-approved for its ability to safely keep babies sleeping on their backs, which helps reduce the risk of SIDS by preventing unsafe sleep positions.

Is the SNOO Bad for the Brain?

No, the Snoo is not bad for the brain. It helps babies sleep better by mimicking the womb environment, promoting healthy sleep habits.

Will My Baby Get Addicted to the SNOO?

Babies may become dependent on the Snoo’s soothing features, but it has a “weaning mode” that gradually reduces motion and noise, helping babies adjust to crib sleep.

It was 3 AM when I first witnessed my daughter’s proud achievement – sitting upright in her crib, beaming with accomplishment.

As a pediatric sleep consultant, I’d guided countless parents through this milestone. But experiencing it firsthand with my own baby? That was different.

Like many parents, my initial pride quickly turned to concern: Would she ever lie down again? Would she hurt herself? Should I keep laying her back down?

If you’re reading this, chances are you’re experiencing your own middle-of-the-night “my baby won’t lie down” moment.

Don’t worry – this exciting milestone doesn’t have to derail your little one’s sleep. Let’s explore how to safely handle this new skill while maintaining healthy sleep habits.

Why Do Babies Sit Up in Their Cribs?

Why_Do_Babies_Sit_Up_in_Their_Cribs

That peaceful moment when your sleeping baby suddenly sits up in their crib marks an important developmental milestone.

Between 6-8 months, your baby discovers they can control their body in exciting new ways, and their crib becomes their preferred practice space.

Your baby chooses the crib because it’s their safe space, offering the perfect combination of a firm mattress and supportive rails for practicing these new skills.

This milestone sets the foundation for future developments like standing and walking. While it might temporarily affect sleep, remember – your baby isn’t being difficult; they’re just mastering an essential skill in their most comfortable environment.

From First Wiggles to Upright Success

Your little one begins with tiny movements and builds up to confident sitting.

Each motion, from early neck control to first rolls, creates the foundation for sitting up. Those precious moments of “almost there” make the final achievement even more special.

Every child moves at their own pace, but here’s what you might notice:

  • Early wiggles and lifts (4-5 months)
  • First attempts at staying up (5-7 months)
  • Steady sitting moments (6-8 months)
  • Moving while sitting (7-9 months)
  • First pulls to stand (8-10 months)

Moving up often comes naturally, but learning to move back down takes time. Think of it like going up and down stairs – going up feels easier at first.

Your little one might need extra practice and patience to master the return journey. Most children take about 1-2 weeks to feel confident with both movements.

When Your Baby Sits Up but Is Happy

When_Your_Baby_Sits_Up_but_Is_Happy

When your little one sits up in the crib and seems content, resist the urge to rush in and lay them down.

Think of it like watching a scientist at work – they’re exploring, learning, and building confidence in their new skill. Based on expert advice from our sources, here’s what works best.

Let Them Practice Their New Skill

If your baby is sitting up and happily babbling or playing, give them space to explore. Keep your video monitor handy for peace of mind, but allow them 15-20 minutes to experiment with their new ability.

They might surprise you by figuring out how to lie down on their own!

The Art of Patient Observation

After 15-20 minutes, if they haven’t settled:

  • Quietly enter the room
  • Sit on the floor beside the crib
  • Gently pat the mattress to encourage lying down
  • Stay at their level rather than standing at crib height

This approach keeps them from getting dependent on your help while ensuring they feel supported in their discovery process.

Remember, this phase is temporary, and giving them space to practice now leads to quicker mastery of the skill.

When Your Baby Sits Up and Is Upset

When_Your_Baby_Sits_Up_and_Is_Upset

When your baby is sitting up and crying, the situation needs a more hands-on approach.

From our expert sources, we know that upset babies need reassurance while still maintaining healthy sleep boundaries. 

When Tears Start Flowing

If your baby is crying while sitting up:

  • Wait 3-5 minutes to see if they’ll resettle
  • Enter the room calmly and quietly
  • Sit on the floor next to the crib
  • Pat the mattress gently to encourage lying down
  • Keep your voice soft and minimal

Avoiding the Up-Down Game

A common parental pitfall is getting caught in a cycle:

  • Baby sits up crying
  • Parent lays baby down
  • Baby immediately sits back up
  • Repeat…

Instead, try this approach:

  • Help them lie down once
  • If they pop back up, wait another few minutes
  • On your second attempt, keep your hands gently on their back for a moment
  • If they continue popping up, stick to verbal reassurance and patting the mattress

Gentle Support Methods

Stay sitting on the floor rather than standing – this encourages your baby to come down to your level rather than trying to reach up to you.

Use consistent, calming phrases like “it’s sleepy time” and keep interactions minimal to avoid stimulation.

How to Encourage Your Baby to Sit in the Crib?

Mastering the sit-up milestone is like learning any new skill – practice makes perfect. Drawing from expert insights in our sources, the key is making practice both purposeful and playful.

Making Daytime Practice Count

Give your baby plenty of opportunities to practice during awake time:

  • Use the crib for short play sessions during the day
  • Practice sitting and lying down motions when changing diapers
  • Let them experience getting “unstuck” while you’re nearby
  • Give them time to work through the motion without immediate help

Playful Learning Techniques

Turn practice into a game:

  • Place favorite toys slightly out of reach to encourage movement
  • Use gentle songs or rhymes during practice
  • Demonstrate the up-and-down motion yourself
  • Celebrate their efforts with smiles and gentle encouragement

Building Confidence Through Consistency

Create a regular practice routine:

  • Set aside specific times for crib practice
  • Allow supervised exploration of sitting skills
  • Give them opportunities to practice lying back down
  • Keep the practice sessions short and positive.

Essential Safety Tools for Supporting Baby’s Sitting Development

Essential_Safety_Tools_for_Supporting_Babys_Sitting_Development

When your baby starts exploring their new sitting and standing skills, safety becomes the top priority. Here are two key tools that help make this developmental phase safer and more comfortable.

1. Sleep Sacks for Balance and Safety

Sleep sacks combine safety with freedom of movement for your growing baby.

These wearable blankets provide warmth without the need for loose bedding in the crib.

They allow enough movement for babies to work on their sitting skills, while making it harder to stand up and climb out.

This balanced approach lets your baby build strength and coordination within safe limits.

2. Strategic Crib Mattress Adjustments

When your baby begins sitting up, it’s time to adjust their sleeping space. The crib mattress needs to be lowered to its bottom setting to create a secure environment.

This step is crucial – when your baby stands in the crib, the rail should reach their mid-chest. Make sure to clear the crib of any items they could use to boost themselves up.

The ideal setup lets them practice sitting and standing while preventing any chance of falling out.

You can check if your mattress height is correct with a simple test: watch where the rail hits when your baby stands in the crib. If it reaches their mid-chest, you’ve found the right position that balances independence with protection.

It’s a Wrap!

As I watch my daughter confidently maneuver in her crib now, those anxious nights of her first sit-ups feel like a distant memory.

Like every parenting milestone, this too shall pass. Your baby’s determination to master sitting and standing in the crib isn’t just about defying bedtime – it’s about growing, learning, and becoming more independent.

Remember, whether your little one is happily practicing their new skill or crying in frustration, your calm presence and consistent response make all the difference.

Give them space to learn, keep their sleep space safe, and trust in their ability to master this skill.

Before you know it, you’ll be watching your baby confidently navigate their crib, and wondering what exciting milestone comes next.

Frequently Asked Questions (FAQs)

Is It Okay for A Baby to Sleep Sitting Up In a Crib?

While not ideal, it’s generally safe. However, gently lay your baby down if you notice them sleeping upright to ensure better sleep quality and comfort.

Why Is My Baby Sitting Up in the Crib?

This is a natural developmental milestone, typically occurring between 6-8 months. Your baby is practicing their new skill and exploring their abilities.

What to Do When Baby Keeps Sitting Up At Night?

Wait 15-20 minutes if they’re calm. If upset, wait 3-5 minutes before helping them lie down. Stay seated near the crib and pat the mattress gently.

Is It Normal for Babies to Sit Up in Their Sleep?

Yes, some babies sit up during sleep transitions. This phase is temporary and common during developmental milestones, usually lasting a few days to weeks.

Going on a trip with your baby requires thoughtful preparation and organization. This guide will walk you through what to bring when traveling with your little one.

From packing the right number of diapers to choosing comfortable sleep items, we’ll help simplify your packing process.

After helping many parents plan their travels, we’ve put together this list of proven items that make family trips more comfortable.

Our guide focuses on practical essentials in key areas: diaper bag must-haves, feeding supplies, sleeping comfort items, clothing needs, and useful travel gear.

We’ll also share tips to help you pack effectively and handle common travel situations.

Let’s look at what you really need to pack for a smooth trip with your baby.

Essential Baby Travel Items You Shouldn’t Forget

When it comes to traveling with a baby, preparation is everything. To help you pack efficiently, here are the essentials, from food and clothing to baby comfort items, that you should never forget on your next trip.

1) Must-Haves for a Baby Travel Bag 

1) Must-Haves for a Baby Travel Bag

Your diaper bag is your best friend while traveling. It needs to hold everything your baby might need without feeling like you’re lugging around a suitcase. Here are the essentials:

  • Diapers & Wipes: Always bring more than you think you’ll need. Blowouts happen at the worst times, and you don’t want to be caught unprepared, especially if you’re in a place where restocking isn’t easy.
  • Changing Pad: Public restrooms aren’t always the cleanest. A portable changing pad not only provides a clean surface for diaper changes but also keeps your baby comfortable when you’re on the go.
  • Diaper Cream: Preventing rashes is easier than treating them. A small tube of diaper cream can save you from dealing with an uncomfortable, fussy baby.
  • Hand Sanitizer & Disinfecting Wipes: Traveling exposes you to countless germs. Having these on hand allows you to clean surfaces and sanitize your hands before feeding or handling your baby.

2) Feeding Essentials for Travel

Feeding Essentials for Travel

Feeding a baby on the go requires a bit of planning. No matter if you’re breastfeeding, using a bottle, or introducing solid foods, feeding your baby while traveling, requires some planning; these items will help:

  • Bottles & Formula (if formula-fed): Pre-measure the formula into small containers or invest in formula dispensers. If your baby is picky about temperature, bring a portable bottle warmer.
  • Breastfeeding Cover (if needed): If you prefer privacy while nursing, a lightweight cover can make feeding on planes or in public spaces more comfortable.
  • Snacks & Baby Food: Choose mess-free options like baby food pouches or teething crackers. These can also be a great distraction during long car rides or flights.
  • Sippy Cup or Water Bottle: Hydration is key, especially in dry airplane cabins. A leak-proof sippy cup makes it easy to keep your baby hydrated.

3) Sleep & Comfort Items for Traveling

Sleep & Comfort Items for Traveling

A well-rested baby is a happy traveler. To help your baby sleep well in a new environment, pack these items:

  • Portable Crib or Travel Bassinet: Familiar sleeping spaces make a big difference. If your baby is used to a specific setup at home, try to replicate it as much as possible while traveling.
  • Blanket & Swaddle: A soft, familiar blanket can provide comfort, warmth, and even serve as a play mat if needed.
  • Favorite Stuffed Animal or Lovey: Many babies have a comfort item that helps them self-soothe. Don’t forget it—losing it mid-trip can lead to serious meltdowns.
  • Sound Machine or White Noise App: Hotels and unfamiliar places can be noisy. A portable sound machine or an app on your phone can create a consistent sleep environment.

4) Clothing & Weather Essentials

Clothing & Weather Essentials

Babies go through outfits quickly, and weather conditions can change. Here’s what you need:

  • Extra Clothes: Spit-ups, diaper leaks, and spills are bound to happen. Pack at least two spare outfits for the day.
  • Weather-Specific Items:
    1. Warm Travel: Sun hat, baby-safe sunscreen, lightweight clothing, and breathable fabrics to prevent overheating.
    2. Cold Travel: Layered outfits, beanies, mittens, and warm socks to ensure your baby stays cozy without overheating indoors.
  • Baby Carrier or Wrap: Navigating airports, crowded streets, or even nature trails is much easier when you can wear your baby instead of pushing a bulky stroller.

Baby Travelling Gear to Make Your Trips Smoother

Baby Travelling Gear to Make Your Trips Smoother

The right travel gear can take a lot of stress out of the journey. Here are some game-changing products:

  • Lightweight Stroller: A compact, easy-to-fold stroller is a lifesaver in airports and city trips. Look for one that fits airline carry-on size restrictions if possible.
  • Car Seat or Travel Booster: Many airlines allow you to bring a car seat, and it’s crucial for road trips and car rentals. Safety first!
  • Portable High Chair: Not every restaurant or hotel has baby-friendly seating. A clip-on or foldable high chair can make mealtimes much easier.
  • Diaper Bag Backpack: Carrying a traditional diaper bag on one shoulder gets uncomfortable fast. A backpack-style diaper bag keeps your hands free while distributing weight evenly.

Baby Travel Tips for Stress-Free Trips

Baby Travel Tips for Stress-Free Trips

1) Packing Hacks for Baby Travel

  • Use packing cubes to keep diapers, clothes, and feeding supplies organized.
  • Roll clothes instead of folding them to save space and make packing more efficient.
  • Keep essentials like pacifiers, bottles, and wipes in easy-to-reach compartments to avoid digging through your bag mid-trip.

2) Flying with a Baby: What to Know

  • Timing the Flight: If possible, book flights that align with your baby’s nap time to increase the chances of a peaceful journey.
  • Seat Choice: Aisle seats make it easier for diaper changes and quick trips to calm a fussy baby.
  • Pacifiers/Bottles for Takeoff & Landing: Babies can’t equalize ear pressure like adults. Offering a pacifier, bottle, or nursing during takeoff and landing can help.
  • Babywearing at Security: Wearing your baby through TSA security checks keeps your hands free and avoids having to juggle everything.

3) Road Trips with a Baby

  • Plan for frequent breaks: Long car rides can be tough on babies. Stop every 1-2 hours to let them stretch and get a diaper change.
  • Use a mirror for rear-facing car seats: This allows you to keep an eye on your baby without needing to turn around constantly.
  • Pack a “car kit”: Keep essentials like diapers, wipes, and an extra outfit within reach instead of buried in luggage.

Final Thoughts

Traveling with a baby may feel like a big challenge, but with the right planning and gear, it can be much easier than you think. The key is to pack what your baby needs without overloading yourself.

Make sure to have all the basics, like diapers, wipes, and feeding supplies, organized in your diaper bag so you can quickly find what you need. 

When traveling, try to stay calm and flexible. Babies can be unpredictable, so it’s important to go with the flow and not stress too much when things don’t go as planned. 

If you’re flying, try to book flights that match your baby’s nap schedule to help them sleep through part of the trip. Bring a bottle or pacifier for takeoff and landing to help with ear pressure.

Above all, enjoy the trip. Just make sure to take it one step at a time, and you’ll be able to handle whatever comes your way. Happy travels!

Frequently Asked Questions

How Many Diapers Should I Pack?

Plan for one per hour of travel plus a few extras for unexpected messes.

What’s the Best Way to Sterilize Bottles While Traveling?

Use sterilizing tablets or a portable sterilizer if you don’t have access to boiling water.

Do I Need a Separate Travel Stroller?

If your main stroller is bulky, a lightweight option is best for convenience.

Many parents think giving their sleeping baby one last feeding will help them rest longer.

These same parents have told me their babies are waking up earlier than ever. I know exactly how frustrating it feels when a solution seems to create another problem.

Good news – I’ve spent years studying infant sleep patterns and can explain how dream feeds affect early waking.

In this post, I’ll explain what dream feeding does to your baby’s sleep cycle, show you clear signs it might be causing early wake-ups, and give you practical steps to fix the issue.

I’ll also help you determine if dream feeding is right for your little one.

Dream Feeds: What Parents Should Know

The Basics Of Dream Feeding

Picture this: it’s around 10 PM, and you quietly lift your sleeping baby for a feeding without fully waking them up. That’s a dream feed in its simplest form.

During this feeding, your baby stays in a drowsy state – just alert enough to eat but not awake enough to fully wake up.

This feeding method works differently from regular feedings. You don’t wait for your baby to cry or show hunger signs.

Instead, you plan this feeding at a specific time while your baby is in a deep sleep.

Why Do Parents Use Dream Feeds?

Parents often try this feeding method for two main reasons:

First, it helps prevent those 2 AM wake-up calls. By giving your baby extra calories before you go to bed, you’re filling their tiny tummy when they might otherwise wake up hungry.

Second, parents use this technique to help their babies sleep in longer stretches. The idea is simple: if you feed your baby right before you go to sleep, they might make it until morning without needing another meal.

Many parents find this method particularly useful during the first few months when babies need frequent nighttime feedings.

It allows parents to control when the feedings occur rather than having their children woken up at random times.

Can Dream Feeding Cause Early Waking?

The Possible Connection

Dream feeding can sometimes lead to early waking. Here’s why:

  1. Disrupting Natural Sleep Cycles

    • Babies have natural sleep rhythms.
    • Dream feeds may interrupt these rhythms, making babies more likely to wake during lighter sleep stages.
    • This can cause a habit of waking up expecting a feed.
  2. Mistimed Feeds

    • Timing matters!
    • Feeding too early: Baby won’t stay full through the night.
    • Feeding too late: This can confuse the baby’s body clock, leading to early waking.

Why Does Dream Feeding Sometimes Backfire?

Interrupting Natural Sleep Cycles

Interrupting Natural Sleep Cycles

Your baby’s sleep works like a dance – with light and deep sleep phases moving in perfect time.

When you add a dream feed to this dance, you might accidentally step on some toes.

Here’s what happens:

  • Your baby’s body gets used to food at specific times, creating a pattern
  • This pattern can make their internal clock expect food at the same time every night
  • Once this pattern sets in, your baby might start waking up right before the usual dream feed time
  • Their sleep cycle might shift to become lighter around feeding time, making it harder to fall back into deep sleep

Overfeeding Or Mistimed Feeding

Overfeeding Or Mistimed Feeding.png

Getting the timing wrong with dream feeds is like serving dinner right before bedtime – it often leads to poor sleep. Too much milk or awkward timing can cause digestive discomfort, making your baby wake up earlier than needed.

Most babies do well with dream feeds between 10 and 11 p.m., but each baby is different. Try picking one consistent time and watching how your baby responds.

If you notice early waking, adjust the feeding time to 15-minute intervals. Keep at least 2.5 hours between the evening feed and the dream feed.

Sometimes, offering a smaller amount leads to better sleep than a full feeding.

Factors To Consider When Dream Feeding

1. Age of Your Baby

Newborns through six-month-olds need night feeds for healthy growth. These early months are best for dream feeding. Most babies over six months can go longer without night feeds.

2. Current Sleep Patterns

Watch how your baby sleeps now:

  • Regular sleep cycles show good rest habits
  • Long sleep stretches might mean dream feeds aren’t needed
  • Fixed wake times help plan dream feeds better

3. Feeding Habits

Look at your baby’s eating schedule:

  • Strong daytime feeding shows good eating patterns
  • Regular hunger times help set dream feed timing
  • Good weight gain means feeding plans work well

4. Natural Sleep Ability

Every baby has different sleep needs:

  • Some babies sleep long without extra feeds
  • Others often wake up for food
  • Watch what works best for your baby

5. Warning Signs

Think twice about dream feeds if:

  • Your baby already sleeps through the night
  • Night feeding disrupts current sleep patterns
  • The daytime feeding schedule works well

Alternatives To Dream Feeding

If dream feeding doesn’t feel right, you have other options. Try focusing on daytime feeding first.

Make sure your baby gets plenty of milk or food during daylight hours. This might mean feeding more often during the day or offering larger feeds when your baby seems hungry.

Here’s what you can try instead:

  1. Add an extra daytime feeding
  2. Make daytime feeds fuller and longer
  3. Space out daytime feeds to avoid snacking
  4. Set a consistent bedtime routine
  5. Try a slightly later bedtime feed

For older babies, you might slowly reduce night feedings while increasing daytime meals. This gentle approach helps your baby adjust without causing hunger or sleep problems.

Remember, each baby is unique. What works for one family might not work for another. Pay attention to your baby’s cues and adjust your approach based on their needs.

How To Fix Early Waking Caused By Dream Feeds

Let’s fix those early wake-ups with some simple timing changes. If your baby wakes too early, try moving the dream feed time by 15 minutes each night.

For example, if you feed at 11 p.m. and your baby wakes at 5 a.m., try feeding at 10:45 p.m. for a few nights.

Keep track of how your baby responds to each change. Some babies sleep longer when the feed occurs earlier, while others do better with a later feed.

You might also try gradually reducing the amount of milk you consume—start by cutting back on just one ounce and see what happens.

Common Mistakes Parents Make With Dream Feeding

Let’s talk about frequent slip-ups that can turn dream feeds into sleep struggles.

Feeding too late at night tops the list. When you feed your baby close to midnight, their body might start a new sleep cycle at the wrong time.

Instead, aim for dream feeds between 10-11 PM for better results.

Another common error is not changing the routine as your baby grows. Your 3-month-old needs different care than your 6-month-old.

Watch for signs it’s time to change:

  • Taking less milk during dream feeds
  • It is harder to wake up for feeds
  • Eating more during the daytime
  • Sleeping through some dream feeds

Many parents also miss important patterns. For example, if your baby wakes at 5:30 a.m. daily for a week, that pattern needs attention.

Keep notes on your phone about wake times to spot these trends.

Remember: dream feeds work best as a short-term tool, not a forever fix. Stay ready to adjust as your baby grows and changes.

Conclusion

Your baby’s sleep patterns make a big difference in your daily life.

While dream feeds can work well for some families, they’re not a magic solution for everyone.

The key lies in watching your baby’s response and making small changes when needed.

If you’re experiencing early wake-ups, remember that timing is crucial.

Pay attention to when and how much you feed, and remember that daytime feeding patterns play a big role in nighttime sleep.

Most importantly, trust your instincts.

Every baby has unique needs, and what matters most is finding what helps your little one – and you – get the best sleep possible. Sometimes, the simplest solution is the one that works best for your family.