Author

Dr. Emily Clarke

Browsing

Looking for the perfect bike for your child?

The showdown between Woom and Guardian has parents buzzing! These two top kids’ bike brands have loyal fans for good reason.

Both promise safety and quality, but they take different paths to get there.

Woom shines with its lightweight frames and smart design, while Guardian boasts its special SureStop braking system.

Parents face a tough choice between these two standouts.

This head-to-head comparison cuts through the hype to reveal what really matters when choosing between these popular rivals.

Let’s break down what sets these bikes apart and help you make the right pick for your child.

Woom vs. Guardian: Quick Comparison Table

Woom bikes focus on lightweight design and ergonomics for natural riding progression.

Guardian bikes prioritize safety with their patented SureStop braking system.

Feature Woom Guardian
Age Range 18 months – 14+ years 3 – 14 years
Price Range $249 – $699 $259 – $519
Weight 6.6 – 20.7 lbs (lightest in class) 16 – 25 lbs (slightly heavier)
Brake Type Dual hand brakes (even on smallest models) SureStop single-lever system
Frame Material Lightweight aluminum Aluminum
Standout Feature Ultra-lightweight, ergonomic design Proprietary SureStop brake system
Gears 0-9 speeds (age-dependent) 1-7 speeds (age-dependent)
Assembly Required 30% (mostly assembled) 20% (nearly ready to ride)
Color Options 6+ color choices 3-4 color choices

Price vs. Quality

When it comes to cost, both Woom and Guardian bikes sit in the premium kids’ bike category. Woom bikes typically run $30-$180 higher than Guardian across comparable sizes.

A 16″ Woom 3 costs around $389, while the Guardian 16″ Ethos is priced at $259.

Is the extra cost for Woom worth it? Many parents say yes. Woom’s attention to detail shows in their ultra-lightweight frames, custom components, and smooth riding experience. These features make learning to ride easier for most kids.

Guardian offers excellent value with its focus on safety. Its SureStop braking system prevents over-the-handlebar accidents, a benefit many parents gladly pay for.

Both brands hold their value remarkably well on the resale market, with Woom bikes often reselling for 70-80% of their original price after years of use.

Frame Material: Aluminum vs. Steel

Frame_Material_Aluminum_vs_Steel

When choosing between aluminum and steel frames, the key factors to consider are weight, durability, and maintenance.

Each material has its advantages, and understanding these differences can help you select the best option for your rider’s needs.

Woom’s Aluminum Frames

  • Lightweight, making the bikes 20-30% lighter than competitors.

  • 16″ Woom 3 weighs just 11.7 lbs, compared to Guardian models weighing 16-17 lbs.

  • Ideal for younger riders who benefit from lighter bikes for easier handling and control.

  • Offers good corrosion resistance.

Guardian’s Steel Frames

  • Known for durability and ability to handle rough treatment.

  • Heavier than aluminum frames, which may make learning more difficult for smaller children.

  • For older riders (8+), weight differences become less significant as strength improves.

  • Requires more maintenance to prevent rust, particularly in wet or humid climates.

Bike Models, Riding Features & Comfort

Bike_Models_Riding_Features__Comfort

Both brands offer bikes across similar age ranges, but with notable differences in their approach to sizing and comfort.

Woom’s lineup includes:

  • Woom 1 (balance bike): Ages 18 months-3.5 years
  • Woom 2 (14″): Ages 3-4.5 years
  • Woom 3 (16″): Ages 4-6 years
  • Woom 4 (20″): Ages 6-8 years
  • Woom 5 (24″): Ages 7-11 years
  • Woom 6 (26″): Ages 10-14 years

Guardian’s main lineup includes:

  • Small (16″): Ages 3-5 years
  • Large (20″): Ages 5-9 years
  • XL (24″): Ages 8-12 years

Woom bikes feature an upright riding position and narrow pedal spacing that matches children’s hips for better balance and natural pedaling.

Guardian offers a slightly forward-leaning stance with a lower center of gravity for stability. Both include kid-sized grips and comfortable saddles.

For accessories, Woom provides more options with their “Click & Ride” system and 6+ colors, while Guardian keeps it simple with standard kickstands and 3-4 color choices.

Manufacturing & Assembly

Manufacturing__Assembly

Woom (Austria-designed) and Guardian (USA-designed) both manufacture their bikes in Asia. Guardian bikes arrive more assembled (80%+) with only handlebars and pedals to install, typically taking 15-20 minutes.

Woom bikes require slightly more assembly (70% complete), including pedals, handlebars, front wheel, and seat, taking about 30 minutes.

Guardian includes a QR code linking to assembly videos and a basic tool kit.

Woom provides printed instructions with diagrams plus online tutorials.

Both offer phone and email support, with Guardian known for responsive service and Woom for comprehensive online maintenance resources.

Training Wheels Compatibility

Woom and Guardian differ significantly in their training wheel philosophy.

Woom doesn’t offer training wheels at all, following the European approach that balance bikes are superior for skill development.

They recommend starting with their Woom 1 balance bike before moving to pedals.

Guardian offers optional training wheels for their 16″ models, accommodating families who prefer traditional learning methods while still encouraging balance-first skills.

For new riders, Guardian’s stability helps prevent tip-overs, while Woom’s lighter weight makes balancing easier once basic skills are established.

Why Guardian Bikes are Great for Early Riders

Why_Guardian_Bikes_are_Great_for_Early_Riders

Guardian bikes stand out for first-time riders for several compelling reasons:

Their SureStop braking system addresses the most common cause of serious biking injuries – over-the-handlebar accidents.

  • Quick learning curve: Parents report that children master Guardian’s braking system within minutes.

  • Lower center of gravity and heavier build: Offers extra stability during the first wobbly rides.

  • Frame geometry design: Specifically reduces tipping even at slow speeds, crucial for beginners.

  • Recognition: Guardian bikes have been recognized by Parents Magazine and featured on Shark Tank.

  • Founder Brian Riley: Secured investment on Shark Tank to expand the safety-focused company.

  • Focus on safety: Guardian prioritizes preventing childhood biking injuries, resonating with safety-conscious parents.

  • Exceptional customer service: Offers a “Love it or return it” 100-day guarantee, ensuring the bike is right for the child.

Which Bike is Right for Your Child?

After comparing these premium brands across all major factors, here’s our recommendation:

Choose Guardian if:

  • Safety is your absolute top priority.
  • Your child is just learning to ride or lacks confidence.
  • You want near-complete assembly out of the box.
  • Your budget is slightly more limited ($30-180 less than comparable Woom).
  • You prefer a heavier, more stable feel for a beginner.

Choose Woom if:

  • You want the absolute lightest weight bike possible.
  • Your child will be riding longer distances or tackling hills.
  • You plan to pass the bike down to siblings (higher durability).
  • You’re willing to pay more for premium components and design.
  • You value higher resale value.
  • Your child has already mastered basic balance.

For active kids who will put in serious miles or those with more experience, Woom’s lightweight build creates a more enjoyable, less fatiguing experience.

For families on a budget, Guardian delivers excellent quality and safety at a lower price point.

For those willing to invest more upfront, Woom’s exceptional resale value and durability might actually save money in the long run.

In the end, both brands represent a significant upgrade from department store bikes, and either choice will provide a quality riding experience that helps children develop a love for cycling.

Conclusion

The battle between Woom and Guardian comes down to what matters most for your child. Woom’s lightweight build and thoughtful design make riding easy and fun.

Meanwhile, Guardian’s focus on safety features gives parents peace of mind. Both brands offer quality bikes that stand above typical department store options.

Your choice depends on your priorities: easier handling or better safety systems. Consider your child’s skill level, where they’ll ride, and your budget.

Remember that either choice represents a step up from basic bikes. The perfect bike is the one that gets your child excited to ride.

Which brand appeals to you more?

Share your thoughts in the comments below,w and tell us about your family’s biking adventures!

The arrival of a baby boy changes everything—from sleepless nights to heart-swelling moments that words struggle to capture.

Yet, finding the perfect expression for these feelings can be challenging when you’re knee-deep in diapers and midnight feedings.

This collection of baby boy quotes cuts straight to the core of what it means to welcome a little man into your world.

These aren’t just pretty phrases; they’re emotional anchors for those overwhelming moments when your son’s tiny hand wraps around your finger or when his first smile lights up the room.

If you’re looking for the perfect caption for milestone photos, a heartfelt message for a baby book, or comfort knowing other parents share your feelings, these meaningful quotes about baby boys will connect with what every parent experiences.

Love Quotes for Baby Boys

Love_Quotes_for_Baby_Boys

Let’s begin with the purest part of having a baby boy — the overwhelming love that takes over your heart from the very first moment.

  1. “A baby boy is a little miracle you never knew you needed.”

  2. “He stole my heart the moment I saw him.”

  3. “A baby boy fills a place in your heart you never knew was empty.”

  4. “My baby boy is my world wrapped in a bundle.”

  5. “His giggles are my favorite sound.”

  6. “My heart walks around outside my body and wears tiny shoes.”

  7. “There’s no buddy like a baby boy.”

  8. “He’s my reason for everything.”

  9. “My baby boy is sunshine with a smile.”

  10. “A baby boy is a blessing beyond words.”

  11. “His smile lights up my entire world.”

  12. “Little boys bring big joy.”

  13. “My baby boy is proof that love at first sight is real.”

  14. “Snuggles from my baby boy are the best therapy.”

  15. “I never knew how much love my heart could hold until someone called me Mom.”

  16. “A son is love that lasts a lifetime.”

  17. “A baby boy may leave smudges on your heart, but they’ll never be anything but love.”

  18. “A baby boy is your heart turned into a little human.”

  19. “His hugs make the hardest days better.”

  20. “Tiny boy, big love.”

Joy and Giggles Quotes

Joy_and_Giggles_Quotes

With love comes laughter — here are the joyful giggles and everyday smiles that only a little boy can bring.

  1. “A baby boy is happiness in human form.”

  2. “His laughter is my favorite symphony.”

  3. “Little boys should never be sent to bed – they always wake up a day older.”

  4. “Tiny hands, big dreams.”

  5. “He laughs without fear of the future.”

  6. “Little boys are sunshine with a little bit of thunder.”

  7. “From his giggles to his wiggles, everything about him makes me smile.”

  8. “Raising a boy is full of messy joy.”

  9. “Each smile is a celebration of love.”

  10. “A baby boy’s laugh can melt the coldest heart.”

  11. “Joy looks like a baby boy in pajamas.”

  12. “There’s magic in his giggles.”

  13. “My boy’s laugh is the soundtrack of my soul.”

  14. “A baby boy makes every day brighter.”

  15. “He teaches me to find happiness in little things.”

  16. “He’s my little reason to smile every day.”

  17. “Joy is watching him discover the world.”

  18. “The twinkle in his eyes reflects pure joy.”

  19. “With every giggle, the world becomes a better place.”

  20. “He is my little bundle of giggles and grins.”

Little Hands, Big Dreams

Little_Hands_Big_Dreams

As they grow, those tiny hands start to reach for the stars — reminding us how much potential lives in such a small body.

  1. “One day, these tiny hands will do great things.”

  2. “In his eyes, I see infinite possibilities.”

  3. “Small hands, great future.”

  4. “His future is as bright as his smile.”

  5. “He may be small now, but he has the heart of a giant.”

  6. “A little boy today, a leader tomorrow.”

  7. “Behind every strong man was once a curious little boy.”

  8. “He’s a little boy with a big destiny.”

  9. “He’s tiny, but he dreams big.”

  10. “Planting seeds of greatness in a little boy’s heart.”

  11. “My son is going to change the world one smile at a time.”

  12. “Let him sleep, for when he wakes, he will move mountains.”

  13. “He’s building dreams with every step.”

  14. “His dreams are as limitless as the sky.”

  15. “These little feet are walking toward a bright future.”

  16. “He has big ideas in a little package.”

  17. “Every great story starts with a little boy and a big imagination.”

  18. “He’s the author of his own adventure.”

  19. “Small but mighty.”

  20. “Every superhero starts out as someone’s baby boy.”

Strength and Bravery Quotes

Strength_and_Bravery_Quotes

Even in their earliest days, baby boys show us what quiet strength and brave beginnings truly look like.

  1. “He’s small, but he’s fierce.”

  2. “A baby boy has a warrior’s heart.”

  3. “Raising a brave little boy one day at a time.”

  4. “Fearless in diapers.”

  5. “He’s got courage packed in a tiny frame.”

  6. “Born to be bold.”

  7. “His bravery inspires me daily.”

  8. “A baby boy is strength in its purest form.”

  9. “Little boys teach us how to be brave in the smallest ways.”

  10. “He’s a gentle warrior.”

  11. “Strong arms aren’t built overnight, but love builds character early.”

  12. “Each scraped knee is a badge of bravery.”

  13. “Even the strongest men once needed lullabies.”

  14. “He may be tiny, but he has the heart of a lion.”

  15. “Strong, silly, and full of spunk – that’s my boy.”

  16. “He’s learning to stand tall in a big world.”

  17. “His willpower surprises me every day.”

  18. “He teaches me that real strength is gentle.”

  19. “There’s courage in every step he takes.”

  20. “His strength is rooted in love.”

Sweet and Silly Moments Quotes

Sweet_and_Silly_Moments_Quotes

Of course, no baby boy’s life is complete without the messy, silly, and unforgettable moments that make parenting so much fun.

  1. “He turns my house into a circus and my heart into a sanctuary.”

  2. “There’s nothing like the chaos of a baby boy’s love.”

  3. “He’s a tornado of joy and juice boxes.”

  4. “Messy hair, muddy hands, happy heart.”

  5. “There’s glitter in his eyes and crumbs on the floor.”

  6. “A baby boy is laughter covered in peanut butter.”

  7. “Sticky hands, happy soul.”

  8. “He teaches me to embrace the beautiful mess.”

  9. “Every toy tells a story.”

  10. “His wild spirit brings peace to my soul.”

  11. “He’s the reason I trip over Legos and smile anyway.”

  12. “Life with a baby boy is loud, chaotic, and completely perfect.”

  13. “Even his tantrums are kind of cute.”

  14. “He’s the reason my coffee is cold but my heart is warm.”

  15. “Spilled milk and kisses – that’s my life.”

  16. “His little roars echo with big personality.”

  17. “Bath time becomes splash time with a baby boy.”

  18. “He brings sunshine and jelly stains to every room.”

  19. “Wiggles, giggles, and a thousand questions.”

  20. “My baby boy turns ordinary into unforgettable.”

Wonder and Whimsy Quotes

Wonder_and_Whimsy_Quotes

In a baby boy’s eyes, the world is filled with wonder — let’s step into their imaginative little world of magic and curiosity.

  1. “A baby boy is the beginning of a lifelong adventure.”

  2. “He makes the everyday feel magical.”

  3. “The world is brand new through his eyes.”

  4. “He sees wonder in the simplest things.”

  5. “With every coo and crawl, he discovers the world.”

  6. “He turns puddles into oceans and boxes into castles.”

  7. “His curiosity is endless and inspiring.”

  8. “Every day with him is a new chapter of joy.”

  9. “He finds treasure in the tiniest things.”

  10. “Wonder lives in his eyes and laughter.”

  11. “He paints my world in the colors of imagination.”

  12. “He’s a dreamer in diapers.”

  13. “Through his eyes, I see magic again.”

  14. “Adventure begins when my baby boy wakes up.”

  15. “He believes in dinosaurs, superheroes, and me.”

  16. “He lives in a world of dragons and dreams.”

  17. “He makes cardboard boxes more fun than gold.”

  18. “He reminds me that joy lives in the moment.”

  19. “The moon is his nightlight and the stars his playground.”

  20. “A baby boy is living proof that dreams really do come true.”

Moments and Memories Quotes

Moments_and_Memories_Quotes

Time moves fast, and every little moment becomes a memory you’ll hold onto forever — here are the ones worth keeping close.

  1. “Every moment with him becomes a memory I treasure.”

  2. “He’s only little for a little while.”

  3. “I wish I could bottle up his giggles forever.”

  4. “I never want to forget the sound of his first laugh.”

  5. “These are the days I’ll miss someday.”

  6. “I blinked, and he grew.”

  7. “His tiny milestones are my greatest victories.”

  8. “Memories begin with his first steps.”

  9. “The days are long, but the years are short.”

  10. “From sleepless nights to endless love.”

  11. “I’ll miss these little feet racing down the hallway.”

  12. “His bedtime snuggles are my favorite part of the day.”

  13. “I’ll hold him a little longer, because one day he’ll be grown.”

  14. “Each moment is a snapshot of love.”

  15. “I’m collecting memories, one cuddle at a time.”

  16. “He’s writing his childhood on my heart.”

  17. “He’s growing fast, but he’ll always be my baby.”

  18. “He’s turning tiny moments into lifelong memories.”

  19. “I’ll never forget the way he looked at me with wide-eyed wonder.”

  20. “Someday he’ll outgrow my lap, but never my heart.”

Connection and Comfort Quotes

Connection_and_Comfort_Quotes

Beyond the milestones and laughter, it’s the quiet moments of connection that mean the most.

  1. “He knows my heartbeat better than anyone.”

  2. “We speak in cuddles and baby babble.”

  3. “He doesn’t have words, but he speaks to my soul.”

  4. “He’s my safe place and my biggest adventure.”

  5. “His hand fits perfectly in mine.”

  6. “He needs me now, but I’ll need these memories forever.”

  7. “His hugs are tiny doses of magic.”

  8. “Even on hard days, he’s the softest part of my world.”

  9. “He’s my daily reminder that love is simple.”

  10. “He brings peace with every breath he takes.”

  11. “He’s the calm in my chaos.”

  12. “There’s comfort in his sleepy sighs.”

  13. “When he smiles at me, the world fades away.”

  14. “He’s the lullaby that soothes my tired soul.”

  15. “I am his home, and he is my heart.”

  16. “He teaches me to slow down and be present.”

  17. “He fills my life with love I never knew existed.”

  18. “We’re learning each other day by day.”

  19. “He may not remember these days, but I’ll never forget them.”

  20. “I never feel alone with my baby boy in my arms.”

Dreams and Hopes Quotes

Dreams_and_Hopes_Quotes

And finally, every heartbeat and breath carries a hope — for who he’ll become and the beautiful life ahead of him.

  1. “I hope he always knows how deeply he’s loved.”

  2. “My greatest wish is for his happiness.”

  3. “I dream of all he will become.”

  4. “He’s my hope wrapped in baby blankets.”

  5. “He is the start of everything I’ll ever hope for.”

  6. “My heart grew the day he arrived, and so did my dreams.”

  7. “He is the reason I believe in a brighter future.”

  8. “May he always chase stars and believe in magic.”

  9. “He is a wish that came true in the most beautiful way.”

  10. “I hope his journey is filled with wonder and kindness.”

  11. “His name is written in every one of my dreams.”

  12. “My baby boy is a masterpiece in progress.”

  13. “He is living proof that prayers are answered.”

  14. “I’ll always be his biggest fan and softest place to land.”

  15. “Every heartbeat holds a hope for him.”

  16. “He turned my dreams into reality.”

  17. “With him in my life, every hope feels possible.”

Tips for Creating Meaningful Memories with Your Baby Boy

Creating lasting memories with your baby boy doesn’t require elaborate planning—just intentional presence.

Here are some practical ways to build meaningful connections:

  1. Document the everyday moments, not just milestones. The way he sleeps, his favorite toys, and his tiny expressions are worth capturing.

  2. Start simple traditions early like special bedtime routines or Saturday morning cuddles that can develop as he grows.

  3. Create sensory experiences through nature walks, feeling different textures, or kitchen time where he can safely observe cooking smells and sounds.

  4. Read together daily, even when he’s too young to understand the words. Your voice creates security and builds language foundations.

  5. Make music part of your routine with lullabies, gentle dancing, or playing instruments. Musical memories form deep neural connections.

  6. Involve extended family through video calls or recorded messages to maintain relationships with distant loved ones.

  7. Leave technology behind for dedicated periods each day, allowing uninterrupted attention and eye contact.

Wrapping Up

The right words about your baby boy can capture moments that pass too quickly—from his first steps to those quiet cuddles that heal the hardest days.

These quotes serve as reminders of the profound connection between parents and sons, the hopes we carry for them, and the unexpected ways they teach us about ourselves.

As your little boy grows from infant to toddler and beyond, these sentiments will deepen in meaning but never diminish in truth.

They reflect the universal way of raising sons—filled with pride, wonder, and the occasional superhero costume.

Which quote resonated most with your experience raising a little boy?

Has your son inspired words no quote could capture?

Share your thoughts below—your personal quote might be exactly what another parent needs to hear today!

Finding time for yourself isn’t easy when you’re juggling kids, work, and life’s daily chaos. Your car often becomes your personal sanctuary—those precious minutes between drop-offs and pickups.

What if you could turn that driving time into something that leaves you feeling refreshed, inspired, or just plain entertained?

That’s where podcasts come in. They’re like having a friend riding shotgun, ready to chat about everything from parenting tips to true crime mysteries.

But with thousands of options out there, which ones are actually worth your time?

We’ve done the homework for you and rounded up podcasts that busy moms love. These shows fit perfectly into school runs, grocery trips, or those rare moments when you’re folding laundry in peace.

Ready to change your driving time into “me time”? Let’s dive in.

Podcasts for Quick & Easy Parenting Tips

1. The Mom Hour

When you need down-to-earth mom advice that feels like chatting with a friend, The Mom Hour is a lifesaver. Hosted by Sarah Powers and Meagan Francis, it covers everything from bedtime battles to handling meltdowns in the grocery store.

  • Best for: Moms looking for practical, non-judgmental parenting tips on the go
  • Average episode length: 30-40 minutes
  • Episode to try:“Getting Kids to Sleep Without Losing Your Mind”
  • New episodes: Every Monday

2. Respectful Parenting: Janet Lansbury Unruffled

Tired of yelling and guilt-tripping? Janet Lansbury’s Unruffled podcast is like a deep breath for overwhelmed moms. She helps you handle toddler tantrums, sibling fights, and parenting stress using gentle, respectful techniques that actually work.

  • Best for: Moms who want peaceful, positive discipline strategies
  • Average episode length: 15-25 minutes
  • Episode to try:“What to Do When Your Child Ignores You”
  • New episodes: Weekly

3. The Modern Mommy Doc Podcast

Dr. Whitney Casares knows mom life is messy, and she’s here to make it easier. This podcast blends science-backed parenting advice with real talk about self-care, career struggles, and raising happy kids.

  • Best for: Moms who want expert guidance without the guilt trip
  • Average episode length: 25-35 minutes
  • Episode to try:“The Secret to Raising Resilient Kids”
  • New episodes: Every Friday

Self-Care & Wellness Podcasts

4. The Mindful Mama Podcast

Ever wish you had just five minutes of calm in your day? This podcast helps you ditch the stress and be a more present mom. Host Hunter Clarke-Fields shares meditation techniques, mindful parenting tips, and ways to stay sane when mom duties feel overwhelming.

  • Best for: Moms looking for simple ways to bring calm and patience into their parenting
  • Average episode length: 30-40 minutes
  • Episode to try:“How to Stop Yelling and Start Connecting”
  • New episodes: Every Wednesday

5. The Self-Care Club

Self-care sounds nice, but who has the time? Enter The Self-Care Club. Hosts Lauren Mishcon and Nicole Goodman test-drive different self-care methods so you don’t have to—everything from morning routines to gratitude journaling.

  • Best for: Moms who need self-care ideas that fit into their schedule
  • Average episode length: 40-50 minutes
  • Episode to try:“Is Waking Up at 5 AM Really Worth It?”
  • New episodes: Twice a week

6. The Lazy Genius Podcast

If “doing it all” feels impossible, Kendra Adachi’s Lazy Genius approach is the mom hack you need. She teaches you how to prioritize what matters (and let go of the rest)—from meal planning to keeping your house clean with minimal effort.

  • Best for: Moms who want to simplify life without the pressure of perfection
  • Average episode length: 20-30 minutes
  • Episode to try:“The Lazy Genius Guide to Meal Planning”
  • New episodes: Every Monday

Funny & Relatable Podcasts

7. #IMOMSOHARD

Some days, you just need a laugh—and these two moms deliver. Hosts Kristin and Jen tackle everything from mom guilt to embarrassing kid stories with unfiltered honesty.

  • Best for: Moms who need a good belly laugh and zero judgment
  • Average episode length: 30-40 minutes
  • Episode to try:“Why Do Kids Never Eat What’s on Their Plate?”
  • New episodes: Weekly

8. The Holderness Family Podcast

Kim and Penn Holderness talk about marriage, parenting, and surviving life’s chaos with humor and heart.

  • Best for: Moms who love a mix of humor and heartwarming real talk
  • Average episode length: 40-50 minutes
  • Episode to try:“How We Make Marriage Work After Kids”
  • New episodes: Every Thursday

9. The Mom Truths Podcast

If you’ve ever hid in the bathroom for a moment of peace, this podcast is for you. Hosted by viral mom duo Cat & Nat, Mom Truths is a no-filter, tell-it-like-it-is take on motherhood.

  • Best for: Moms who want real talk about the messy, hilarious side of parenting
  • Average episode length: 25-35 minutes
  • Episode to try:“Mom Fails That Will Make You Feel Better”
  • New episodes: Weekly

Productivity & Time Management Podcasts 

10. The Best Today Podcast

Ever feel like there’s never enough time? This podcast gives you practical ways to take control of your mornings, routines, and daily tasks—without burnout. It’s about working smarter, not harder, so you can focus on what really matters.

  • Best for: Moms who want to reclaim their time and stay organized
  • Average episode length: 20-30 minutes
  • Episode to try:“How to Create a Morning Routine That Actually Works”
  • New episodes: Every Monday

11. The Purpose Show with Allie Casazza

Allie Casazza helps you declutter everything—your home, schedule, and mindset—so you can focus on what truly brings joy. She’s all about simplifying life in a way that actually sticks, and her episodes are full of actionable tips.

  • Best for: Moms who want to create a clutter-free, stress-free home and life
  • Average episode length: 25-35 minutes
  • Episode to try:“The Secret to a Minimalist Mom Life”
  • New episodes: Weekly

12. The Mompreneur Mastermind Show

For moms who juggle parenting and business, this podcast is gold. Host Stefanie Gass shares real strategies on building a business while raising kids, so you don’t feel like you’re choosing between family and success.

  • Best for: Moms who dream of balancing a business and motherhood
  • Average episode length: 30-45 minutes
  • Episode to try:“How to Build a Business in Naptime”
  • New episodes: Every Wednesday

Educational & Inspirational Podcasts 

13. Good Inside with Dr. Becky

Dr. Becky’s Good Inside helps you understand your child’s behavior and respond in a way that actually works. No shaming, no blaming—just solid, science-backed strategies.

  • Best for: Moms who want to parent with confidence and connection
  • Average episode length: 30-45 minutes
  • Episode to try:“How to Handle Big Feelings Without Losing Your Cool”
  • New episodes: Twice a week

14. The Motherly Podcast

Need a dose of inspiration? This podcast features stories from moms, experts, and celebrities sharing their biggest life lessons. Whether it’s parenting wins, career advice, or self-care tips, it’s like a warm hug for your mom soul.

  • Best for: Moms who want uplifting stories and real-life mom wisdom
  • Average episode length: 35-50 minutes
  • Episode to try:“Redefining Motherhood in a Changing World”
  • New episodes: Every Thursday

15. Risen Motherhood

If faith is a big part of your parenting journey, Risen Motherhood brings biblical wisdom into the everyday struggles of motherhood. It’s real, relatable, and perfect for moms looking for encouragement on the tough days.

  • Best for: Moms who want faith-based encouragement in parenting
  • Average episode length: 25-40 minutes
  • Episode to try:“Trusting God in the Chaos of Motherhood”
  • New episodes: Weekly

Final Thoughts

Now you have the podcast gems to keep you company during school runs, errands, or those rare quiet moments. Each one offers something special—whether it’s a good laugh, helpful advice, or just a chance to escape for a while.

Remember, even a 10-minute episode can be the perfect break you need in your busy day. The beauty of podcasts is that you can pause and pick up right where you left off.

Ready to start listening? Subscribe to a couple that caught your interest today. Download a few episodes before your next drive so they’re ready when you are.

Have a favorite mom podcast we missed? Share it in the comments below!

And don’t forget to bookmark this list for later—because some days you need parenting wisdom, and other days you just need true crime stories to make carpool duty feel like an adventure.

As a parent, you’ve likely experienced the struggle of sleepless nights with your 10-month-old. Whether it’s constant wake-ups or the need to be rocked to sleep, it can feel exhausting.

But here’s the good news: sleep training at this stage can help your baby learn to sleep independently, leading to more restful nights for both you and your little one. 

By this time, your baby is mentally ready, and with the right approach, they can start building healthy sleep habits.

In this blog, we’ll cover everything you need to know about sleep training for your 10-month-old, from creating a perfect sleep environment to choosing the right sleep training method.

Let’s get started on the path to better sleep for your whole family!

What’s Normal for a 10-Month-Old’s Sleep?

At 10 months old, babies typically need 12 to 14 hours of sleep in total each day.

This includes about 10 to 12 hours of sleep at night and 2 to 3 hours of sleep during the day, usually split into two naps.

Many babies at this age can sleep for longer stretches at night, often 8 to 10 hours, but it’s still normal for them to wake up once or twice.

They may also be able to stay awake for longer periods between naps. Some babies might still need help falling asleep, while others are starting to sleep more independently.

It’s common for sleep patterns to vary, so some babies may need more or less sleep than others. Maintaining a consistent bedtime routine can help your baby develop good sleep habits.

What is Sleep Training for A 10-Month-Old?

Sleep training a 10-month-old involves helping your baby learn to fall asleep independently and sleep through the night.

At this age, babies are developing better sleep patterns, but they may still wake up frequently or struggle to settle down on their own.

Sleep training can help them learn how to self-soothe and establish a regular sleep routine.

This might involve setting a consistent bedtime, creating a calming pre-sleep routine, and making sure the sleep environment is safe and comfortable.

The goal is to teach your baby to sleep without needing your help each time they wake up during the night. It may take some time and consistency, but with patience, your baby can learn to sleep better on its own.

Why Sleep Training Matters

By this time, your baby is developmentally ready to sleep through the night. Sleep training will help both you and your baby:

  1. Improved Sleep Habits: Sleep training teaches your baby to self-soothe, reducing the chances of frequent wake-ups and ensuring better sleep quality for everyone.
  2. Healthier Attachment: A consistent bedtime routine and the ability to sleep alone contribute to emotional security and a stronger bond with you.
  3. Restful Nights for Parents: No more late-night feedings or constant rocking – once your baby learns to sleep independently, both parents can enjoy more restful nights.
  4. Physical Growth: Your baby is likely crawling, sitting, and even pulling up to stand. This mobility helps them feel secure enough to sleep independently.
  5. Cognitive Development: Understanding object permanence at this age may cause your baby to experience some separation anxiety, but this is also the right time to help them develop self-soothing skills.
  6. Emotional Growth: With increased social awareness, 10-month-olds benefit from the consistency of a bedtime routine that helps them feel safe and calm before sleep.

How to Sleep Train a 10-Month-Old?

A calm and comfortable sleep space is key to good sleep.
Here’s how to prepare:

  • Use blackout curtains to block out any light. A white noise machine can help mask background noises.
  • Keep the room at a comfortable temperature (68-72°F) for optimal sleep.
  • Use a Sleep Sack, which provides warmth and safety without the risk of loose blankets, which could disturb your baby’s sleep.

A consistent bedtime routine signals to your baby that it’s time to wind down.
Some calming activities include:

  • Bath time followed by soft pajamas
  • Reading a book or singing a lullaby
  • Gentle rocking or cuddling to calm them before placing them in their crib

Establish a bedtime that works best for your baby:

  • Aim for a bedtime between 6:30 – 8:00 PM.
  • Be consistent with bedtime timing to help set your baby’s internal clock and improve their ability to fall asleep on their own.

Sleep associations, like being rocked or fed to sleep, can disrupt long-term sleep patterns.
Here’s how to wean off these sleep props:

  • If your baby is used to being rocked, slowly reduce the rocking time.
  • Gradually reduce night feedings and help your baby learn to fall asleep without your intervention.
  • By 10 months, your baby may be transitioning from three naps to two naps.

Some Tried and Tested Sleep Training Methods

Depending on your preference and how quickly you want results, there are several approaches to try.

1. Fading Method: Reduce the amount of interaction you have with your baby at bedtime. For example, instead of rocking, simply place your baby in the crib while awake, staying close but not intervening.

2. Pick-Up/Put-Down Method: Pick up your baby when it cries, soothe it briefly, and put it back in the crib once it is calm. Repeat this as necessary until your baby learns to self-soothe.

If you need faster results, these methods are effective but may involve more crying:

3. Ferber Method: Gradually increase the intervals between comforting visits (e.g., 3 minutes, 5 minutes, 10 minutes). This allows your baby to learn self-soothing while still receiving reassurance from you.

4. Cry-It-Out: Put your baby to bed awake and allow them to cry until they fall asleep. Before trying this method, it’s important to ensure your baby is safe, comfortable, and not hungry. Use a video monitor to check in if necessary.

What to Do if Sleep Training Isn’t Working

1. Check the Sleep Environment

  • Darkness: Use blackout curtains to keep the room dark, as light can disrupt sleep.
  • Noise: Use a white noise machine to block out distractions.
  • Temperature: Keep the room between 68-72°F (20-22°C) for optimal sleep.
  • Safety: Ensure the crib is clear of any hazards like toys or loose blankets.

2. Adjust Sleep Schedule

  • Wake Windows: Ensure your baby has 2.5-3.5 hours of wake time between naps and bedtime.
  • Bedtime: Aim for a consistent bedtime between 6:30 PM – 8:00 PM to avoid overtiredness.
  • Naps: Transition to two naps per day and avoid naps too close to bedtime.

3. Seek Professional Help

  • Personalized Advice: A pediatric sleep consultant can help identify specific issues and suggest tailored strategies.
  • Health Concerns: Ensure there are no underlying medical conditions affecting sleep.
  • Support: A professional can offer guidance and reassurance to keep you consistent and on track.

Final Thoughts: Consistency is Key

Sleep training is a journey, but consistency is essential. Here’s why it’s worth the effort:

Sleep training may take a few weeks, but once your baby learns to sleep independently, the whole family will enjoy better sleep.

Whether you’re using gentle or faster methods, consistency will help your baby adjust and develop healthy sleep habits.

While consistency is key, life happens. Be flexible when needed, but always return to your training method to maintain progress.

Remember, sleep training isn’t about “forcing” your baby to sleep but about helping them learn the skill of self-soothing and independent sleep.

Ready to start sleep training? Try implementing these methods, and don’t forget to track your progress. You’ll see improvement as your baby gains the confidence to sleep independently.

Frequently Asked Questions

Is It Too Late to Sleep Train a 10-Month-Old?

No, 10 months is an ideal time to sleep train. Most babies are developmentally ready to learn independent sleep skills by this age.

How Long Should You Let a 10-Month-Old Cry It Out?

If using the Cry-It-Out method, let your baby cry for a set period (e.g., 10-15 minutes) before offering comfort. Gradually increase the intervals. Always ensure your baby’s basic needs are met before starting.

What is the 5-3-3 Rule for Sleep Training?

The 5-3-3 rule is a guideline for wake windows: a 5-hour wake window in the morning, followed by 3 hours before the afternoon nap, and another 3-hour wake window before bedtime.

What is the Hardest Night of Sleep Training?

The hardest night is often the first or second night, when your baby is adjusting to the new routine. Expect some tears and frustration, but consistency will help your baby learn to self-soothe.

I remember that night so clearly. Standing beside the crib, my heart racing as I tried to place my 6-month-old in it for the millionth time.

After months of peaceful co-sleeping, here I was, feeling like I was betraying my baby’s trust.

If you’re reading this, chances are you’re in the same boat – torn between wanting your bed back and feeling guilty about the transition.

Let me tell you something reassuring: you’re not alone in this journey. As a mom who’s helped both my babies make this big move, I know exactly how overwhelming it can feel.

There are mixed emotions, doubts, and yes, even those well-meaning relatives who ask, ” Isn’t it time they sleep in their own bed?”

I’ll share practical, simple, doable steps to help your baby transition from your cozy bed to their crib while keeping everyone’s sanity intact.

What is Co-Sleeping?

What_is_Co-Sleeping

Co-sleeping is the practice of sharing a sleeping space with your baby, and it can take several forms:

  • Bed-Sharing: The baby sleeps in the same bed as the parents.
  • Room-Sharing: The baby sleeps in the same room but in their own crib or bassinet, often close to the parent’s bed.
  • Co-Sleeping Attachments: A co-sleeper is an attachment to the parent’s bed, allowing the baby to be near while still having their own space.

Transition Approaches: From Co-Sleeping to Crib

When transitioning your baby from co-sleeping to independent sleeping, two primary approaches can help ensure a smooth and successful shift:

1. Gradual Transition Approach (Slow and Steady)

Gradual_Transition_Approach_Slow_and_Steady

The gradual transition method involves easing your baby from co-sleeping into their own crib, helping them adjust to the change without feeling overwhelmed.

This method allows your baby time to get comfortable while still feeling secure.

How It Works:

  • Start with Room Sharing: Initially, place your baby’s crib or bassinet next to your bed. This enables them to get accustomed to their own sleep space while remaining close to you for reassurance.
  • Increase the Distance Gradually: Over time, move the crib further away from your bed. This gradual shift helps both you and your baby adapt to the change at a comfortable pace.
  • Nighttime Adjustments: Rather than making an immediate switch, begin by putting your baby in the crib for part of the night and slowly extend the time they spend in their crib as they adjust.

2. Quick Approach (Cold Turkey)

Quick_Approach_Cold_Turkey

The cold turkey method involves moving your baby to their crib or room all at once, making a decisive shift. While this can be a bit more difficult, it’s ideal for families ready to make a quick and clear change.

How It Works:

  • Put Baby in the Crib at Bedtime: When you’re ready, place your baby in their crib or bassinet, even if they’ve been co-sleeping up until now. While your baby may need some reassurance, this approach avoids the temptation to return to co-sleeping.
  • Stick to the Routine: Keep your usual bedtime routine, but ensure your baby knows the crib is their primary sleep space. Consistency is essential for this method to be successful.

When Should You Shift Your Baby to A Crib?

Knowing when to transition your baby from co-sleeping to a crib is an important decision that depends on both your baby’s development and your family’s needs.

Age Signs of Readiness Best Approach Success Tips
4-6 months Good head control, Less night feeding, Regular naps starting Gentle & Gradual: Start with naps, Stay in room, Keep nursing schedule Use sleep sack, White noise, Room darkening, Consistent bedtime routine
6-9 months Sitting up alone, Self-soothes occasionally, Sleeps 5+ hours Mixed Approach: Naps + night sleep, Chair method, Gradual distance Safe comfort object, Same routine daily, Regular timing, Calm environment
9-12 months Crawling/standing, Regular sleep patterns, Less separation fear Confident Approach: Full crib sleep, Quick check-ins, Brief comfort Child-proof room, Familiar cues, Clear bedtime, Consistent response
12+ months Walking well, Clear communication, Independent play time Direct Approach: Full transition, Brief routine, Limited checks Toddler bed prep, Night light option, Clear rules, Reward system

How to Set up A Crib?

How_to_Set_up_A_Crib

Setting up a safe crib starts with choosing a firm mattress that fits snugly – you shouldn’t be able to fit more than two fingers between the mattress and crib frame.

Place the crib away from windows, cords, and heaters, on a flat surface. Use only a fitted sheet; skip the bumpers, blankets, and toys. Start with the mattress at its highest setting for newborns, then lower it as your baby becomes mobile.

Check all hardware monthly, ensuring screws are tight and no parts are loose or broken. Remember to register your crib for safety recalls and always follow the manufacturer’s assembly instructions.

Safety Guidelines for Crib Sleep

The safety guidelines for perfect crib sleep are as follows:

  • Firm Mattress: Use a firm, flat mattress that fits snugly in the crib, with no gaps to prevent suffocation risks.

  • Back Sleeping: Always place your baby on their back to sleep, which reduces the risk of sudden infant death syndrome (SIDS).

  • No Loose Bedding: Keep the crib free of pillows, blankets and stuffed animals to avoid suffocation hazards.

  • Appropriate Sleepwear: Dress your baby in a sleep sack or wearable blanket instead of using loose blankets to keep them warm.

  • Crib Assembly: Ensure the crib is properly assembled, with no loose parts, broken slats, or sharp edges.

Safety is a holistic concept combining physical environment, emotional support, and responsive care. No single approach fits all children—flexibility, observation, and professional guidance are key.

How to Handle Resistance and Emotional Challenges?

Sleep transitions are profound emotional journeys that challenge both parents and children. Each cry, protest, and moment of resistance represents complex feelings of security, uncertainty, and developmental growth.

The path from co-sleeping to independent sleeping is not a linear progression, but a nuanced dance of emotional development.

  • Understand Your Baby’s Emotional Needs: Babies may experience separation anxiety during the transition, which is natural and will fade over time.
  • Be Consistent:A consistent bedtime routine helps your baby feel secure and understand the crib is their sleep space.
  • Gradually Reduce Help: Allow your baby to self-soothe by reducing the amount of help you provide at bedtime.
  • Handle Resistance with Patience: Expect some resistance at first. Stay patient, as this phase is temporary and your baby will adjust.
  • Manage Parental Guilt: It’s normal to feel conflicted, but transitioning to independent sleep is healthy for both you and your baby.

Expert Insights and Recommendations

Expert_Insights_and_Recommendations

Sleep is more than a biological necessity—it’s a critical developmental process that shapes a child’s physical, cognitive, and emotional growth.

Experts across pediatrics, child psychology, and sleep science offer nuanced insights into creating safe, supportive sleep environments.

  • Recognized as a complex, culturally influenced practice
  • Not inherently harmful when practiced safely
  • Varies across different cultural and medical contexts
  • Co-sleeping can support early bonding
  • Independent sleep develops critical self-soothing skills
  • Individual child temperament matters significantly
  • Timing is more important than absolute rules
  • Gradual approaches often more successful
  • Consistent approach trumps perfection

Conclusion: Embracing the Sleep Transition Journey

As a mom who’s been through the co-sleeping to crib journey twice, I know just how challenging this transition can be.

But here’s what I’ve learned: with patience and the right approach, your baby can learn to love their crib.

Remember, every baby is different, and what works for one might not work for another. Don’t feel pressured to rush the transition if neither you nor your baby feels ready. 

Whether you choose the gradual approach, or any other strategy we’ve discussed, consistency is your best friend. It might take a few days or even weeks, but your baby will eventually adjust to their new sleep space.

Keep in mind that setbacks are normal – teething, illness, or big life changes might temporarily affect your progress.

That’s okay! Stay patient, stay consistent, and most importantly, be gentle with yourself during this transition.

Frequently Asked Questions

At What Age Is Co-sleeping Inappropriate? 

Cosleeping is generally considered inappropriate when it interferes with a child’s ability to sleep independently, typically around ages 2-3, though this varies by family and culture.

How To Get Your Kid To Sleep Without Laying With Them?

Create a consistent bedtime routine, offer comfort items like a stuffed toy, and gradually reduce your presence to help your child learn to sleep alone.

What Are The Long-Term Effects Of Co-sleeping?

Cosleeping may lead to sleep dependency or difficulty self-soothing, but it can also foster security. Effects depend on family dynamics and cultural practices.

A new parent’s quest for peaceful nights often leads to one crucial challenge: getting their baby to sleep in a crib.

Between midnight wake-up calls and restless naps, parents find themselves desperately seeking solutions for their little one’s sleep struggles.

It’s about building healthy sleep habits that will benefit both parent and child.

While some babies naturally take to their cribs, others need extra help making the transition.

This guide breaks down practical, gentle approaches to help babies embrace their cribs, drawing from both expert advice and real-world experience.

Transitioning a Baby to A Crib: What to Expect?

Transitioning a baby to a crib can be challenging due to major changes in their sleeping environment.

Babies often feel secure in a bassinet or co-sleeping setup, making the crib’s larger, open space unfamiliar. Without a parent’s warmth and scent nearby, settling in can take time, especially during milestones like teething or separation anxiety.

Disrupted sleep patterns may add stress, but a gradual approach and consistency can ease the process.

With patience, babies will adjust and find comfort in their new crib.

Why Your Baby Wont Sleep in A Crib

  • Separation Anxiety
    Babies may struggle to sleep in a crib because they feel separated from their parents, especially if they are used to co-sleeping or being held.

  • Uncomfortable Sleeping Environment
    The crib might be too firm, cold, or unfamiliar, making it difficult for the baby to settle and sleep peacefully.

  • Hunger or Growth Spurts
    Babies experiencing hunger or growth spurts may wake up frequently and resist sleeping in the crib as they seek comfort and extra feeds.

  • Disruption in Routine
    Changes in bedtime routines, nap schedules, or external factors like travel can make it harder for babies to adapt to sleeping in a crib.

  • Teething or Illness
    Pain from teething, colic, or illness can make a baby uncomfortable and unwilling to sleep in the crib, preferring closeness to a caregiver for reassurance.

How to Introduce a Crib to Your Baby?

How to Introduce a Crib to Your Baby_

Introducing a crib to your baby is an essential milestone that promotes independent sleep and a structured bedtime routine.

By gradually transitioning and creating a positive association with the crib, you can help your baby adjust comfortably to their new sleeping space.

1. Start with Daytime Naps

Begin the transition by using the crib for daytime naps. This allows your baby to get familiar with the crib in a less intimidating setting.

The natural light during the day also helps them feel secure and safe, making it easier to adapt.

Start by placing your baby in the crib when they are drowsy but awake, so they associate the crib with falling asleep.

Gradually increase the duration of naps in the crib to build their comfort and trust in the new sleeping space.

2. Create a Sleep-Inducing Environment

Help your baby associate the crib with positive experiences to ease the transition.

Place them in the crib during playtime with a favorite toy or mobile to make it a fun and engaging space.

Spend time near the crib, talking or singing softly, so your baby feels your presence.

Lay them down in the crib when they are calm and awake, allowing them to explore the surroundings without pressure.

Over time, this familiarity reduces resistance and creates a sense of security, making the crib a comforting place for sleep.

3. Make the Crib Inviting

Help your baby associate the crib with positive experiences to ease the transition.

Place them in the crib during playtime with a favorite toy or mobile to make it a fun and engaging space.

Spend time near the crib, talking or singing softly, so your baby feels your presence.

Lay them down in the crib when they are calm and awake, allowing them to explore the surroundings without pressure.

Over time, this familiarity reduces resistance and creates a sense of security, making the crib a comforting place for sleep.

4. Establish a Consistent Routine

Follow a predictable bedtime routine that ends with your baby being placed in the crib.

Activities such as bathing, reading, or singing signal that it’s time to wind down. Keep the routine calm and soothing, ensuring it follows the same sequence every night.

Over time, these cues will help your baby associate the routine with sleep, making the transition to the crib smoother and more comforting.

5. Gradually Transition from Co-Sleeping

If your baby is used to sleeping in your room or bed, transition gradually to ensure a smooth adjustment.

Start by placing the crib next to your bed, allowing your baby to stay close to you while getting used to their own sleeping space. Once they are comfortable, begin moving the crib slightly farther away every few days.

Eventually, transition the crib into their nursery, ensuring the environment remains familiar.

You can also introduce a comforting item like a sleep sack or a consistent bedtime routine to reassure them.

This step-by-step approach helps reduce separation anxiety and builds your baby’s confidence in sleeping independently.

6. Be Patient and Supportive

Adjusting to a crib can take time, so remain patient.

Offer comfort when needed, but encourage self-soothing with gentle reassurance. Celebrate small wins, like a successful nap, to boost confidence.

Avoid comparing progress to others—every baby adapts differently.

Stay consistent and supportive, creating a positive and stress-free transition.

7. Monitor and Adjust

Observe your baby’s reactions to the crib and make necessary adjustments.

If they seem unsettled, consider small tweaks, such as changing the crib’s location or adding a sleep sack for added comfort.

Flexibility ensures a smoother transition. Introducing a crib requires patience, consistency, and understanding.

With these steps, your baby will soon feel safe and secure in their new sleeping environment.

Dealing With Common Challenges

Separation Anxiety: Transitioning your baby to the crib can be easier with gradual steps.

Start by using the crib for naps or keeping it in your room initially. Reassure your baby with soothing words or gentle touches to help them feel your presence.

Difficulty Falling Asleep: A calming bedtime routine can work wonders.

Include activities like a warm bath, soft lullabies, or a bedtime story.

White noise machines can create a soothing environment by mimicking familiar, gentle sounds.

Frequent Night Wakings:

Babies waking up frequently at night need extra care.

  • Ensure they are well-fed and comfortable before bedtime.
  • Allow brief periods for self-soothing before stepping in to intervene.

Resistance to the Crib: Building positive associations with the crib is key.

  • Let your baby spend short, happy moments in the crib during playtime or while calm.
  • Avoid placing them in the crib only after they’ve fallen asleep, as it may create dependency.

Disruptions from Teething or Illness:

Teething or illness can make crib transitions harder.

Offer extra comfort, such as a cool teething ring for relief, and try to stick to the bedtime routine as much as possible.

Inconsistent Sleep Schedule:

Maintaining a regular sleep schedule helps your baby adjust to the crib. Set a consistent bedtime and wake-up time. Avoid stimulating activities close to bedtime to promote relaxation.

Overtiredness: Overtired babies may struggle with crib sleeping.

Watch for signs of sleepiness, like yawning or rubbing eyes, and put them to bed promptly. A dark, quiet room can help them settle faster.

Easy Tips for Parents

Easy Tips for Parents

  • Consistency is key—try a warm bath, a gentle lullaby, or a calming story to signal it’s time for sleep. This creates positive sleep associations over time.

  • Let your baby learn to fall asleep in the crib on their own. This helps them self-soothe making it easier for them to settle back to sleep if they wake up.

  • A firm mattress and breathable, fitted sheets are essential.

  • Avoid any toys or blankets that might disrupt sleep or pose a safety risk.

  • A white noise machine can mimic the soothing sounds of the womb, helping your baby feel secure. It also blocks out sudden household noises.
  • Dim lighting or blackout curtains help create a sleep-friendly environment, it can offer reassurance without overstimulation.

  • Not every night will be perfect, and that’s okay. Small wins, like a successful nap, and adjusting your approach as needed to fit your baby’s unique needs is what you need.

Conclusion

While establishing crib sleeping habits might seem daunting at first, consistent effort and gentle persistence will eventually lead to peaceful nights. Every baby adapts at their own pace, and what works for one might not work for another.

Parents should remember that setbacks are normal and part of the learning process.

By maintaining a consistent bedtime routine, creating a sleep-friendly environment, and responding to their baby’s cues with understanding.

Parents can help their little ones develop healthy sleep habits that will last well beyond the crib years.

Air travel with a baby can be pretty daunting.

That first moment when other passengers spot you walking down the aisle with a baby carrier.

But here’s the thing: flying with your little one doesn’t have to be the nightmare scenario you’re imagining.

This guide entails practical tricks that actually work. Real strategies that might help you keep your sanity intact while navigating airports and airplanes with your tiny co-pilot.

Make Sure to Pick a Baby Friendly Airline

Choosing a baby-friendly airline can make your journey significantly easier and more enjoyable.

With amenities like early boarding, extra baggage allowances for strollers or car seats, and family-friendly seating, you’ll feel more relaxed and prepared.

Airlines with thoughtful services ensure your baby stays comfortable, entertained, and well-cared-for, helping you focus on making precious travel memories together.

Baby Friendly Airline Options To Opt For

Delta Air Lines
Delta is a fantastic choice for families, offering early boarding so you can settle in with your little one comfortably.

Their in-flight entertainment includes kid-friendly options, making it easier to keep your baby entertained.

Southwest Airlines
With Southwest’s relaxed seating policy, you can choose seats that work best for your family.

They also allow free checked baggage for strollers and car seats, making travel with your baby more convenient.

JetBlue Airways
JetBlue is a favorite for families thanks to its free Wi-Fi and extra legroom.

Their dedicated kids’ snack box is perfect for keeping your baby happy during the flight.

Alaska Airlines
Alaska Airlines goes the extra mile for families by offering complimentary priority boarding and free checks for car seats and strollers.

They make flying with your baby hassle-free.

Pre-Flight Preparation

  • Choose Baby-Friendly Flights
    Opt for direct flights and consider times that align with your baby’s nap or bedtime to minimize disruptions.

  • Pack a Well-Organized Diaper Bag
    Include essentials like diapers, wipes, formula, snacks, a change of clothes, and favorite toys for easy access during the flight.

  • Check Airline Policies
    Research baggage allowances, seating options for infants, and the availability of bassinets to plan accordingly.

  • Prepare for Security Checks
    Be ready to remove liquids, baby food, and strollers for inspection, and dress your baby in easy-to-remove layers for convenience.

  • Practice Babywearing
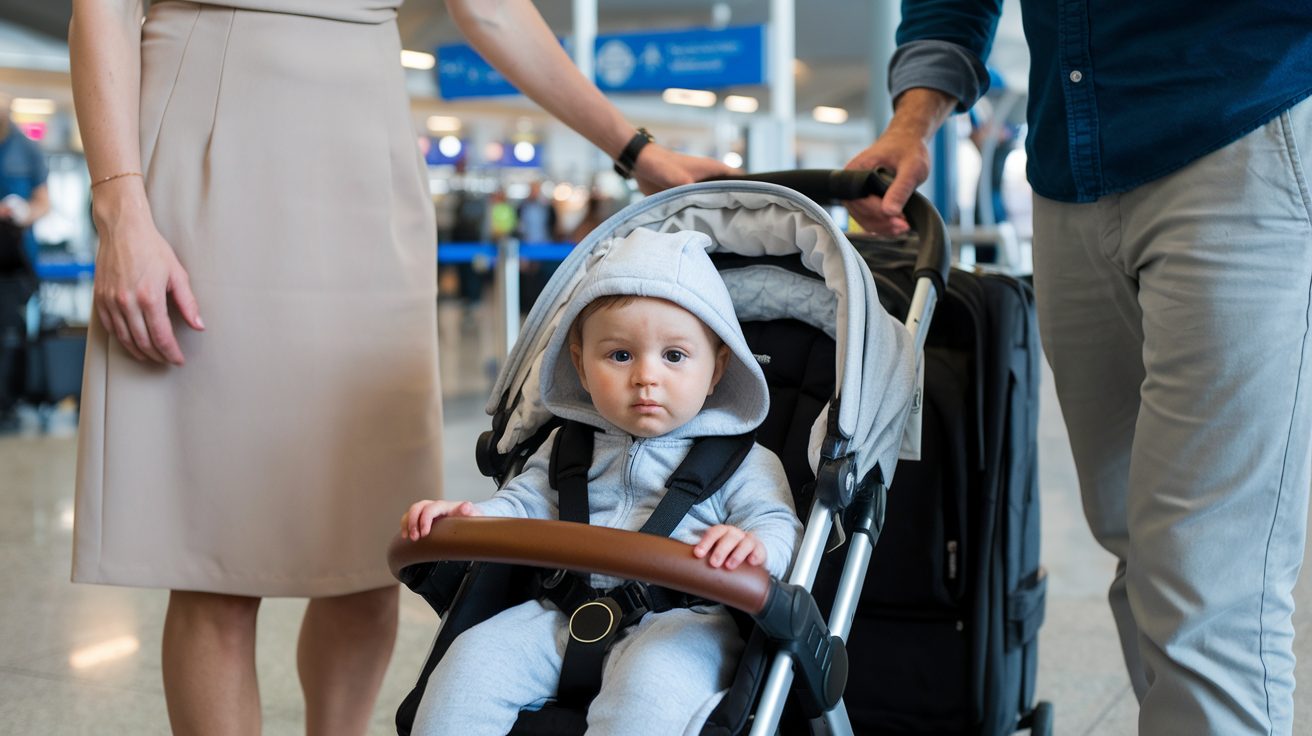
    A baby carrier keeps your hands free and makes navigating the airport and boarding much easier.

In-Flight Tips To Fly With Your Baby

In-Flight Tips To Fly With Your Baby

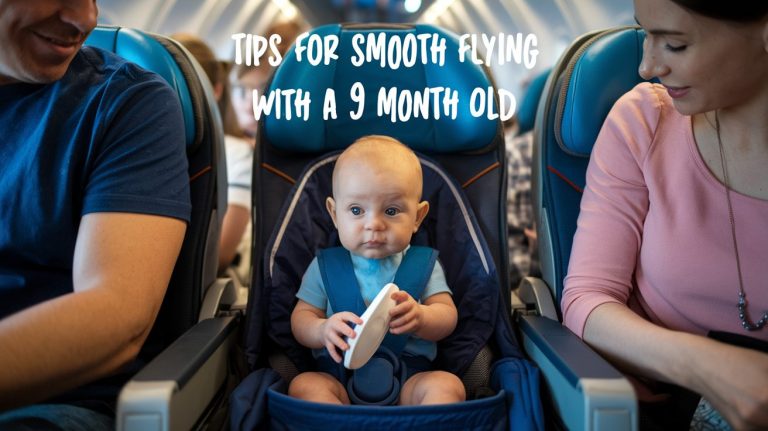
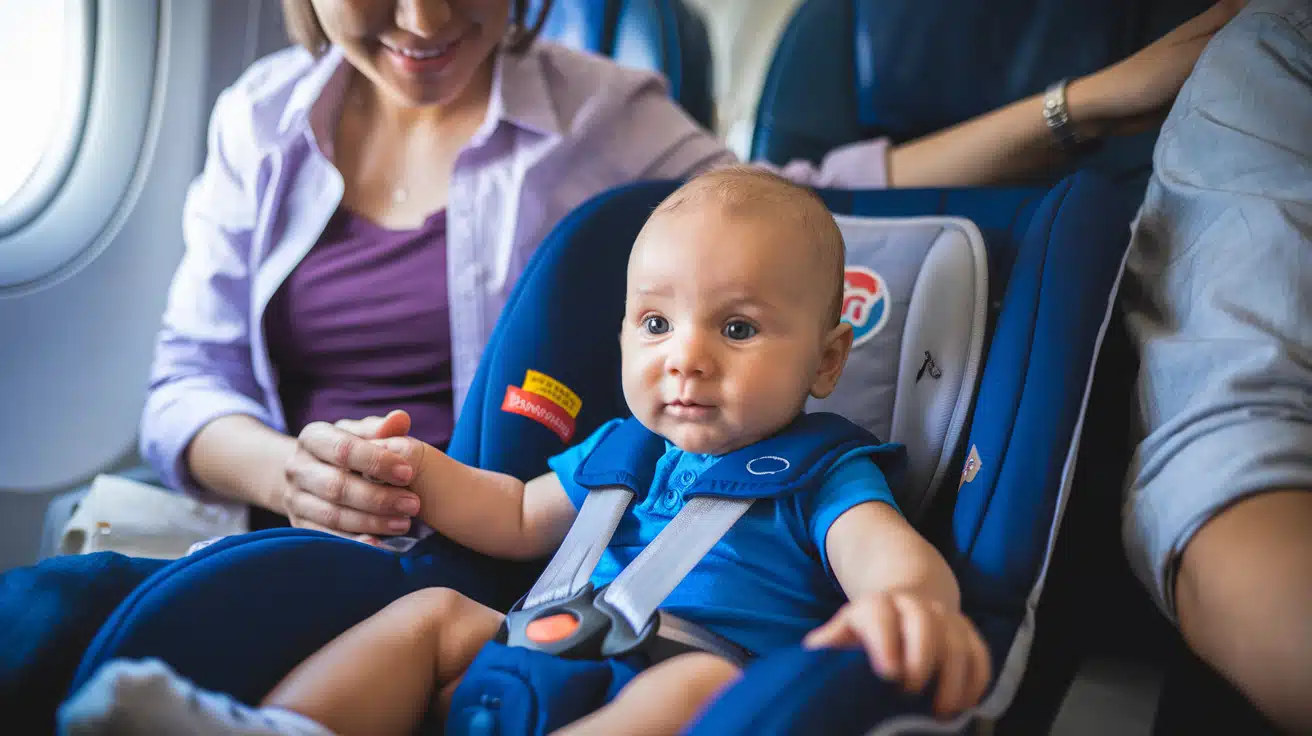
Being prepared for a flight with a 9-month-old ensures a smoother and less stressful travel. Packing essentials like diapers, wipes, extra clothes etc. in an easily accessible bag.

Such preparation minimizes surprises and keeps both you and your baby comfortable during the trip.

1. Feeding During Takeoff and Landing

Feed your baby during takeoff and landing to help ease ear pressure caused by changes in altitude. Breastfeeding, bottle-feeding, or offering a pacifier can provide comfort and prevent discomfort.

This simple act can make a significant difference in keeping your baby calm.

Additionally, feeding can serve as a distraction, helping to keep your baby occupied during the most intense phases of the flight.

Carry extra formula or snacks in case of delays to avoid running out of supplies.

2. Choose Comfort Over Style

Dress your baby in soft, breathable clothing to ensure comfort throughout the flight.

Avoid overly tight or fussy outfits, and opt for layers that can be added or removed depending on the cabin temperature.

Bring a light blanket for added coziness, as planes can get chilly.

Consider using slip-on shoes for quick diaper changes. Keeping your baby physically comfortable reduces the chances of irritability.

3. Keep Toys Handy

Pack a few quiet, age-appropriate toys or books to keep your baby engaged. Opt for items they haven’t seen before to spark curiosity.

Avoid toys with loud noises to respect fellow passengers.

Consider toys that can attach to a seat or a stroller to prevent them from falling.

Rotate toys throughout the flight to maintain your baby’s interest and provide a constant source of distraction.

4. Use a Baby Carrier

A baby carrier can be a lifesaver during the flight.

It allows you to keep your baby close and secure while freeing up your hands.

Carriers are especially helpful for calming fussy babies and encouraging naps. You can also use the carrier to walk up and down the aisle when your baby gets restless.

Choose a carrier with good back support to keep yourself comfortable as well.

5. Be Ready for Emergencies

Always have a change of clothes for both your baby and yourself in case of spills or accidents.

Keep diapers, wipes, and extra formula or snacks within easy reach.

Preparedness minimizes stress during unforeseen situations. Pack a compact first aid kit with essentials like baby-safe pain relievers or teething gel.

Having these supplies on hand ensures you’re ready for any surprise during the journey.

6. Stay Calm During Crying Spells

Babies can get fussy on flights due to unfamiliar surroundings.

Stay calm and try soothing techniques like rocking, humming, or distracting with a toy.

A calm parent often helps a baby relax faster. Walk the aisles if permitted, as movement can be soothing.

Acknowledge that some crying is inevitable, and don’t worry too much about other passengers—they’ll understand it’s part of flying with a baby.

Post-Flight Tips To Fly With Your Baby

Post Flight Tips To Fly With Your Baby

Check for All Belongings

  • Once you land, take a moment to check your seat area and overhead bins to ensure you haven’t left behind any baby essentials like toys, bottles, or blankets.
  • It’s easy to forget things when juggling a baby after a long flight.

Change and Freshen Up

  • Head to the nearest restroom to change your baby’s diaper and freshen them up.
  • A quick clean-up can help your little one feel more comfortable after the flight.
  • Don’t forget to check yourself, too—it’s been a long journey!

Give Your Baby Time to Adjust

  • Allow your baby some quiet time to acclimate to the new environment.
  • Let them stretch, crawl, or play in a safe space.
  • It’s a great way to help them decompress after being confined during the flight.

Plan for a Restful Arrival

  • If possible, schedule some downtime at your destination.
  • If it’s a nap or a relaxed meal, both you and your baby need time to recharge after the journey. This also sets the tone for a smoother trip ahead.

Wrappin Up

The first flight with your 9-month-old might not go exactly as planned – and that’s perfectly okay! Every baby is different and what works for one tiny traveler might not work for another.

The key is staying flexible and keeping your sense of humor intact.

Sure, there might be some tears, a few diaper surprises at 30,000 feet, or those moments when you’re dancing in the aisle to keep your little one happy.

But here’s the thing – you’re making memories and teaching your baby to be an adventurer from the start.

Pack those essentials, take a deep breath, and embrace the journey.

Before you know it, you’ll be sharing your own flying-with-baby wisdom with other nervous parents!

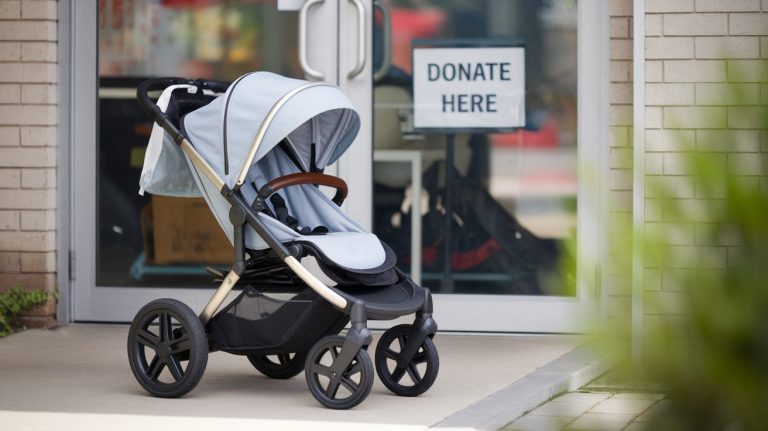
Remember that tiny stroller that carried your baby through countless park visits, grocery store runs, and afternoon walks?

Now it’s sitting in your garage, collecting dust. But somewhere out there, a family hopes to find an affordable stroller for their little one.

As a parent who’s donated three strollers (and helped dozens of friends do the same), I know exactly how to turn your unused stroller into a life-changing gift for another family.

This guide combines everything I’ve learned about making donation easy and meaningful.

You’ll discover trusted organizations that will handle your stroller with care, simple steps to prepare it for its new home, and ways to ensure it reaches a family in need.

Let’s find the perfect new home for that stroller that served your family well.

Local Charities and Shelters

Local organizations often provide the most direct path for your stroller to reach families in your community. These groups understand local needs and can quickly connect your donation with the most needy parents.

1. Homeless Shelters

Homeless_Shelters

Homeless shelters across the country report a constant need for strollers. A stroller is more than just baby gear for families staying in shelters.

It’s essential transportation that helps parents get to job interviews, medical appointments, and housing viewings while caring for their children.

Contact your local homeless shelter to learn about their needs and donation procedures. Many shelters prefer lightweight, foldable models that families can easily store in small spaces.

2. Women’s Shelters

Womens_Shelters

Women’s shelters serve mothers and children who often arrive with only their clothes.

These shelters provide a haven and help families rebuild their lives. A donated stroller gives a mother independence and mobility as she works to create a new start.

Most women’s shelters accept donations through secure, private drop-off procedures to protect their residents’ safety.

Call your local shelter to learn about their donation protocols and current needs.

3. Religious Organizations

Religious_Organizations

Religious organizations frequently run community outreach programs that connect baby gear with local families.

Churches, synagogues, and mosques often maintain lists of needed items for the families they serve. Many operate donation closets or partner with local aid organizations.

These programs typically offer flexible drop-off times and may arrange pickup for larger items.

Hospitals and Pediatric Clinics

Medical facilities often serve as crucial connection points for families needing essential baby equipment.

4. Neonatal Intensive Care Units (NICUs)

Neonatal_Intensive_Care_Units_NICUs

Neonatal Intensive Care Units (NICUs) work closely with families during challenging times. Many NICU parents spend weeks or months traveling back and forth to the hospital, often while caring for other children at home.

Some hospitals maintain programs to provide strollers to NICU families, particularly those facing financial strain.

These programs help parents safely transport their babies home and to follow-up medical appointments.

Contact your local hospital’s NICU social work department to learn if they accept stroller donations or if they can connect you with partner organizations.

5. Community Health Clinics

Community_Health_Clinics

Community health clinics serve as front-line healthcare providers for many low-income families. These clinics often know which families need support beyond medical care.

Many maintain resource centers or partner with local organizations to provide baby equipment to their patients.

A donated stroller can help parents transport their children to medical appointments and developmental checkups.

Some clinics also collaborate with prenatal programs, assisting expectant mothers in preparing for their babies’ arrival.

Online Platforms and Social Media

Digital platforms provide convenient ways to connect directly with local families who need strollers.

6. Freecycle

Freecycle

Freecycle connects people who want to give and receive free items within their communities. To list your stroller on Freecycle, join your local group and create a detailed post that includes:

  • The stroller’s brand and model
  • Age and condition

7. Facebook Marketplace

Facebook_Marketplace

Facebook Marketplace offers a simple way to list your stroller for donation. To ensure a safe and successful donation:

  • Take clear photos of the stroller from multiple angles
  • Write a complete description of the item’s condition

8. Craigslist
Craigslist

Craigslist reaches many local families who are seeking baby equipment. When creating a Craigslist donation post:

  • Select the “free” section in your local area
  • Include detailed photos showing all features

National Organizations Accepting Stroller Donations

Several established national organizations make it simple to donate your stroller. Each offers different programs and processes to help your donation reach needy families.

9. Goodwill

Goodwill

Goodwill accepts stroller donations at their local donation centers nationwide.

Your contribution supports their mission of providing job training and employment services to people facing barriers to work.

To donate, bring your stroller to any Goodwill location during business hours. Staff will inspect it and provide you with a tax receipt.

Ensure your stroller is clean, has working brakes, and includes all essential parts.

10. Salvation Army

Salvation_Army

The Salvation Army operates donation centers nationwide, accepting strollers as part of their family support programs.

They distribute items directly to needy families or sell them in their stores to fund community services.

You can drop off your stroller at any Salvation Army location or schedule a free pickup in many areas. The organization asks that donated strollers meet current safety standards and have no recalls.

11. Baby2Baby

Baby2Baby

Baby2Baby provides children living in poverty with essential items they need.

The organization works with a network of community partners to get donations directly to families.

They accept new, gently used strollers under five years old and meet all safety requirements.

While Baby2Baby’s main warehouse is in Los Angeles, they partner with similar organizations nationwide. Contact them to find your area’s nearest donation point or partner organization.

Benefits of Donating Strollers

Environmental Impact

When you donate your stroller, you create positive change in multiple ways.

First, you make an important environmental choice. Each stroller kept out of landfills reduces waste and conserves resources.

By extending the life of existing strollers through donation, you help decrease the demand for new production, which cuts down on manufacturing emissions and packaging waste.

Community Support

Your donation directly strengthens your community. Many families face tough financial choices, and the cost of a new stroller can strain limited budgets.

A donated stroller allows parents to transport their little ones to doctor appointments, grocery stores, and parks.

This basic mobility tool helps families fully participate in daily life and access essential services.

Personal Satisfaction

Beyond the practical impact, giving your stroller to a needy family creates a meaningful connection. Your donation will help another parent care for their child.

Many donors find deep satisfaction in passing along a well-loved item that brought joy to their family.

This simple act of giving transforms an unused item into a valuable resource that helps another family thrive.

Key Considerations Before Donating

Before you donate your stroller, please take a few important steps to ensure it will serve another family well and meet the requirements of receiving organizations.

Start with a thorough inspection of your stroller’s condition. Check that:

  • All wheels turn smoothly and lock properly
  • The brakes work effectively

Safety standards for strollers change periodically, so verify your stroller meets current requirements:

  • Look up the model number on the manufacturer’s website
  • Check for any recalls through the Consumer Product Safety Commission

Wrapping it Up!

Your stroller can make a meaningful difference in another family’s life, and now you have multiple opportunities to make that connection.

From national organizations like Goodwill and the Salvation Army to local shelters and medical facilities, each option serves families with different needs and circumstances.

Online platforms provide direct ways to help parents in your community while ensuring your donation meets safety standards to help protect the next young passenger.

The most effective donation is one that matches your comfort level and schedule. Consider which method works best for you.

Take the first step today. Clean your stroller, check its safety features, and contact your organization.

Frequently Asked Questions

How Do You Get Rid of A Baby Stroller?

You can sell it through local marketplace apps, donate to charities if it’s in good condition, or list it for free on community groups.

When Can You Get Rid of Strollers?

You can responsibly dispose of your stroller when your child has outgrown it (typically around age 3-4) or if it shows significant wear and tear that affects its safety and functionality.

What Won’t Goodwill Take?

Goodwill doesn’t accept broken items, heavily soiled, recalled, or missing essential parts, or certain items like car seats past their expiration date, used cribs, and mattresses.

Where Can You Donate Used Baby Equipment?

Local women’s shelters, family resource centers, and organizations like Baby2Baby accept gently used baby equipment.

The moment when your baby’s perfect sleep schedule suddenly turns into chaos – yup, you’ve been there.

Sleep regression isn’t just a fancy term; it’s that maddening phase when your little one starts fighting naps, waking up at odd hours, and turning bedtime into an Olympic sport.

This guide will walk you through what sleep regression really is, why it happens (spoiler: it’s actually a good sign!), and most importantly, how to survive it without losing your mind.

Grab your coffee – let’s tackle this together.

What Is Separation Anxiety Sleep Regression?

Separation anxiety sleep regression is a developmental phase where a child’s increased awareness of parental absence disrupts their sleep.

Typically occurring between 8-24 months, it manifests as difficulty falling asleep, frequent night wakings, and resistance to naps.

This phase is linked to emotional growth and attachment but is temporary with proper support and reassurance.

Is Separation Anxiety Linked to Sleep Regression?

Yes, separation anxiety is closely linked to sleep regression, particularly during key developmental stages like 8-24 months.

As children grow, their emotional attachment to caregivers strengthens, leading to heightened awareness of separation. This can disrupt sleep, causing difficulty settling down, frequent night wakings, and clinginess at bedtime.

The overlap between separation anxiety and sleep regression is natural, as both stem from the child’s evolving emotional and cognitive development.

Supportive routines and reassurance can help navigate this challenging phase.

How Long Does Separation Anxiety Sleep Regression Last?

Typical Duration:

Separation anxiety sleep regression usually lasts 2-6 weeks, depending on the child.

Factors Affecting Length:

Developmental stage, temperament, and consistency in routines can influence how long it lasts.

Patience and Consistency:

Staying calm and maintaining predictable routines help ease the transition and shorten the phase.

Supportive Environment:

Providing reassurance and a sense of security can make the regression more manageable.

Common Symptoms To Look Out For

  • Difficulty Falling Asleep Without a Parent Present: Your child may insist on your presence at bedtime, refusing to settle down unless you’re nearby, which stems from their heightened need for reassurance.

  • Frequent Night Wakings: Separation anxiety can cause your child to wake up multiple times during the night, seeking comfort and struggling to fall back asleep on their own.

  • Crying or Clinging Behavior at Bedtime: At bedtime, your child might become overly emotional, crying or holding onto you tightly, as they fear being left alone.

  • Resistance to Naps or Changes in Routine: Daytime sleep may also be affected, with your child showing reluctance to nap or struggling with any adjustments in their usual schedule.

Ways to Manage Separation Anxiety Sleep Regression

ways to Manage Separation Anxiety Sleep Regression

1. Create a Consistent Bedtime Routine

A predictable bedtime routine helps your child feel secure and know what to expect.

Incorporate calming activities like reading a book, singing a lullaby, or a warm bath before bed.

Keep the routine short but comforting to avoid overstimulation.

Consistency is key to signaling that it’s time to sleep. Over time, this routine can reduce anxiety and encourage better sleep patterns.

2. Use Comfort Items

Introduce a special stuffed animal, blanket, or other familiar object to provide reassurance during the night.

These items can serve as a source of comfort when your child wakes up and doesn’t see you.

Familiar objects help your child feel safe and connected, even when you’re not immediately present. Encourage your child to associate these items with positive feelings and security.

3. Practice Gradual Separation

Help your child build independence by practicing short separations during the day.

Start with small intervals and gradually increase the time as they become more comfortable.

Use positive reinforcement, such as praising them when they stay calm.

This helps them understand that you’ll always return, reducing anxiety at bedtime. Over time, this confidence translates to improved sleep habits.

4. Offer Gentle Reassurance

When your child struggles to fall asleep or wakes during the night, respond calmly and reassuringly. Use a soft voice and gentle touch to comfort them without staying too long.

Avoid picking them up unless absolutely necessary to prevent creating a habit of dependency. Reassure them with phrases like, “I’m here, you’re safe,” to build their sense of security.

5. Implement Gentle Sleep Training Methods

Introduce gradual sleep training techniques, such as the chair method or fading, to help your child learn self-soothing skills.

Stay close initially and slowly increase the distance over time.

This approach ensures they feel supported while developing the ability to sleep independently.

Be patient and consistent, as progress may take time, but it’s an effective way to manage separation anxiety sleep regression.

When to Seek Professional Help?

When to Seek Professional Help_

Signs of a More Significant Issue:

If your child’s sleep regression lasts longer than a few weeks, is accompanied by extreme distress, or affects their daytime behavior significantly.

It may indicate an underlying problem such as a medical condition or heightened anxiety.

Consulting a Pediatrician or Sleep Consultant:

Seek professional advice to rule out medical issues like sleep apnea, ear infections, or other discomforts.

A sleep consultant can provide tailored strategies to address persistent separation anxiety and improve sleep.

Addressing Parental Stress and Exhaustion:

Managing sleep regression can be physically and emotionally taxing for parents.

Professional support can help identify practical solutions and ease the strain on caregivers, ensuring both the child and parents receive adequate rest and care.

Tips to Support Your Child During This Phase

  • Stick to a regular bedtime and nap schedule to help them feel secure and understand what to expect. Predictability reduces anxiety and promotes better sleep habits.

  • Brief, positive separations during the day can help your child build confidence. 

  • Set aside time for your child to engage in independent play. This helps build their sense of self-reliance, reducing the emotional impact of separation.

  • Use soothing tones and comforting phrases when your child struggles at bedtime.

  • Avoid showing frustration, as this can increase their anxiety.

  • During this phase, try to avoid big transitions like moving homes or starting daycare.

  • Minimizing stressors allows your child to focus on overcoming the sleep regression with less disruption.

Wrapping Up

Remember, every baby’s sleep journey is different – there’s no one-size-fits-all solution.

Sleep regression is simply a phase, albeit a challenging one. While these disruptions can feel endless, they typically resolve within a few weeks.

Trust your parental instincts, maintain consistent routines, and don’t hesitate to adjust strategies based on what works for your little one.

If you’re struggling, reach out to your pediatrician or a sleep consultant – there’s no shame in seeking help.

Your peaceful baby, sound asleep, gently sucking on their pacifier.

It’s an adorable sight that’s probably helped you through countless sleepless nights.

But lately, you’ve been wondering – when is the right time to say goodbye to this trusty sleep companion?

It’s not just about timing – it’s about navigating the emotional attachment, managing sleep routines, and handling those middle-of-the-night wakings.

If your little one is approaching toddlerhood or you’re just starting to think ahead.

Buckle up – let’s explore how to make this transition smoother for both you and your baby.

What Role Does A Pacifier Play?

What Role Does A Pacifier Play_

Pacifiers are effective in soothing babies by mimicking the natural sucking reflex, which provides comfort and reduces fussiness.

Parents often use pacifiers during sleep to help babies fall asleep faster and stay calm, as well as to lower the risk of SIDS in infants under six months.

However, prolonged use can lead to potential downsides, such as dental alignment issues, speech development delays, and dependence on the pacifier for sleep, making weaning off essential at the right time.

Signs It’s Time to Remove Your Baby’s Pacifier

Recognizing the signs to remove a pacifier early is crucial for your baby’s healthy development.

It allows you to address potential issues like dental alignment problems, speech delays, or dependency before they become more challenging to manage.

Acting promptly ensures a smoother transition and supports your child’s growth milestones effectively.

Sign 1: Your Baby Is Over Six Months Old

Pacifiers offer protective benefits, like reducing the risk of SIDS, during the first six months. However, after this age, the risks of overuse, such as dependency and delayed self-soothing, increase.

This makes it an ideal time to start gradually weaning your baby off the pacifier.

Sign 2: Teeth Are Beginning to Show

Once teeth begin to emerge, prolonged pacifier use can lead to alignment issues like an overbite or crossbite.

Pediatric dentists often recommend limiting pacifier use to prevent dental problems that may require correction later in life.

Sign 3: Your Baby Relies on the Pacifier to Sleep

If your baby wakes up multiple times during the night searching for their pacifier, it may have become a sleep dependency.

This reliance can disrupt both your baby’s and your own sleep patterns, leading to exhaustion. Gradually transitioning your baby away from the pacifier can promote healthier sleep habits.

This makes bedtime and nighttime wake-ups more manageable.

Sign 4: Speech Development Is Being Impacted

Constant use of a pacifier can limit opportunities for your baby to practice babbling or imitating sounds, which are essential for speech development.

Extended sucking may also restrict tongue and mouth movement, hindering the formation of early words.

By reducing pacifier use, you give your child more chances to explore vocal expressions and develop their language skills.

Sign 5: The Pacifier No Longer Provides Comfort

If your baby starts tossing the pacifier away or becomes upset even when it’s offered, it’s a clear sign that it’s no longer serving as a source of comfort.

This shift may happen as they grow older and find other ways to self-soothe, such as cuddling a soft blanket or hugging a favorite stuffed toy.

Recognizing this behavior can be a natural opportunity to phase out the pacifier and introduce new comforting routines.

How to Gently Remove the Pacifier?

Start with Daytime Weaning:

Gradually limit pacifier use during the day, reserving it only for naps or moments of high stress. This helps your baby adjust to spending longer periods without it.

Introduce Alternative Soothing Techniques:

Offer cuddles, lullabies, or gentle rocking as replacements for the pacifier. Engaging your baby in calming activities helps them find comfort in other ways.

Replace the Pacifier at Night:

Swap the pacifier with a comforting object like a stuffed toy, blanket, or soft pillow. This can provide similar security while breaking the pacifier dependency.

Establish a Consistent Bedtime Routine:

Create a predictable and soothing bedtime routine, such as a warm bath, storytime, or dim lighting. A structured routine helps signal to your baby that it’s time to sleep without needing the pacifier.

Handle Resistance with Patience:

Expect some resistance or tantrums during the transition. Stay calm, offer reassurance, and stick to your plan. Consistency and understanding will make the process smoother over time.

Gradual vs. Immediate Removal: Which Is Better?

Approach Pros Cons When to Choose
Gradual Weaning – Allows the baby time to adjust. – Process can take longer and requires patience. – Ideal for younger babies or when dependency is moderate.
  – Reduces emotional stress for the baby. – May cause confusion if not done consistently. – Suitable for parents who prefer a gentle, step-by-step approach.
Immediate Removal – Faster resolution of pacifier dependency. – Can cause temporary distress or tantrums. – Best for older toddlers who can understand simple explanations.
  – Eliminates the risk of inconsistencies during weaning. – May disrupt sleep temporarily during the adjustment period. – Suitable when dental or speech issues are urgent, or when gradual methods have not been effective.
Choosing the Best Approach – Consider your baby’s age, temperament, and dependency level. – Assess the potential impact on sleep and emotional well-being. – Seek advice from pediatricians for personalized guidance.
  – Evaluate your family’s routine and ability to handle temporary sleep disruptions. – Choose an approach that aligns with your parenting style and your baby’s developmental needs.  

Overcoming Common Challenges

  • Replace the pacifier with a comfort item like a stuffed toy or blanket to help your baby transition without feeling unsettled.
  • Incorporate soothing activities like reading, lullabies, or gentle rocking to create a calming environment that replaces the pacifier’s role in sleep.
  • Understand that the pacifier provides security. Offer extra cuddles and reassurance to help your baby feel supported during the transition.
  • Celebrate small milestones, like a night without the pacifier, with praise or small rewards to encourage progress.
  • Stick to your plan, even during setbacks. Consistency helps your baby adapt to the change and builds confidence in their ability to self-soothe.
  • Understand that it’s normal for babies to resist initially. Give them time to adjust and avoid rushing the process, keeping a flexible approach when needed.

To Conclude

Taking away your baby’s pacifier is a significant milestone that requires patience, understanding, and flexibility.

The key isn’t about finding the “perfect” moment – it’s about choosing a time when both you and your little one are ready for this change.

If you opt for the gradual approach or decide to go cold turkey, remember that some regression is normal. What matters most is staying consistent with your chosen method while remaining responsive to your baby’s needs.

Trust yourself – you know your child better than anyone. If one approach isn’t working, it’s perfectly okay to try something else.

This transition might take time, but with love and persistence, your little one will learn to sleep soundly without their pacifier.