When embarking on landscaping or construction projects, the selection of materials significantly impacts both the aesthetic outcome and the structural integrity of the finished project. Outcropping stones, with their natural beauty and durability, are a popular choice among designers and builders aiming to create harmonious and enduring outdoor spaces.
The cost of these outcropping stone prices can vary widely depending on a multitude of factors, making it crucial for purchasers to understand how to navigate these variables effectively. This article aims to serve as a practical guide for those looking to compare outcropping stone prices across various suppliers.
By delving into the nuances of stone pricing, the discussion will equip readers with the knowledge needed to make informed decisions that balance cost with quality, ensuring value in their investment.
Aesthetic and Practical Uses of Outcropping Stones in Your Yard
Outcropping stones, known for their rugged and natural appearance, are an essential element in various landscaping and construction projects. These stones, including popular types like limestone, are often chosen for their ability to blend seamlessly with the natural environment.
Limestone, in particular, is favored for its durability and attractive, earthy tones. Outcropping stones are not just functional; they are also aesthetically pleasing, making them ideal for creating visually appealing landscapes.
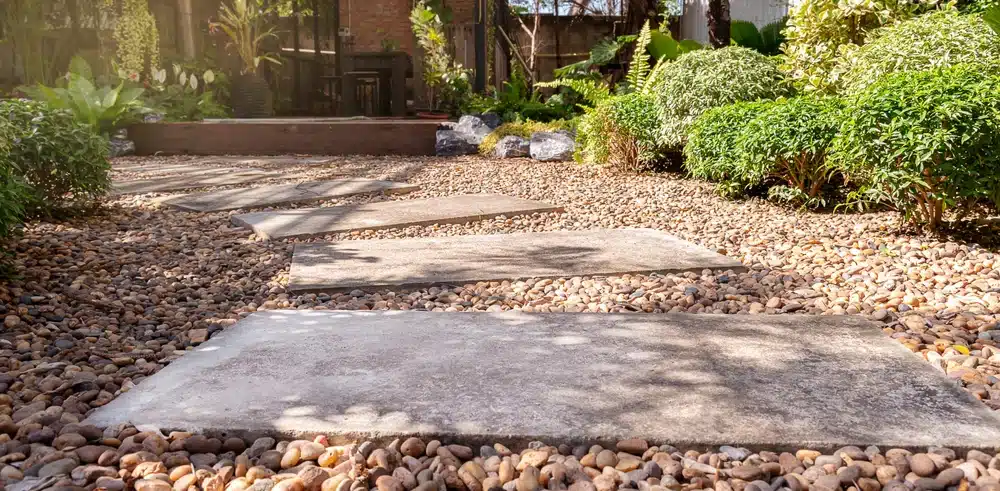
In landscaping, outcropping stones are used to craft natural stone stepping stones that guide pathways through gardens and outdoor spaces. These stepping stones add a rustic charm and provide practical benefits, such as reducing soil erosion and creating stable walkways.
Another prominent use of outcropping stones is in constructing limestone fireplaces, which serve as focal points in outdoor living areas. These fireplaces offer warmth and ambiance, enhancing the overall outdoor experience.
The versatility of outcropping stones extends to various design contexts, from retaining walls to decorative garden features. Their natural look complements a wide range of styles, from contemporary to traditional, making them a flexible choice for designers and builders.
Understanding the different types and uses of outcropping stones is crucial for making informed decisions, especially when considering factors like outcropping stone prices, which can vary based on the stone’s characteristics and intended use.
How Material Type and Sourcing Affect Outcropping Stone Prices

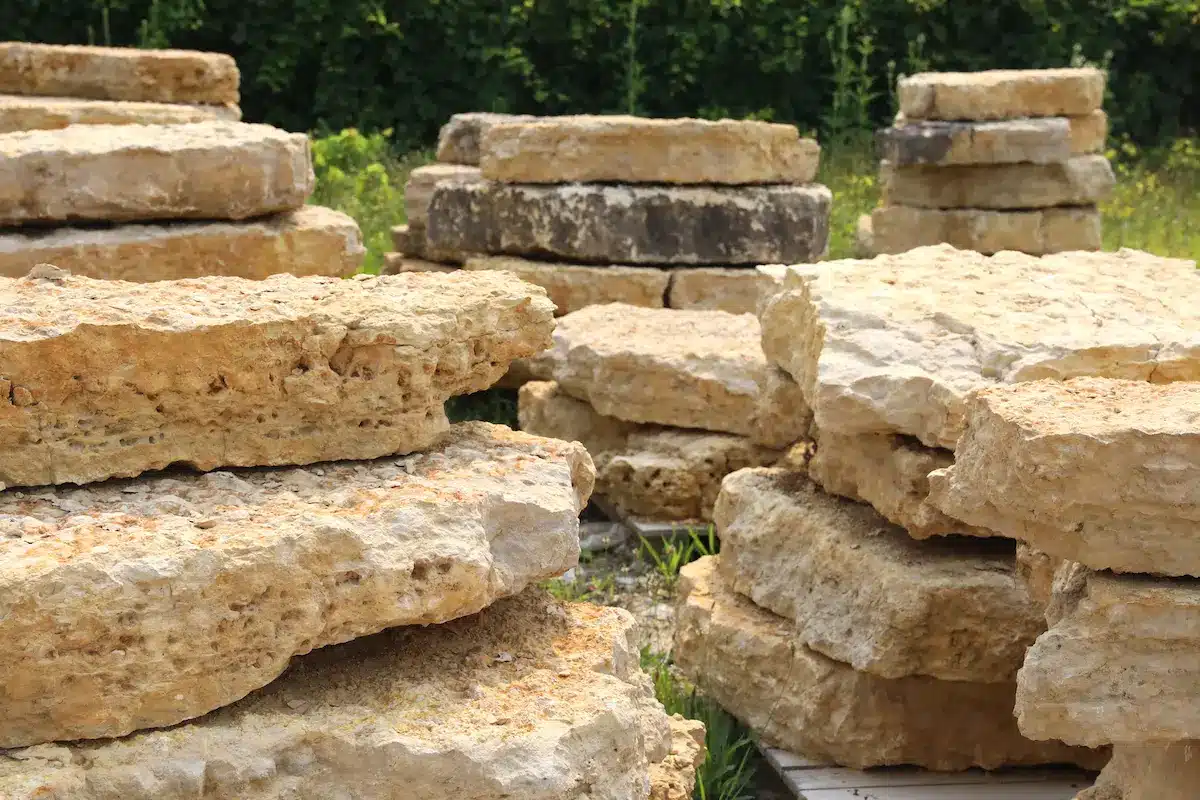
The pricing of outcropping stones is influenced by a variety of factors, each contributing to the overall cost of these essential landscaping materials. One of the primary determinants is the type of material used. Stones such as limestone and granite each have distinct characteristics that impact their price.
Limestone, for instance, is valued for its durability and consistent texture, whereas granite is prized for its strength and unique color variations. The size and thickness of the stones also play a significant role in pricing, as larger and thicker stones require more effort to quarry, shape, and transport.
Sourcing and transportation are additional factors that can significantly affect outcropping stone prices. Stones that are locally sourced tend to be less expensive due to reduced transportation costs. In contrast, stones imported from distant locations can incur higher costs because of the expenses associated with long-distance shipping and handling. The method of extraction and the environmental considerations during the quarrying process can further influence the overall cost.
Coping stones offer a specific example where customization and finish have a marked effect on price. These stones are often used to cap the tops of walls or edges of pools, requiring precise cutting and finishing to achieve the desired aesthetic and functional outcome.
Customization options, such as unique shapes or polished finishes, can elevate the cost due to the additional labor and expertise involved. Understanding these various factors helps in making informed decisions when comparing outcropping stone prices across different suppliers.
Beyond the Price Tag: Understanding the True Cost of Outcropping Stones
In addition to the basic cost of the stones, it is crucial to consider additional expenses that may be associated with the purchase. These can include delivery charges, especially for stones sourced from distant locations, as well as any fees related to customization or special finishing processes. Understanding these potential extra costs upfront helps in creating a more accurate budget and prevents unexpected financial surprises.
Comparing outcropping stone prices effectively requires a strategic approach that balances cost with quality. One of the fundamental strategies is to thoroughly understand the relationship between price and the intrinsic qualities of the stones.
This involves assessing factors such as the stone’s origin, durability, and the reputation of the supplier. Potential buyers should inquire about the geological source of the stones, as this can influence both the aesthetic appeal and the structural integrity of the material.
Questions regarding the durability of the stones are essential, especially for applications like natural stone stepping stones, which need to withstand significant foot traffic and environmental conditions.
Why Supplier Reputation Matters When Buying Outcropping Stones
Leveraging supplier expertise is essential for understanding the full value offered by outcropping stones, extending beyond just the initial price tag. Suppliers with extensive knowledge in the field can provide invaluable insights into the best types of stones for specific projects, whether it involves creating elegant natural stone stepping stones or robust coping stones.
Engaging with these experts allows potential buyers to gain a deeper understanding of the materials, including their durability, maintenance requirements, and aesthetic qualities.
Warranties and customer support are critical components that influence the overall cost-effectiveness of a purchase. Reliable suppliers often offer warranties that protect against defects and guarantee the longevity of the stones.
This assurance can significantly impact the long-term value of the investment, providing peace of mind that the materials will perform as expected. Additionally, strong customer support can facilitate the buying process, offering guidance on installation, maintenance, and any potential issues that may arise post-purchase.
The reputation of the supplier also plays a crucial role in the decision-making process. Established suppliers with positive feedback and a history of satisfied customers are more likely to provide quality products and reliable service. Engaging with suppliers who offer detailed product information helps in making informed decisions.
Knowing the specific properties of the stones, such as their suitability for use as natural stone stepping stones or their resistance to weathering, ensures that the chosen materials will meet the project’s needs and withstand the test of time. By thoroughly evaluating these aspects, buyers can ensure they are not only getting the best price but also the best overall value for their investment.
Conclusion
A thorough comparison when purchasing outcropping stones ensures both cost and quality are considered. Beyond the price, factors like durability, aesthetics, and additional expenses must be understood. Choosing the right supplier, one who offers detailed product information, reliable support, and warranties, enhances the purchase’s value.
The supplier’s reputation is crucial, built on positive feedback and quality service. By applying these strategies, individuals can ensure their investment in outcropping stones meets aesthetic and functional expectations, leading to successful and lasting landscaping projects.


 Hiring a professional company can make the stress-free journey less daunting yet selecting the appropriate one can be a challenging endeavor. There are various factors to take into account and it’s essential that you do your research to find a dependable service. Begin your search by consulting friends and family.