Printmaking is a satisfying, fun way to flex your artistic chops that yields some very cool results. For those readers unfamiliar with printmaking, it is an age-old process of making art that involves transferring designs from an engraved plate or block (the “matrix”) onto a surface.
Some people make the matrix from wood, which is the traditional way of printmaking, while others use metal, glass, polymers, or linoleum.
They then apply ink to the matrix and press it to a surface, which can be paper, fabric, wood, canvas… you name it. And voila! You have a stunning piece of self-made art.
This article aims to familiarize up-and-coming artists with printmaking by offering a basic guide. If you want to try this accessible process, learn the basics below.
Understanding the Different Types of Printmaking
First, understand that there are different types of printmaking you can try. To get you started, here’s a “101” overview of the most popular methods.
- Relief Printing: This technique involves carving away parts of a block or surface, leaving the raised areas to receive ink and create the print; it’s probably the simplest method of the bunch, and popular for beginners.
- Intaglio: In intaglio, artists etch or engrave lines into a metal plate, filling the grooves with ink, which transfers the design onto paper when pressed.
- Lithography: This method uses a flat surface treated to repel ink in some areas and attract it in others, ideal for detailed and shaded images.
- Screen Printing: This stencil-based technique pushes ink through a mesh screen to create bold, colourful prints on various materials, often used for posters and textiles.
In the step-by-step guide below, we will discuss relief printing. However, if you’re keen to try the other options, we recommend this video. You can also speak to the knowledgeable staff at an art supply store for more info.
Gathering Essential Tools and Materials
Before launching into a proper step-by-step guide, we need to make sure you have the right tools and materials.
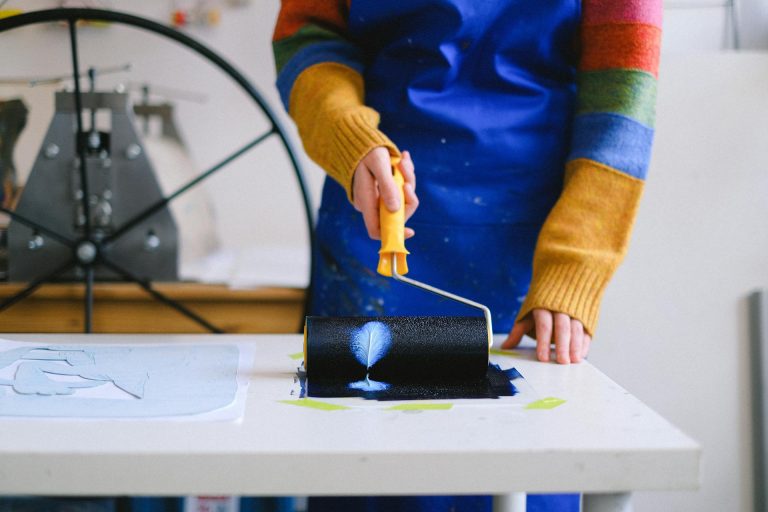
Basic supplies for printmaking include carving tools, ink, a brayer (basically a paint roller), a matrix, and a surface like paper or fabric.
You can easily find these tools at a well-stocked physical or online art supply store, like Above Ground Art Supplies. If in doubt, ask one of the salespeople to point you in the right direction.
A Step-by-Step Guide to a Simple Printmaking Project
Now we’re on to the fun part! Follow these steps to start honing your skills.
Step 1: Choose a Design
Consider choosing simple ideas to start; the first couple of designs should help you gain confidence in the practice. Simple ideas can include shapes, patterns or basic illustrations. That said, if you’re keen to dive into the deep end, you can be as complicated as you want.
Step 2: Prepare Your Printing Surface
Some beginners skip straight to wood, but most prefer to work with linoleum or rubber in their first prints; it’s accessible, easy to work with, and nets a lovely result. Use your carving tools to create your pattern. Some people enjoy the freedom of freehand. But most work with an overlaid stencil sheet, carefully removing the areas that won’t be inked (thereby creating a raised surface for printing). Start with light cuts and gradually deepen them to avoid mistakes and create clean lines.
Step 3: Inking and Printing
To ink your design, roll a thin layer of ink onto the carved surface using a brayer, ensuring even coverage without excess ink (which can lead to smudging). Once inked, carefully place your paper over the block and press firmly, either by hand or with a baren (basically a circular tamp), to transfer the image. Gently lift the paper to reveal your print, and repeat as desired for additional copies.
Step 4: Admire and Refine Your Print
Once you’ve lifted the paper, take a moment to admire your first print and notice any areas that may need adjustments, like uneven ink coverage or missed details. If needed, make small refinements by carving more or adding ink, then try printing again to improve the result.
This stage is all about experimenting and enjoying the process, so don’t hesitate to test different ink levels or pressures to find your ideal print style.
From here, you’re embarking on a fun journey towards mastery. Experiment with various colours, engraving tools, and techniques.
You can even try some of the other printmaking techniques listed above. Feel free to hang your artwork around the house for visitors to admire, or give them away as cards attached to holiday gifts.

