")
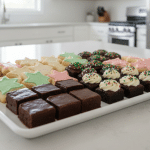
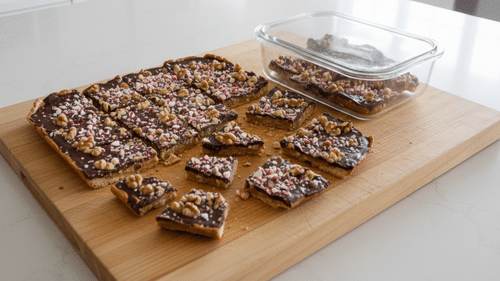
Christmas crack is one of those treats that looks fancy but is secretly very easy to make. It’s salty, sweet, crunchy, and chocolatey all at the same time, exactly the kind of snack that disappears fast from the holiday plate.
With a simple base of crackers, buttery toffee, and melted chocolate on top, it feels special without taking hours in the kitchen.
You don’t need baking skills or lots of tools to make it. Most of the ingredients are probably already in your pantry, and the steps are simple enough for kids to help with.
You can also add your own twist with nuts, sprinkles, or different types of chocolate. Christmas crack is perfect for gifting, sharing at parties, or keeping in a tin for cozy movie nights by the tree.
Why Is Christmas Crack Suddenly Everywhere Again?
Christmas crack has been around for years, but it’s popping up again because it fits how people like to bake now: fast, fun, and almost foolproof.
It uses simple pantry ingredients, doesn’t need fancy tools, and comes together in just a few steps. With busy holiday schedules, a treat that feels special but doesn’t take all day is very easy to love.
It’s also perfect for photos and videos, which is why it keeps trending on social media. The bubbly toffee, melted chocolate, and topping “crack” apart in a way that makes people want to share it online.
Every year, new versions appear: peppermint, pretzel, dark chocolate, even gluten-free twists, so it never feels old or boring.
Now, a new generation is discovering it, passing the recipe between friends, and adding their own toppings. That mix of nostalgia, ease, and endless flavor ideas is exactly why Christmas crack is having a big comeback.
The Secret Behind Perfect Christmas Crack
A perfect batch of Christmas crack has that crisp, glassy snap on the bottom and a smooth, rich chocolate layer on top.
Each bite should feel light but still satisfyingly crunchy, with the cracker base holding everything together without going soggy or too hard.
The magic starts with the toffee. When the butter and sugar bubble together, they should turn a deep golden color and thicken slightly. This stage gives you that classic candy texture firm enough to crack, but not so hard that it hurts your teeth.
Poured hot over the crackers and baked just until it’s bubbling all over, the toffee seeps into every gap and fuses the layers into one solid sheet.
On top, the chocolate should melt gently from the heat of the toffee, then spread into a smooth, even layer.
When the toffee is cooked just right, the chocolate is silky and set, and the crackers stay crisp, you get true Christmas crack: salty, sweet, crunchy, and completely addictive in every bite.
Ingredients You’ll NeedBase
Chocolate Layer
Optional Flavor & Texture Boosters (choose any)
Toppings & Finishers (mix & match)
|
Recipe Notes
| Information | Details |
|---|---|
| Prep Time | 15 minutes |
| Cook Time | 10 minutes |
| Cooling Time | 30 minutes |
| Total Time | 55 minutes |
| Method | Stovetop + Baking + Chilling |
| Yield | 1 sheet pan (about 24–30 pieces) |
| Cuisine | American, Holiday Treat, Christmas Candy |
How to Make Christmas Crack
Christmas crack looks impressive, but the process is very simple. You build it in layers: first, crackers; then, hot toffee; then, melted chocolate; and toppings.
The key is to work in order and not rush the cooling time, so everything sets into that perfect, crackly sheet.
1. Prep Your Pan and Crackers
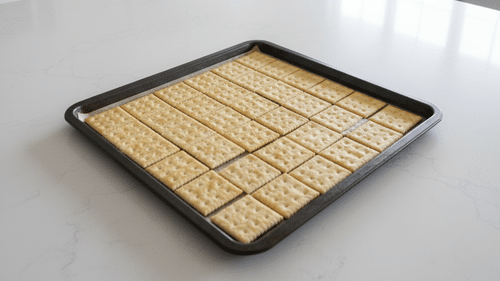
Line a rimmed baking sheet (about 10×15 inches) with foil or parchment paper, making sure it goes up the sides a little so you can lift everything out later. Lightly grease the foil or paper so the toffee doesn’t stick.
Arrange the saltine crackers in a single, tight layer across the entire pan, with no large gaps. This cracker “floor” is what gives the Christmas crack its structure and salty crunch.
2. Make the Toffee Base
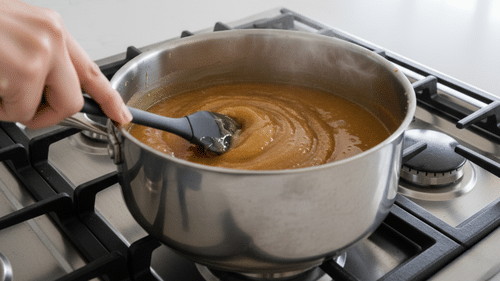
In a medium saucepan, add the butter and brown sugar. Place it over medium heat and stir gently as the butter melts and mixes with the sugar. Once it turns smooth and starts to bubble, stop stirring so it can cook evenly.
Let it boil for about 3–4 minutes, until it thickens slightly and looks glossy and caramel-like. Take it off the heat and stir in the vanilla and a small pinch of salt to deepen the flavor.
3. Pour and Spread the Toffee
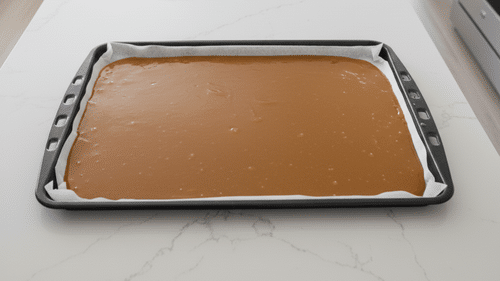
Carefully pour the hot toffee over the cracker layer. It will be very hot, so work slowly and safely. Use a spatula to spread it from edge to edge, trying to cover every cracker as evenly as you can.
Don’t worry if a few corners peek through; the toffee will move a bit as it bakes. This step helps the toffee soak into and around the crackers, so they all fuse together later.
4. Bake until Bubbly
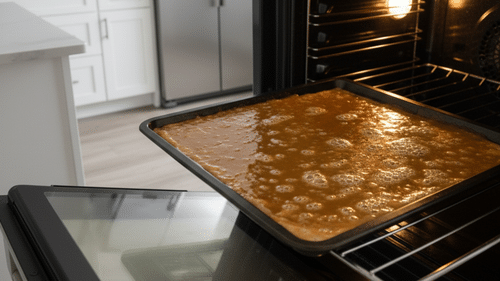
Place the pan in a preheated oven at 350°F (175°C). Bake for about 8–10 minutes, or until the toffee is bubbling all over the surface. Keep an eye on it near the end so it doesn’t burn.
When you see steady bubbles across the whole pan, and the color is a rich golden brown, carefully remove the pan from the oven and set it on a heat-safe surface.
5. Add and Melt the Chocolate
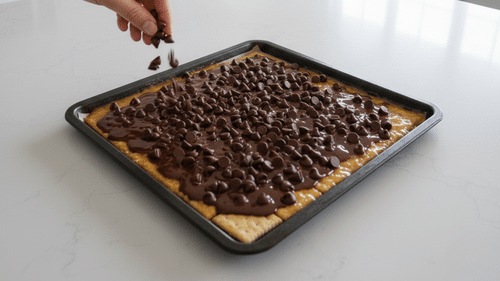
Right away, while the toffee is still very hot, sprinkle the chocolate chips evenly over the toffee. Try to cover as much of the surface as possible. Let them sit undisturbed for 1–2 minutes so the heat from the toffee can melt the chocolate.
When the chips look soft and shiny, use a clean spatula to gently spread the chocolate into a smooth, even layer from corner to corner.
6. Sprinkle on Your Toppings
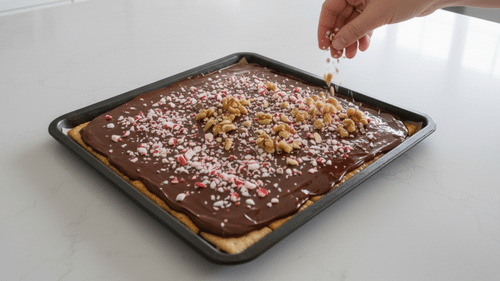
While the chocolate is still warm and soft, add your toppings. You can use chopped nuts, crushed candy canes, sprinkles, pretzels, toffee bits, or a little flaky sea salt.
Sprinkle them evenly over the chocolate so each piece gets a bit of crunch or color. Press very lightly with your hand or the back of the spatula so the toppings stick without pushing them deep into the chocolate.
7. Let It Cool and Chill until Firm
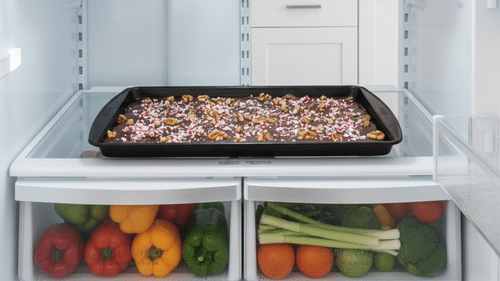
First, allow the pan to cool at room temperature for about 10–15 minutes. This takes some of the heat out and helps the toffee and chocolate start to set.
Then move the pan to the fridge or freezer and chill until everything is completely firm, usually 20–30 minutes. This chilling time is what gives you those clean “cracks” and helps the layers hold together.
8. Crack, Serve, and Store
Once the chocolate is firm to the touch, lift the whole sheet of candy out of the pan using the foil or parchment edges. Place it on a cutting board and break it into uneven pieces with your hands, or use a sharp knife for more even shapes.
Store the pieces in an airtight container in the fridge or a cool place to keep them crisp. Now you’ve got salty-sweet, crunchy Christmas crack ready for gifting, snacking, and sharing.
Nutrition Facts
| Nutrient | Per Piece (about 25g) |
|---|---|
| Calories | 130 kcal |
| Protein | 1 g |
| Fat | 7 g |
| Saturated Fat | 4 g |
| Carbohydrates | 16 g |
| Sugar | 13 g |
| Fiber | 0–1 g |
| Sodium | 85 mg |
Disclaimer: These values are approximate and can change depending on the type of crackers, butter, chocolate, and toppings you use (such as nuts, candy, or extra salt), as well as the exact size of each piece.
Christmas Crack Variations You’ll Love
Once you’ve nailed the basic Christmas crack, it’s so easy to play with flavors.
A few simple swaps or toppings can turn one recipe into many different treats. Here are some fun twists to try:
1. Salted Caramel Pecan Christmas Crack
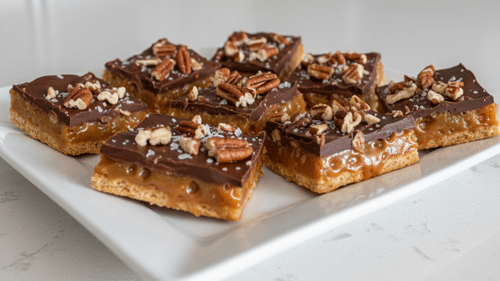
Sprinkle chopped pecans over the chocolate, then finish with a light dusting of flaky sea salt. The mix of caramel-like toffee, nuts, and salt tastes like a grown-up candy bar.
Ingredients: Base recipe + ½–1 cup chopped pecans + ½–1 tsp flaky sea salt.
2. White Chocolate Cranberry Christmas Crack

Use half dark or milk chocolate and half white chocolate, swirling them together on top. Add dried cranberries and a few chopped pistachios. The red and green colors look beautiful and feel very holiday-ready.
Ingredients: Base recipe + 1 cup white chocolate chips + ½ cup dried cranberries + ¼ cup chopped pistachios.
3. S’mores Christmas Crack
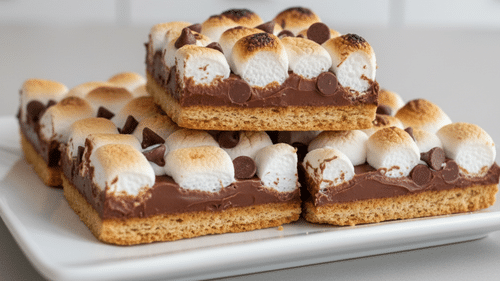
Use graham crackers instead of saltines for the base. After spreading the chocolate, top with mini marshmallows and a few extra chocolate chips. Broil for a very brief time (or use a torch) to toast the marshmallows, then chill.
Ingredients: Graham crackers instead of saltines + base toffee + 2 cups milk chocolate chips + 1–1½ cups mini marshmallows.
4. Dark Chocolate Sea Salt Christmas Crack
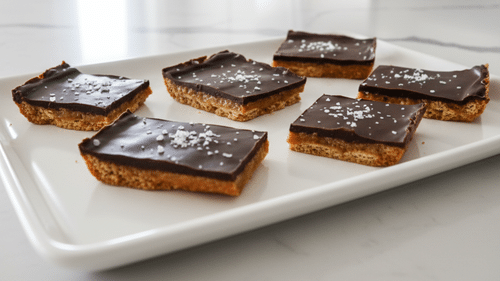
Use dark chocolate chips for a deeper, less sweet flavor. Finish with a little flaky sea salt on top. It’s simple, rich, and perfect for people who don’t like overly sugary desserts.
Ingredients: Base recipe + 2 cups dark chocolate chips + ½–1 tsp flaky sea salt on top.
5. Peanut Butter Swirl Christmas Crack

After spreading the melted chocolate, drizzle warmed peanut butter on top and swirl it in with a knife or toothpick. Chill as usual. You get a peanut butter cup vibe in crunchy, crackly form.
Ingredients: Base recipe + 2 cups chocolate chips + ¼–⅓ cup warmed peanut butter for drizzling and swirling.
What to Serve With Christmas Crack
Christmas crack is rich, sweet, and crunchy, so it goes really well with simple drinks and light snacks that balance all that flavor. Here are some tasty ways to serve it and make your treat plate feel extra special.
- Hot chocolate: The creamy, warm drink pairs perfectly with the salty-sweet crunch of Christmas crack.
- Coffee or latte: A hot cup of coffee cuts through the sweetness, making each bite feel even richer.
- Tea (black, or herbal): A cozy mug of tea keeps things light while still feeling warm and festive.
- Vanilla ice cream: Serve a small scoop with a few chunks of Christmas crack on the side for a fun “ice cream sundae” twist.
- Fresh fruit: Strawberries, orange slices, or apple wedges add a fresh, juicy break from all the chocolate and toffee.
- Salty snacks: Bowls of pretzels, nuts, or popcorn help balance the sweetness and make a great snack mix on a party table.
- Whipped cream: A small dollop on the side feels soft and airy next to the crunchy candy pieces.
Baking & Storage Tips for Perfect Results
Making Christmas crack is simple, but a few smart steps will help you get that shiny, crunchy, perfect batch every time. These little details protect the texture, flavor, and freshness.
- Line your pan well: Always line your baking sheet with foil or parchment, letting it hang over the edges.
- Lightly grease it: This keeps the toffee from sticking and makes it easy to lift the whole slab out and crack it later.
- Watch the toffee closely: When boiling the butter and brown sugar, let it bubble until it turns a rich golden color and thickens. Stir gently and don’t walk away.
- Bake until evenly bubbly: Once you pour the toffee over the crackers and bake, look for steady bubbles across the entire surface. That’s a sign the toffee has set into the crackers. If only the edges bubble, give it another minute or two.
- Cool, then chill completely: Let the pan cool to room temperature, then transfer it to the fridge or freezer. The Christmas crack needs to be fully cold and firm before you break it.
- Storage: Store Christmas crack in an airtight container in the fridge for up to 1 week. For longer storage, freeze it for up to 2 months. Keep it away from warm spots or humidity so it stays crisp, not sticky.
Wrapping Up
Christmas crack is one of those recipes that quickly becomes a tradition. It doesn’t need fancy tools, long prep, or perfect baking skills, just simple steps and a bit of patience while it cools. Once you’ve made it once, the process feels easy and almost automatic.
It also fits into almost any holiday moment. You can pack it into tins for gifts, add it to dessert boards, tuck a few pieces into lunchboxes, or keep a secret stash for movie nights.
If you’re looking for a crowd-pleasing treat that feels special but doesn’t keep you stuck in the kitchen all day, Christmas crack is that recipe.
A simple pan of crackers, toffee, and chocolate turns into something people remember and ask for again and again.
Frequently Asked Questions
Can I make Christmas crack ahead of time?
Yes. Christmas crack is great for making ahead because it keeps well. You can make it a few days before you need it and store it in an airtight container in the fridge. It will stay crunchy and fresh for about a week.
Can I make a dairy-free version?
Yes. Use a dairy-free butter alternative and dairy-free chocolate chips. Check the labels to be sure. The texture will be slightly different, but the sweet, crackly effect will still work.
What can I use instead of saltine crackers?
You can swap saltines for graham crackers, pretzels, Ritz crackers, or even a gluten-free cracker. Just remember that each one changes the flavor a bit: Graham crackers are sweeter, pretzels are saltier, and buttery crackers are richer.