These days, making videos is easier than ever, and that means there’s a huge demand for good video editing software. Whether you’re a total pro or just starting out, finding the right desktop editor can really level up your videos.
But with so many options out there, it can feel like diving into a bottomless ocean of choices. You’ve got software for hardcore filmmakers with all the bells and whistles, and then there are simpler tools for folks who just want to have fun. Each one has its own strengths and weaknesses. In this guide, we’ll help you figure out what to look for when you’re picking the perfect video editor for you. Let’s dive in!
User Interface
Choosing video editing software can be overwhelming, especially for beginners. That’s why having a user-friendly interface is super important. You want something with clear icons and tools that are easy to find.
The layout should make sense right off the bat, so you can jump into editing without feeling lost. It’s also great if the software lets you customize things like where tools are placed and even lets you set up shortcuts for tasks you do often. That way, you can make the software work just the way you like it, speeding up your editing process.
Available Features
Video editing software comes in all shapes and sizes, with a wide range of features from the basics to some seriously advanced stuff like color grading and 3D effects. So, before you settle on one, think about what you really need for your projects and what you can’t live without.
Some software packs everything and the kitchen sink, while others specialize in certain areas like cool effects or tweaking audio. It’s all about finding the right balance for what you want to create.
Export Options
Consider the export options offered by the video editor, including the ability to export your projects in different formats and resolutions suitable for sharing on various platforms.
Look for software that provides customizable export settings, allowing you to adjust parameters such as bitrate, codec, and aspect ratio to achieve the best possible quality for your final output.
Additionally, check if the software supports exporting to popular video hosting platforms like YouTube, Vimeo, and social media networks.
Cost and Licensing
Evaluate the cost of the video editing software and determine whether it fits within your budget. Some software offers one-time purchase options, while others follow a subscription-based model with monthly or annual fees.
Consider the pricing plans and choose one that provides the best value for your money, taking into account factors such as the features offered, customer support, and frequency of updates. Keep in mind any additional costs, such as plugins or add-ons, that may be required to access certain features or functionalities.
Support and Updates
Look for video editing software that offers reliable customer support and regular updates. Responsive customer service can be invaluable if you encounter any technical issues or have questions about using the software.
Additionally, frequent updates ensure that you have access to the latest features, improvements, and compatibility enhancements, keeping your editing software up to date with the latest industry standards and trends.
Compatibility with Other Tools
Consider the compatibility of the video editing software with other tools and software applications that you use in your video production workflow.
This includes cameras, microphones, external storage devices, and third-party plugins or effects. Seamless integration between your editing software and other tools can streamline your workflow and save you time and effort by allowing you to work with your preferred equipment and accessories without encountering compatibility issues or workflow disruptions.
CapCut Desktop Video Editor: The Best Choice
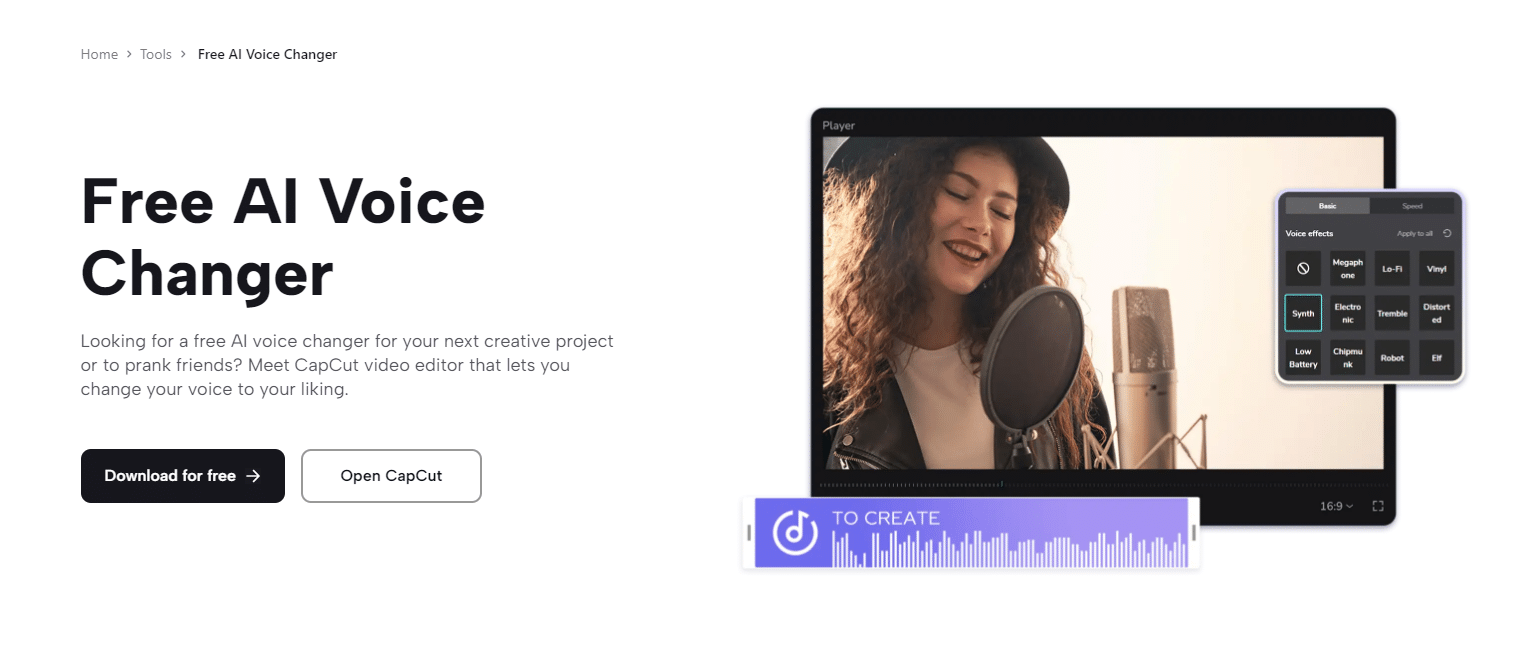
CapCut stands out as a top choice for both novice and experienced editors alike. Renowned for its user-friendly interface and extensive feature set, CapCut offers a seamless editing experience with a voice changer.
With intuitive tools for trimming, cutting, merging, and adding effects, CapCut empowers users. CapCut’s compatibility with various file formats and resolutions, along with customizable export options, makes it suitable for sharing videos across different platforms.
Steps to Use CapCut Desktop Video Editor
Here are the steps to edit a video with the CapCut desktop video editor:
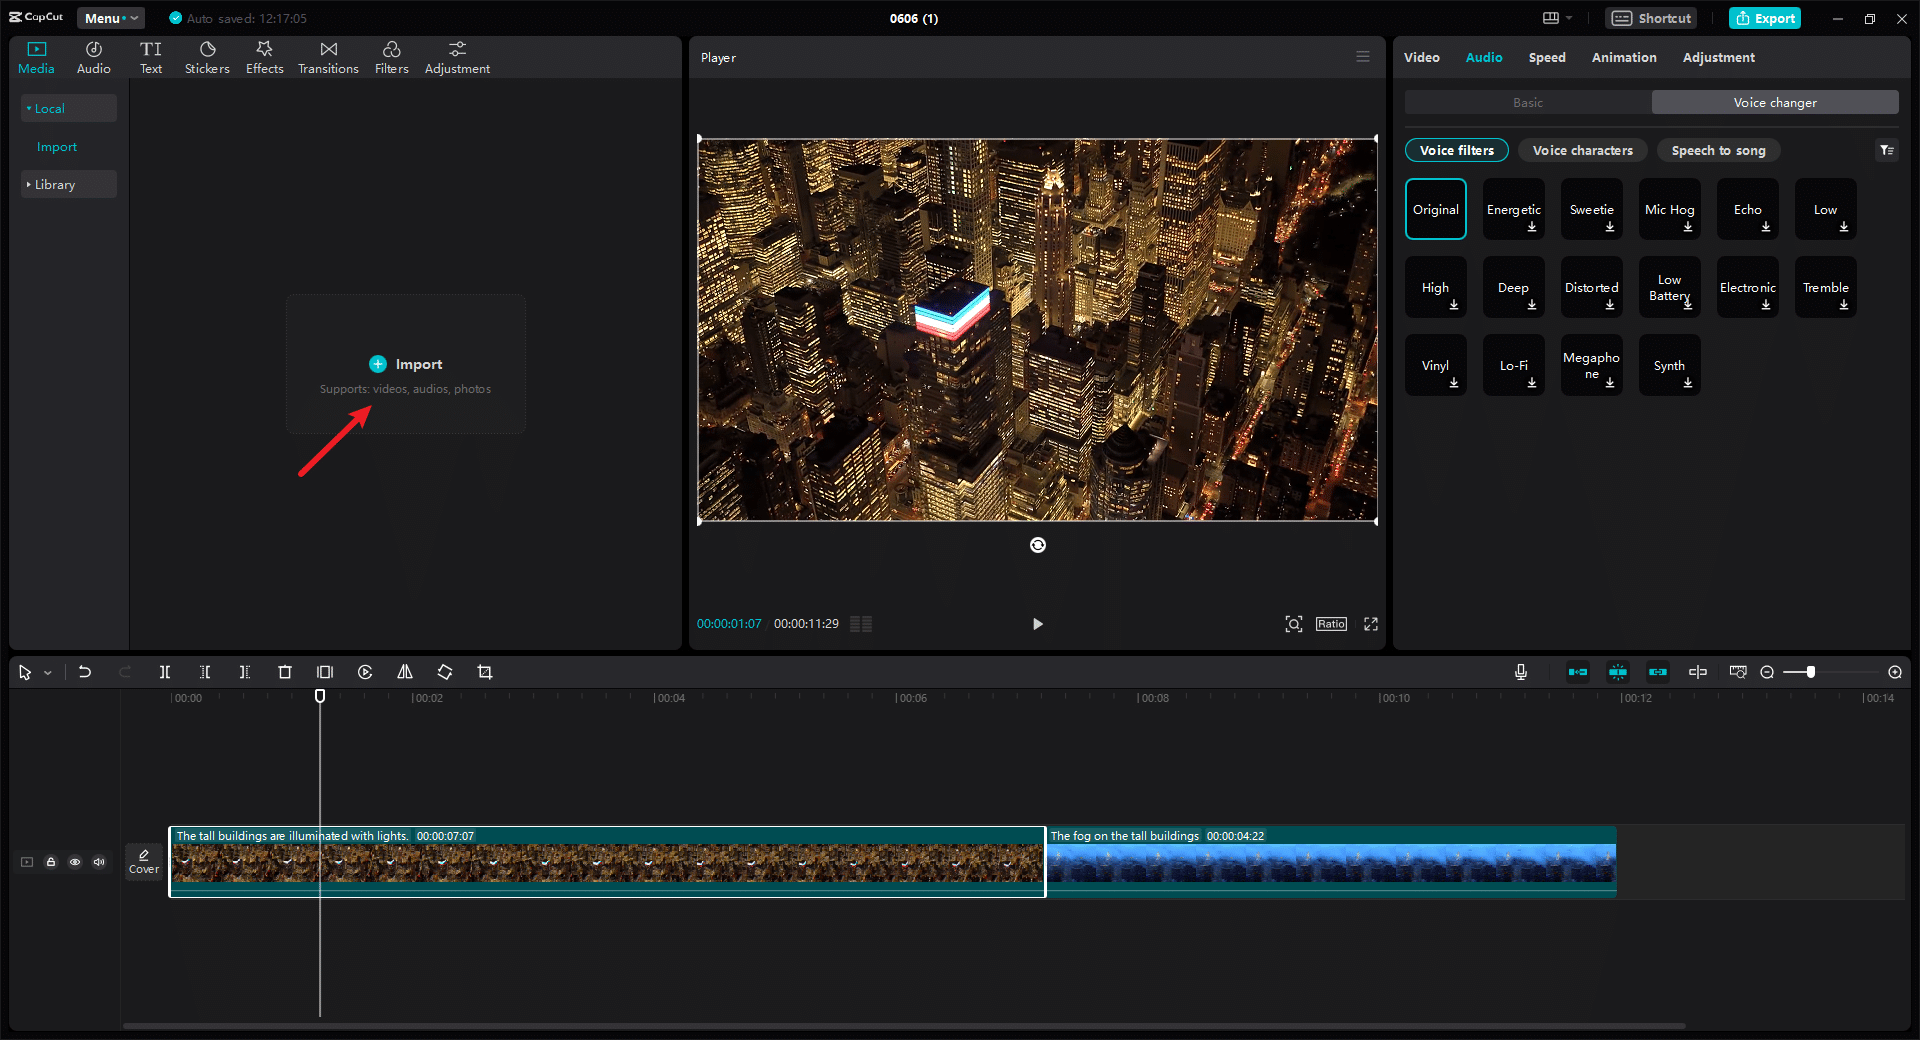
Step 1: Import the Video
To start in CapCut Desktop, import your materials by either dragging and dropping files or accessing CapCut’s library. Quickly add videos, and images, or choose from templates and stock music for instant creativity.
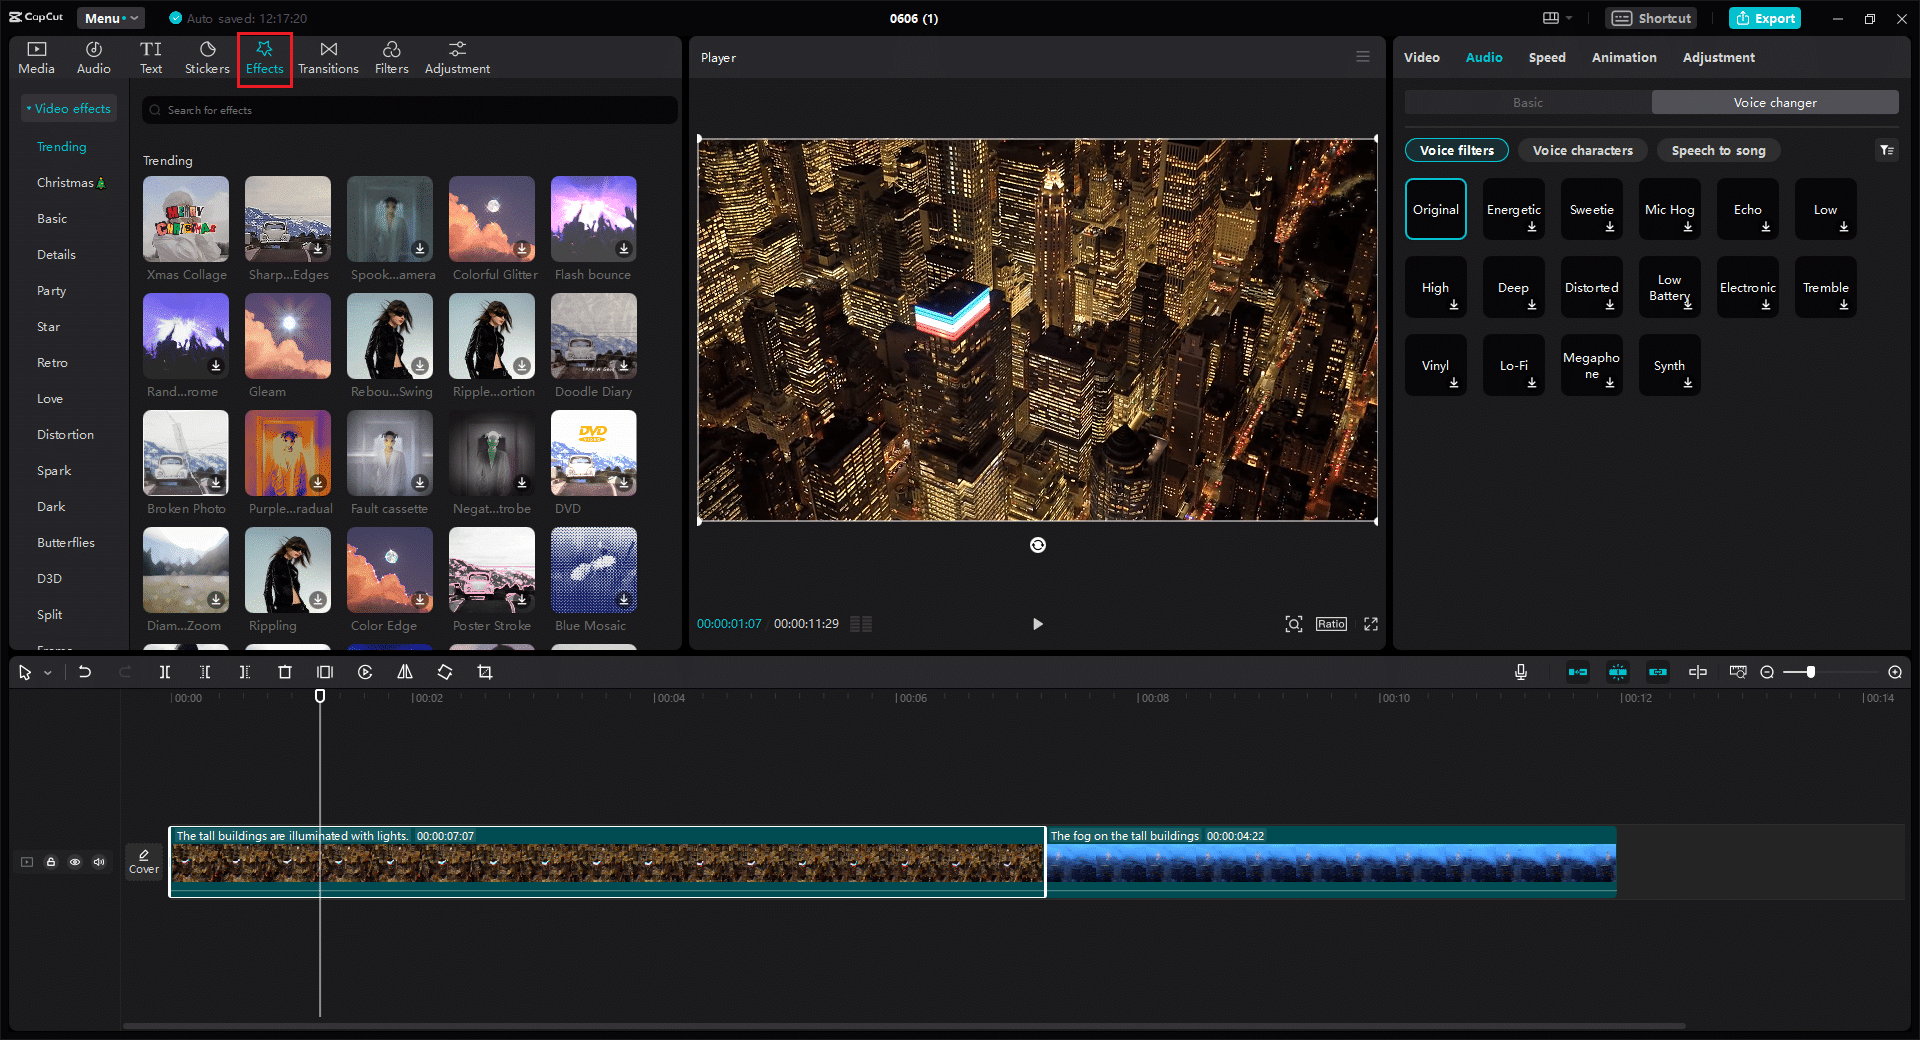
Step 2: Edit Your Video
Craft your project with ease using CapCut’s topic-related features and intuitive editing tools. You can with basic, advanced, and AI-driven tools. Its video effects also improve your video. You can also explore overlays, stickers, and fonts from CapCut’s rich media resources for added flair.
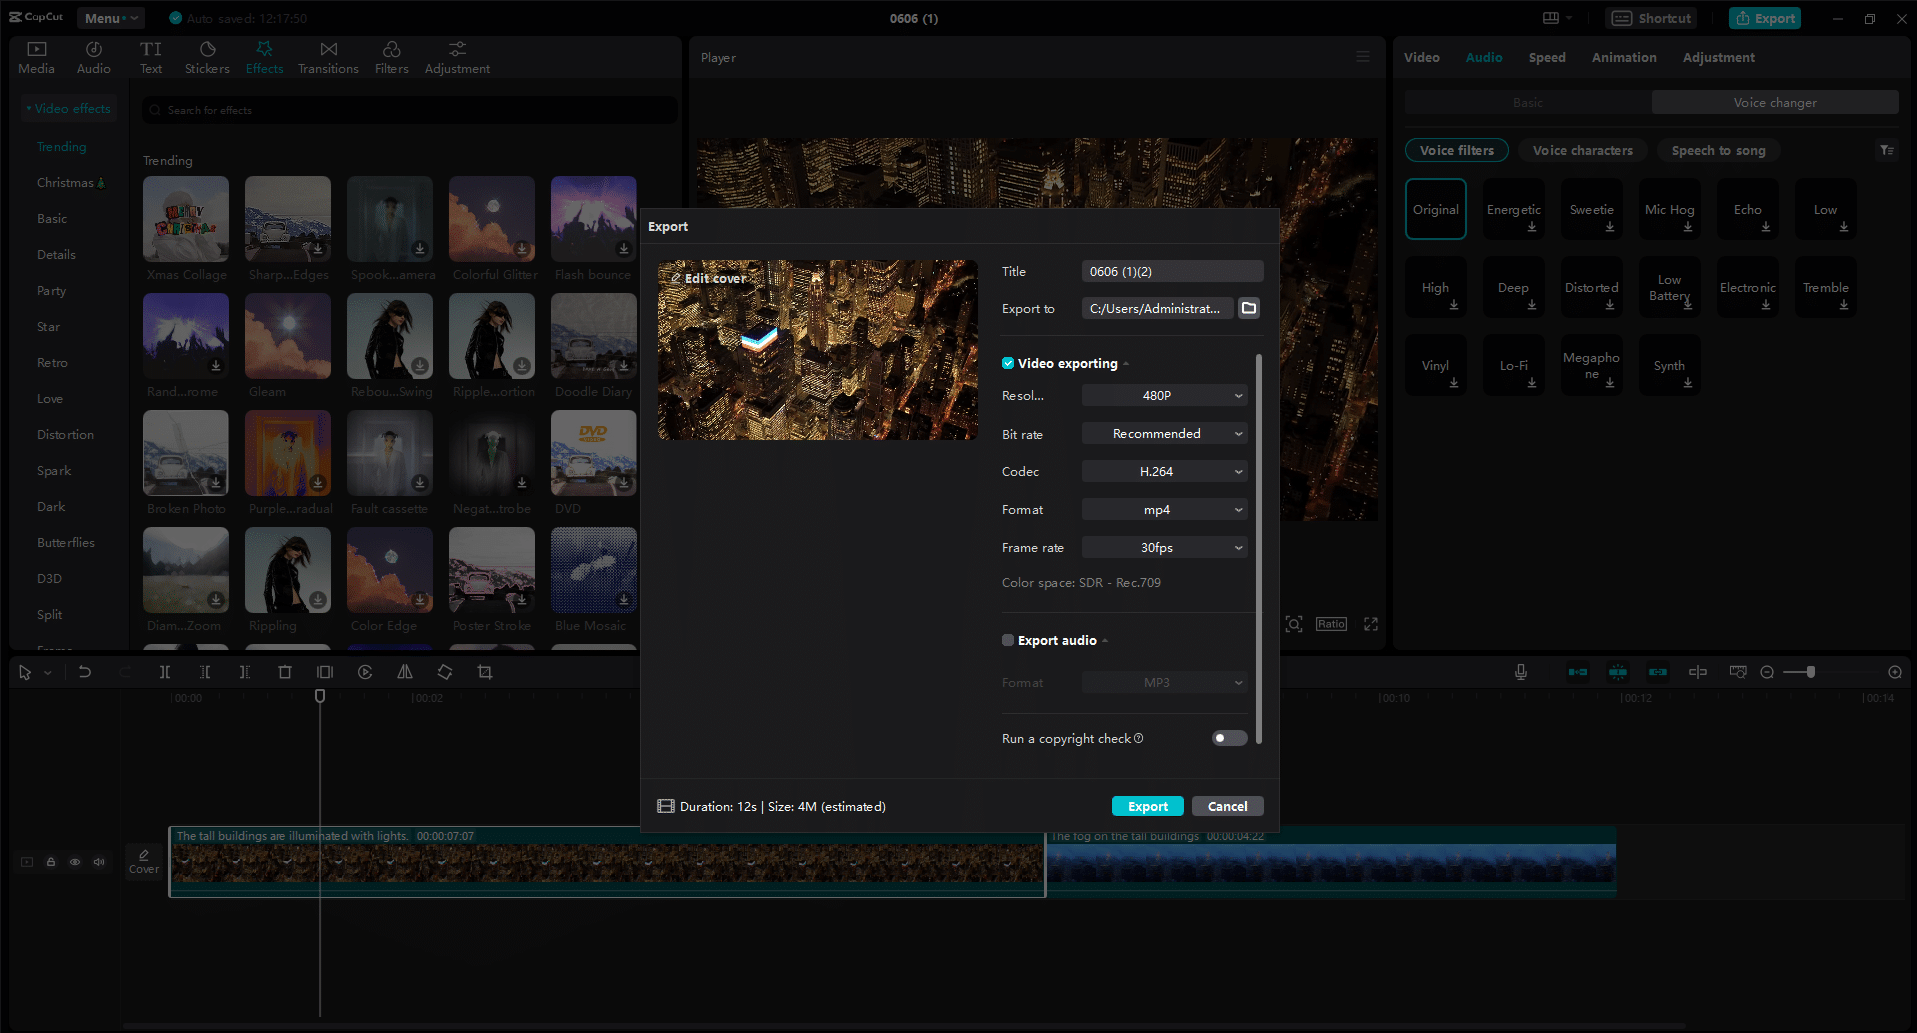
Step 3: Export the Edited Video
Share your masterpiece effortlessly with export options tailored for platforms like TikTok and YouTube. Customize resolution, bitrate, codec, and more. Ensure compliance with copyright checks. CapCut streamlines sharing your vision with the world.
Conclusion
When selecting the best desktop video editor, prioritizing user-friendly interfaces, versatile editing tools, and efficient export options is paramount. CapCut Desktop stands out as a premier choice, offering seamless importing, intuitive editing features, and robust export capabilities tailored to various social media platforms.
With its rich media resources and customizable settings, CapCut empowers creators to bring their visions to life effortlessly. Take your editing to the next level by downloading CapCut Desktop today and unlock endless possibilities for your video projects.


